Now, with the ProductX WooCommerce Builder Plugin, you can easily create custom shop pages for your WooCommerce Store. Here’s a quick video to show you how to do it.
Step-1. Turn on WooCommerce Builder Addon
The very first thing you need to do is enable the WooCommerce Builder Addon. To do this, go to ProductX > Addons from your WordPress dashboard. In the addons section, look for the WooCommerce Builder Addon and enable it.
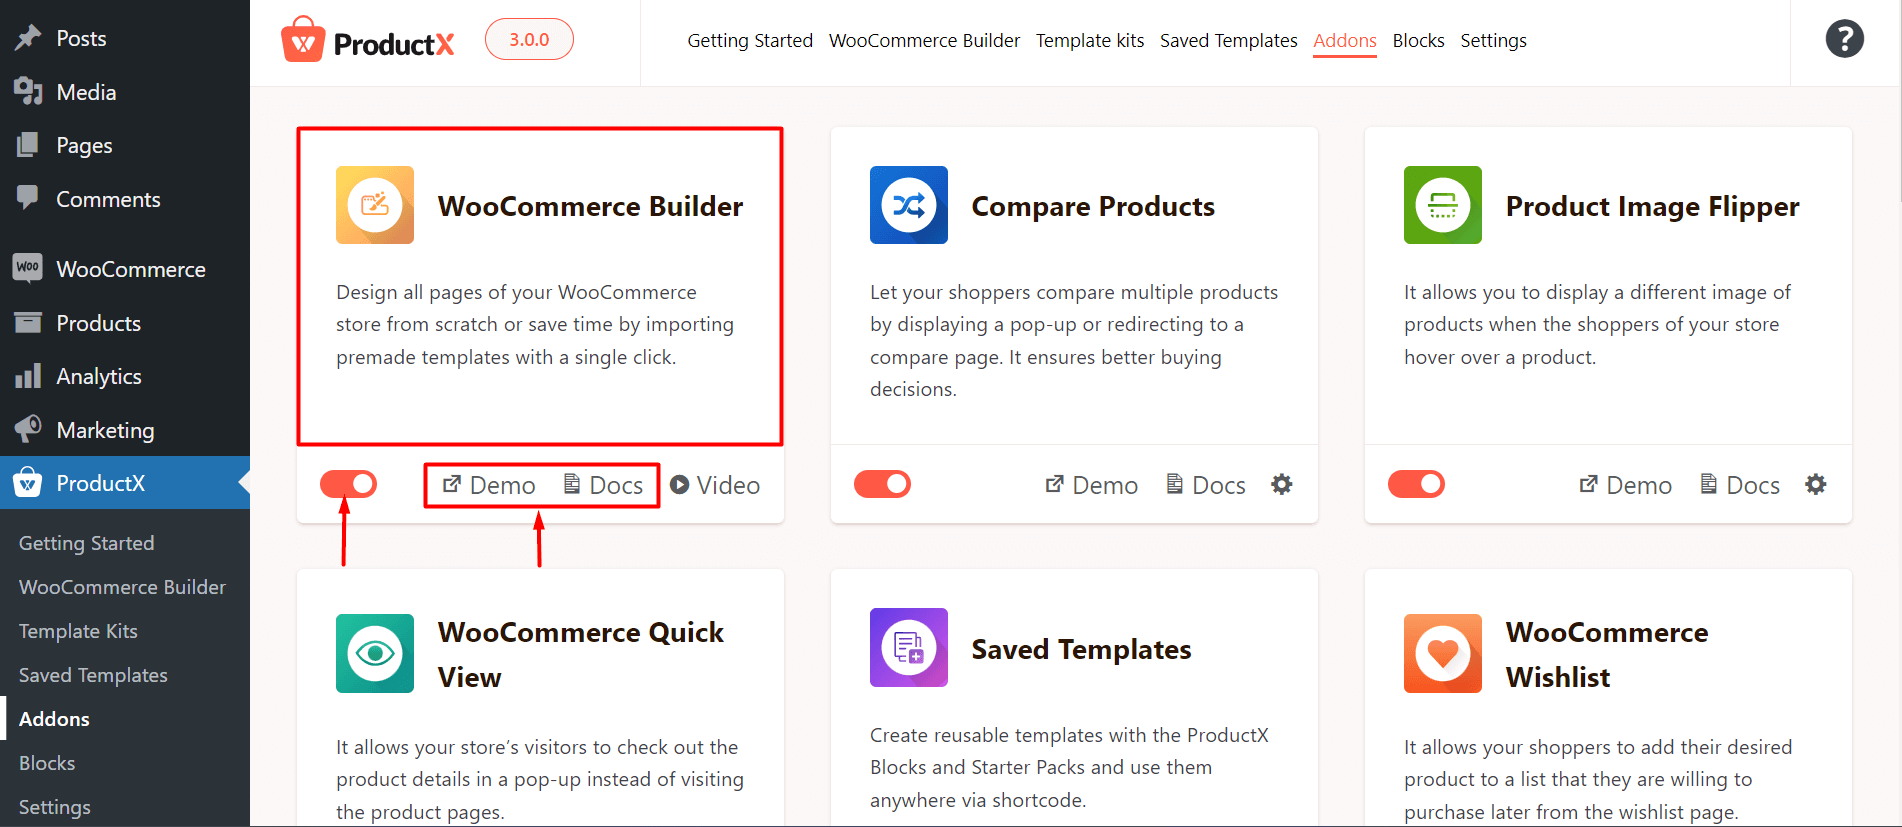
Note: This step is mandatory to work with the ProductX Gutenberg Builder. Without this step, you will be unable to create any templates with ProductX.
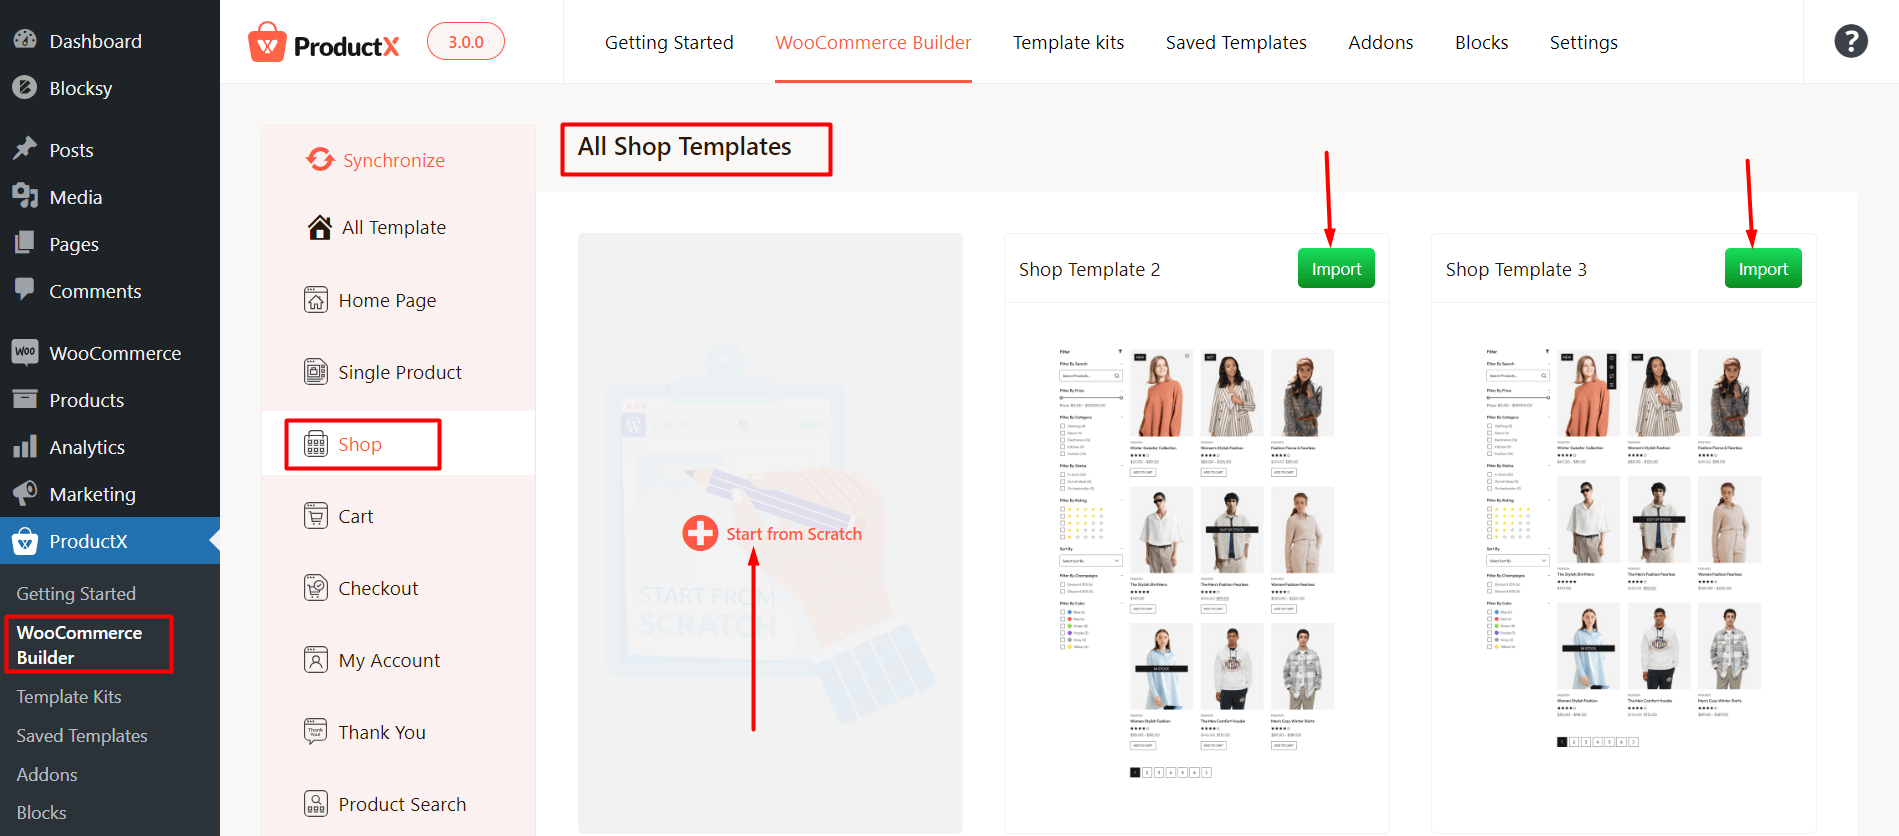
Step-2. Create A Custom Shop Page
You can create a custom shop page in two ways:
Use Pre-made Layouts to Create A Shop Page
You can import one of the pre-made shop page layouts. If you import a page, you will land on the Shop page editor. Or, you start from scratch, go to the editor, click on the Builder Library and import a layout from there.
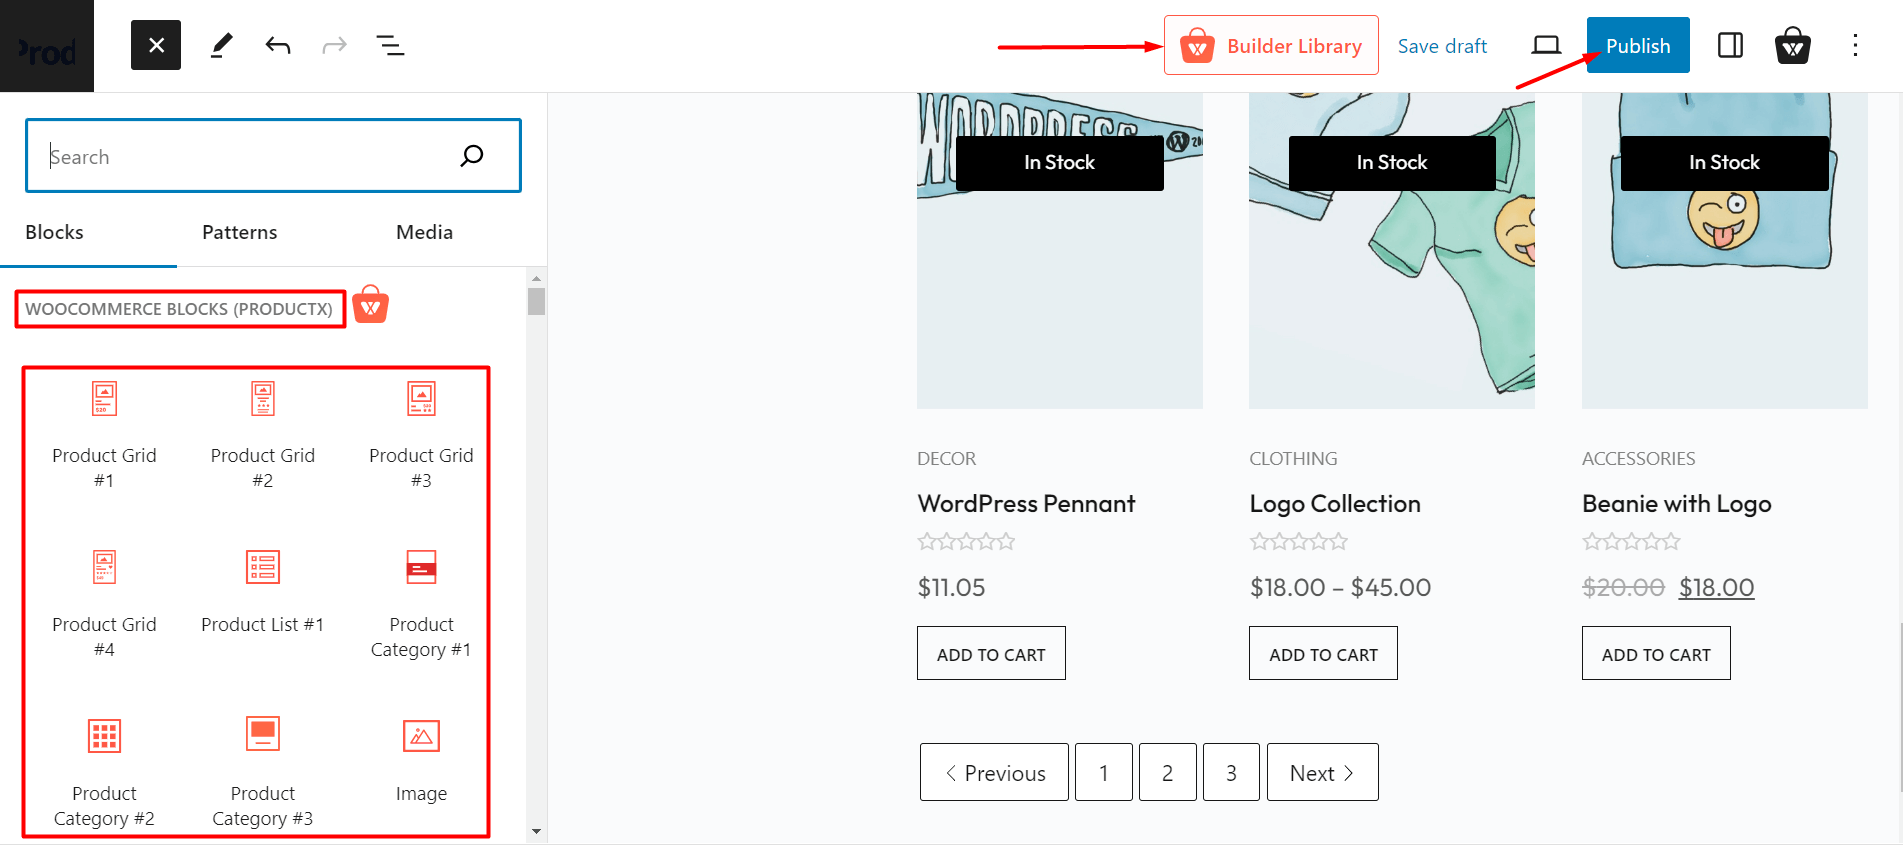
Use the blocks of the ProductX WooCommerce Builder Plugin to Create a Custom Page
You can choose to start from scratch and create a new shop page template using the ProductX WooCommerce blocks. Just click on “Start from Scratch”, go to the shop page editor, and use the ProductX blocks to create a custom shop page.
Note: Please note that the shop page does not require a condition to be published.
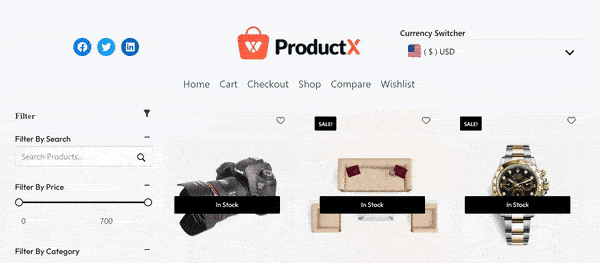
Step-3. Publish the Page and View Changes
Finally, you can publish the page and view the changes. Here’s how the page looks on the front-end:
Read Other Relevant Documentation
- How to create the home page
- Creating a Single Product Page
- How to Build a Cart Page
- How to Build a Checkout Page
- How to Create My Account Page
- How to Create a Thank You Page
- How to Create an Archive Page
- How to Edit ProductX Header Template
- How to Edit ProductX Footer Template
- How to Edit WooCommerce 404 Page
- How to Create a Product Search Page