You can create a custom WooCommerce Checkout page using the ProductX WooCommerce builder plugin. Here’s a quick video to get you up and running. Please note that there may be changes as we keep updating the product. However, the process remains the same:
How to create a Custom Checkout Page using the ProductX WooCommerce Builder Plugin
1. First of all, you need to access your WordPress dashboard [You need to have the ProductX plugin installed on your WordPress site].
Now, the very first thing you need to do is enable the WooCommerce Builder Addon. To do this, go to ProductX > Addons from your WordPress dashboard. In the addons section, look for the WooCommerce Builder Addon and enable it.
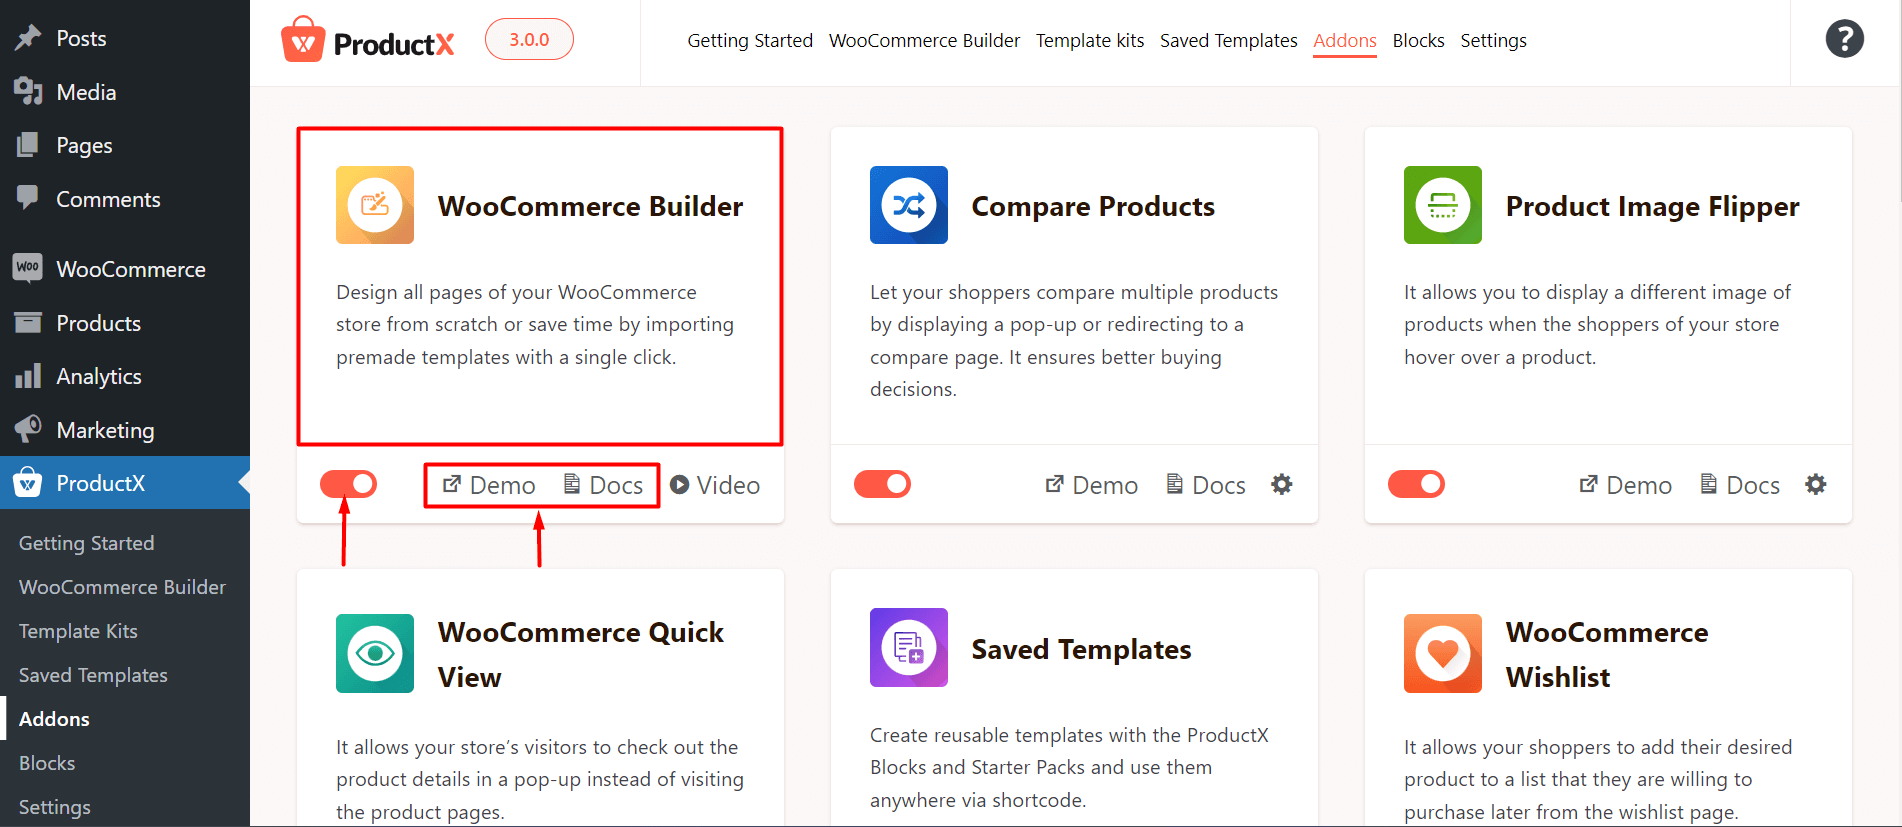
Note: This step is mandatory to work with the ProductX Gutenberg Builder. Without this step, you will be unable to create any templates with ProductX.
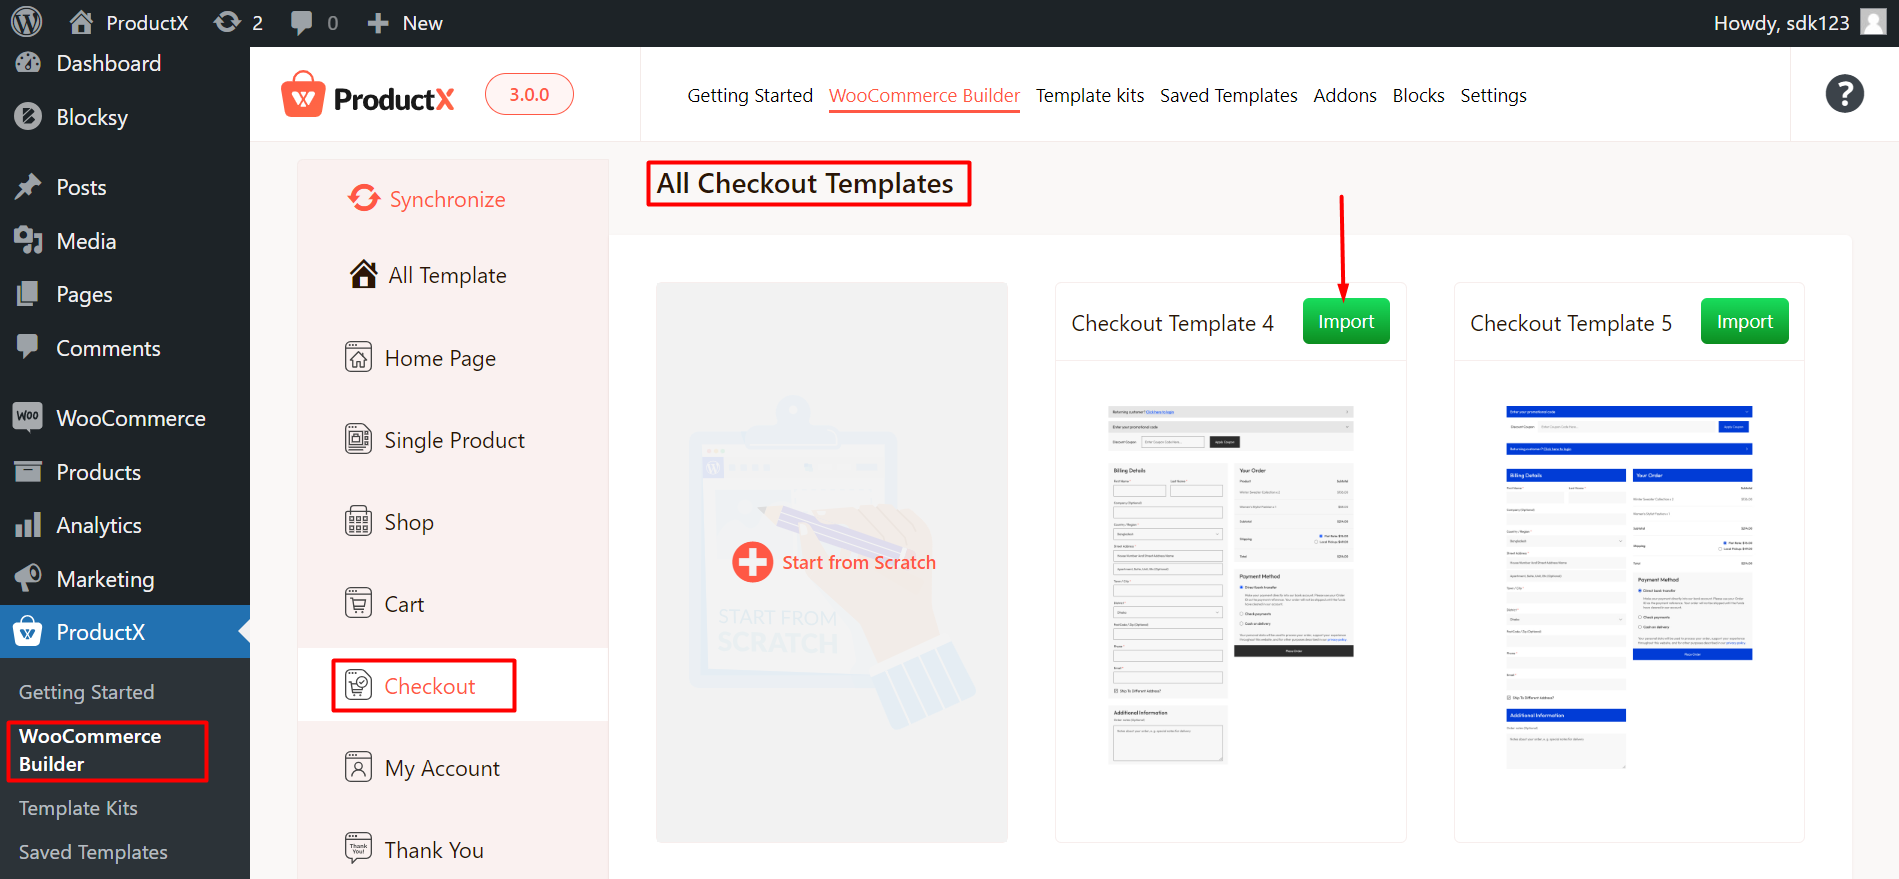
2. Next, Go to the ProductX WooCommerce Builder Plugin and choose Checkout. .
3. Select Start from scratch (if you want to make it from scratch) or Import a layout (if you want a premade layout). You can either select and import a layout from the “All Checkout Templates” dashboard or choose a layout in the checkout page editor from the Builder Library.
4. Name your template, click the icon (toggle block inserter), and then add the desired Blocks to complete your checkout page. Now hit Publish.

5. Please note that you do not have to set any custom conditions for this page. You can now publish the page.
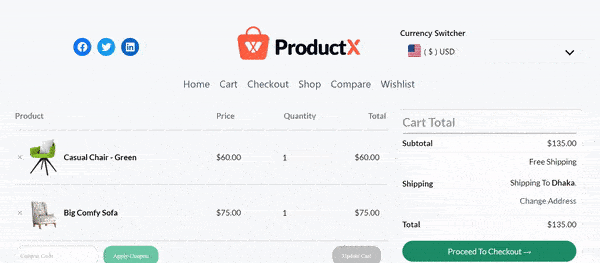
6. Once you publish the page, you can see the following front-end representation:
Read the Relevant Documentation
- How to Build a Home Page
- How to Build a Single Product Page
- How to Build a Shop Page
- How to Build a Cart Page
- How to Create My Account Page
- How to Create a Thank You Page
- How to Create an Archive Page
- How to Edit ProductX Header Template
- How to Edit ProductX Footer Template
- How to Edit WooCommerce 404 Page
- How to Create a Product Search Page