Here’s how to create a custom product archive page with the ProductX WooCommerce Builder Plugin. It’s super simple and adds a great deal of functionality to your website.
How to Create a Product Archive Page
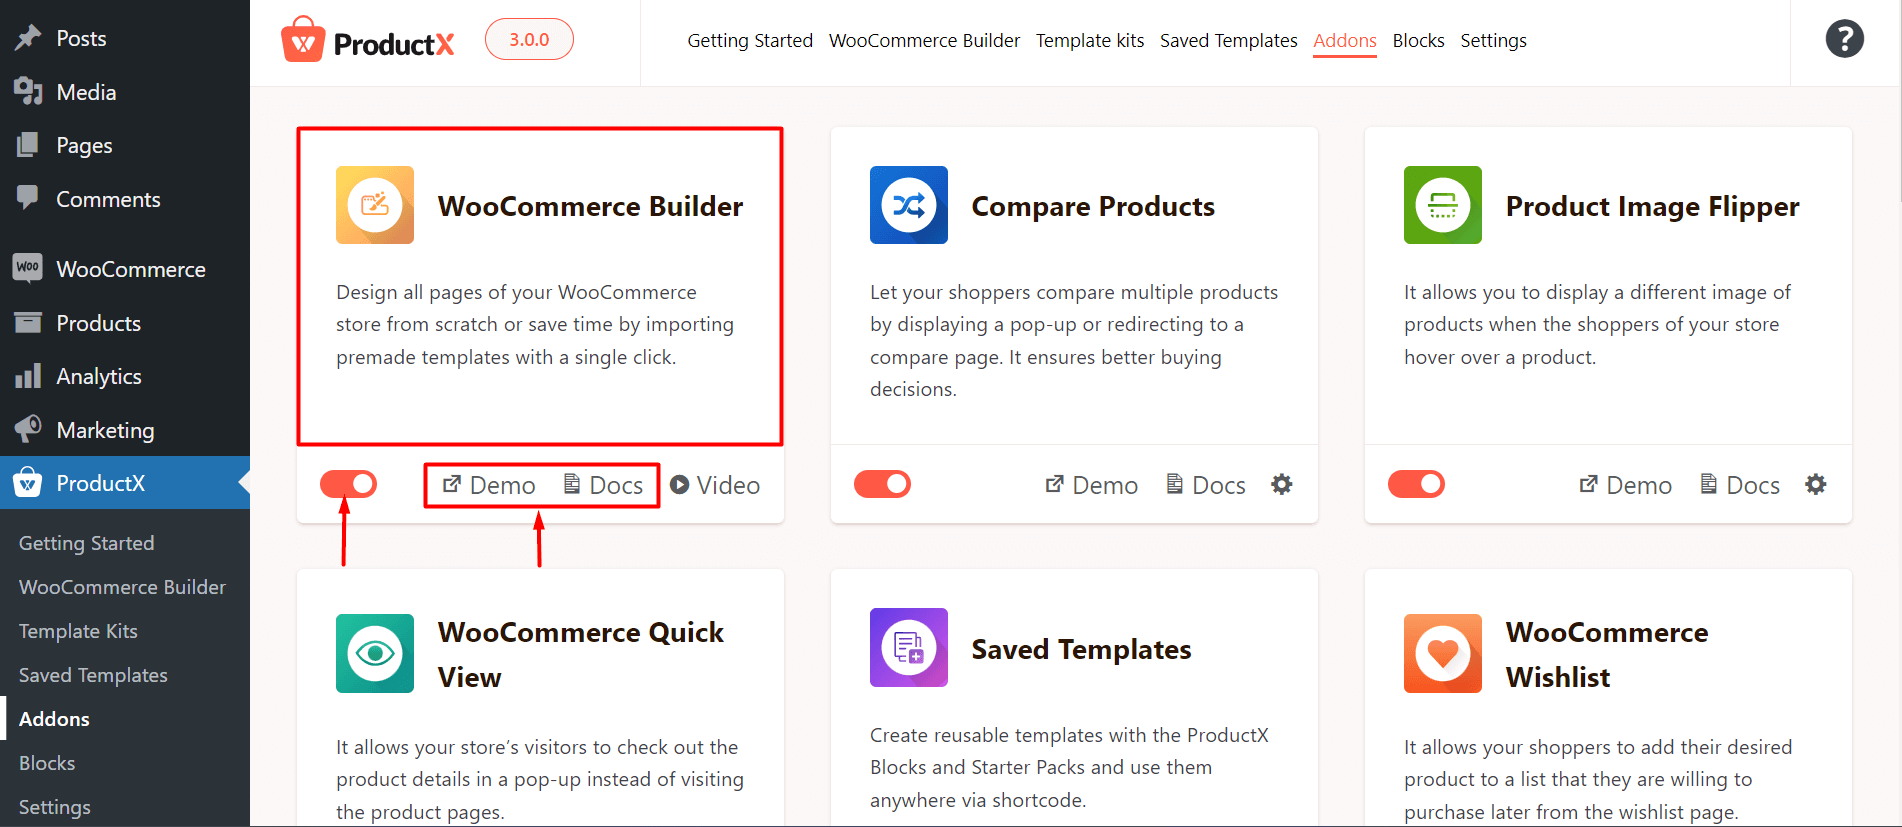
1. You will need to have the ProductX WooCommerce Plugin installed and the WooCommerce Builder Addon Enabled. Otherwise, you will not have the proper functionality to build your product archive page.
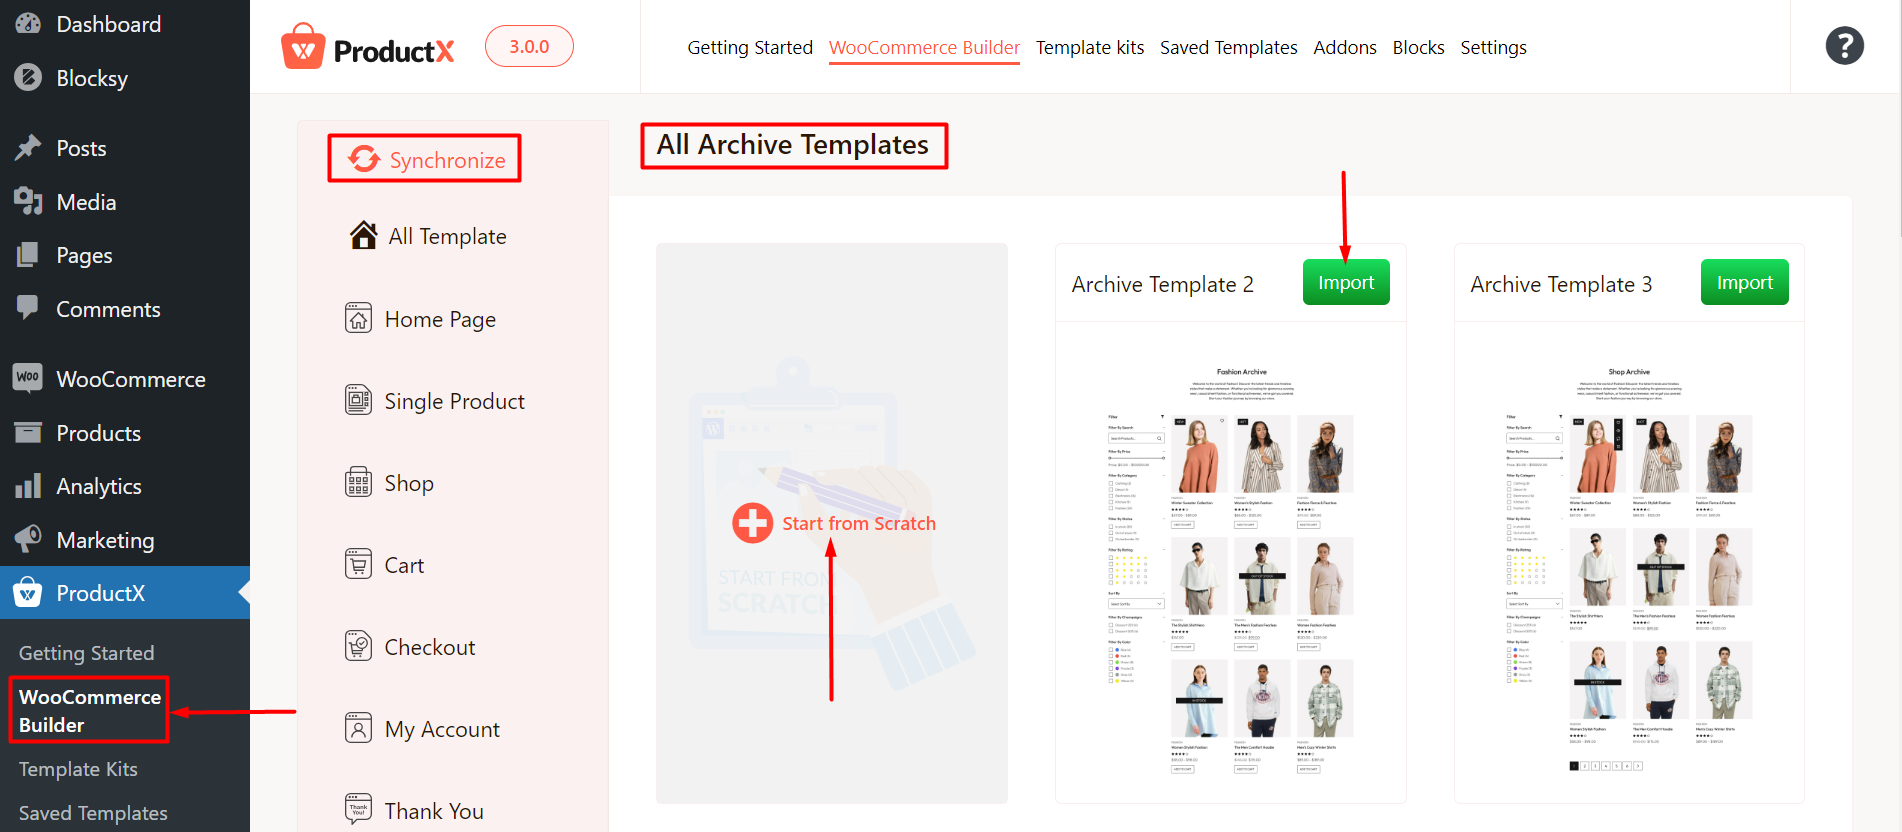
2. Now go to ProductX > WooCommerce Builder. Scroll down and click on the Archive Page. From here, you can create a new template from scratch or import a pre-made layout. You will be taken to the editor page once you select an option.
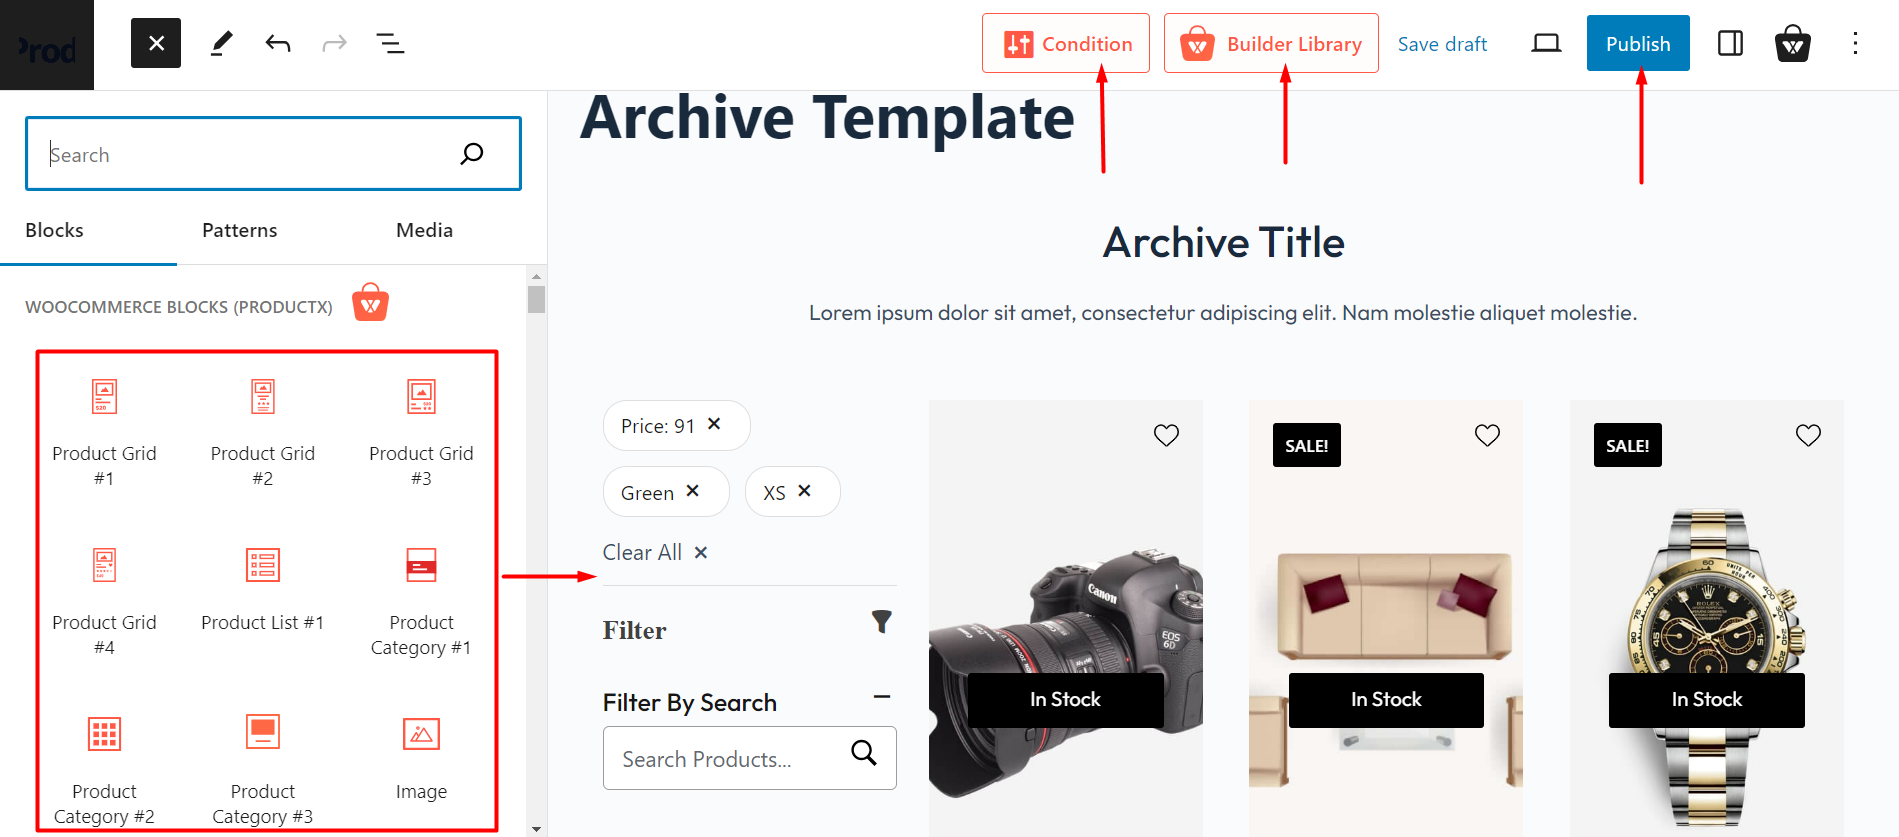
3. You can also choose to create the archive page using the ProductX blocks. Once you are done, you can move on to publish the page.
You will see a popup box of “Where Do You Want to Display Your Template?”
Here Select Include; then select All Archive (for all archive pages) or product categories, sub-categories, or tags according to your need.
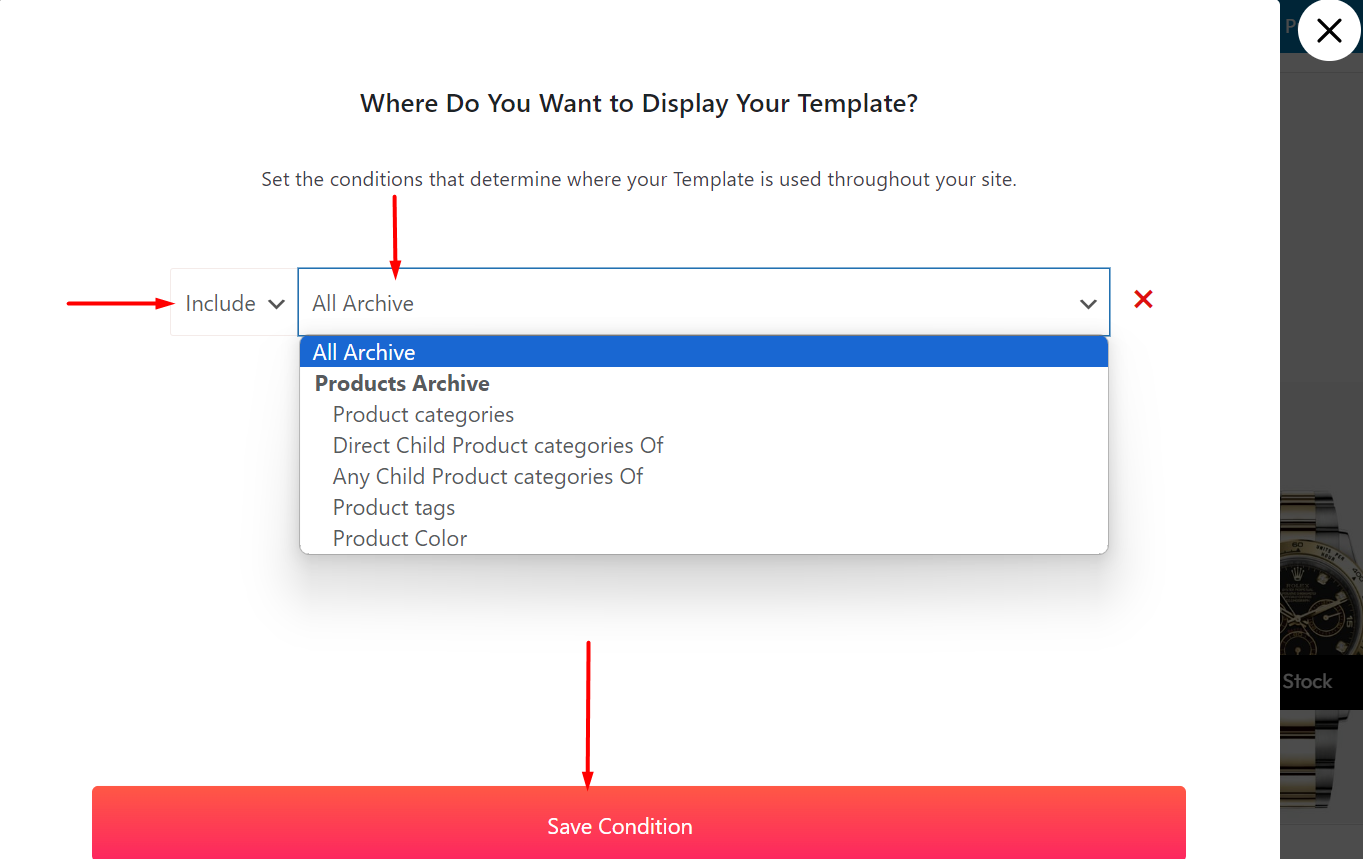
4. Then Select Save Condition and Exit the Popup box by clicking the Cross (X) button. Click Publish.
And you have successfully created your custom product archive page. Here’s how it looks on the front-end [We choose to create archive page for our category pages. That’s the preview we are showing] :

Read the Relevant Documentation
- How to Build a Home Page
- How to Build a Single Product Page
- How to Build a Shop Page
- How to Build a Cart Page
- How to Build a Checkout Page
- How to Create My Account Page
- How to Create a Thank You Page
- How to Edit ProductX Header Template
- How to Edit ProductX Footer Template
- How to Edit WooCommerce 404 Page
- How to Create a Product Search Page