The Variation Swatches Addon helps to convert variations into nice-looking Swatches to grab the attention and make things easier for the shoppers.
Enabling the Variation Swatches Addon
The WowStore variation swatches for WooCommerce let you showcase variations of your products in a very effective way. Here’s how you can use the WowStore variation swatches the right way.
Installing the WowStore Plugin
The very first thing you need to do is have the WowStore WooCommerce builder plugin installed on your WordPress site. If you are having issues installing our plugin, you can check out the steps for installation and get a proper idea about installing the product.
Note: Before getting started, it is important to know that the WowStore WooCommerce variation swatches only work for variable products. Variable products are the ones that allow you to show ‘variations’. For example, if you have a T-shirt that you sell in varying sizes (Large, Medium, and Small), you can use our variation swatches to show the different variations.
Turn on WooCommerce Variation Swatches Addon
You need to turn it on to access this feature. To do that:
- Go to your WordPress dashboard.
- Click on “Getting Started”.
- Scroll down and turn on the WooCommerce Variation Swatches.
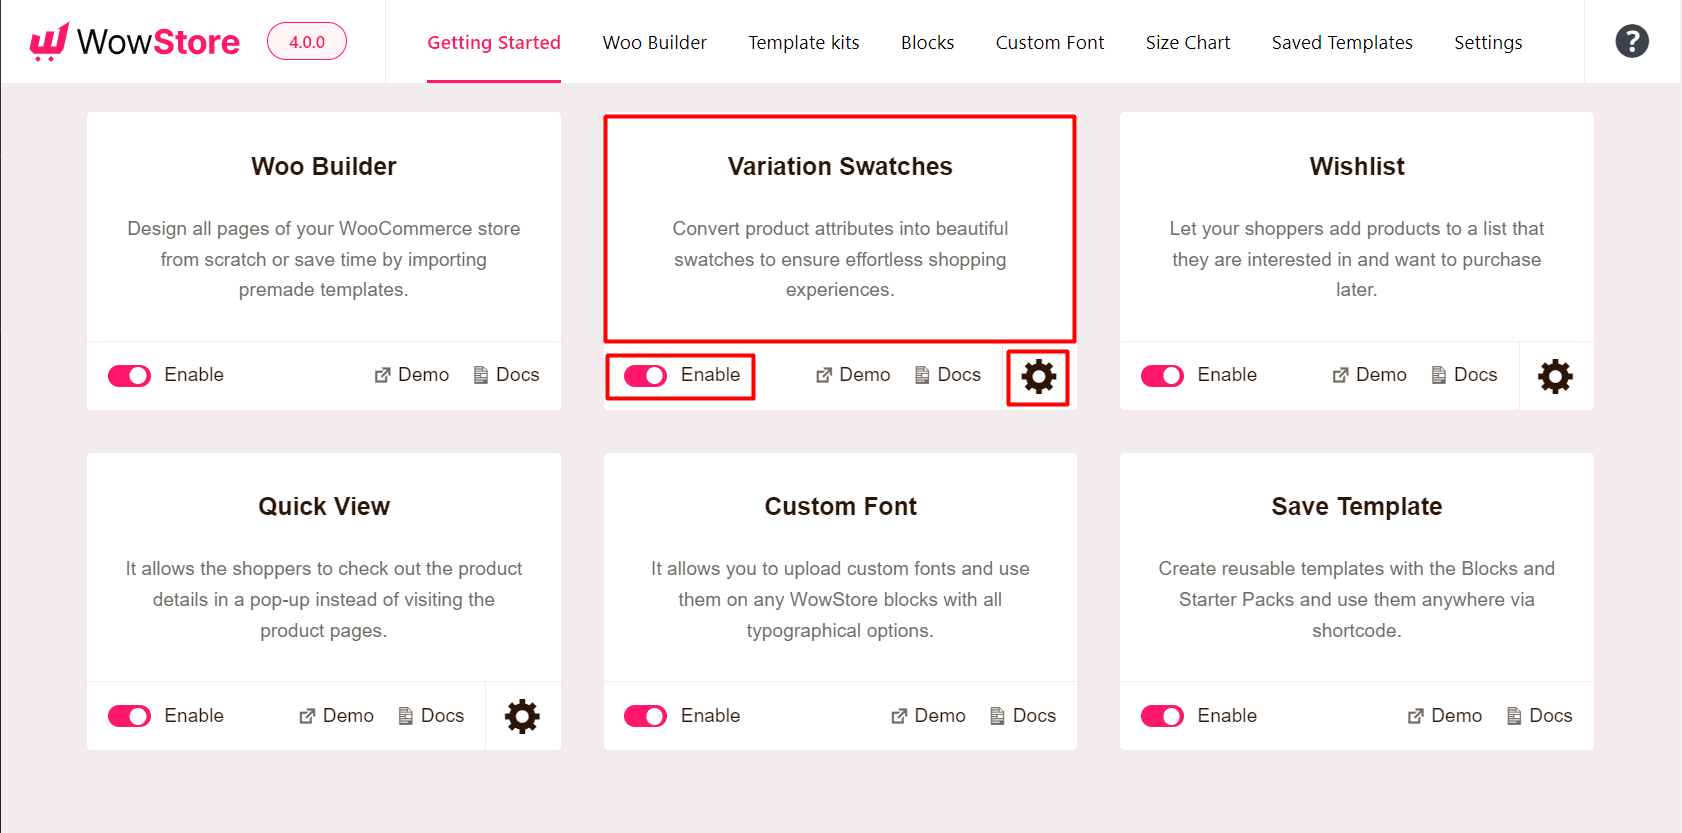
Accessing the Settings
After turning on the addon, the swatches settings option will be available for you, along with all other addon settings.
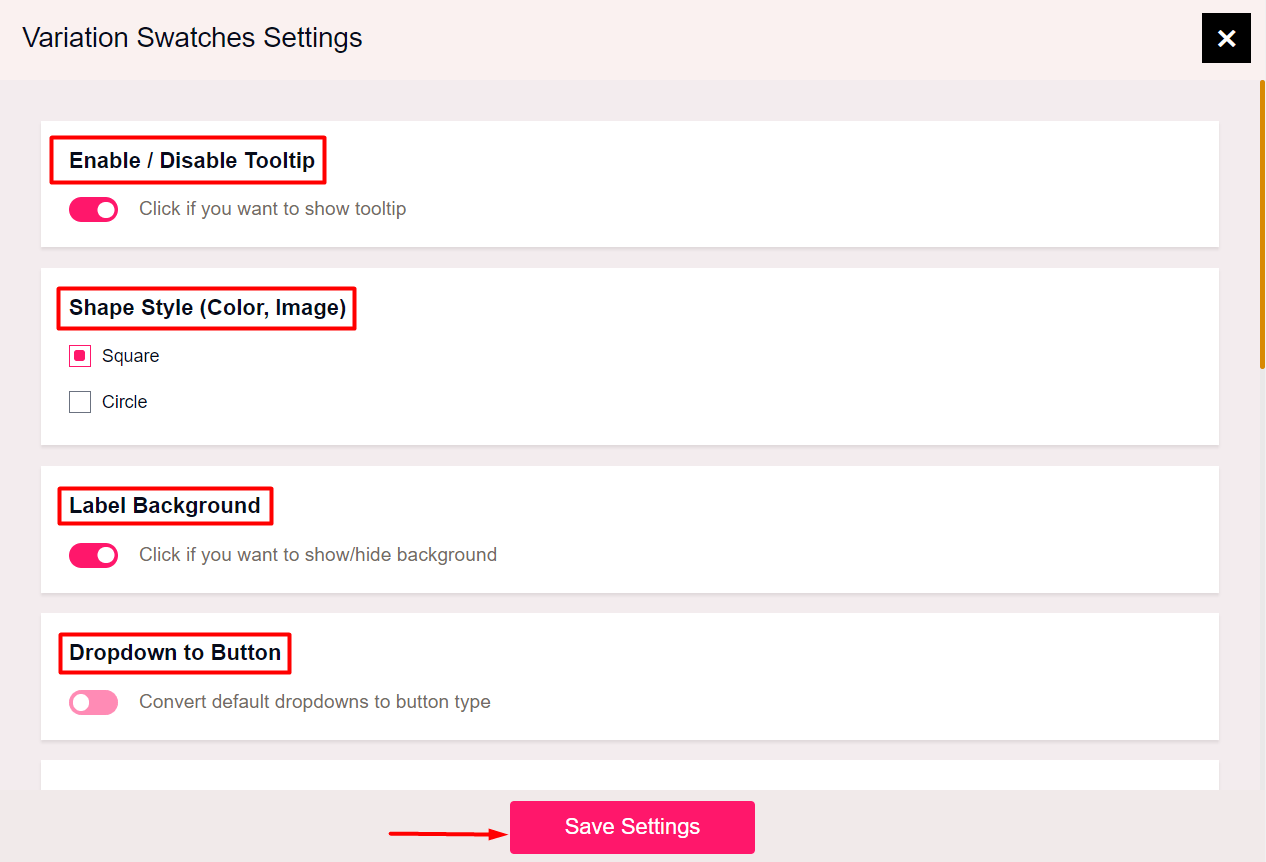
In the WooCommerce variation swatches, you can access various global settings using the ‘Gear’ Icon. Here’s a quick overview of the settings:
- You can enable or disable the tooltip.
- Change the Shape Style to either a circle or a square.
- Show or Hide the Label Background.
- Convert the variation type to a button.
- Change the Width (in Pixels) of the button.
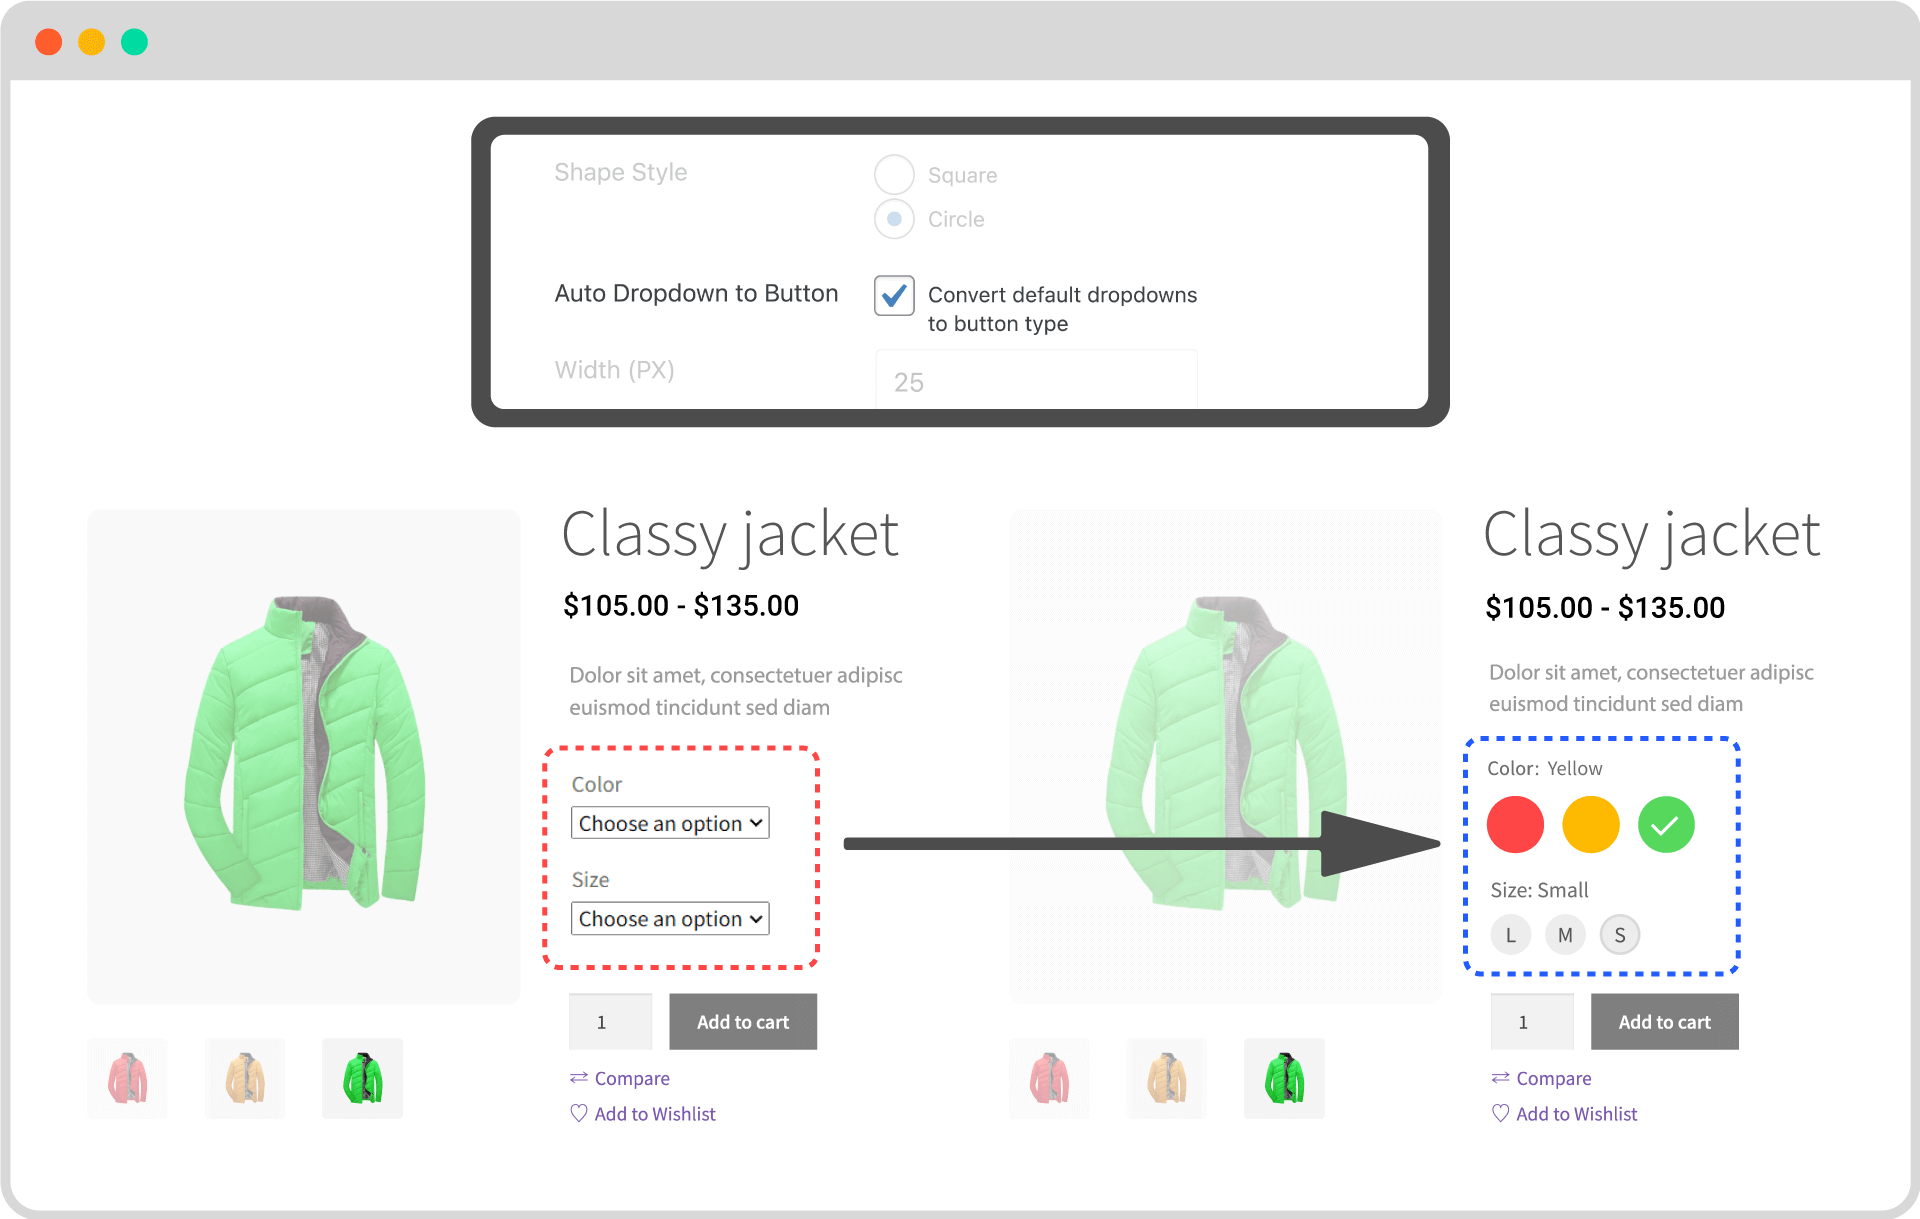
Note: Here is an example of the “Dropdown to Button” feature. If you choose to activate it, you will be able to see the following change:
There are other settings as well:
- Change the height of the variation button.
- Enable/Disable variation images in the product archive pages.
- Show the variation image from the product.
- Change the WooCommerce variation swatch positioning (6 choices in the dropdown).
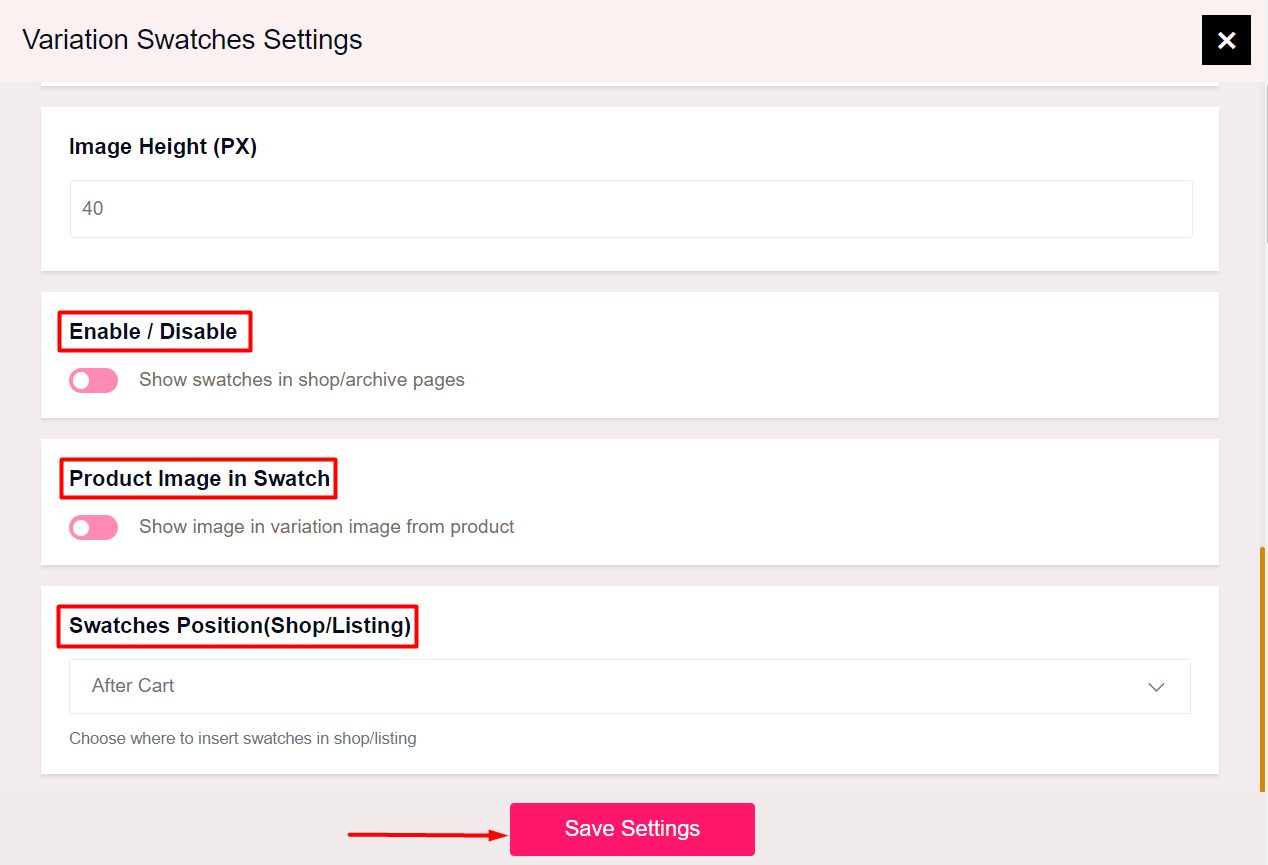
Once you are done with global settings, you can save the settings.
Change and Customize the Product Attributes
As mentioned earlier, the WowStore WooCommerce swatches work with variable products. In order to show the attributes of the variable products, you need to change and customize the product attributes.
To do that:
- Go to Products > Attributes from your WordPress dashboard.
- On this page, you can create new attributes for the variable products or edit existing product attributes.
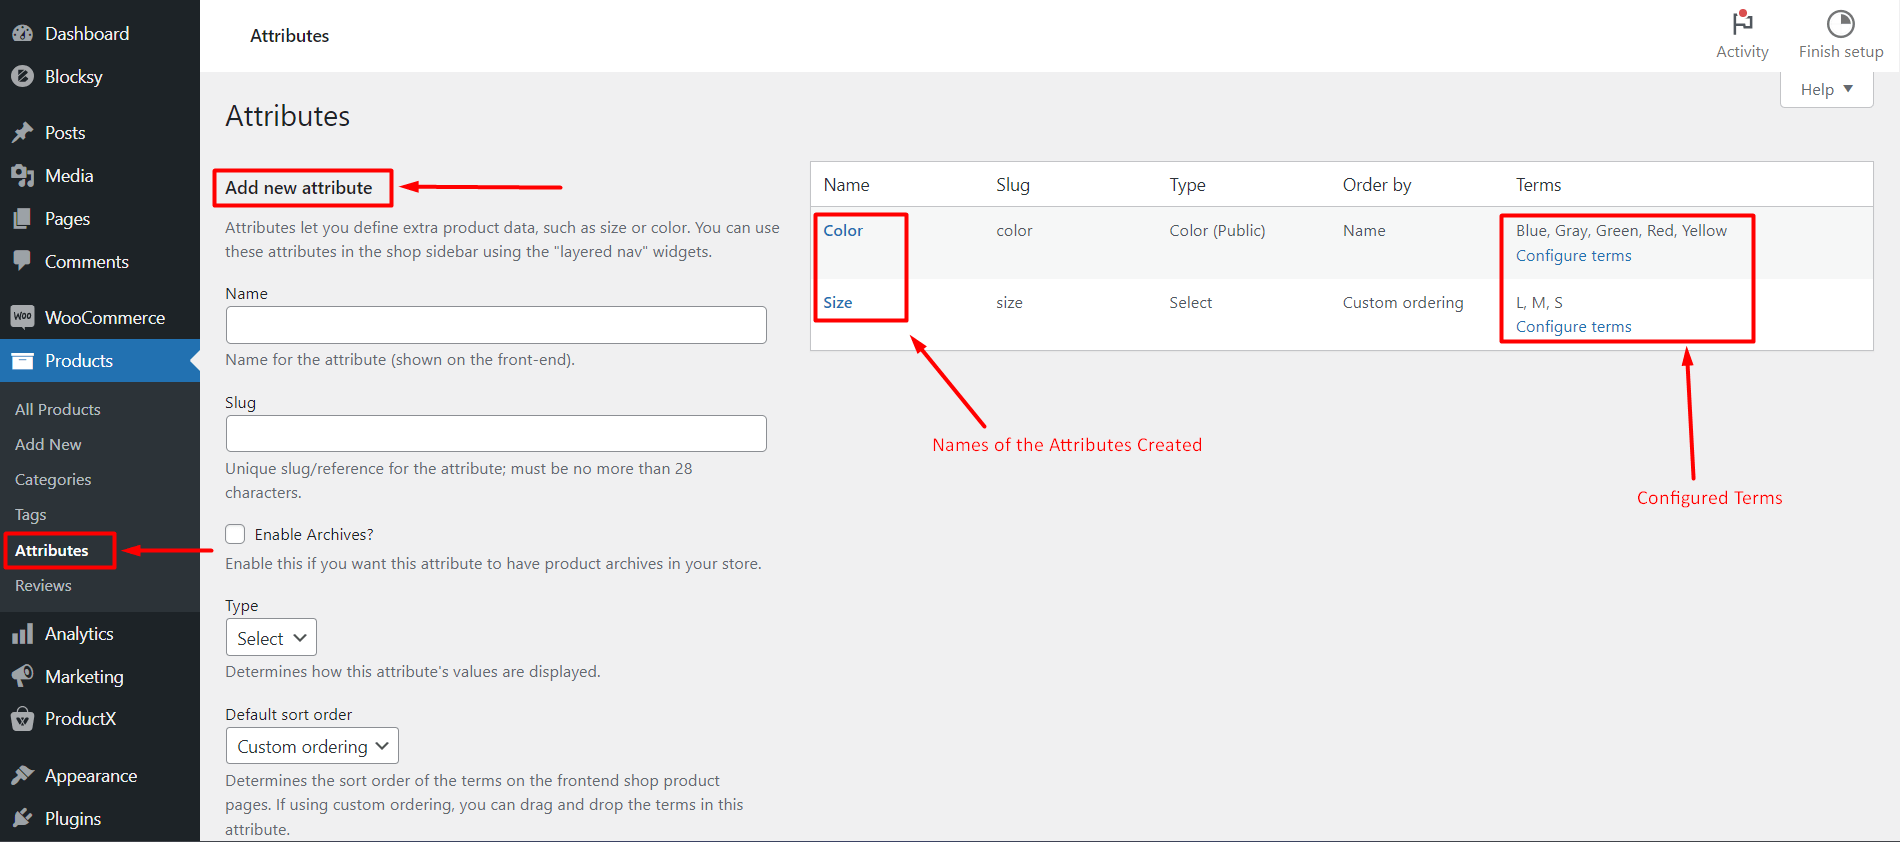
We have added 2 attributes here, color and size. However, you can add new attributes and edit them.
If you want to edit an attribute then click on the “Configure Terms” button under the terms section.
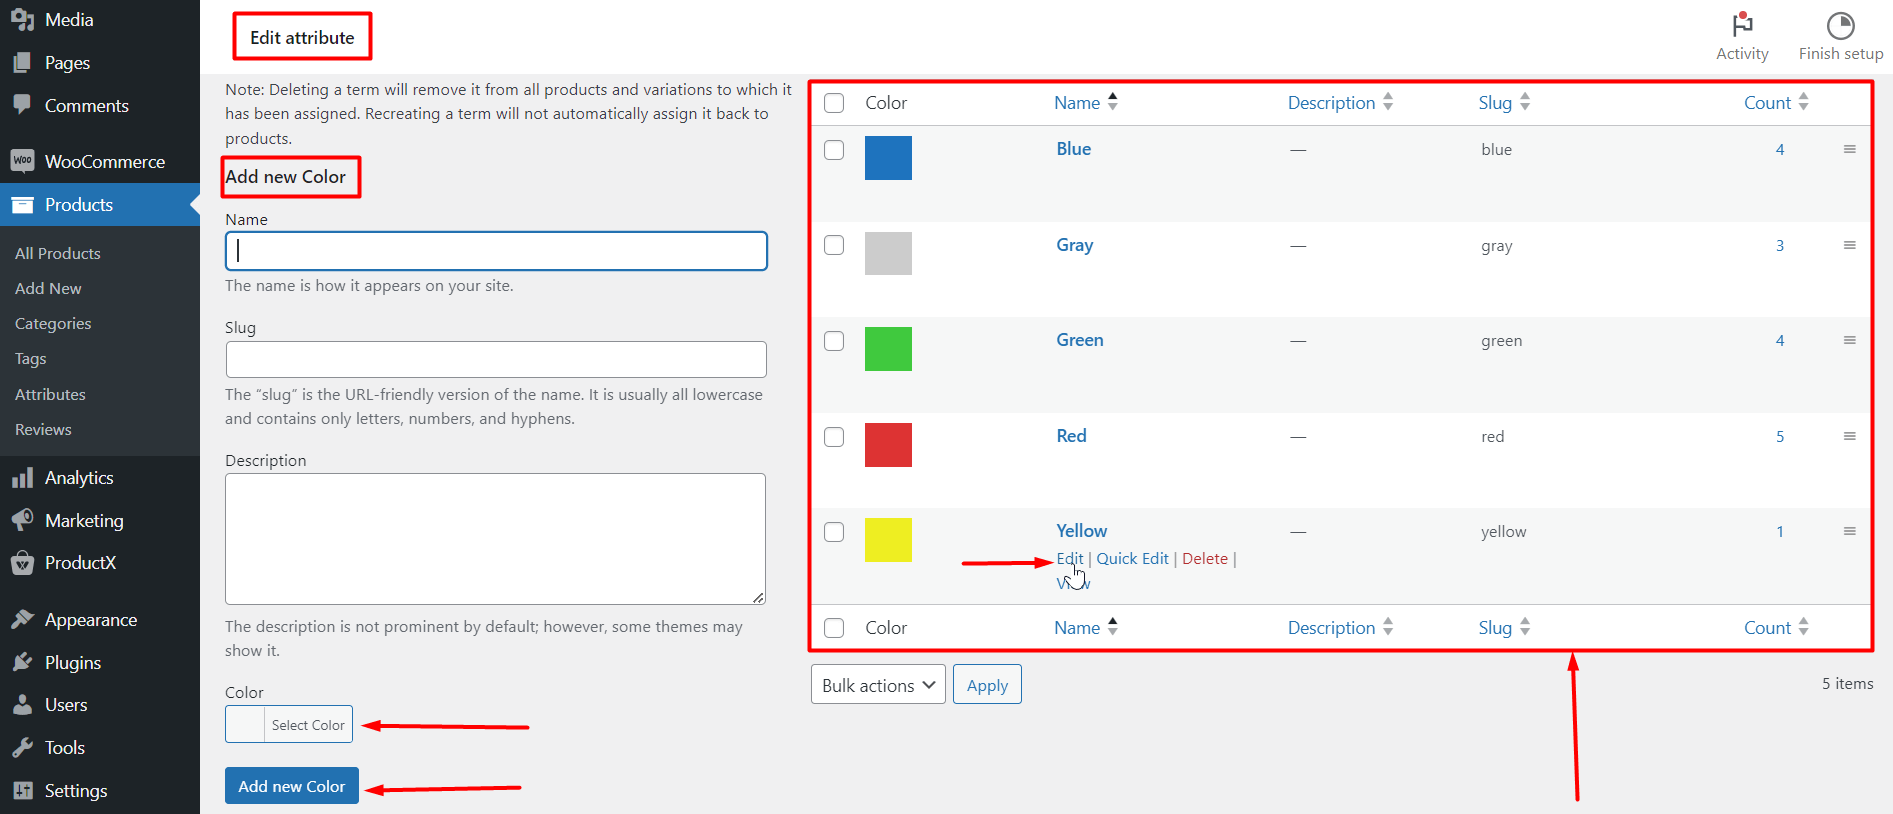
You will be taken to the “Edit Attributes” page (for any specific attribute).
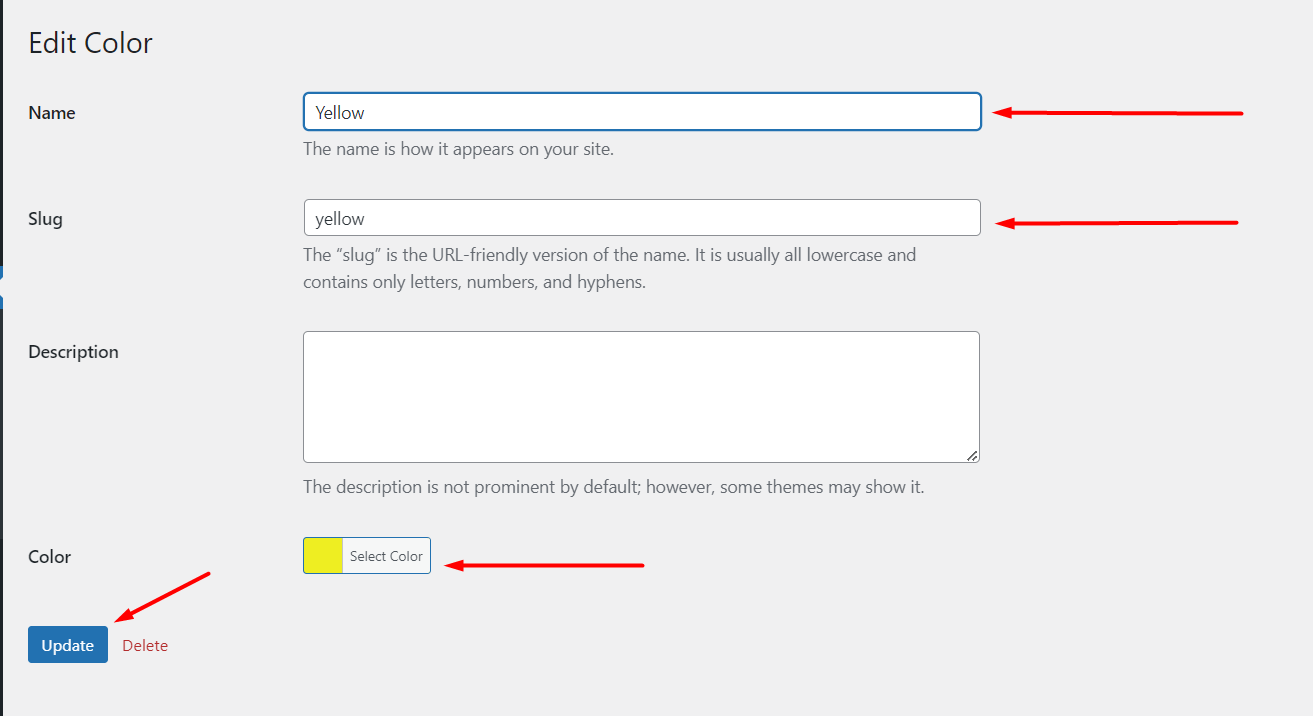
We are here in the Color attribute section. You can add a specific color or edit a color as per your needs.
Add Variations to the Variable Product
Now is the time to add the product variations. In order to do that, you can:
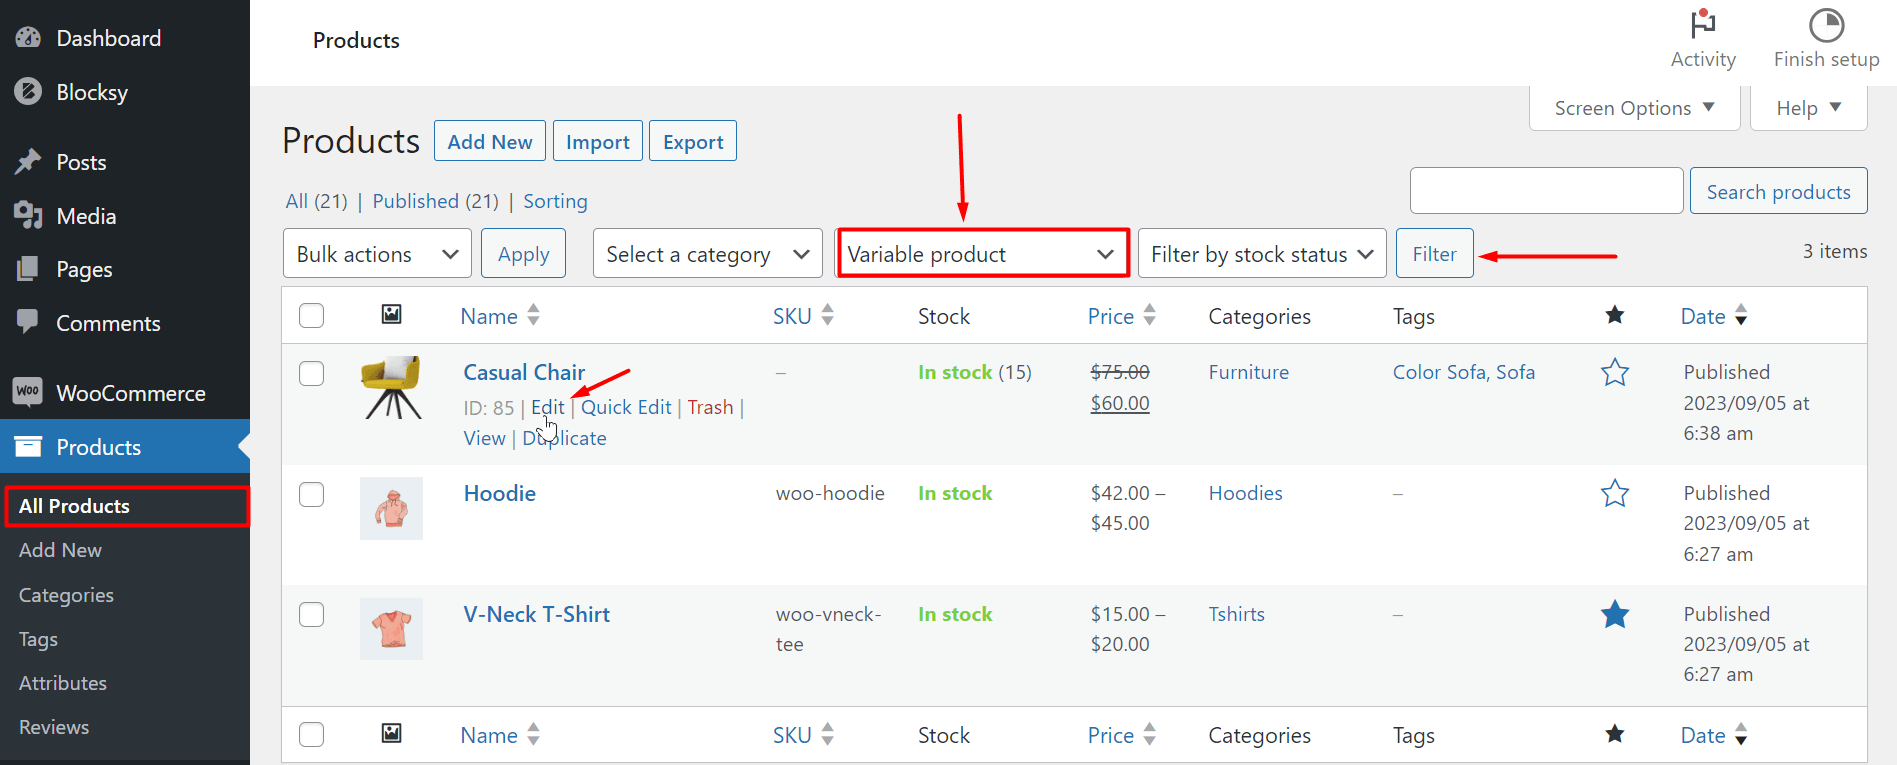
- Go to Products > All Products from your WordPress dashboard.
- From here, you can filter the variable products using the Filter feature (it’s built into WordPress).
- Finally, click on Edit to add the product variations.
This is a crucial part of product variation swatches for WooCommerce. Follow these steps carefully to add variations to your product. Here’s how:
- Click on Product Data and choose Variable Product.
- Now go to the Variations tab from the right menu under Product Data.
- Here you can add or edit variations automatically or manually.
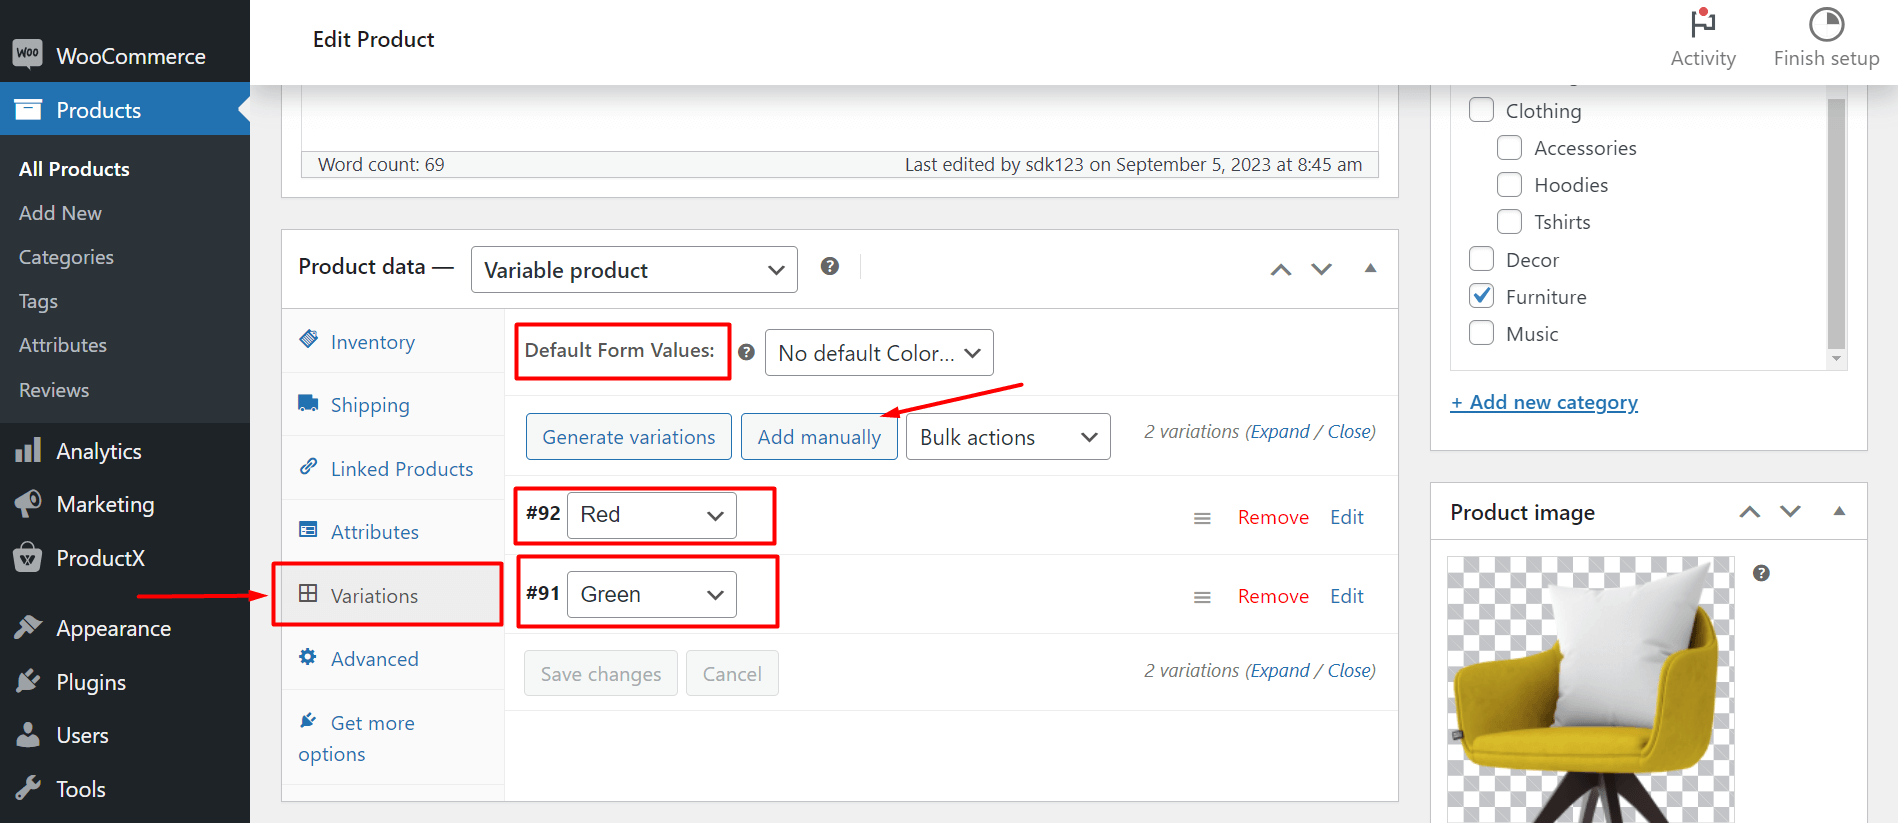
Note: We’ve added 2 color variations manually. You can add or edit different variations as per your needs. Once you’ve added the necessary information like an image, the price, and stock, you can close the tab by clicking on it and save the changes.
- Finally, update the product and see the changes in the front end.
Here’s a front-end view of the change where the product color changes with the color variation:
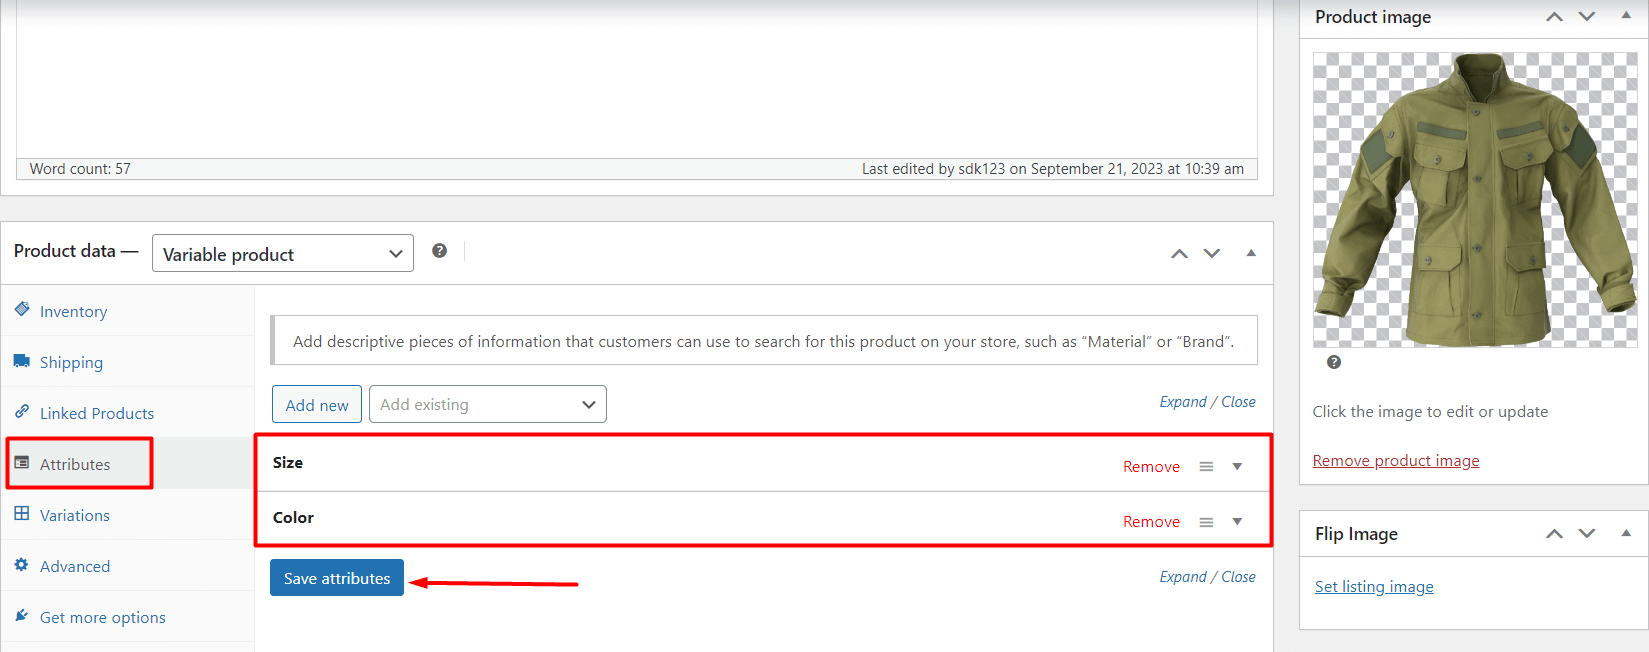
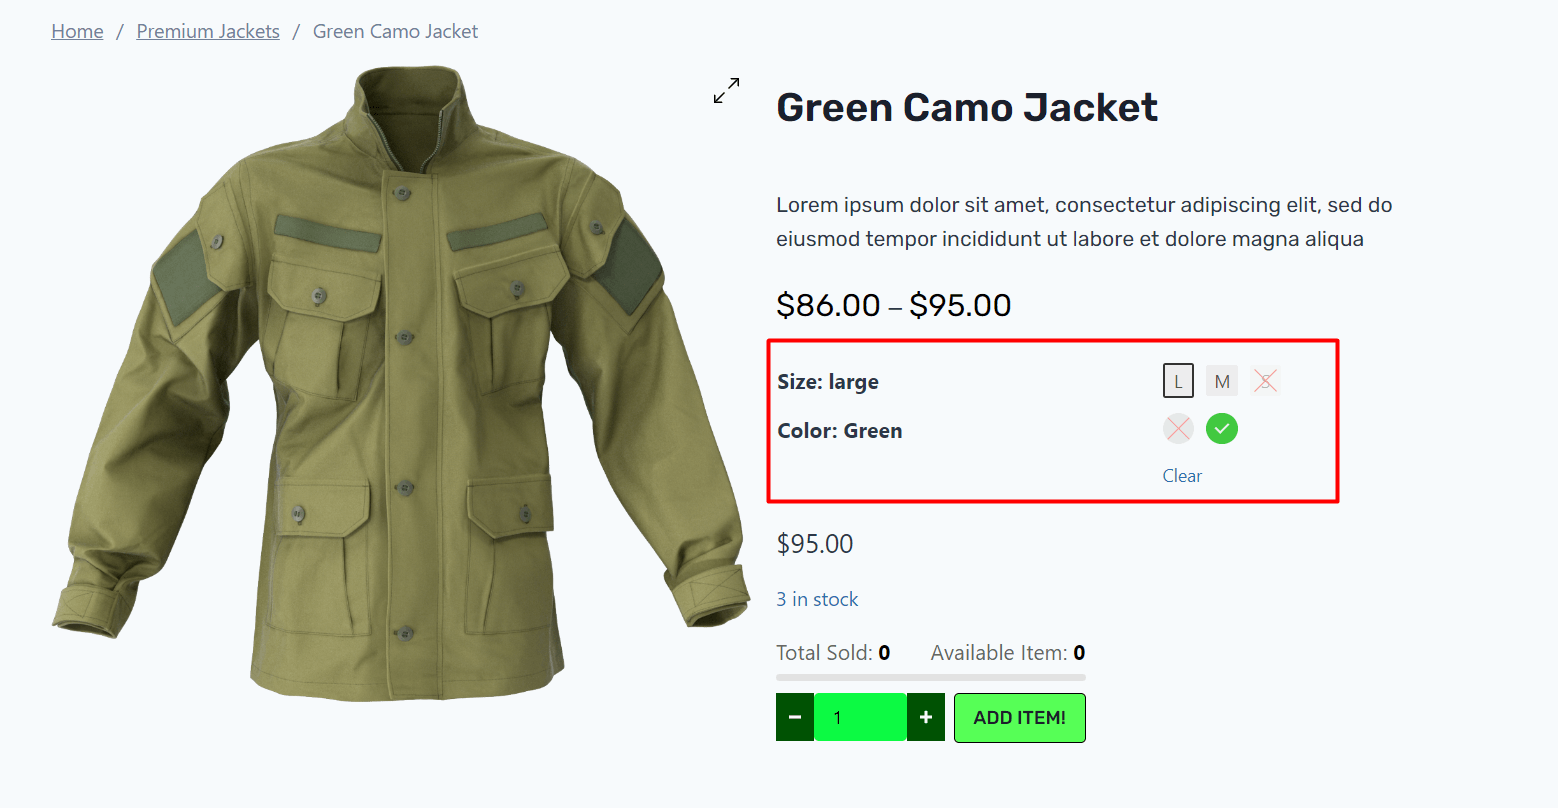
Here’s another example of a product with both the color and the size attributes. The attributes on the product page look like the following:
Adding the color and the size attributes:
Changing and saving the color and size attributes:
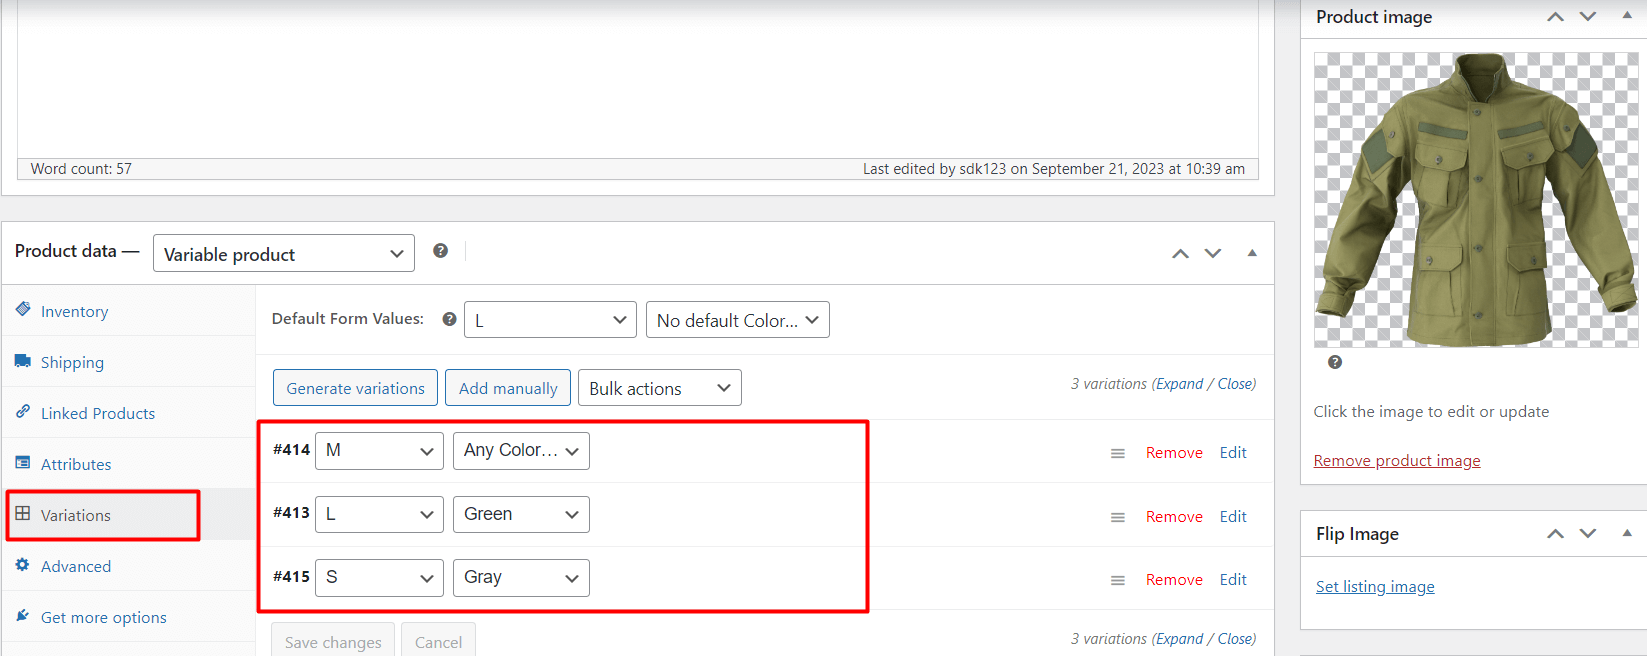
Here’s the final outcome:
Check out the above-mentioned examples and the final outcome. We hope the examples give you a good idea about using the variation swatches.