A Sticky Menu (also a Fixed Navigation Menu) keeps the menu element fixed at the top of the page while the user scrolls down.
This way, the navigation bar remains visible, no matter how far down the page the user goes.
Let’s know how to make the navbar sticky!
Prerequisites: Ensure you have the latest version of PostX installed.
Step-by-Step Instructions
These steps cover choosing the position, adjusting sticky behavior on different screens, and managing the Z-index for better navigation.
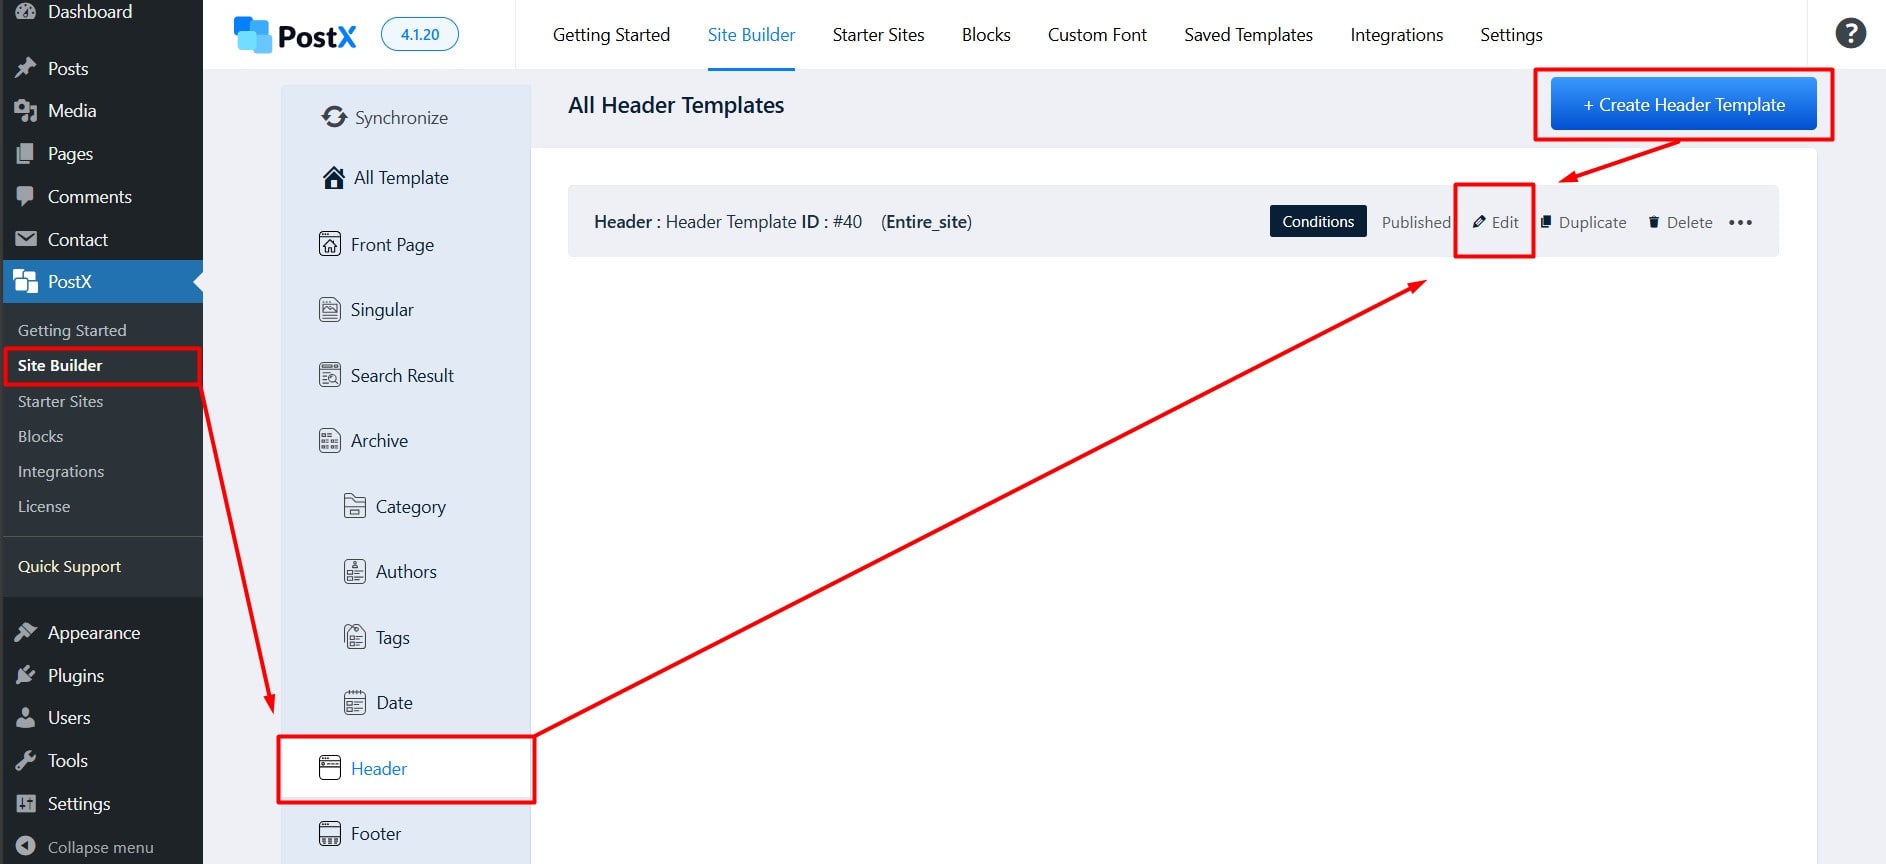
Step 01: Navigate to Header Builder
- Go to the “Site Builder” section in PostX
- Find the “Header” tab.
- If you already have an existing header template, you can edit it.
- Otherwise, you can create a new header from scratch.

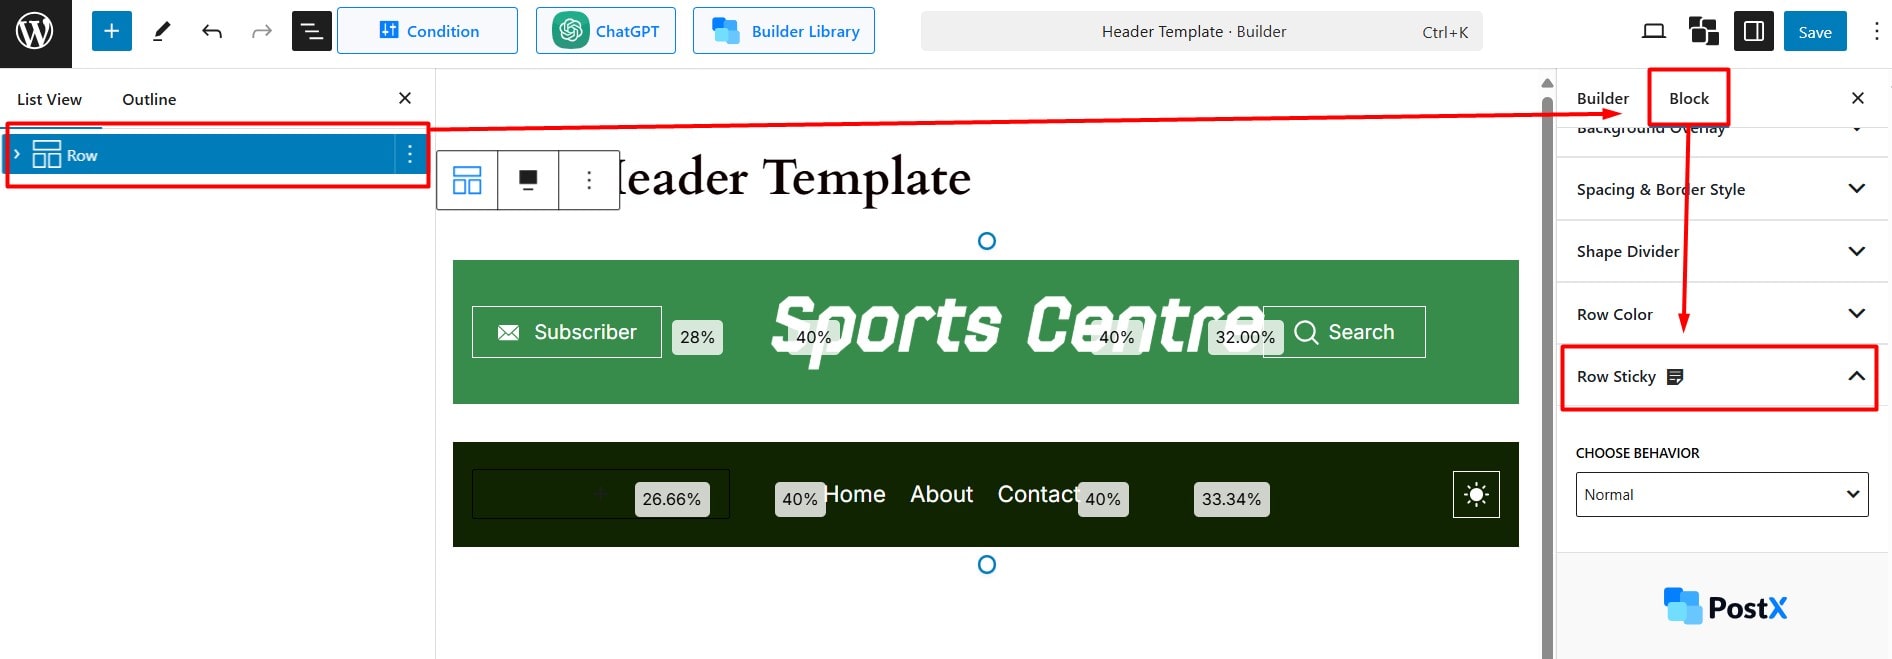
Step 02: Select the Row Block
- Click on the row block that contains your header or navigation menu.
- In the block editor, navigate to the “Row Sticky” section.

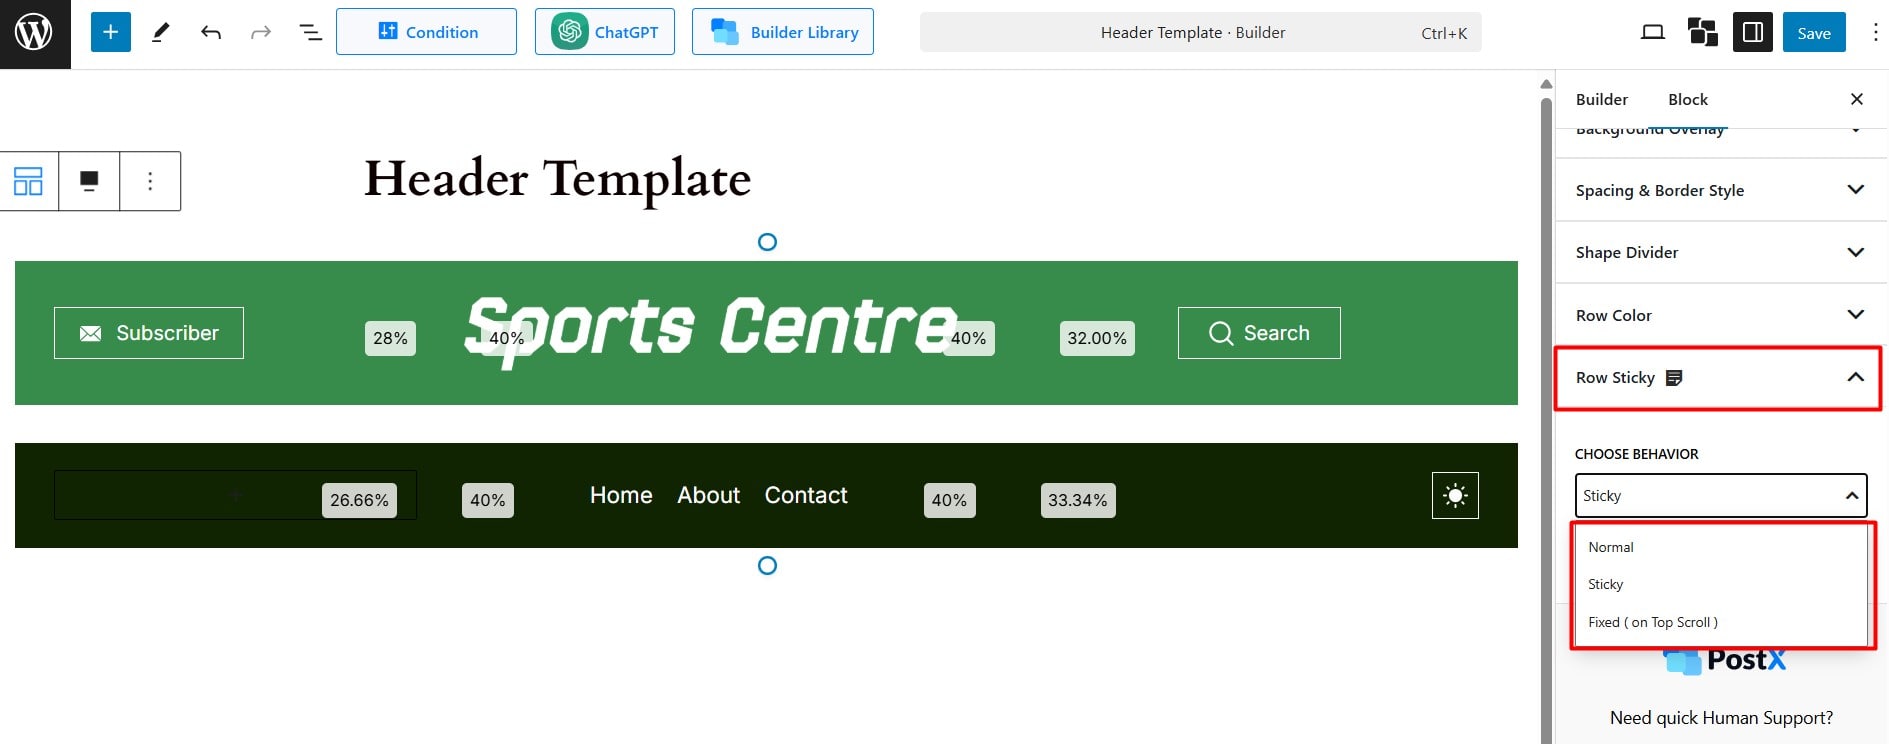
Step 03: Choose Behavior
- From the available options, select a behavior option for the header.
- There are three alternatives to choose from: (Normal, Sticky, and Fixed on Top Scroll).
Click here to learn about Normal, Sticky, and Fixed Top Scroll.

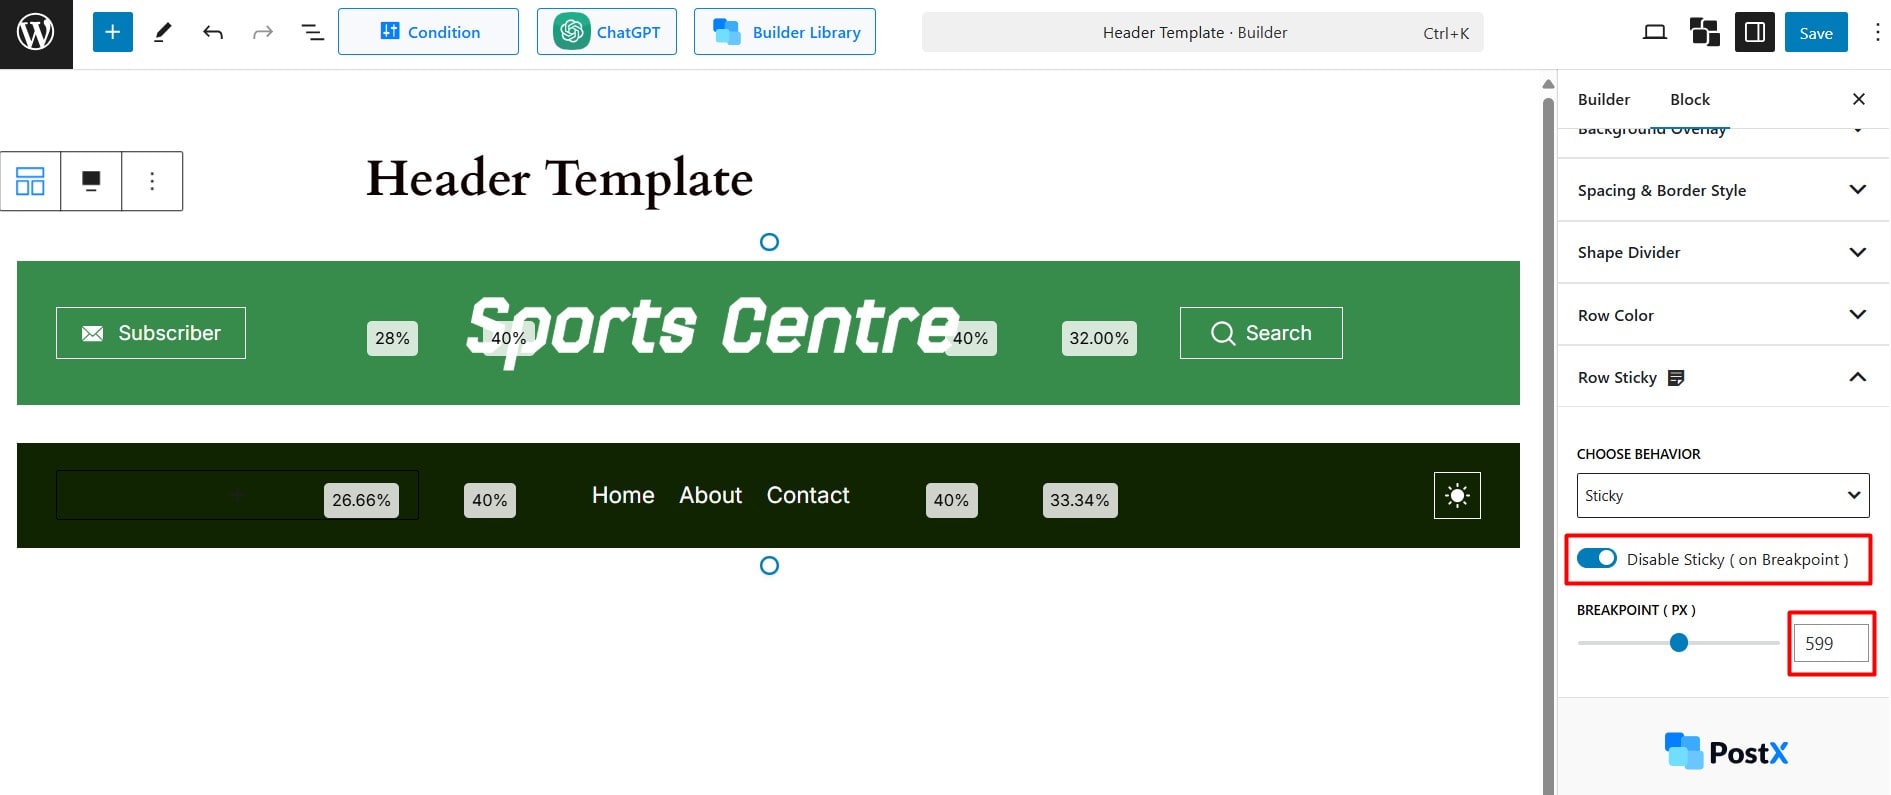
Step04: Disable Sticky (Optional)
In this step, you can disable the sticky behavior for specific screen sizes. This is optional but helps fine-tune the nav menu. Note that “Disable Sticky” does not work for the “Normal” option.
To disable sticky, set pixel values for breakpoints.
- Mobile: less than 600px
- Tablet: less than 990px

Once you’re done, save and see the changes.
