Here is step-by-step documentation on how to use Gutenberg blocks in Divi Builder with the help of PostX:
Video Tutorial
Here’s a video tutorial, to help you go through each step visually. So you won’t miss anything.
Step 1: Install and Activate PostX
- First, you need to Install and Activate the PostX plugin from the WordPress repository.

Step 2: Enable Divi Integration and Saved Template Addon
- Go to the PostX Addons page in your WordPress dashboard. Here we need to enable the Saved template and Divi addon.
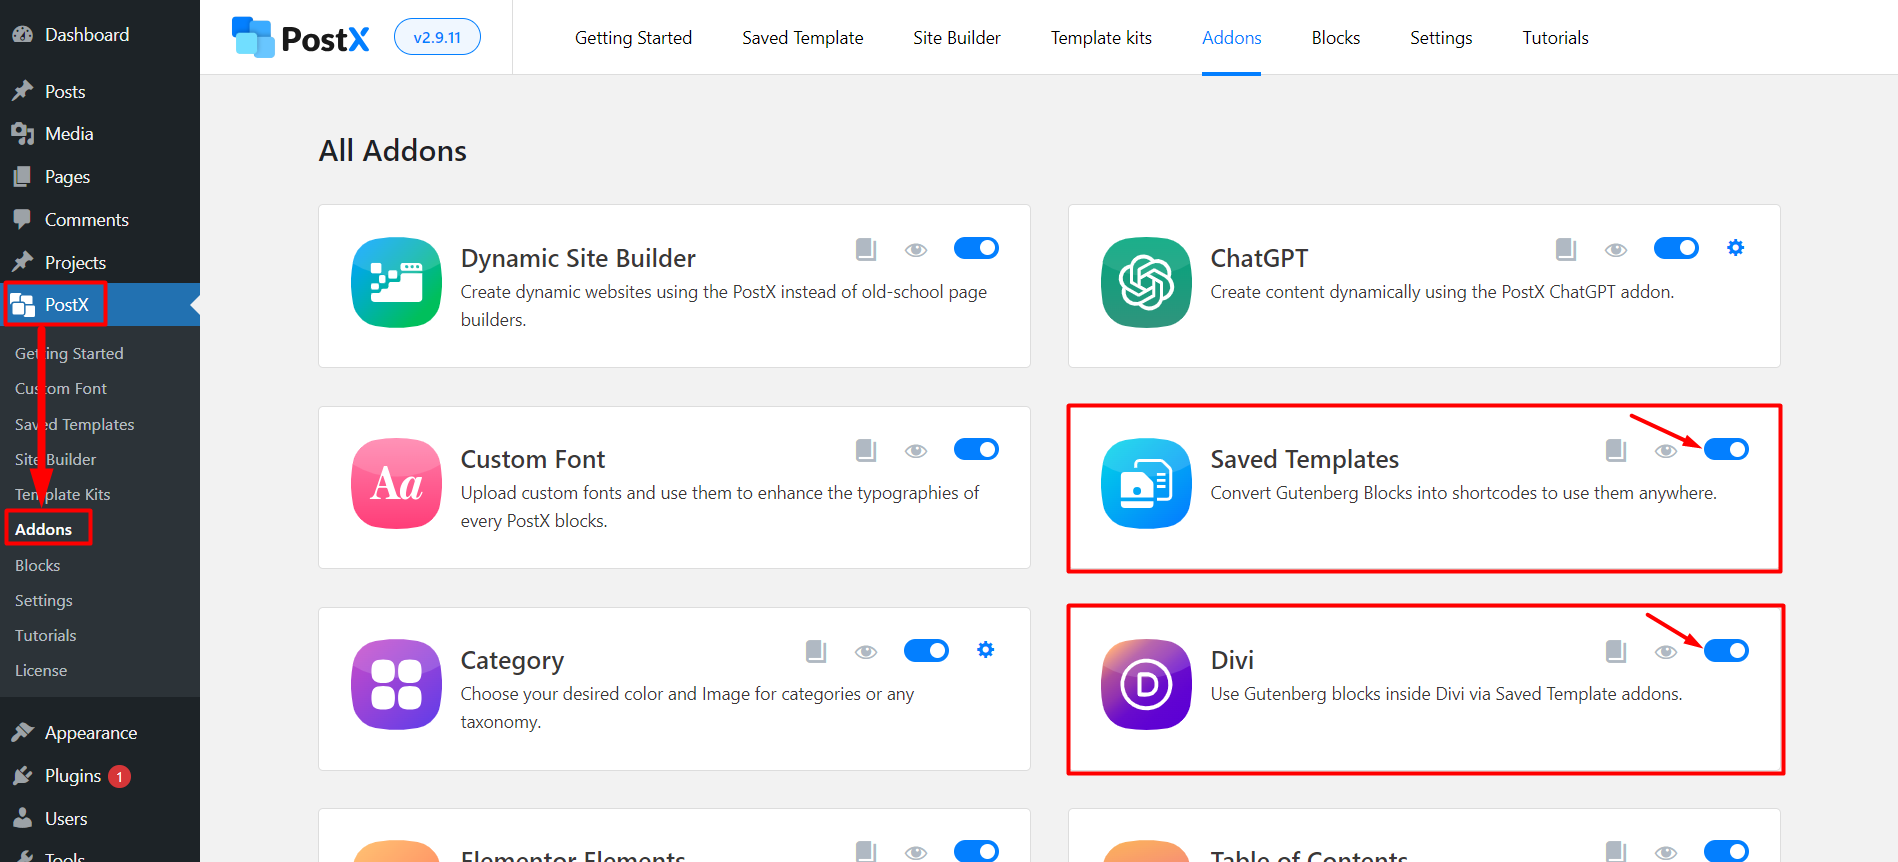
- Locate the Divi and Saved Templates addons. Toggle the switch to enable both addons. And now you can move on to the next step to create a saved template with PostX
Step 3: Create a Saved Template with PostX
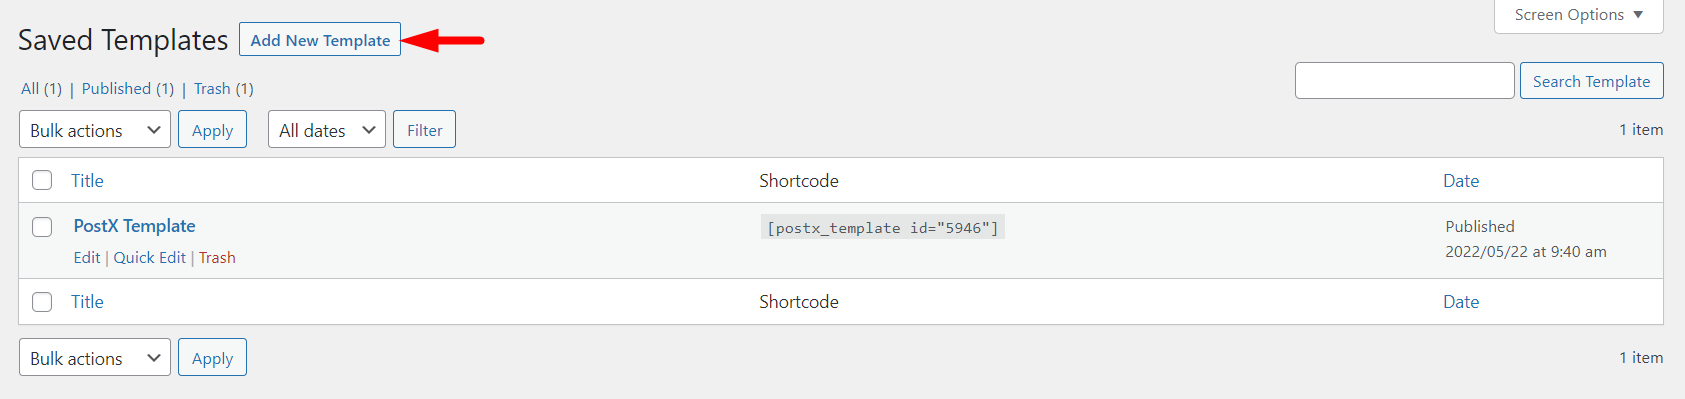
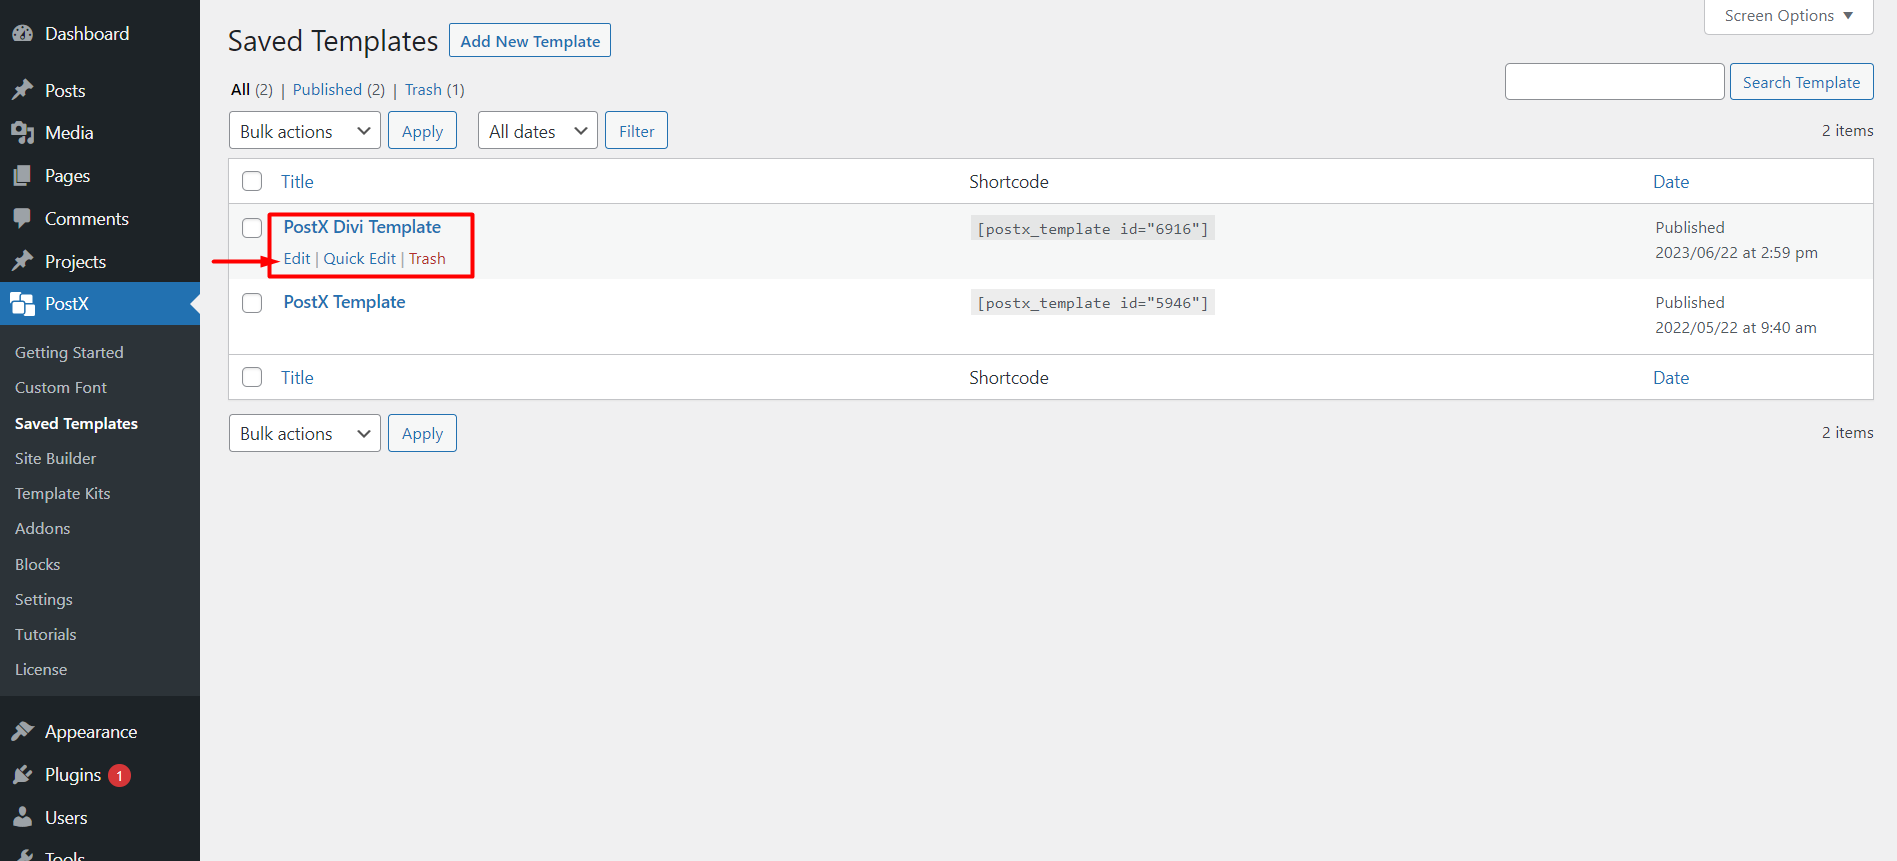
- Navigate to the Saved Template section in the PostX plugin. Here you can create new saved templates or edit the existing ones.

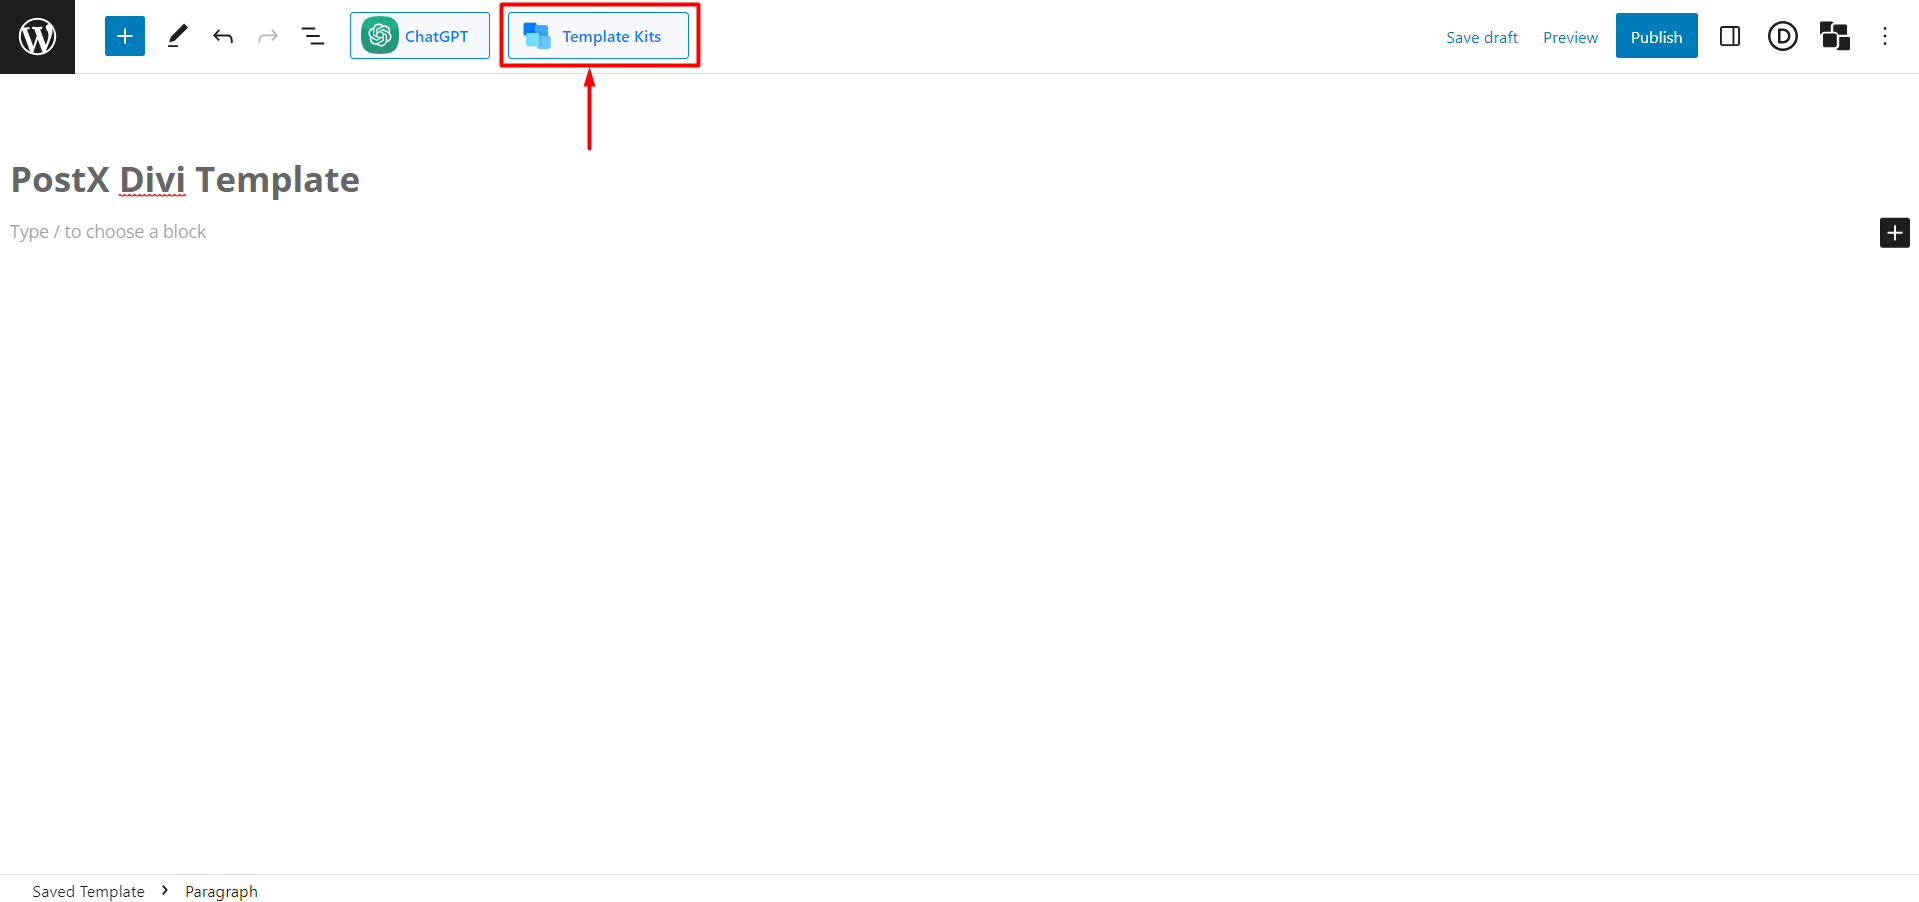
- Click on the “Add New Template” button. And it will redirect to the Gutenberg editor where you can create your template using default Gutenberg blocks, PostX blocks, or premade templates/starter packs by PostX.
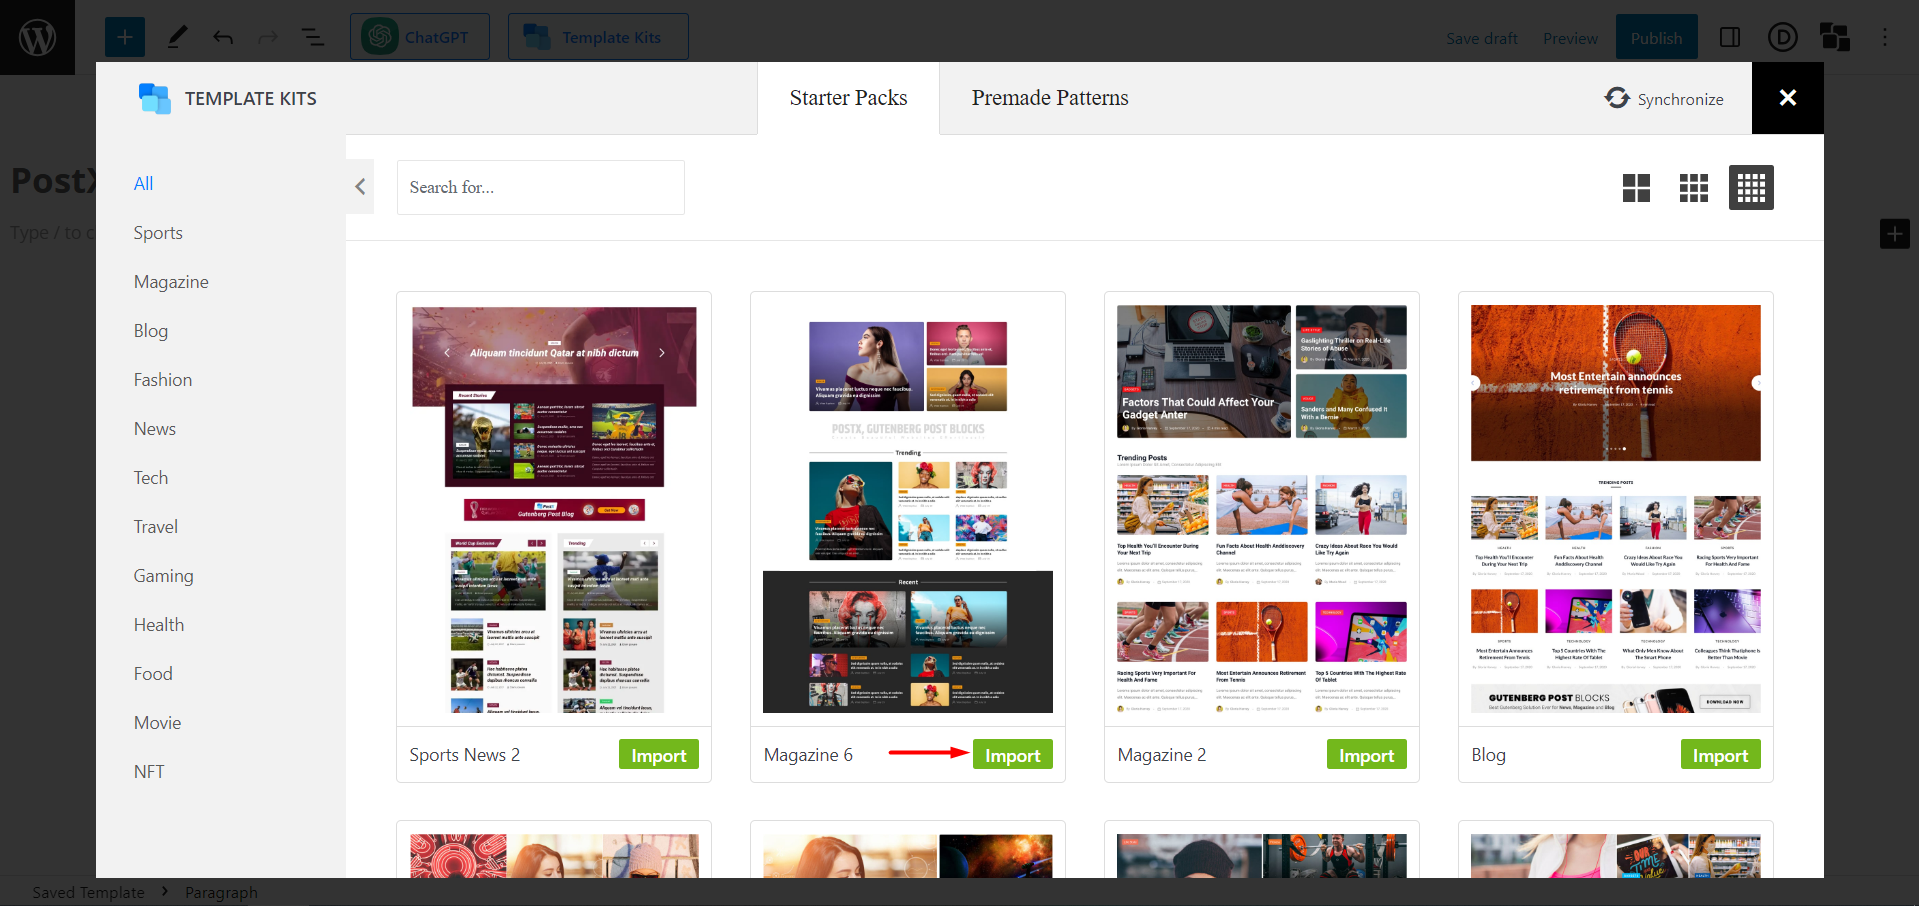
- Click the “Template Kits” button at the top of the page and choose a premade template/starter pack if you don’t want to create it from scratch.
- In starter packs/premade patterns, you will find a huge library of premade designs. Choose your desired one and click “Import.”
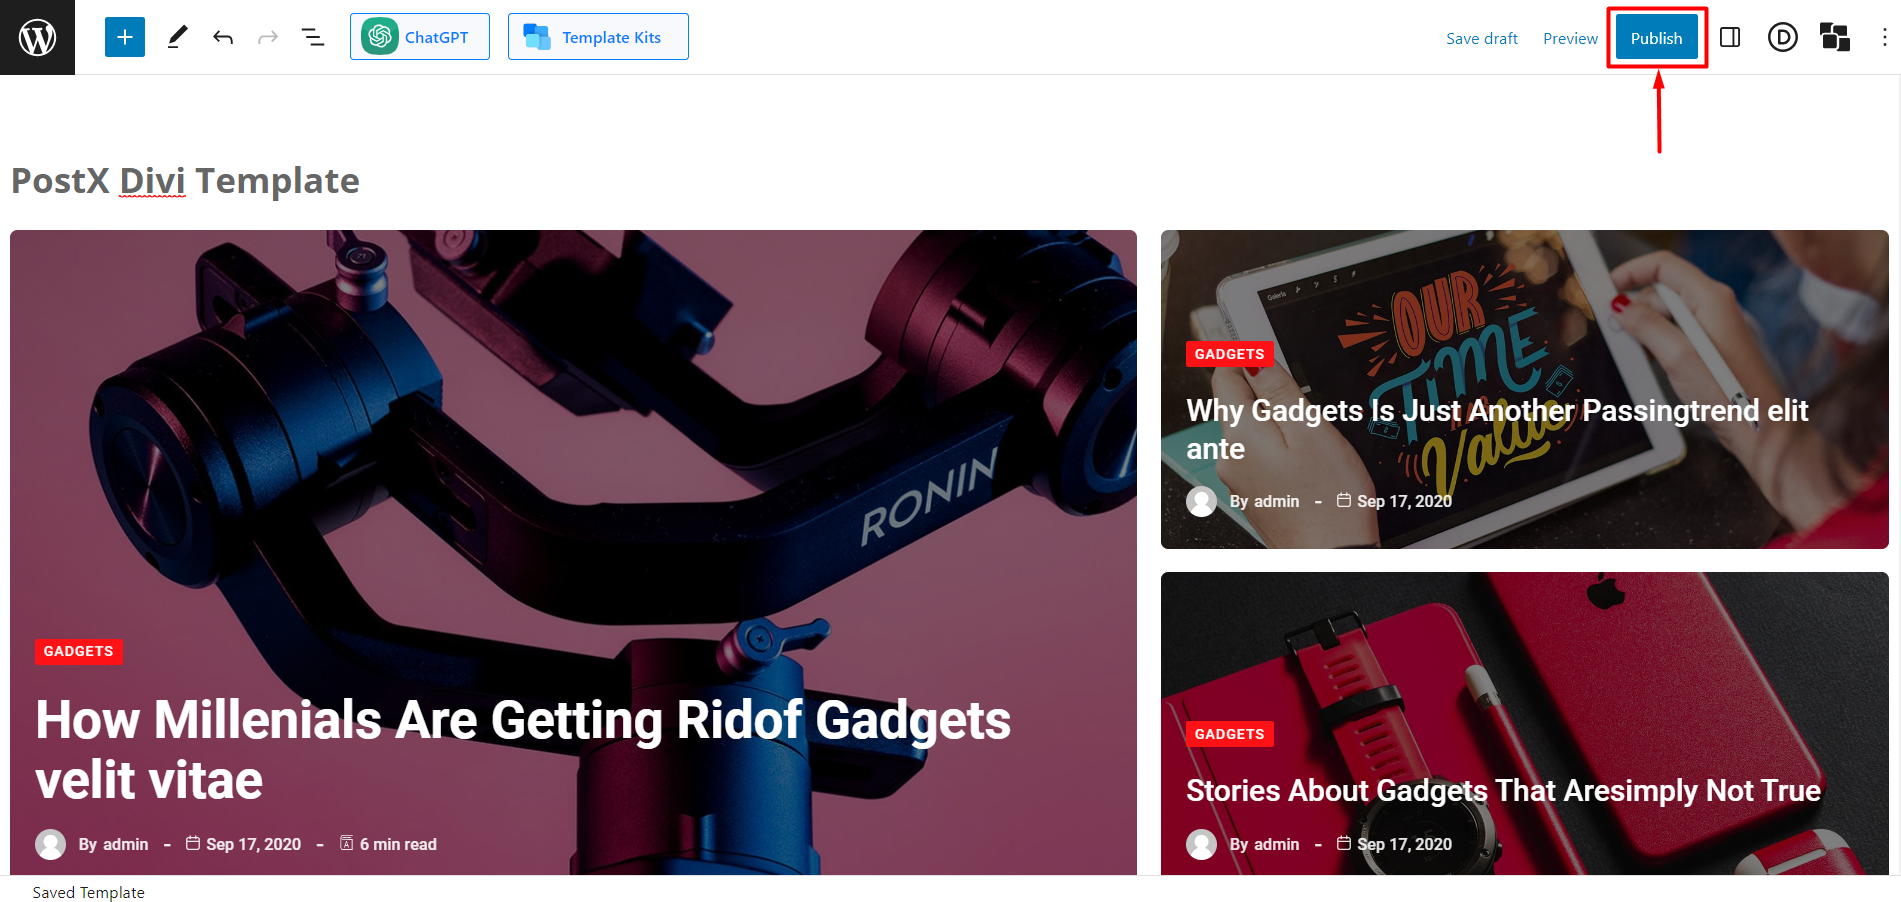
- Give your template a name, as it will be displayed inside the Divi builder in “PostX Template”.

- Click “Publish” to save your template. You can see all the saved templates in the PostX Saved Template section.
Step 4: Use PostX Template in Divi Builder
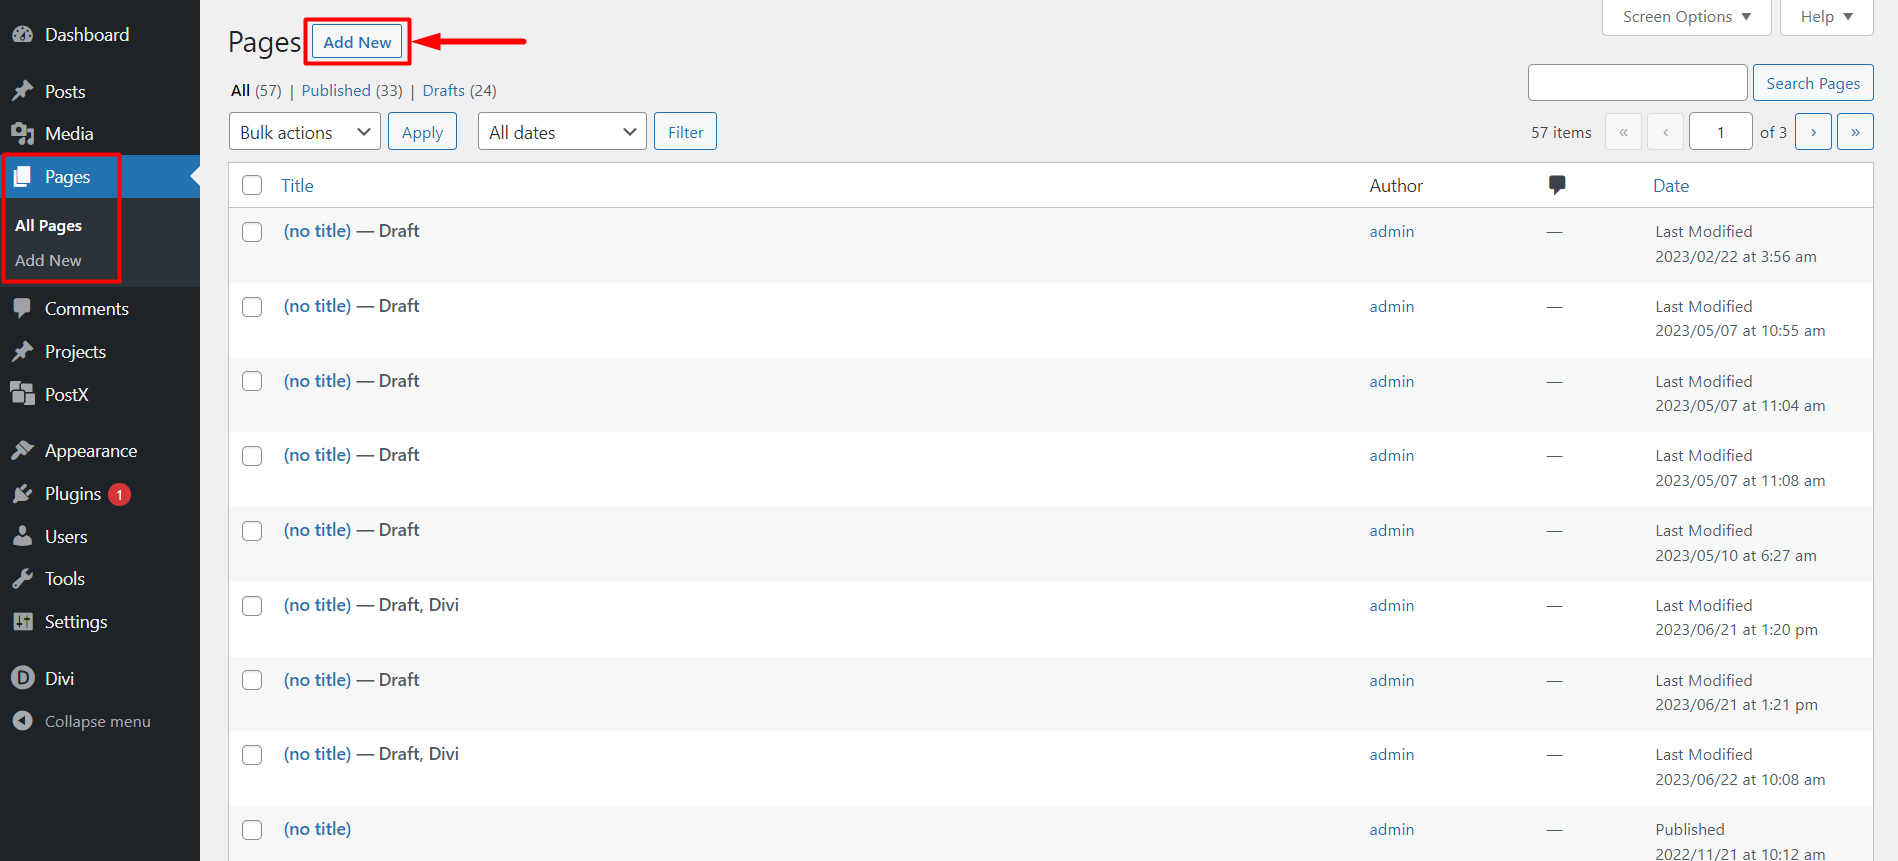
- Go to the WordPress Dashboard and navigate to Pages. Click on “Add New Page” to create a new page.
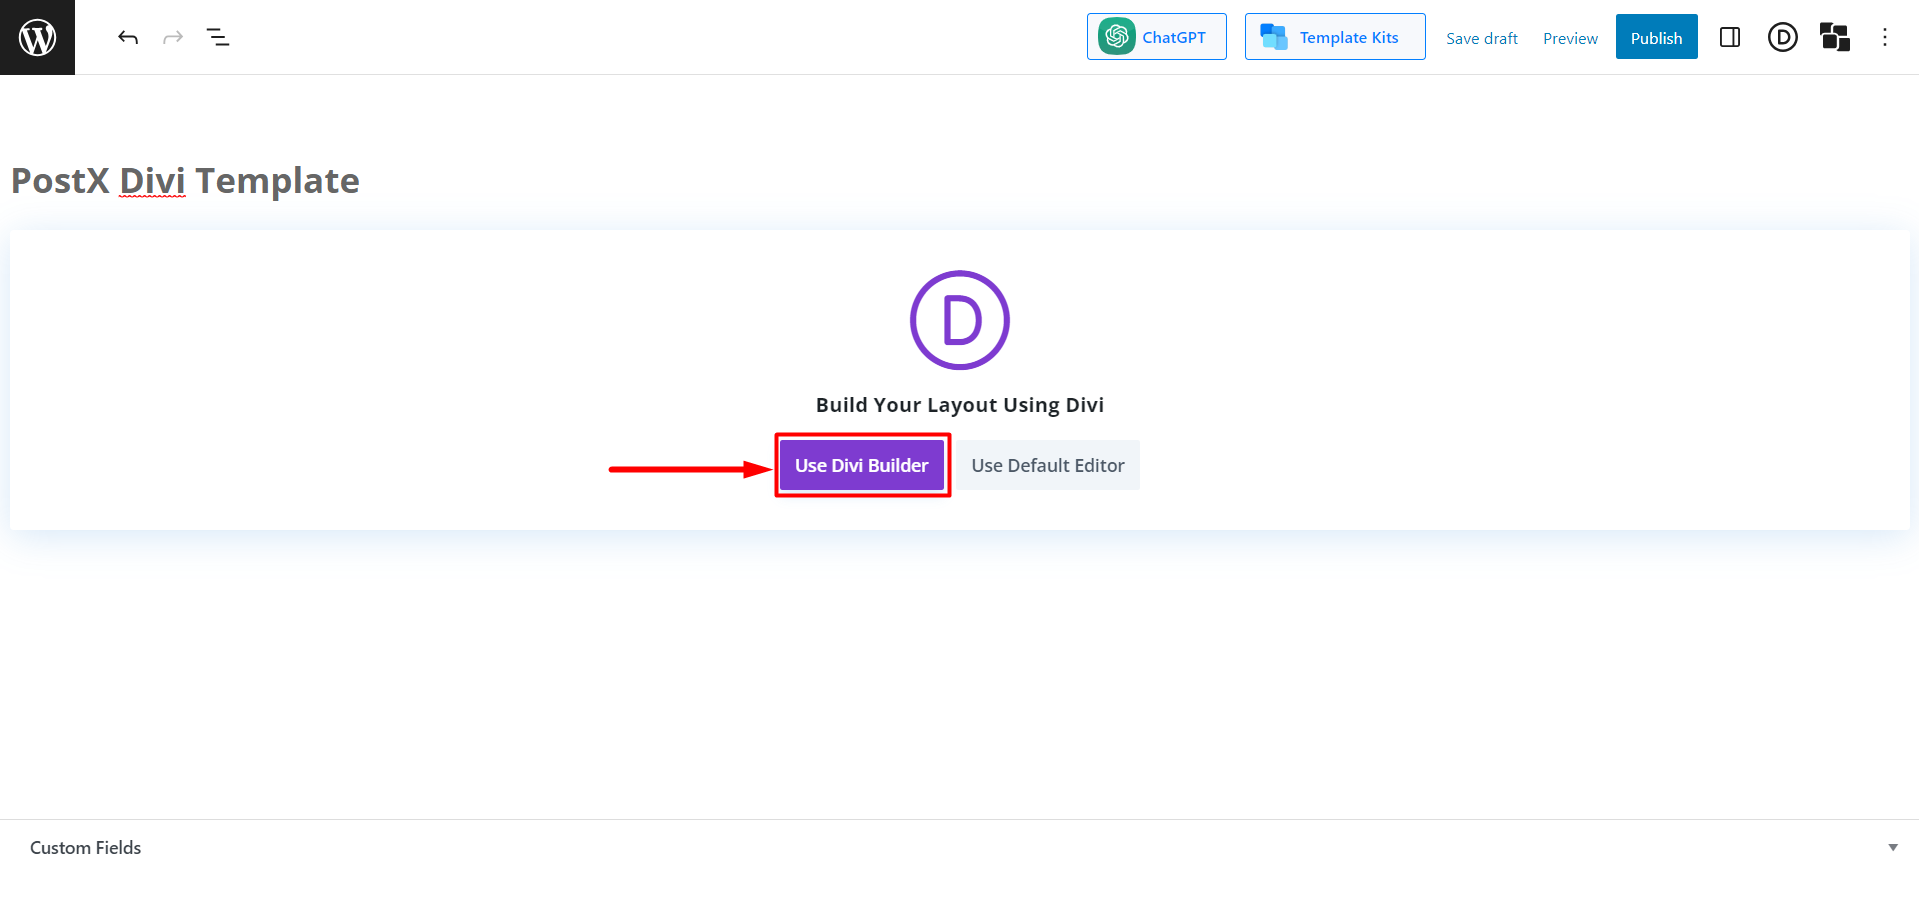
- In the page editor, you will see a pop-up from Divi asking you to “Use Divi Builder.” Click on it to launch the Divi Builder.
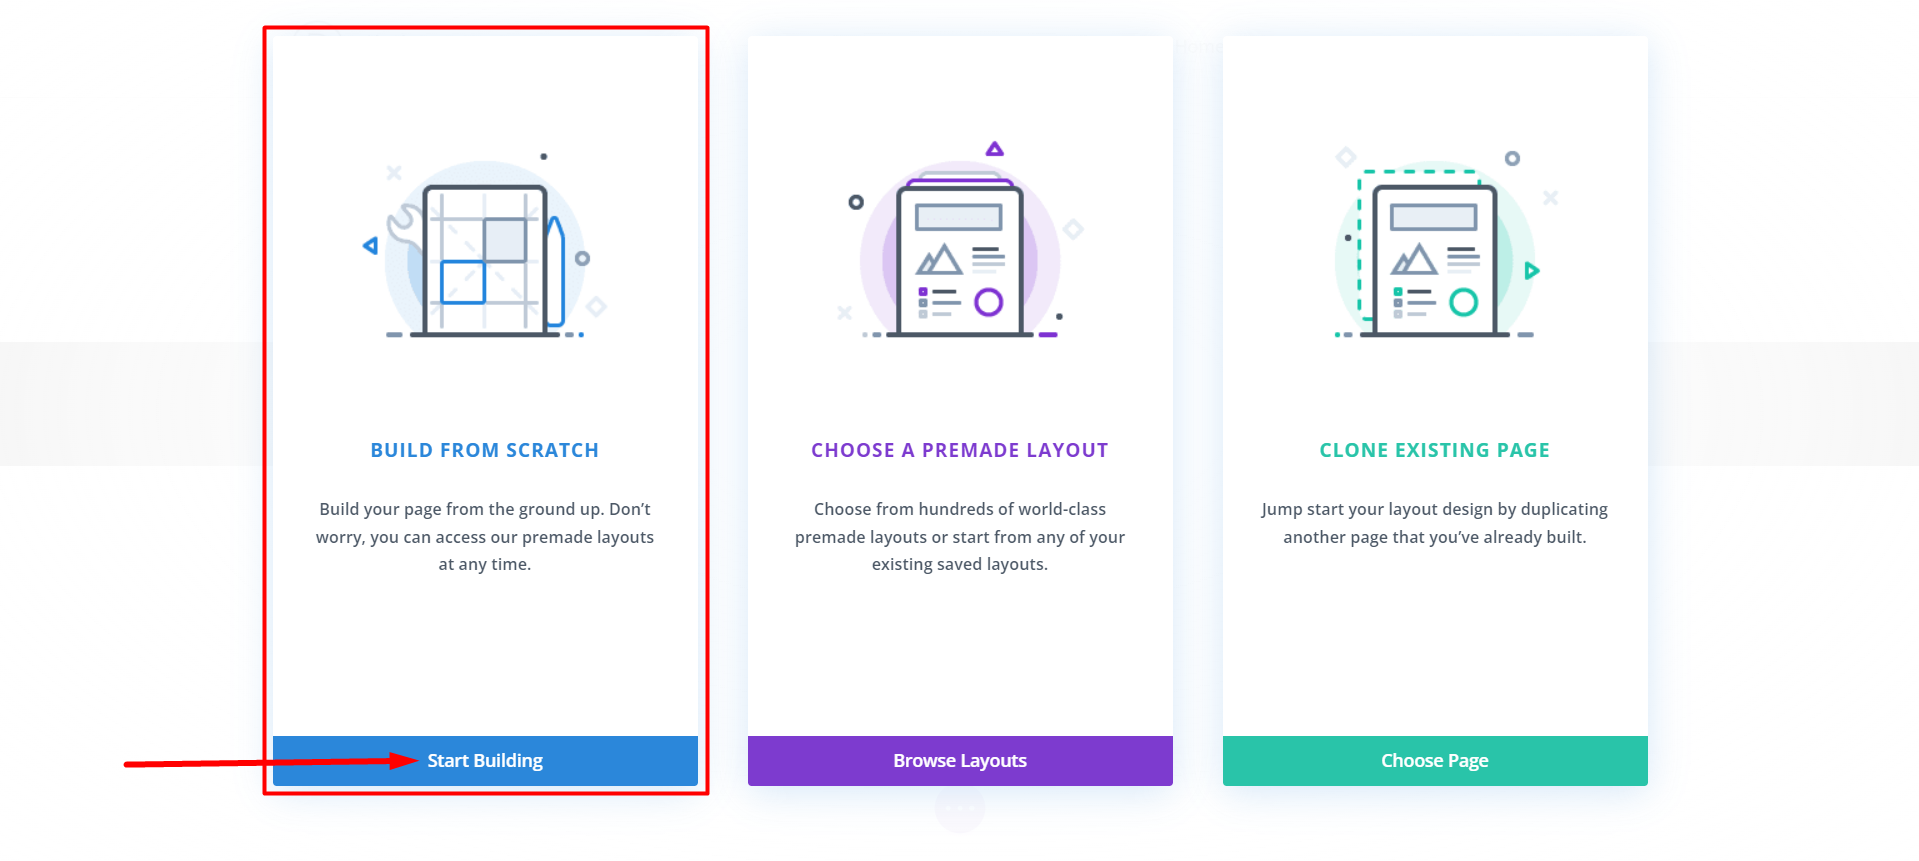
- In the Divi builder, click on “Start Building.”
- Select a single row to add to your page.

- In the search bar, type “PostX Template” and click on it.
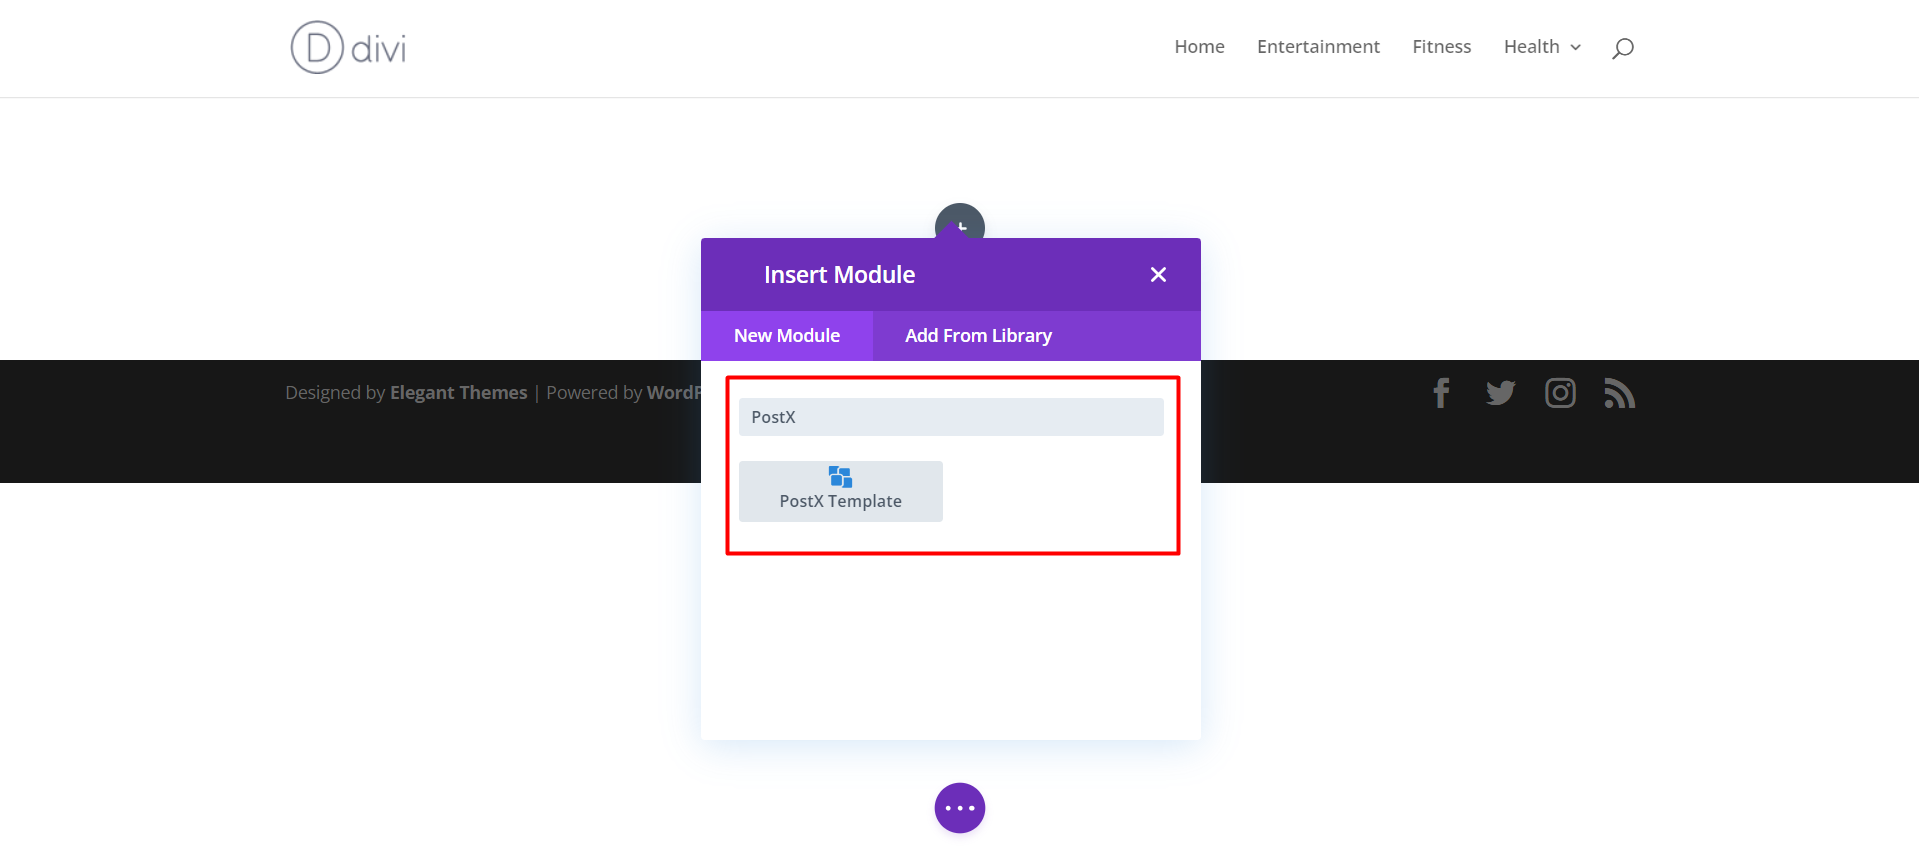
- Select the saved template you created with PostX.
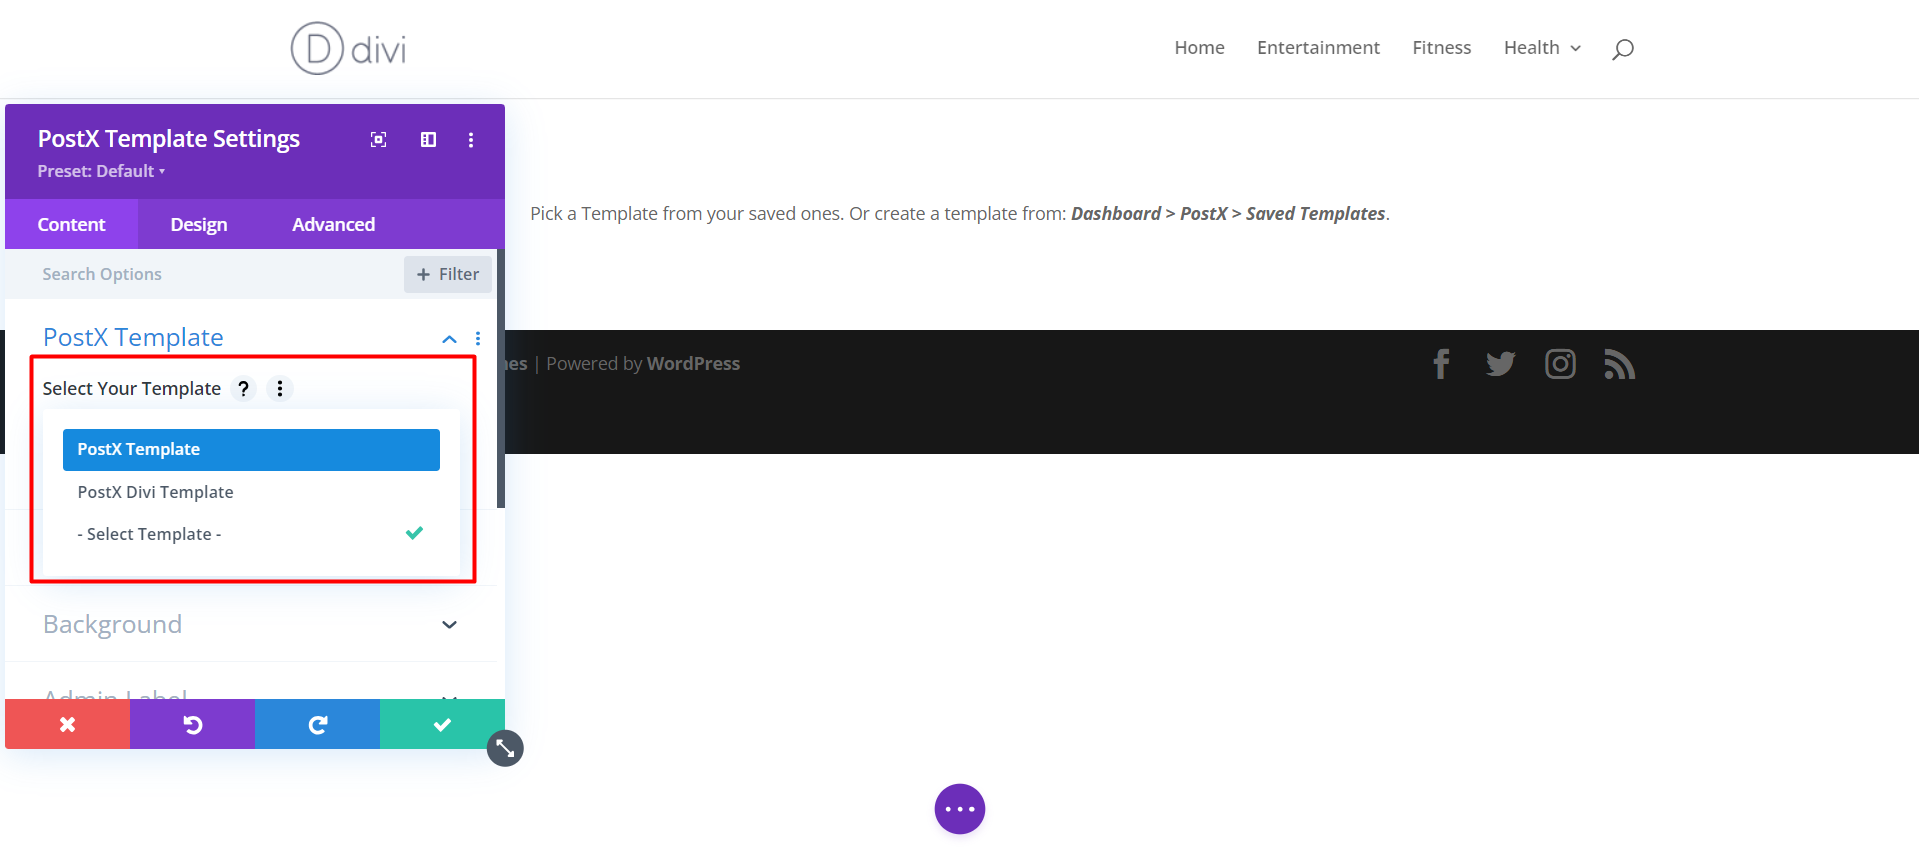
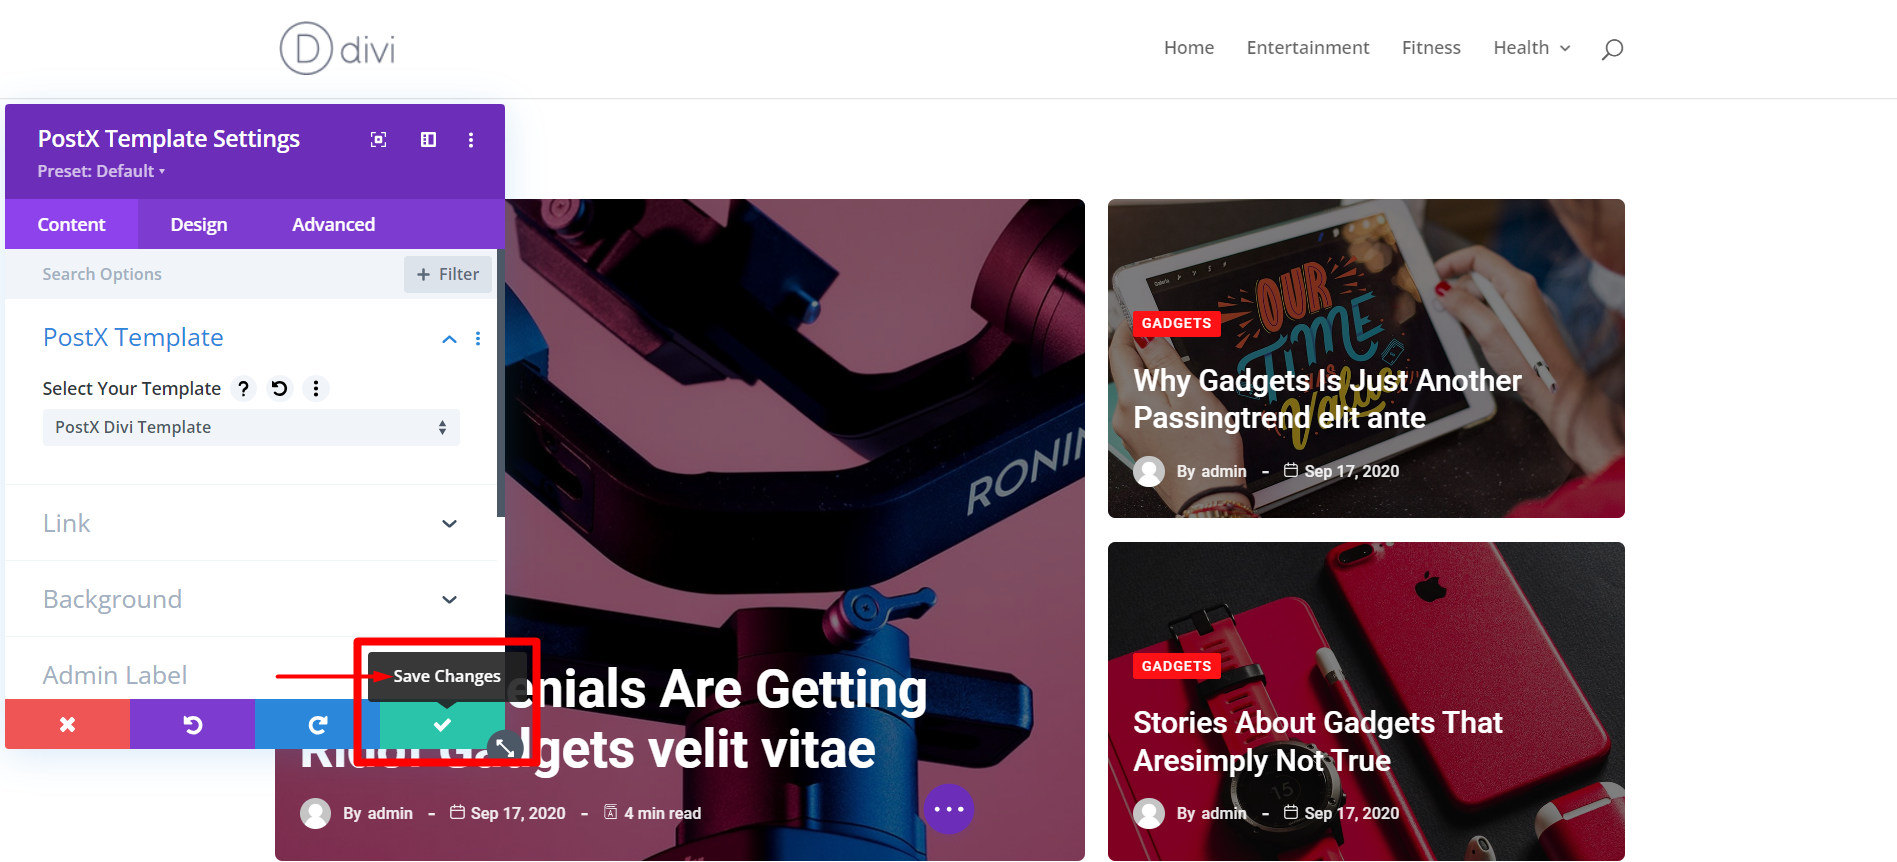
- Choose the template you want to use in Divi and click the “Save Changes” button.
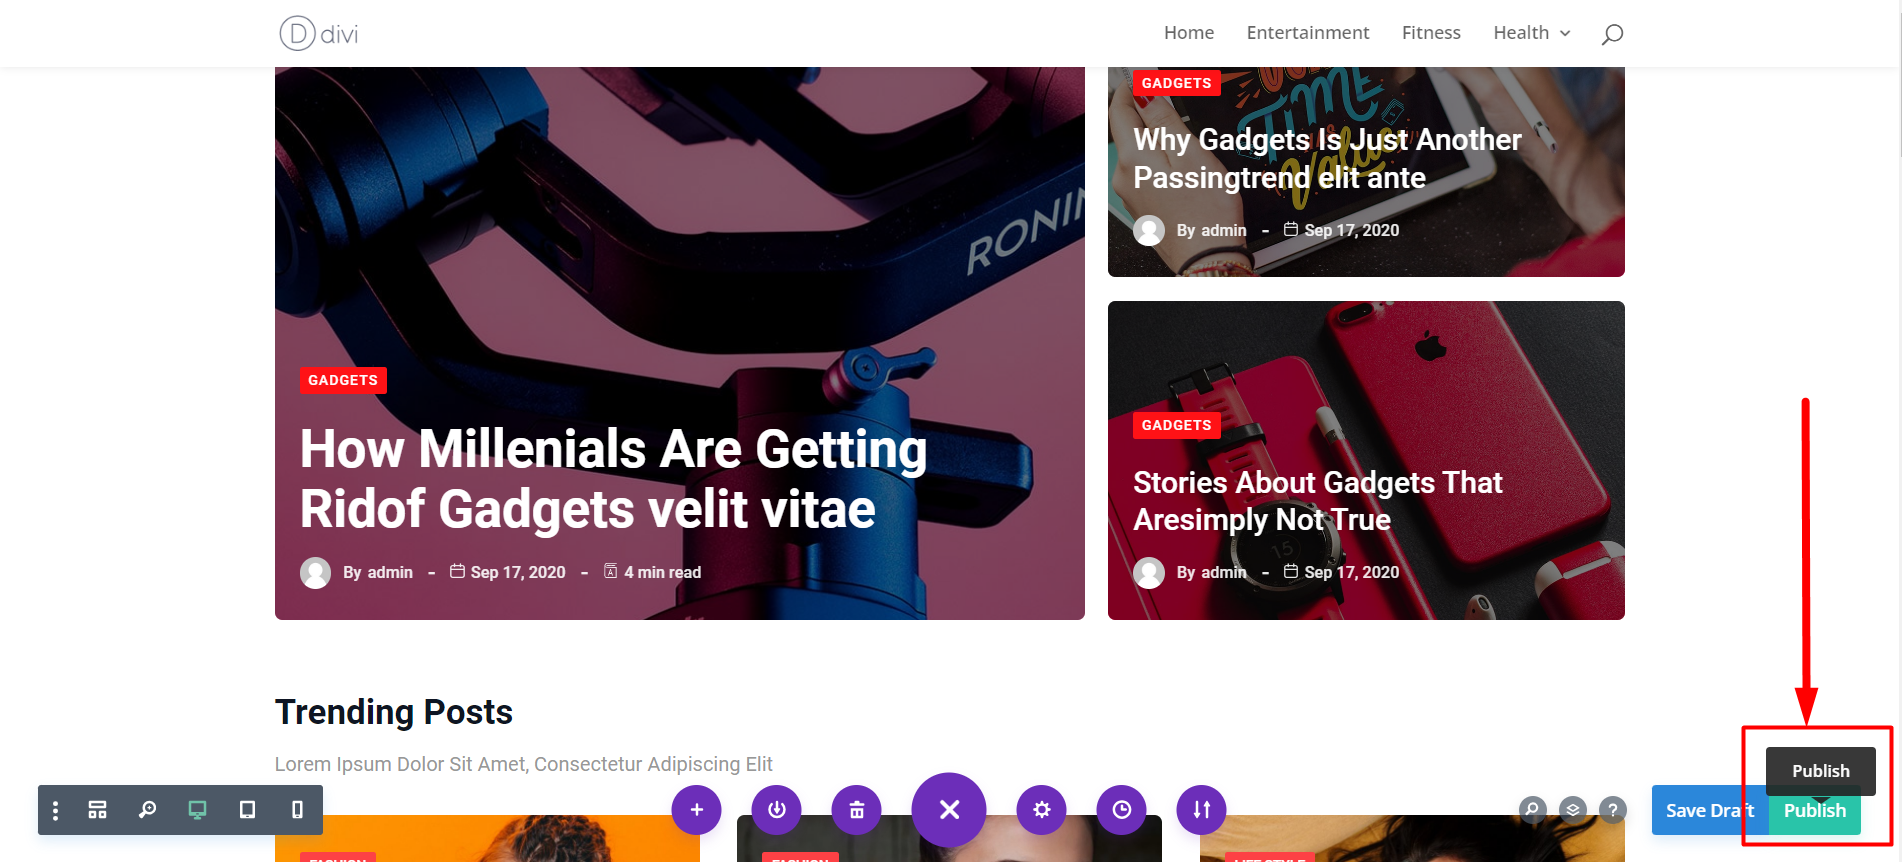
- Publish the page using the Gutenberg blocks in Divi.
Step 5: Customization (Optional)
If you need to customize the PostX blocks or Gutenberg blocks used in Divi, you can do so in PostX.
- Go to the PostX Saved Templates section and click “Edit” for the template you want to customize. Make the necessary changes to the template and click “Update.”
The changes will be automatically synced with Divi if you have used the template inside Divi.
Following these steps, you can easily use Gutenberg blocks in Divi Builder using the PostX plugin. Enjoy the expanded design possibilities and customization options!

