In order to create or customize WordPress header with PostX, you need access to the PostX Site Builder. Using the site builder you can build new headers for your WordPress website.
Here’s a quick overview:
Here’s how to do it:
How to Edit WordPress Header Template with the PostX Header Builder
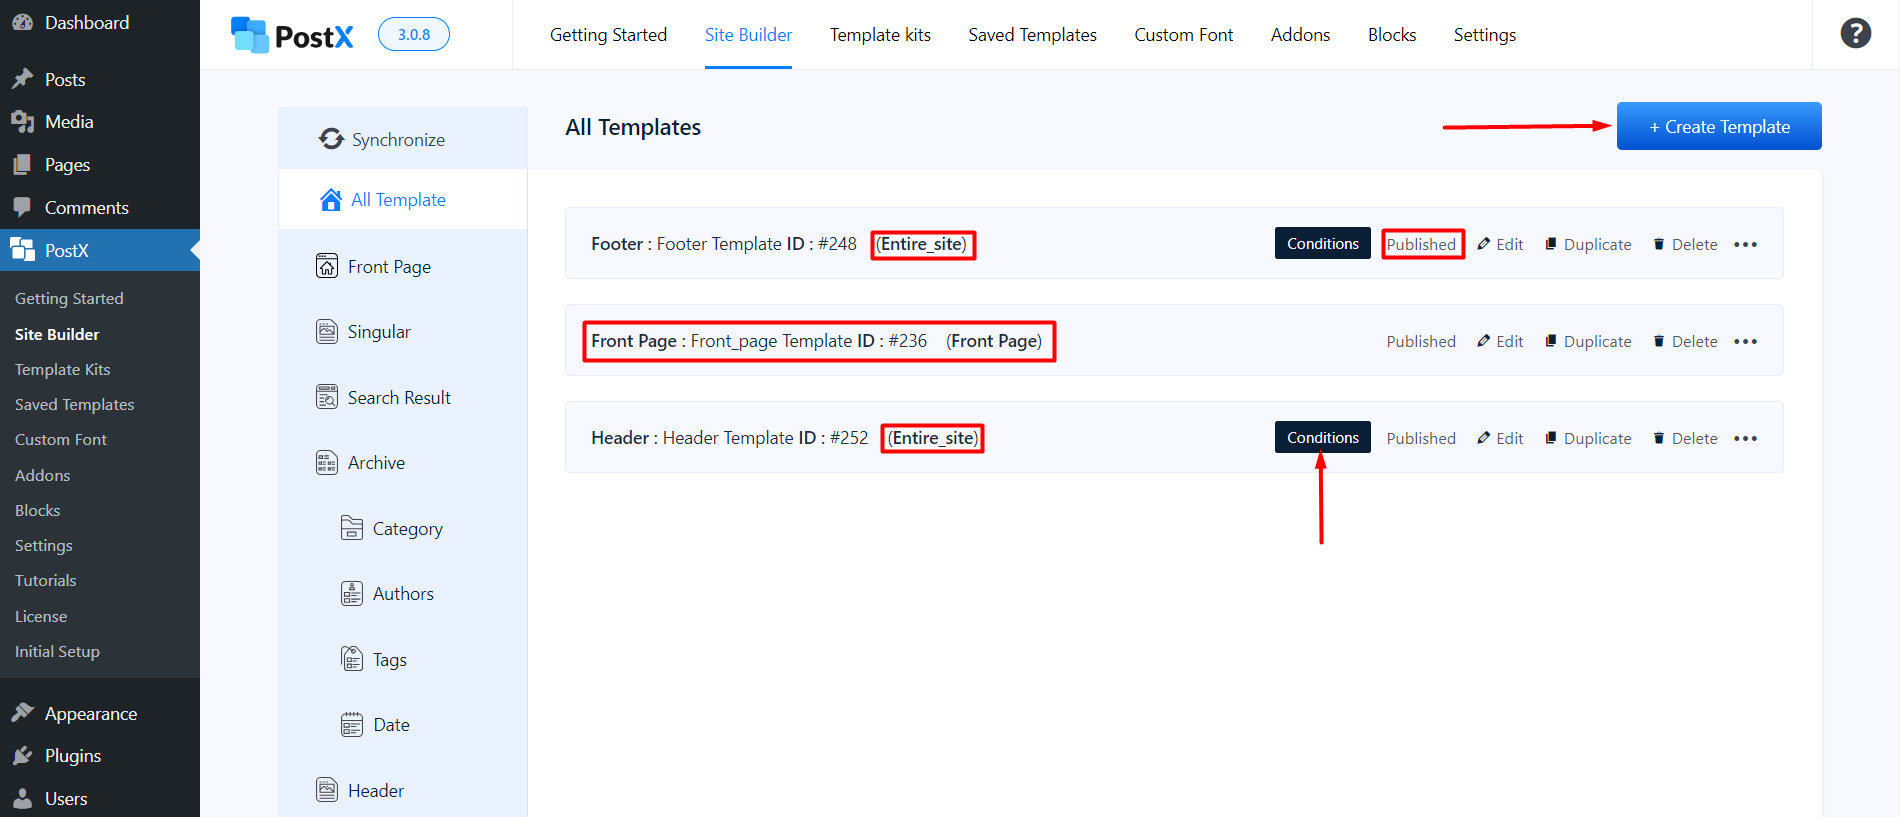
- In order to edit header in WordPress with PostX, you need to go to PostX > Site Builder from your WordPress dashboard.
- Here you will find the Header option. If you don’t have any templates created, then you will have the option to Start from Scratch.

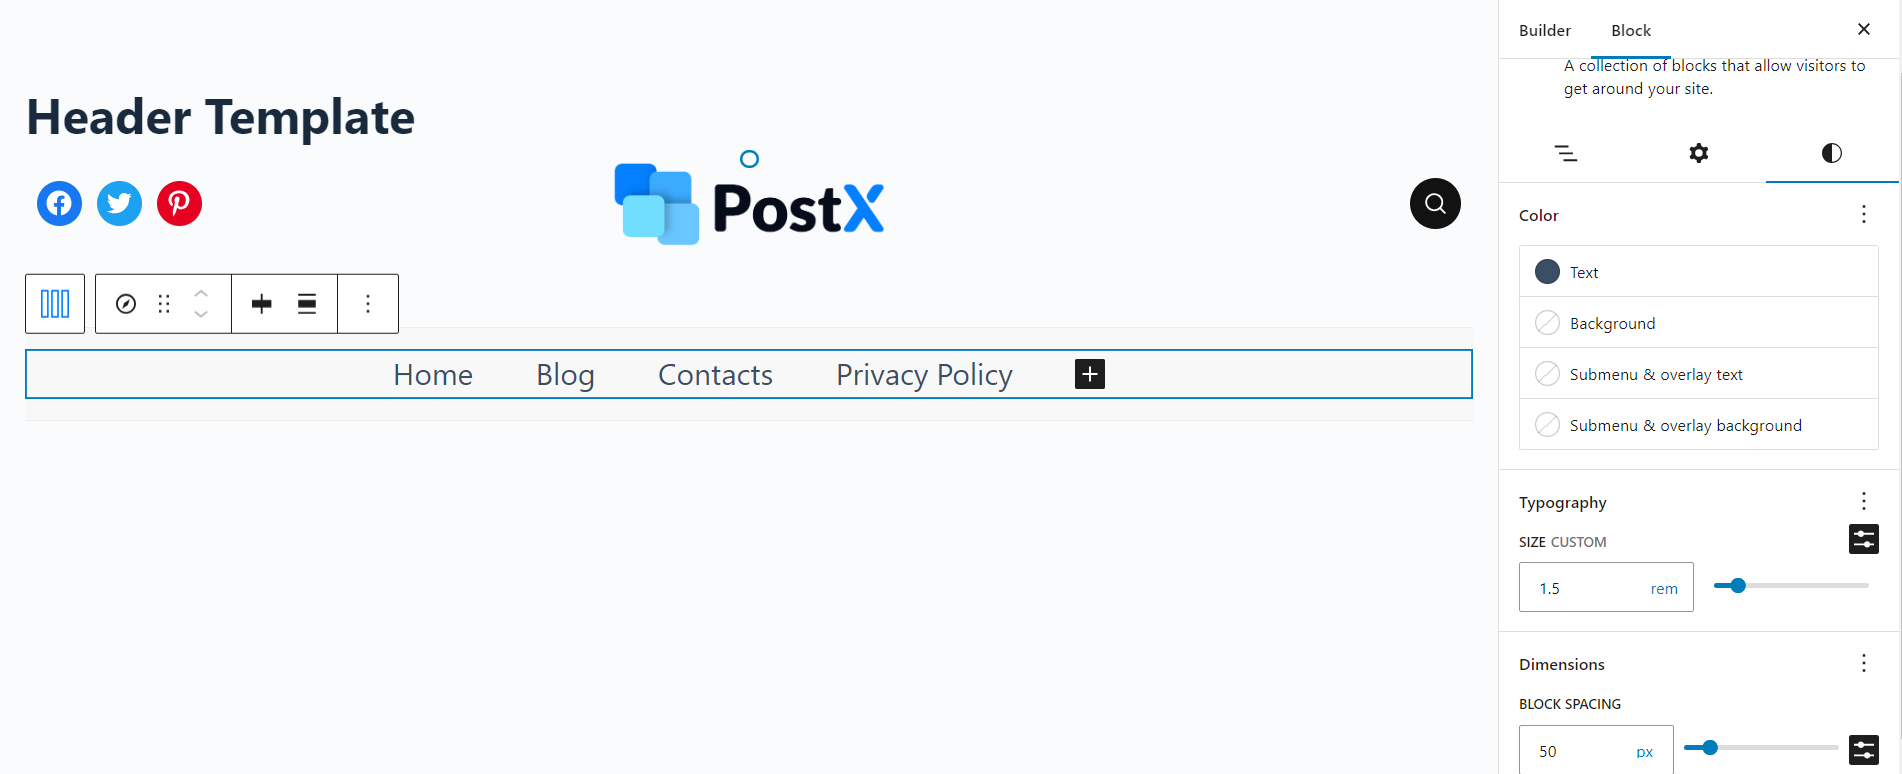
- If you click on “Start from Scratch” (“+”-icon), you will be taken to the Header Template page. You can add various PostX blocks and the default WordPress blocks to create your WordPress header template.
Note: This is true for the footer, 404 page, and all other pages you design for the very first time using the PostX site builder. However, when you have a couple of templates created, they will show up on the site builder dashboard – under “All Templates”. Also, you can create a new template using the “Create Template” button.
- You will be prompted to choose the condition – where do you want to show the header (Do you want to show it on all pages, single post pages, or your archive pages?) Based on your choice, you can show the header or edit header in WordPress; on any page you want.
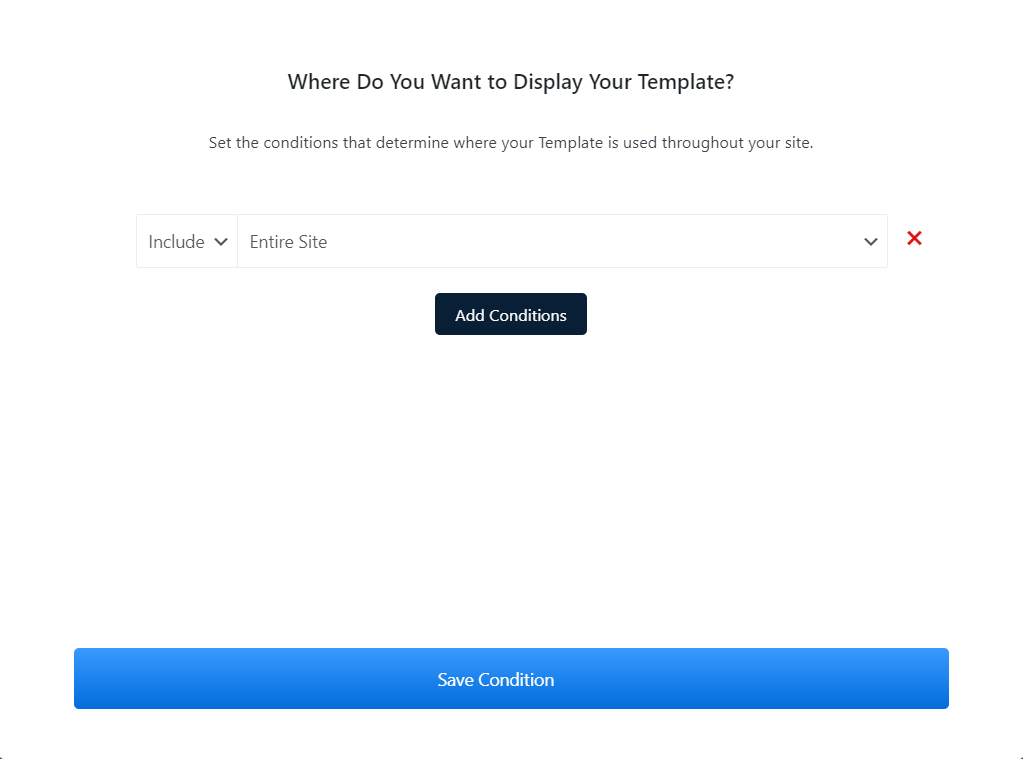
*** If you want to change the conditions prior to the start of the design, you can do that as well. You can also use the PostX Template Kits library to create your styles as well.
Note: When you are about to publish a page template for the first time, you will be prompted to choose a condition from the template page. Once you choose it, you will be able to publish the page. However, this will not apply to the Front Page and the 404 Page as these pages do not have any dependencies.
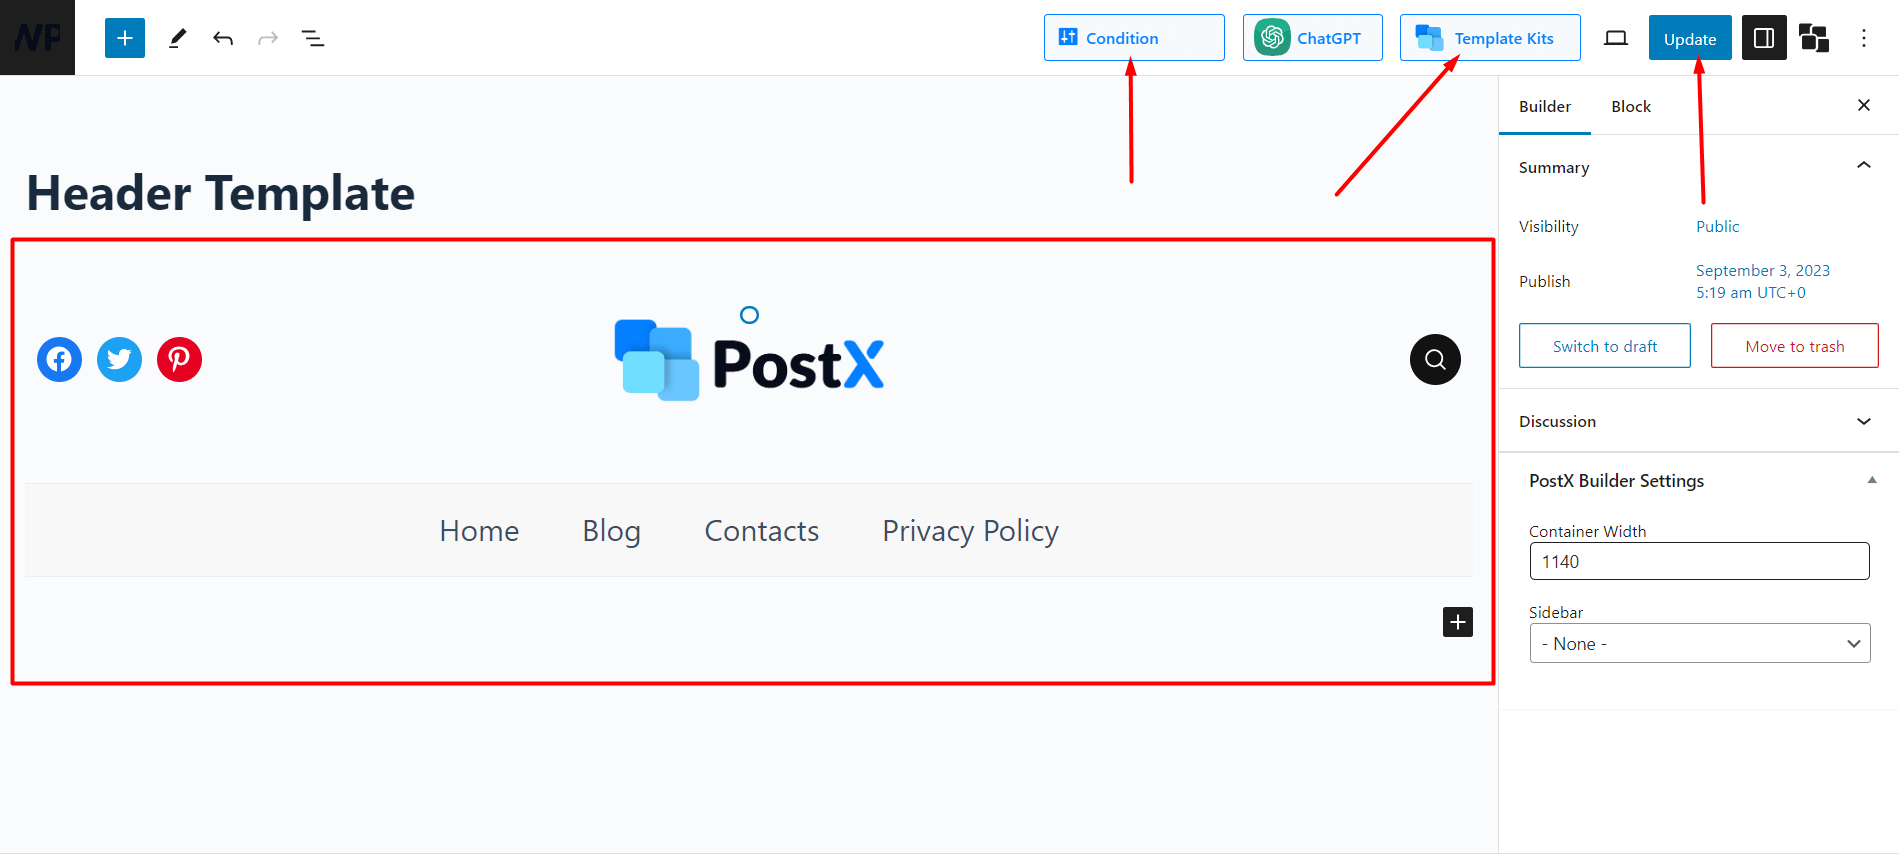
- Once you publish the header template, you will be able to see it on your desired page.
Here’s a design that created using the WordPress Header Template builder in the PostX Site Builder:

All New WordPress Header Templates
In the header builder if you click on the Synchronize Button in the Site Builder, you will find a couple of new header templates (Under the header section in the site builder) :

You can use these ready templates simply by clicking on the import button. If you import one of them and update the header template page (with the updated conditions) you will be able to see the header on the pages you want.
Pro Tip
Pro-tip: When you are using the default navigation feature of WordPress, you can add your main menu using the following method:
- Click on the navigation menu.
- Go to the menu settings on the left and click on the ‘three dots’.
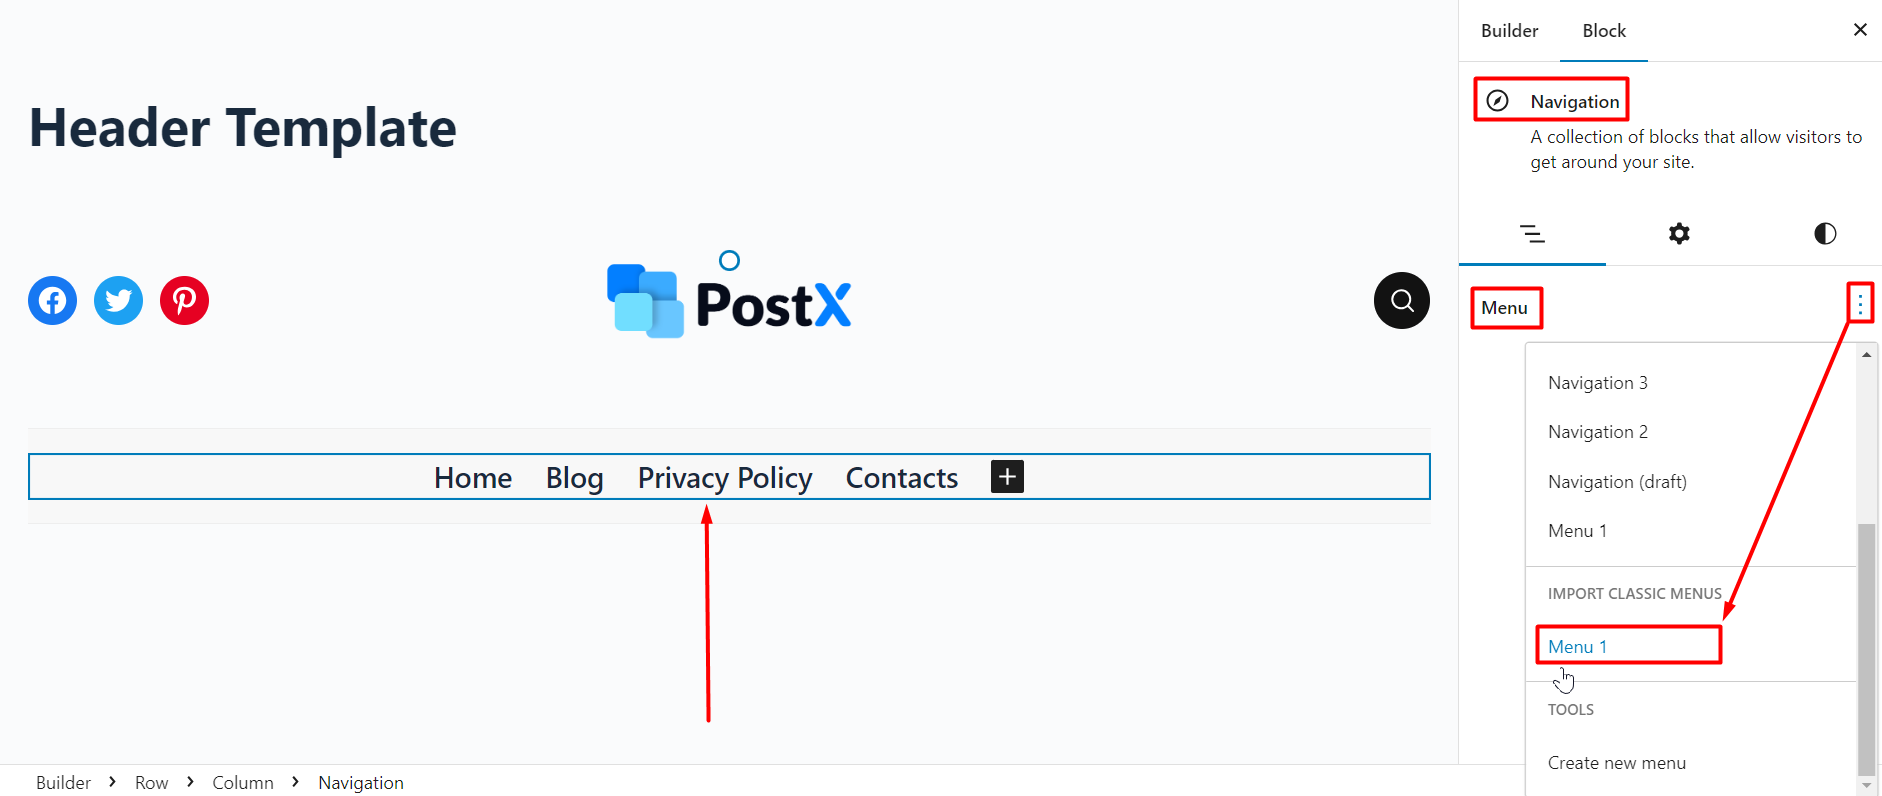
- Choose the menu you created from the dropdown list.
- Finally, publish the header.
Once you select the desired menu, it will show up.

