The PostX Front End Submission addon allows site admins and freelance writers to actively collaborate on blog content for a WordPress website. Let’s see how it works.
***Images may be subject to change as new updates roll out for the product. Please inform the support team of any missing information – we would really appreciate it!
***Pre-requisites
Please note that you need both the PostX free and Pro versions installed on your WordPress site. You can check out the installation process in the following links:
***Before working with the addon, make sure to go to “Settings” from your WordPress dashboard. Select “Permalinks and Save the Default changes for the settings to take effect.
Enabling the Front End Post Submission Addon
To enable the front-end post submission addon, you need to:
- Go to your WordPress dashboard and navigate to PostX > Addons
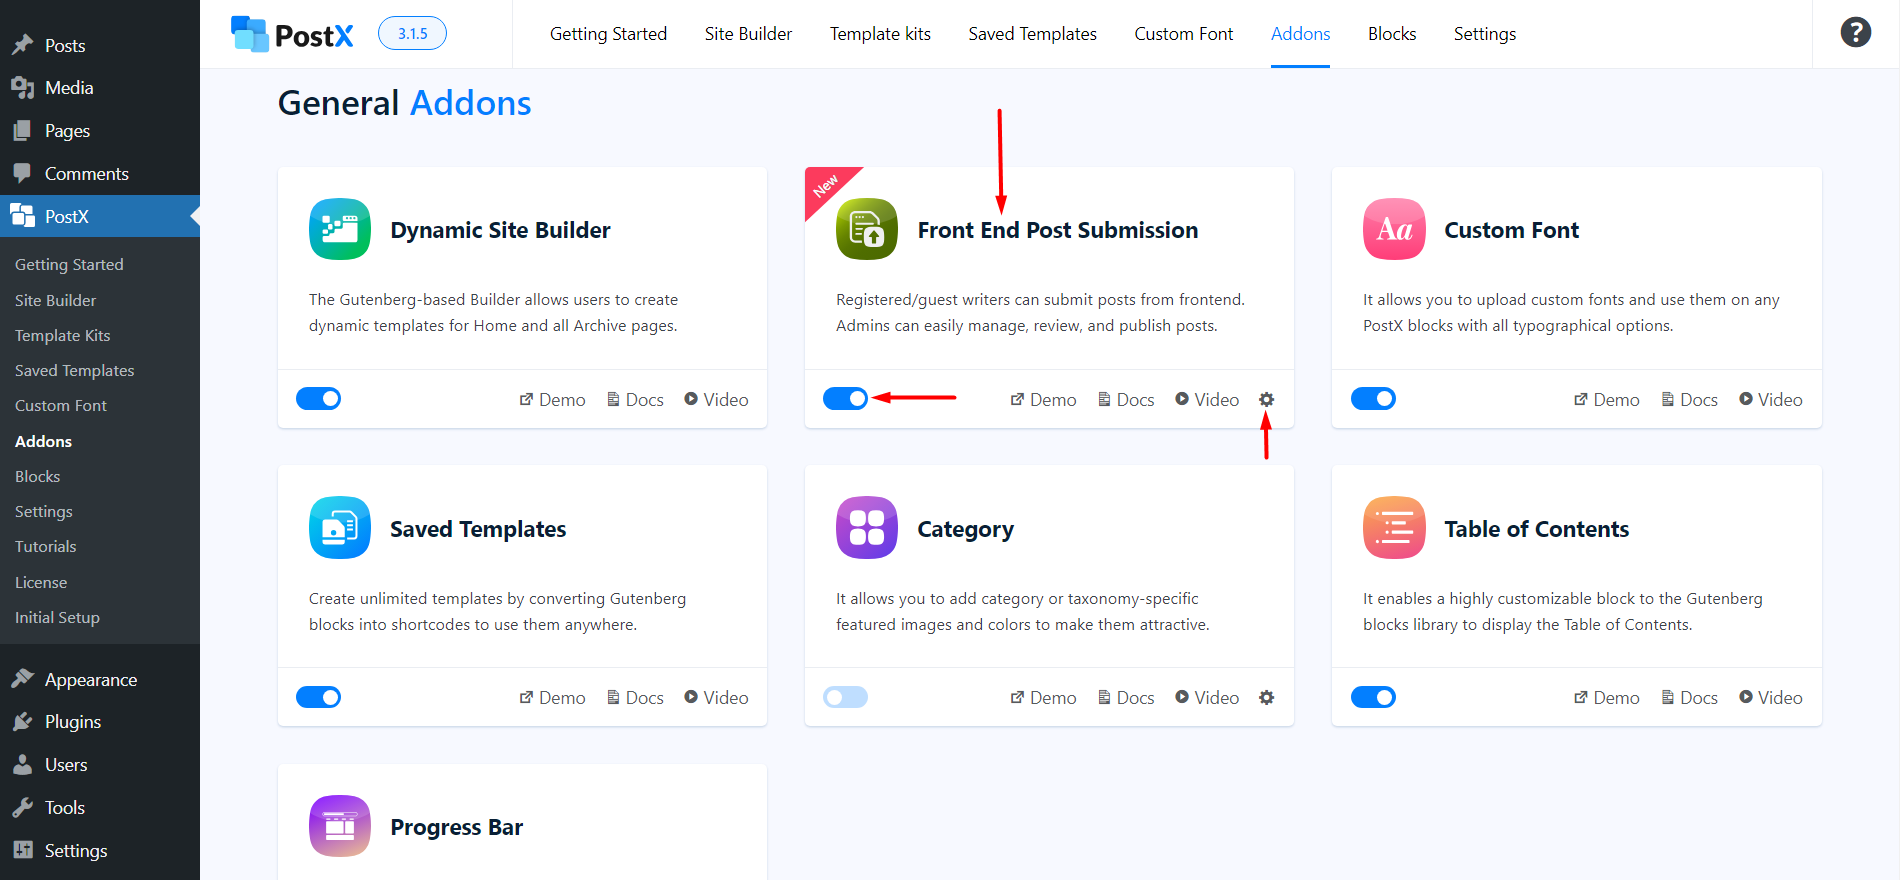
- Search for the Front End Post Submission Addon
- Enable the Addon
Once you enable the addon, you need to check out the settings for the submission addon.
Creating a My Account Page for Freelance Writers
To create a “My Account” page for freelance writers (from where they can submit their posts and review them), you need to:
- Go to PostX > Addons
- Search for the Front End Post Submission Addon
- Click on the Gear Icon within to access the settings
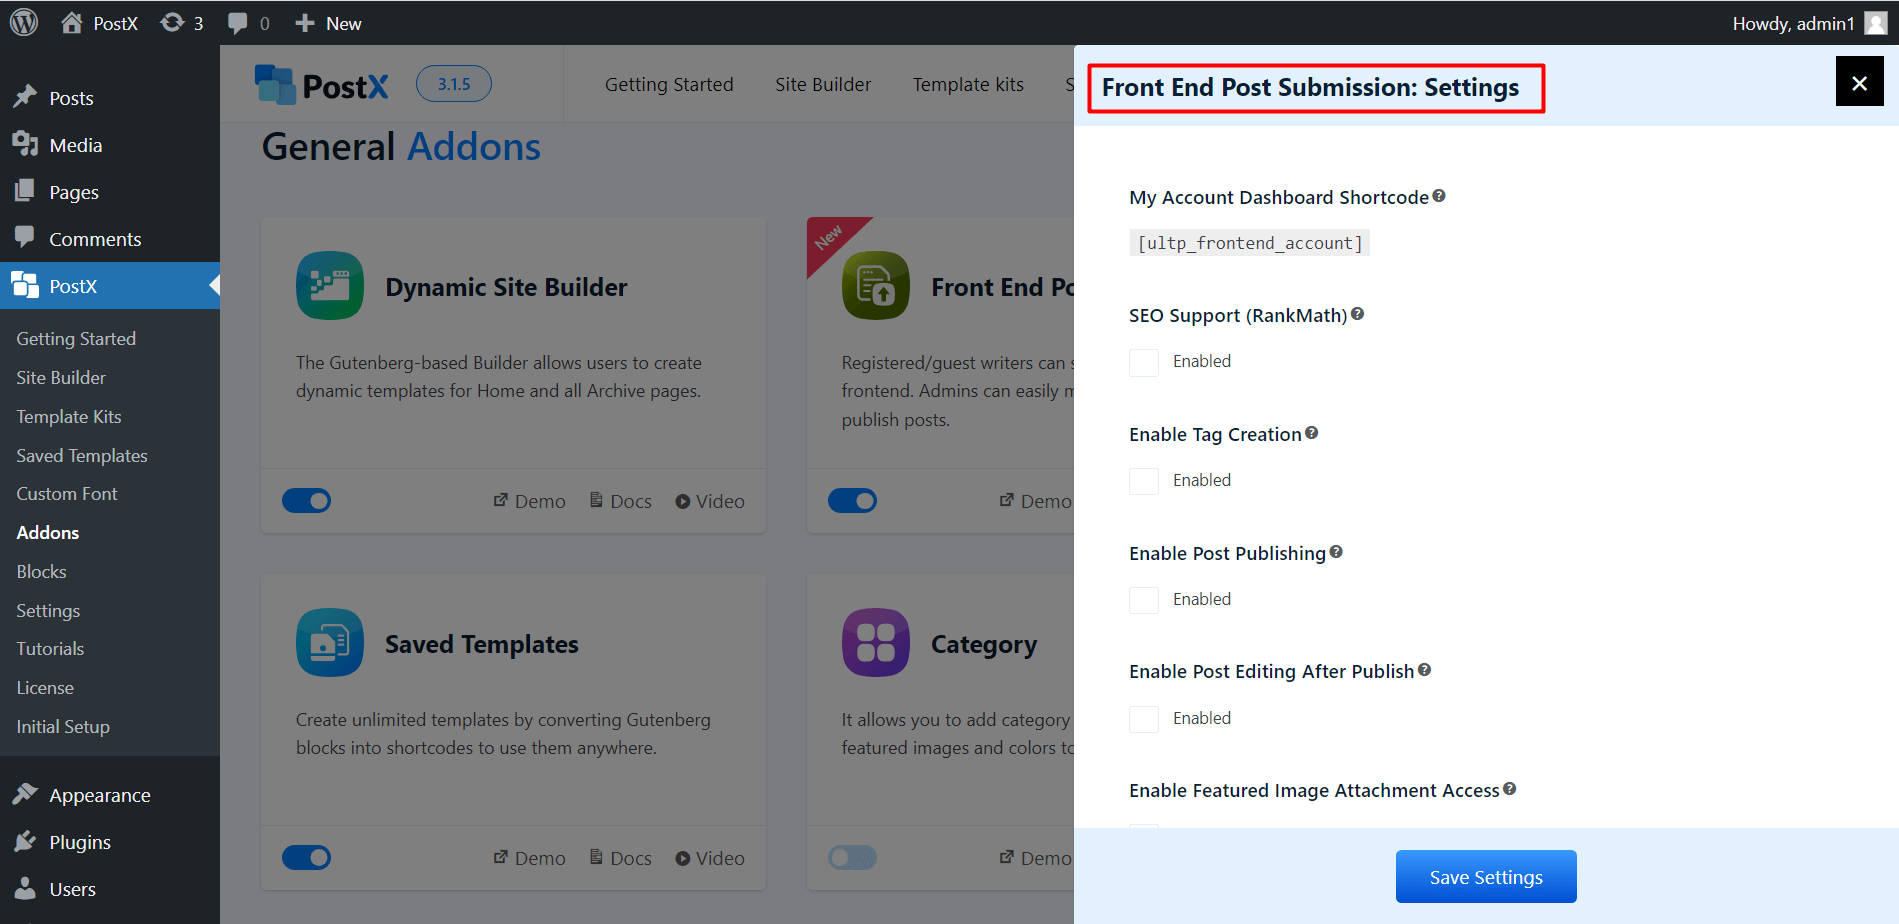
Once you click on the Gear Icon the settings will appear from the right.
Here, you will find the “My Account Dashboard Shortcode” option.
However, if you want to create a custom page for the Front End Submission, you need to:
- Create a page where you want the writers to submit and review their posts
- Come back to the Addons Page
- Access the Front End Post Submission Addon Settings (as mentioned above)
- Copy the shortcode from the addon setting
- Go back to the page
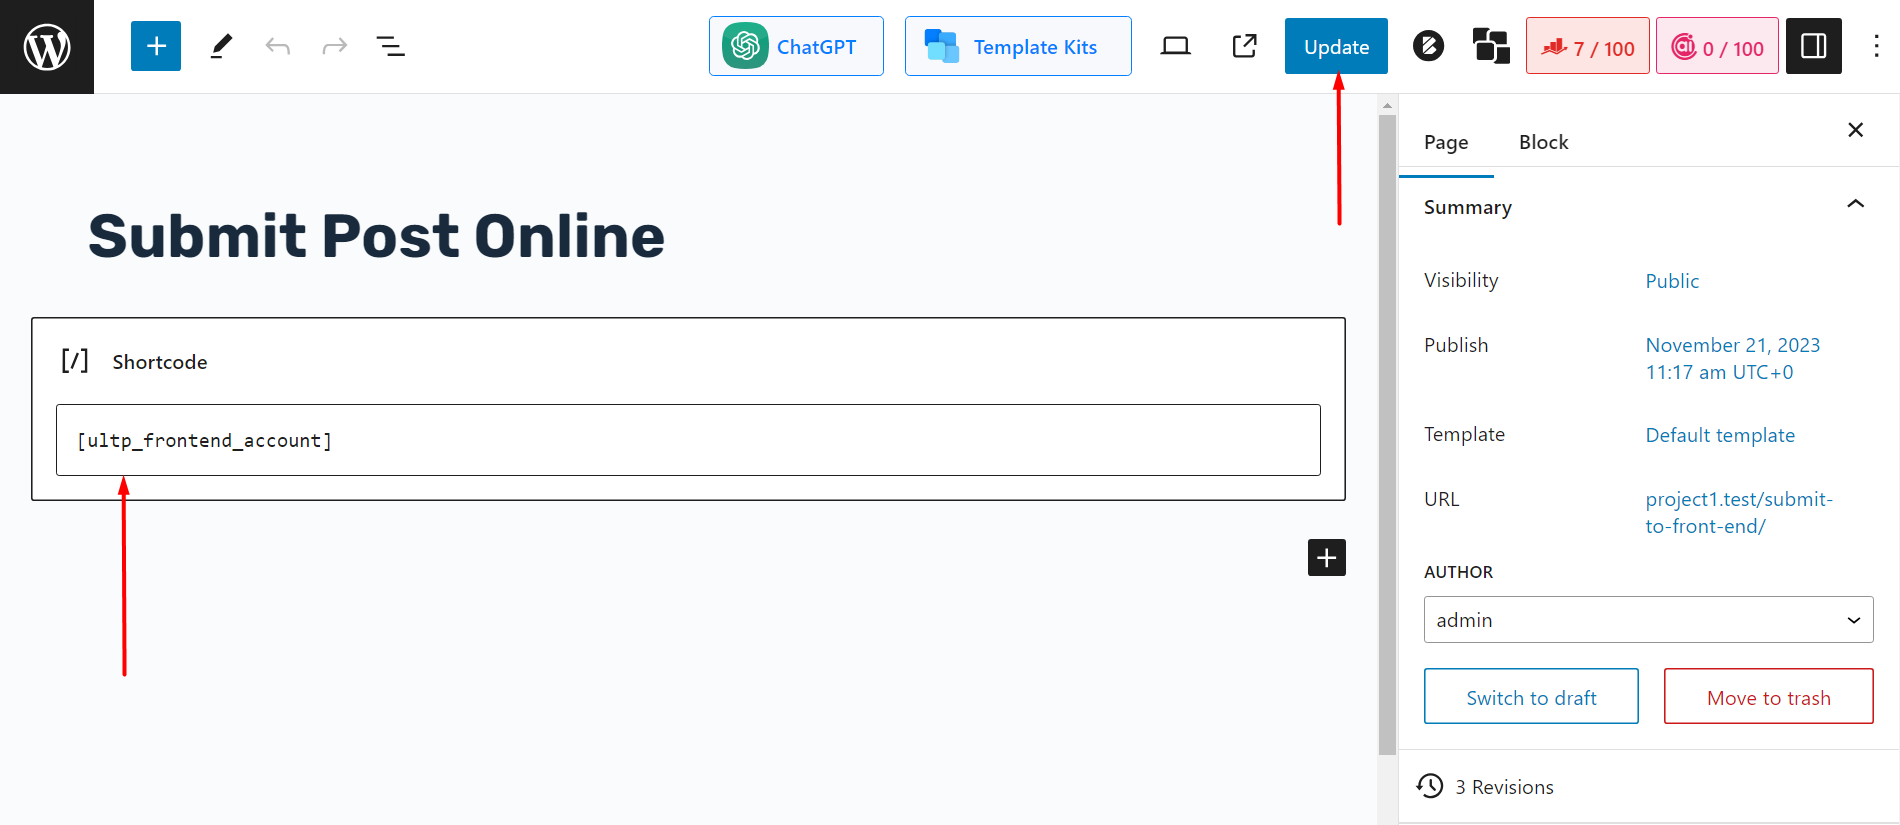
- Paste the Shortcode
- Publish/Update the page
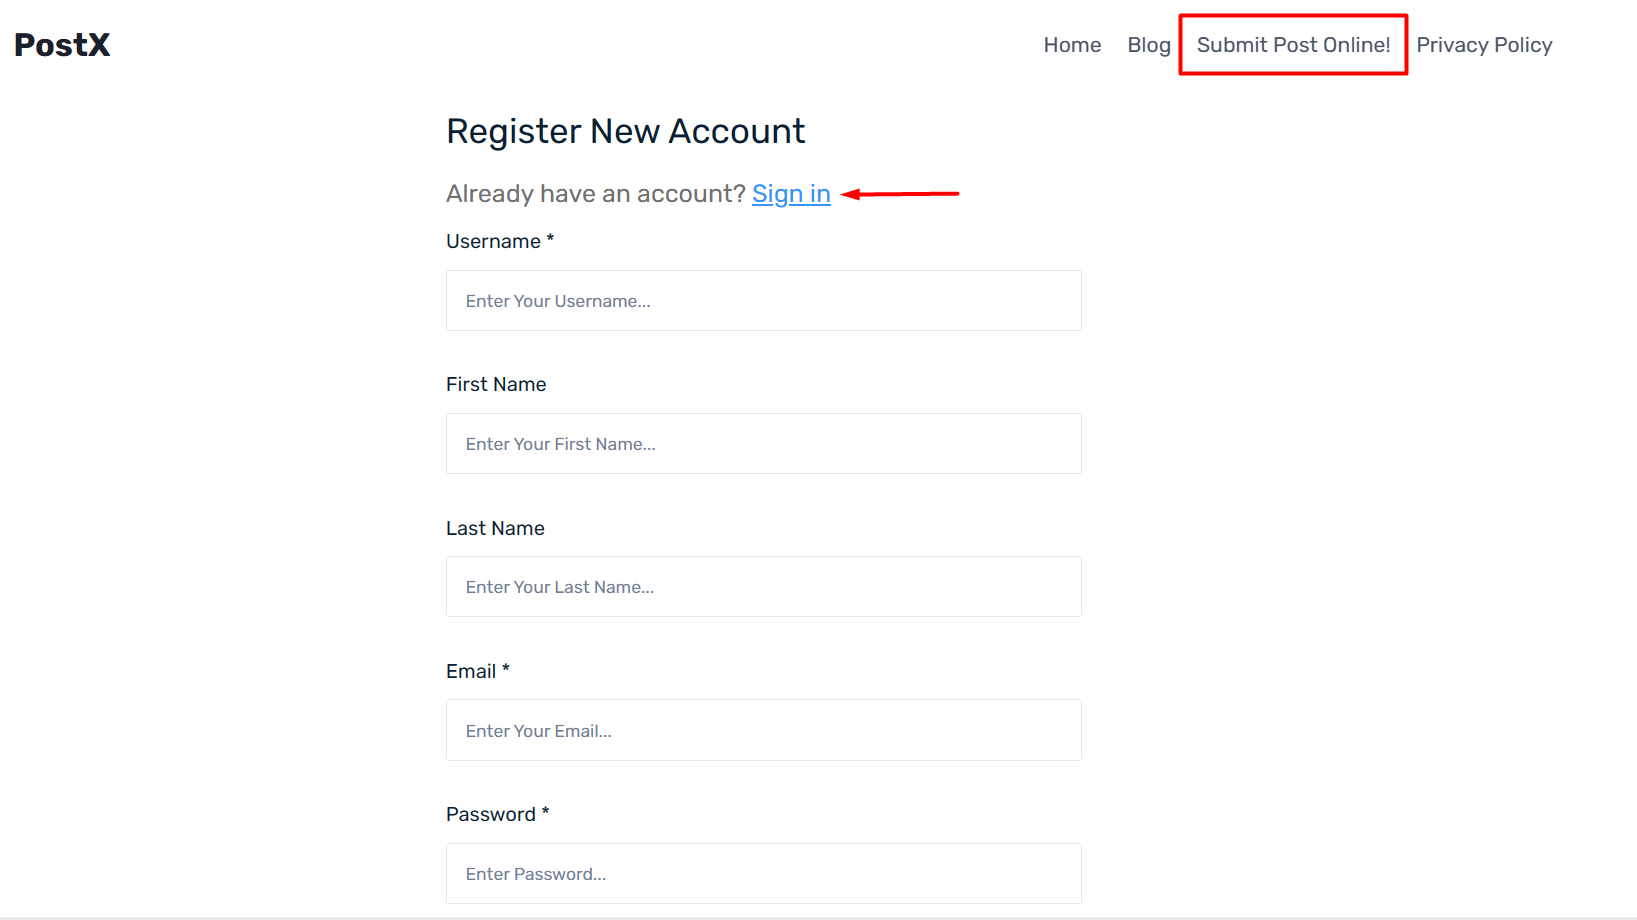
Now, if a writer wishes to access the Front End Submission Feature to add posts to your website, they will have to log in first. Here’s the login page:
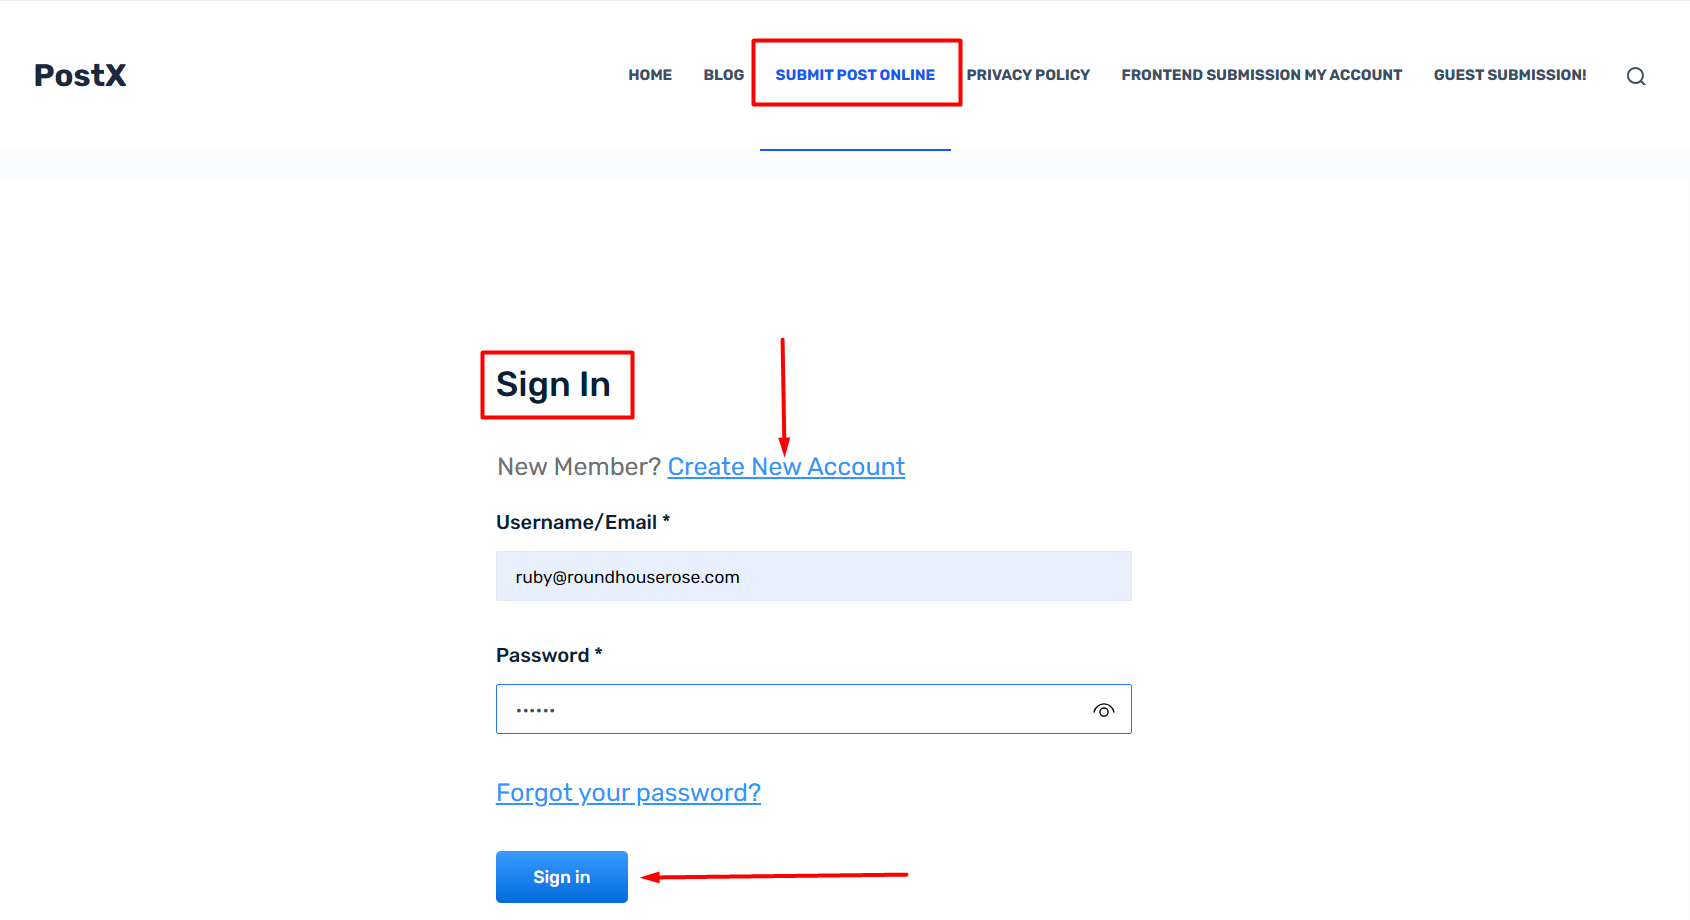
A user will also be able to create their account for the first time:
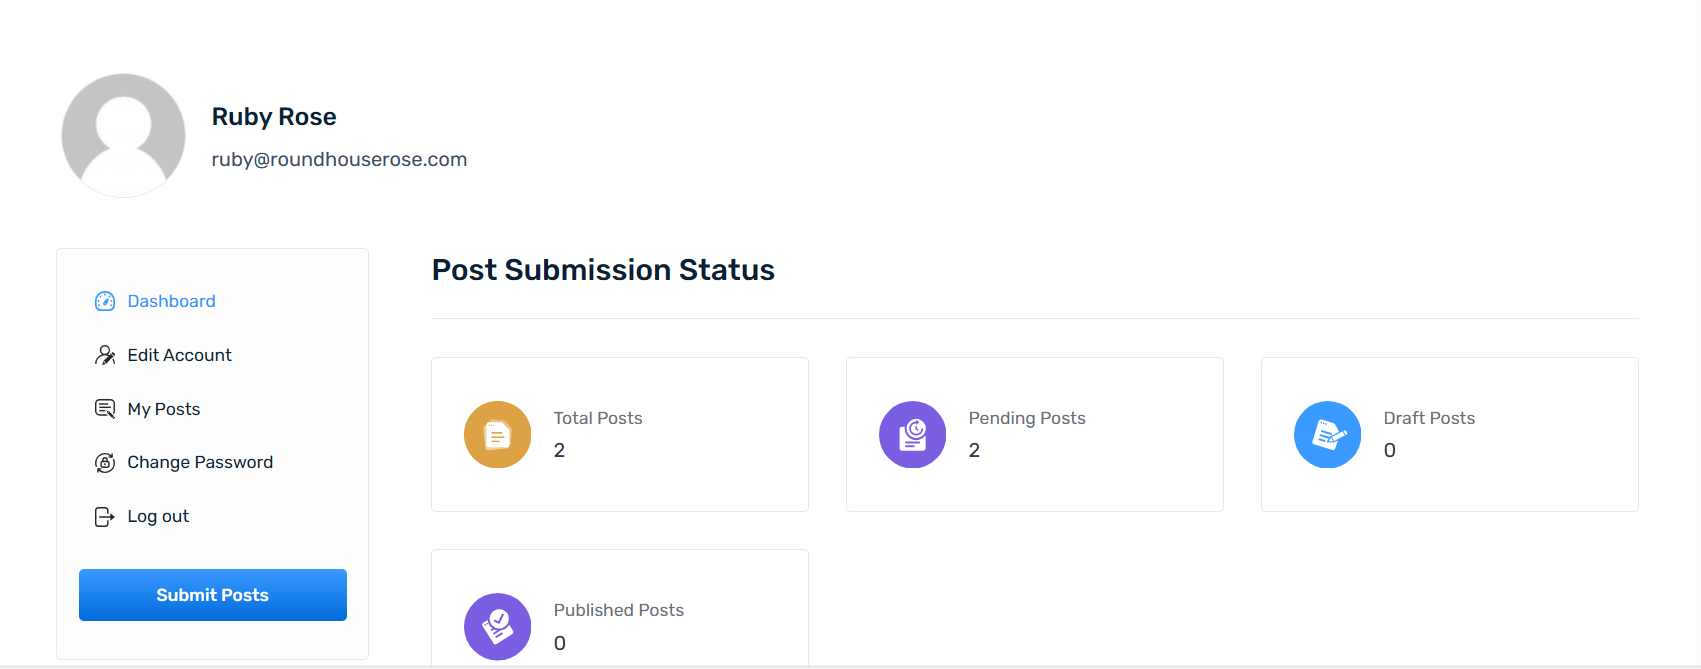
Once they log in, they will find the dashboard page. Here, they will be able to see the following information:
- In the main dashboard, they will find:
- The total number of posts they submitted
- The number of posts that are pending review
- The number of posts they have in the draft
- The number of posts that are published on the site
- Edit your account information:
- Change your name (first name and last name)
- Your display name and
- The Email Address
- You will be able to change your password as well
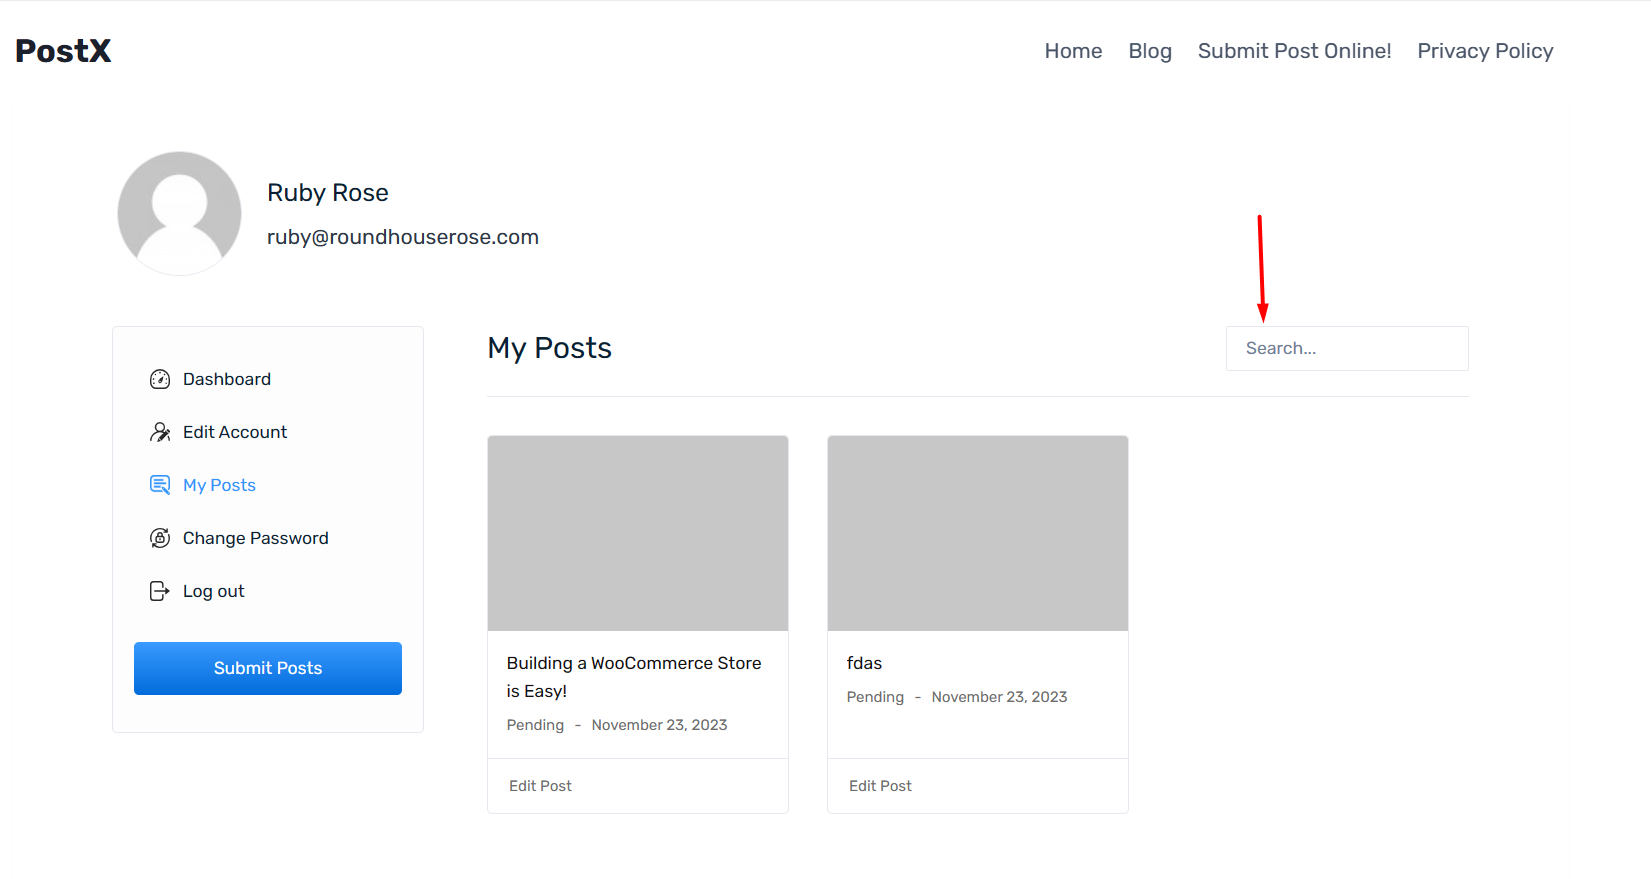
***In the “My Post” section, the user will find a search bar to search for specific posts. It is a non-AJAX search bar:
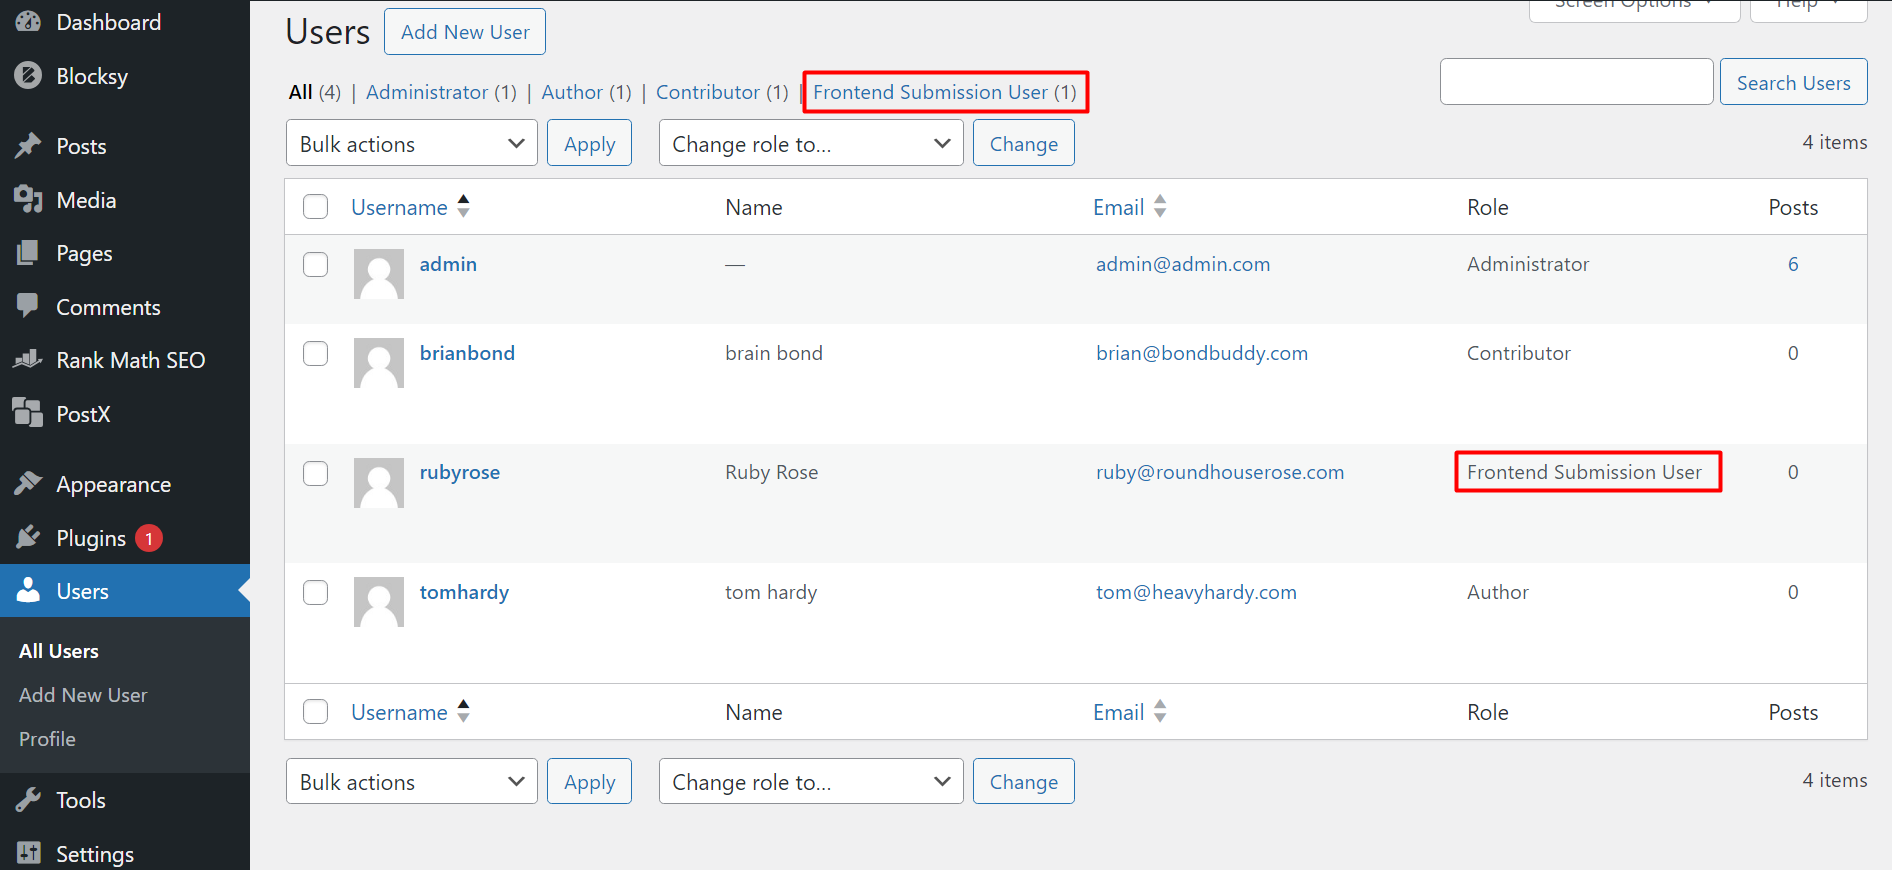
***If you are creating an account on the website for the first time, you will not be able to see your name in the list of users (the admin will not find your name). However, when you create your account, the admin will see your name in the back end of the WordPress site. In the user setting, there will be a category called “Front End Submission User”. Your name will be listed under this category.
Content Submission for Freelance Writer
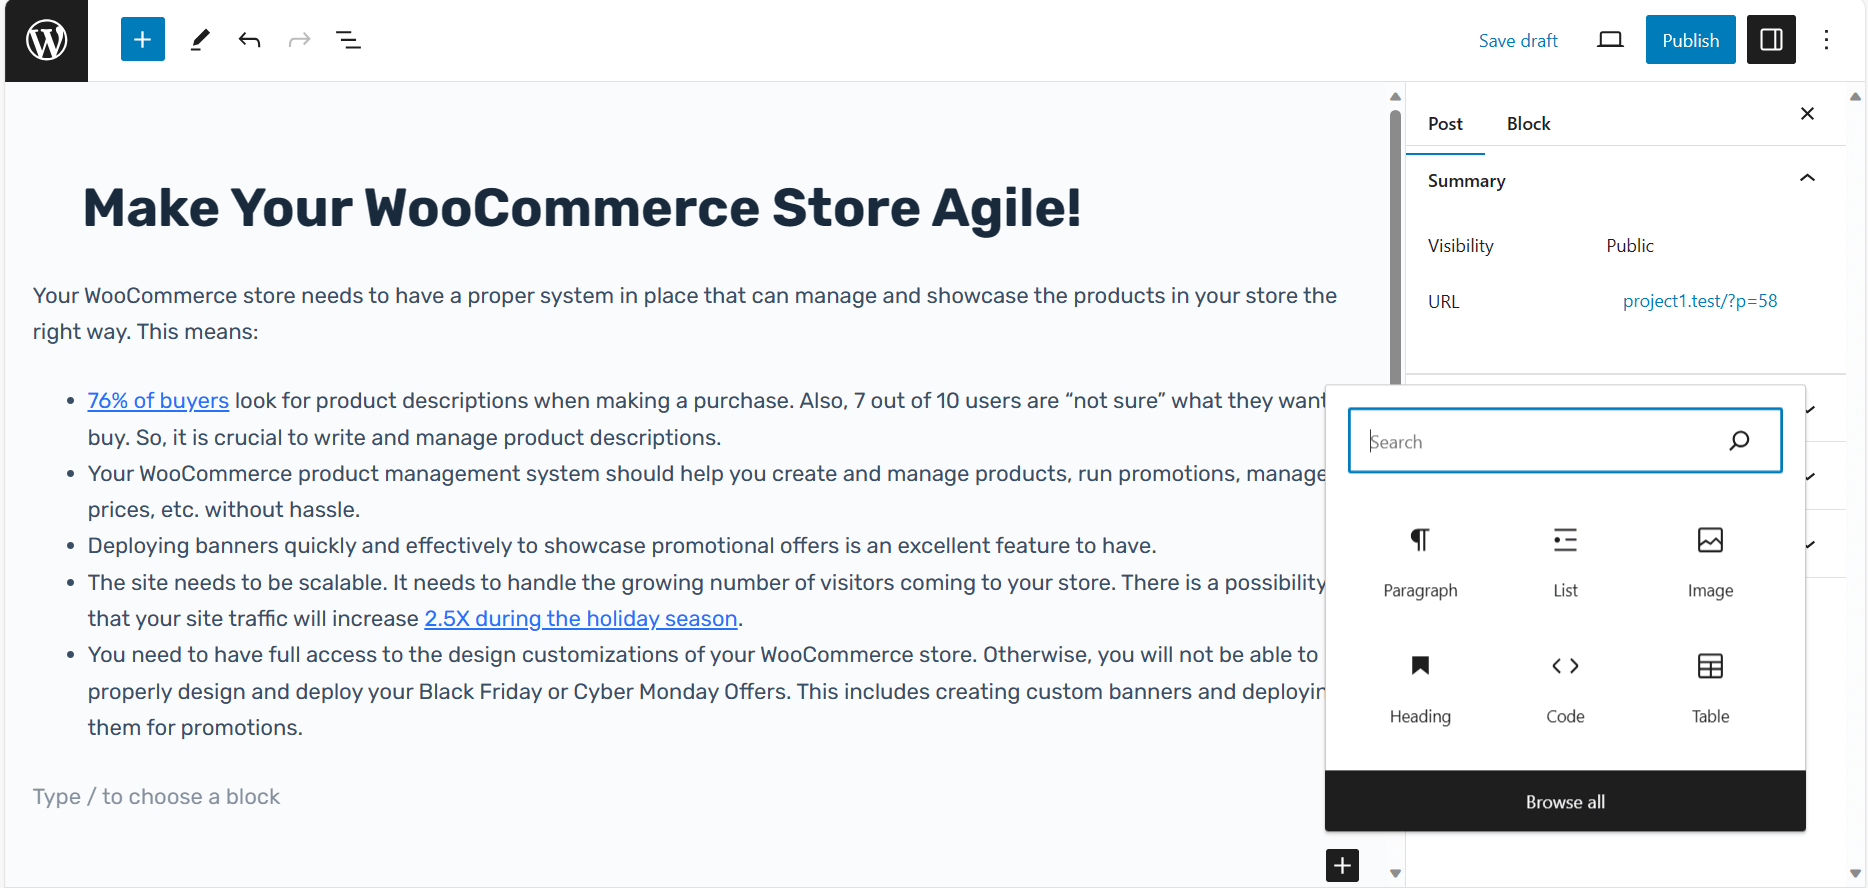
The writer will be able to submit new content by clicking on “Submit Posts”. Once the writer clicks on it, he will be taken to the Gutenberg Editor.
Freelance Writer Permissions
The writer will need some permission from the site admin to edit, and/or publish the content freely.
***These permissions can be set for individual freelance writers. For example, if you want writers “A” and “B” to have publishing permission and Writer “C” to have both publishing and editing permissions, you can do that by simply selecting their names from the dropdown for different settings.
SEO Plugin Support
The Addon currently has support for selected features of the RankMath SEO plugin. The writer will only find the content publishing checklist settings for RankMath if the blog admin permits it. But, for the setting to work properly, you need to:
- Have the RankMath SEO Plugin installed and activated on your site
- Have the PostX RankMath SEO addon enabled from the PostX Addon Settings
To enable the SEO plugin support:
- Go to the Front End Post Submission Addon Settings
- Enable the “SEO Support (RankMath)” setting
- Save the Settings
***The freelance writer will be able to add a meta description, change the post slug, change the look of the snippet, and conduct general content checks with RankMath.
Tag Creation
By default, the Content Writer will not be able to create tags for their content. The site admin will have to enable permission for the writer. To enable tag creation for the writer, just tick the “Enable Tag Creation” setting and save.
***Please note that the freelance writer will not be able to create any new “Categories” for the post he/she publishes. But, they can use the existing categories for their posts. The freelance writer can add categories automatically – from the list of existing categories the site admin uses on the site.
Post Publishing
You can give post-publishing access to the freelance writer by checking the “Enable Post Publishing” box and saving the settings.
Editing the Post After Writing
The WordPress site admin can enable editing for a writer after the post is published. Just click on “Enable Post After Publishing” to enable the editing option for the writer.
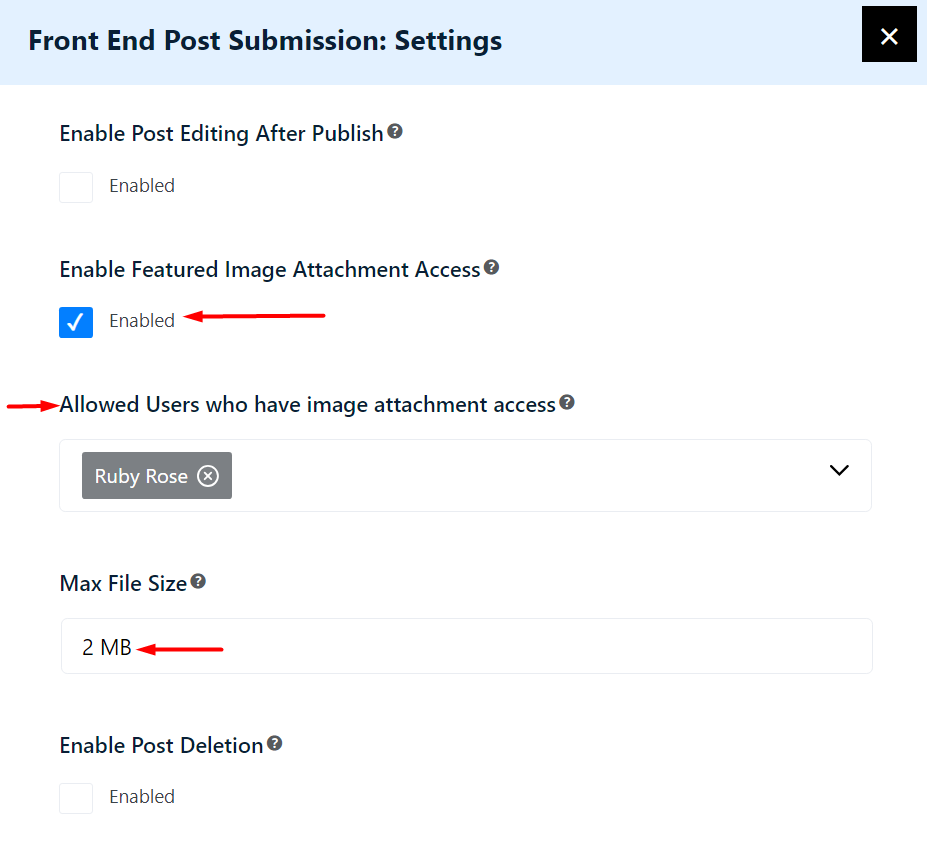
Featured Image Addition
Just check the “Enable Featured Image Attachment Access” and save it so that the freelancer can add a featured image for the post.
***You can limit the file size for the featured image. Simply under “Max File Size” mention the image size (in Megabytes[MB]) and save. If the writer chooses to upload an image with a larger file size, he will face an error.
Post Deletion
If you “Enable Post Deletion” check box from the addon settings, the user will be able to delete the post from the site directly from their dashboard. However, it will not be completely deleted from the site.
***It will end up in the trash folder in the WordPress site’s backend.
***Also note that the freelance writer will not be able to delete any posts that are already published on the site. Once the content is published, the admin can only grant editing permission to the writer.
Sending a Post for Review
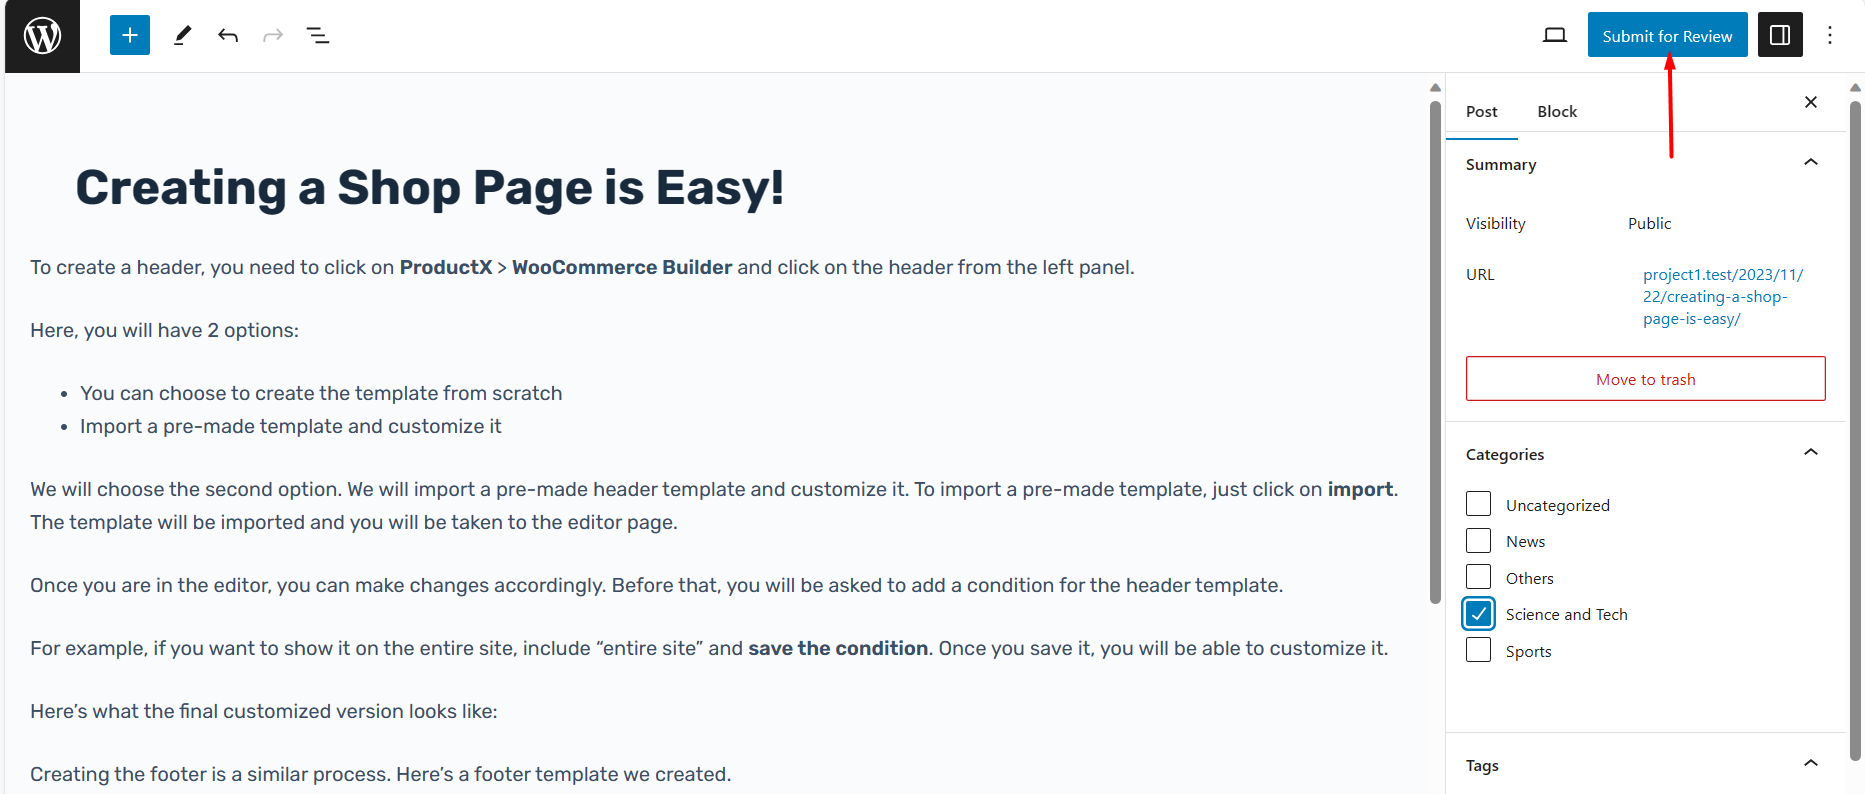
A freelance writer who doesn’t have permission to publish a post directly from the Front End will be able to send it for review.
When he or she goes to save it, it will prompt them to “Submit for Review”.
Receiving and Reviewing the Post
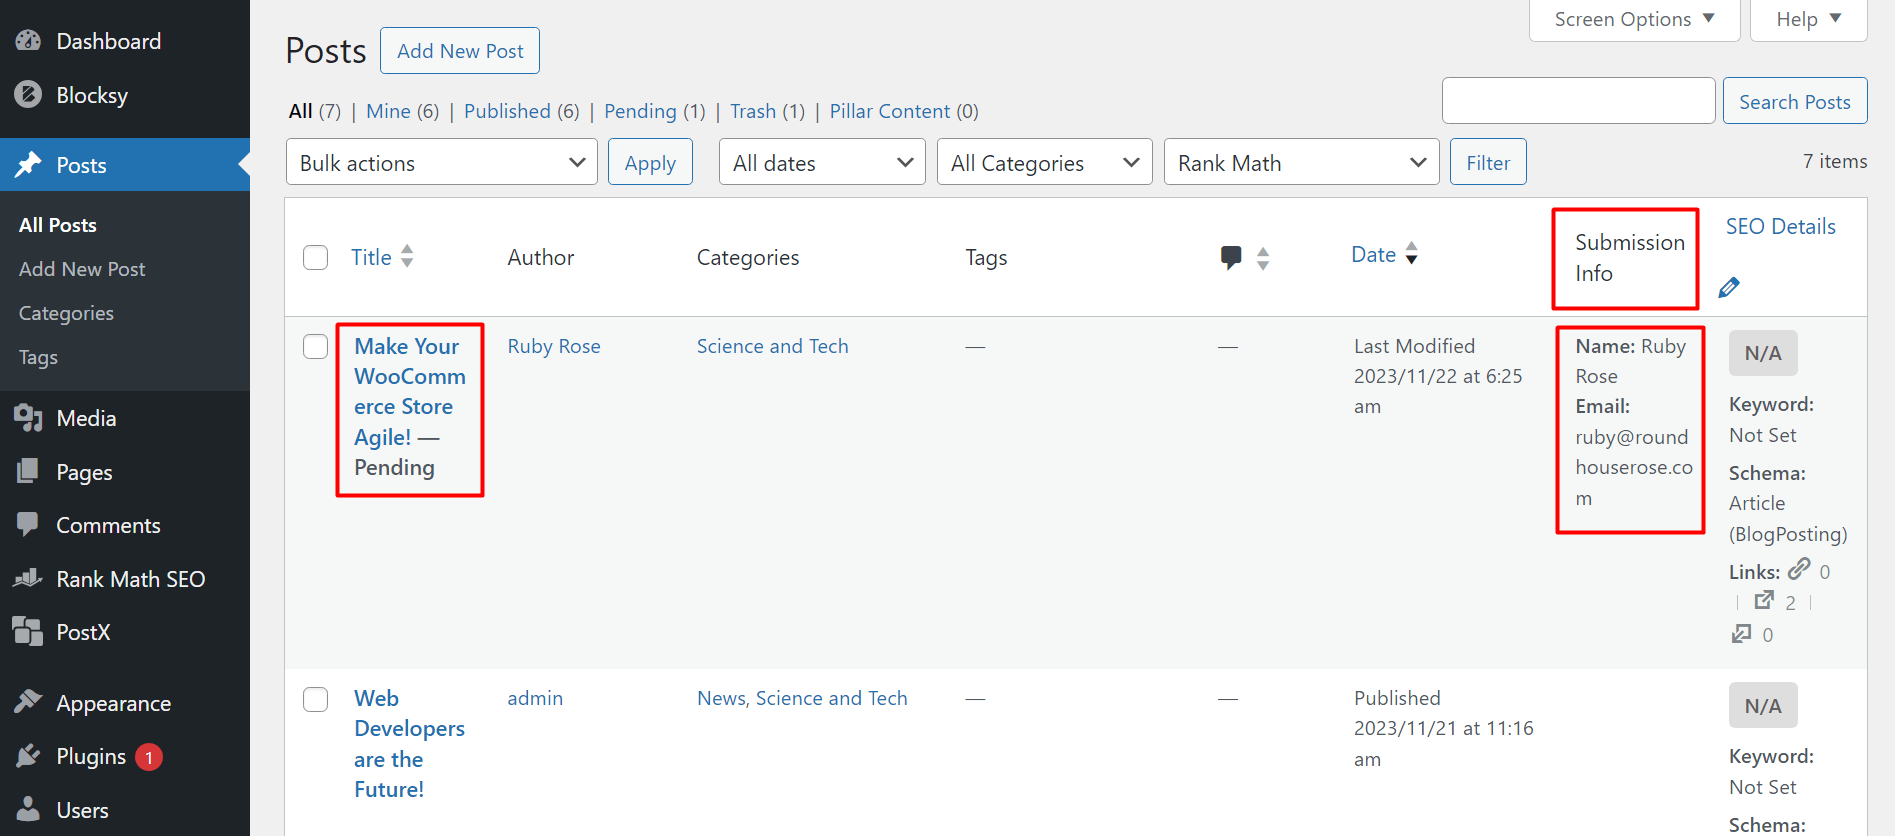
Once he or she submits it for review, the site admin will be able to see the post under “Posts” in the WordPress dashboard. There, the admin will be able to see the details of the sender.
The admin will be able to review the content from the back-end editor.
Making a Comment
To make a comment, the editor will need to:
- Choose a word or string of words
- Click on the comment icon from on settings panel
- Write the comment
- Click on “Add Comment”
Making a Suggestion
Making a suggestion in the review process is similar:
- Choose where to make the suggestion
- Click on the suggestion icon on the settings panel
- Write the suggestion
- Click on “Add Suggestion”
***After the review of the content is complete, the reviewer can publish it or use the “Save as Pending” button. If the reviewer clicks on “Save as Pending”, then an email will go to the writer’s email and he or she can make the changes from their front-end dashboard.
Reviewing a Content from the Writer’s End
The Writer can check the comments and suggestions from their Front End User Dashboard. They will see the number of posts pending review from the “Posts Pending” Tab on their dashboard.
To check the reviews and make changes, the writer has to:
- Login to the dashboard and go to My Posts
- Choose the post that needs editing and click on Edit Post
- Take care of the comments and suggestions
- Submit it again for review
***Please note that the writer, who has permission to publish and edit posts can receive feedback from the admin reviewer and edit the published posts.
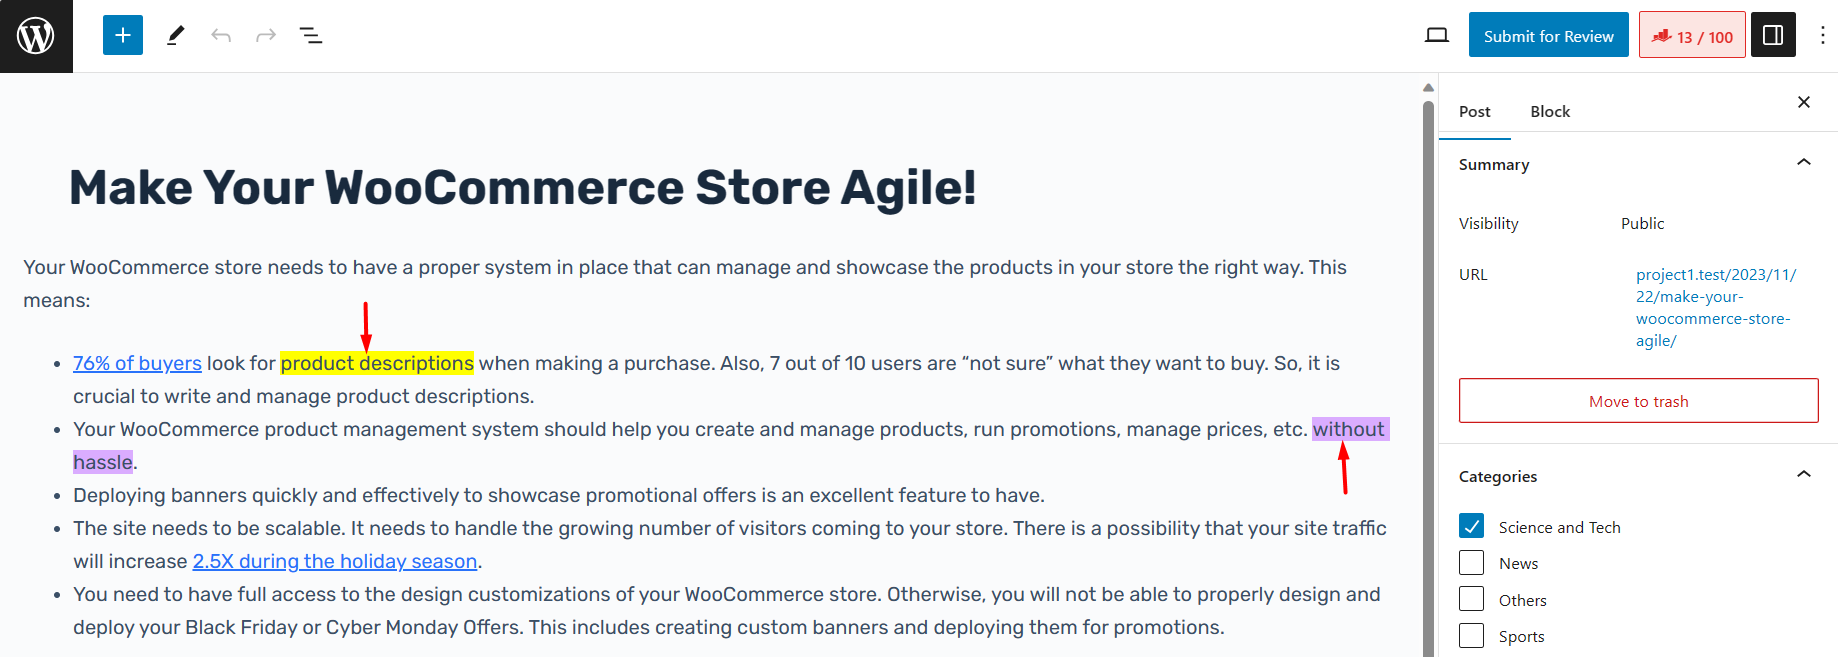
***Also note that when a freelance writer accepts a suggestion, he or she must select the entire word or string or words that are marked (either yellow or Purple). Otherwise, if they select a word in between and accept the suggestion, it will break the structure of that word or string of words.
Email Notifications
The site admin can enable the following email notifications or keep them disabled:
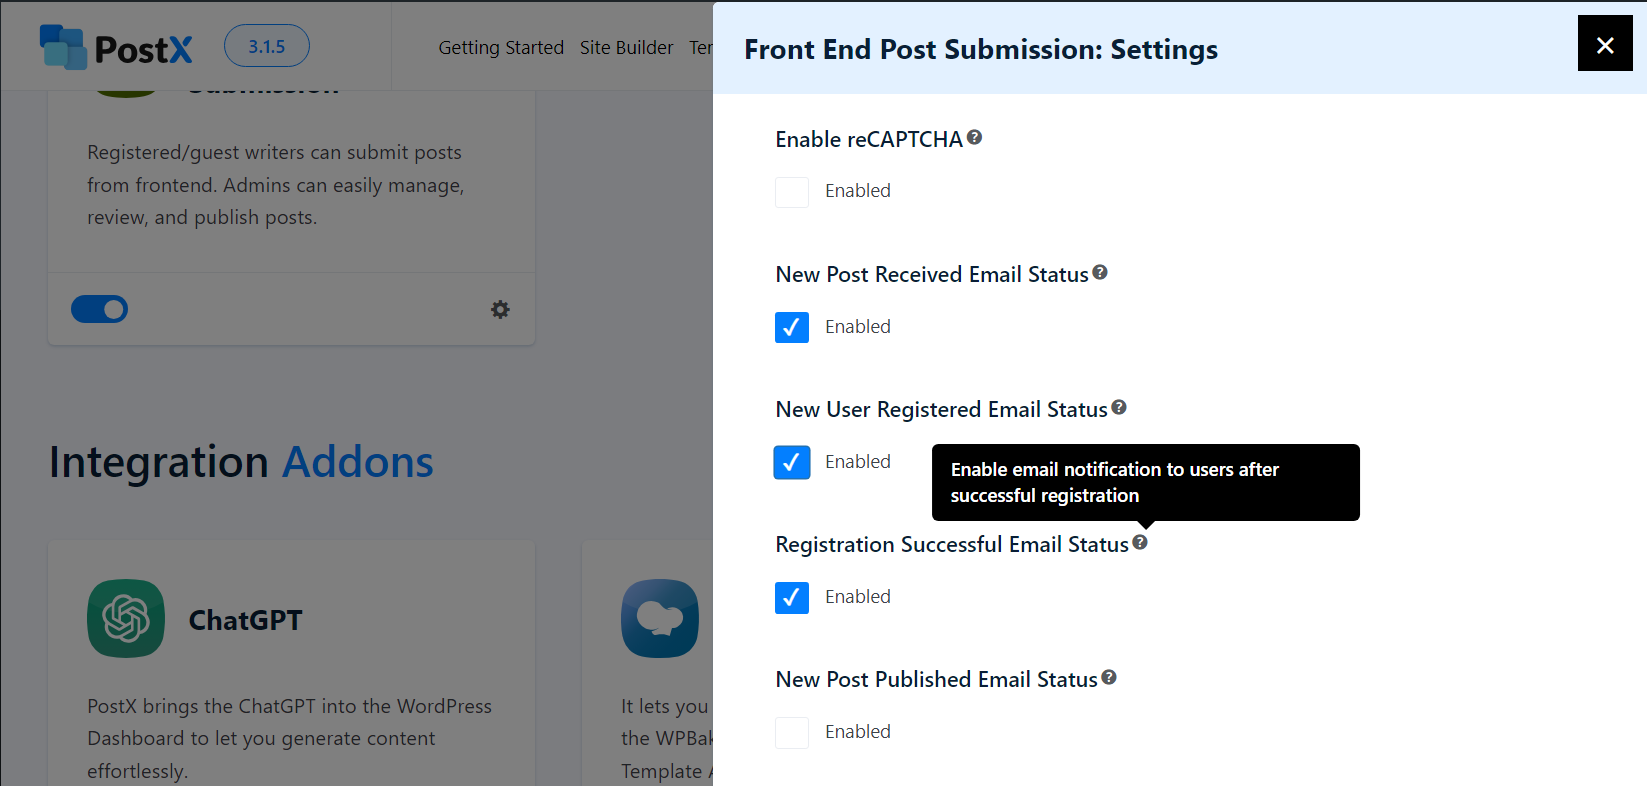
- “New Post Received Email Status”: Admin receives an email when a new post is submitted by a writer.
- “New User Registered Email Status”: An admin receives an email when a user registers to a website.
- “Registration Successful Email Status”: Confirmation that a user has successfully registered.
- “New Post Published Email Status”: Admin receives an email when a freelance writer publishes an email.
- “New Post Submitted for Review Email Status”: An admin receives an email when a writer submits a post for review.
- “Post Reviewed and Need Changes Email Status”: A writer receives an email when an admin completes reviewing and asks for changes.
- “Post Published after Reviewed Email Status”: A writer receives an email when the post is reviewed and published on the site.
Adding a Spam Filter with Google reCAPTCHA
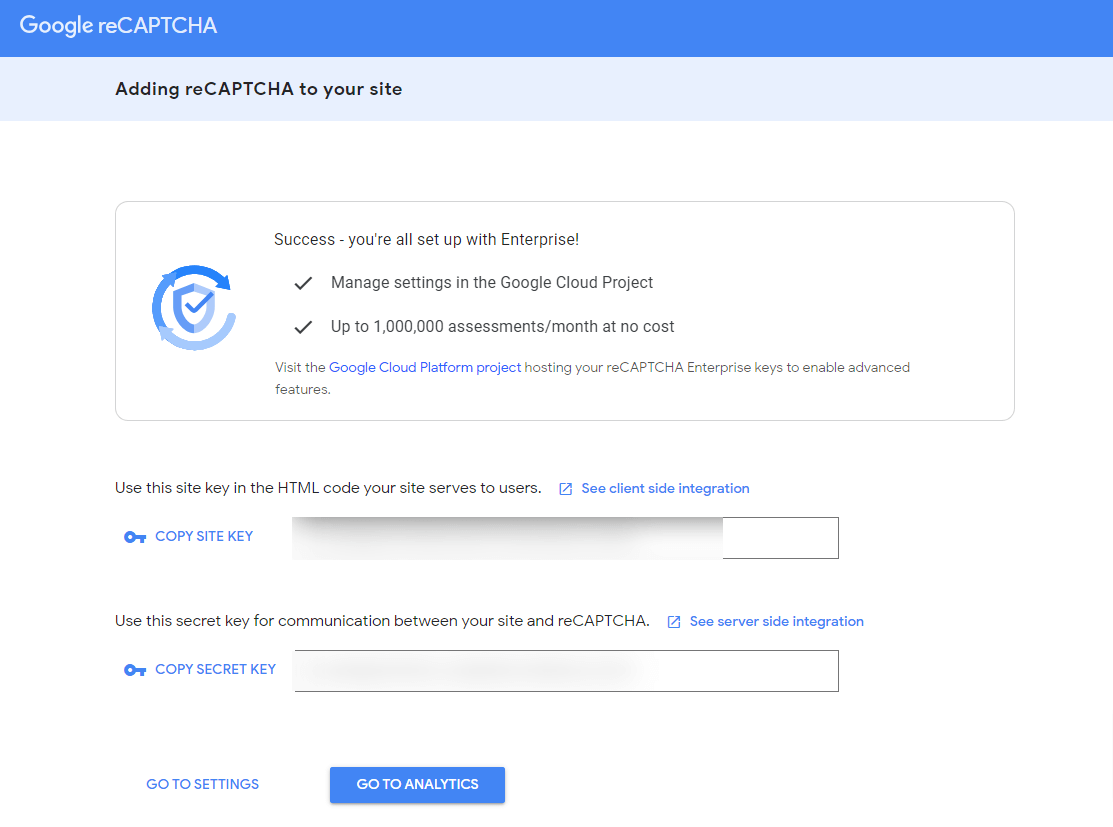
The PostX Front End Post Submission allows you to add a spam filter using Google’s reCAPTCHA. You need a site key and secret key for this to work:
- Go to https://www.google.com/recaptcha/admin/create to get your site key and secret key
- Add your domain
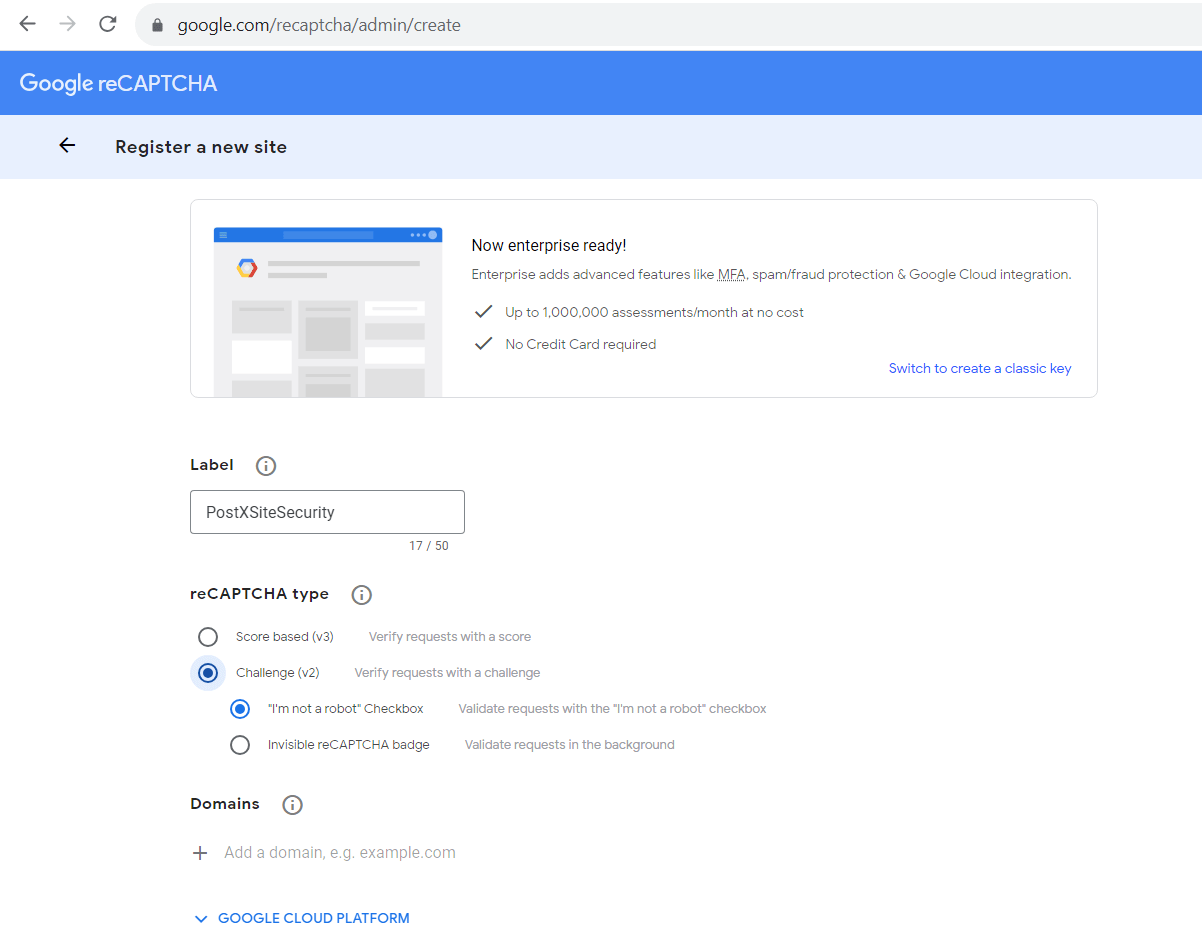
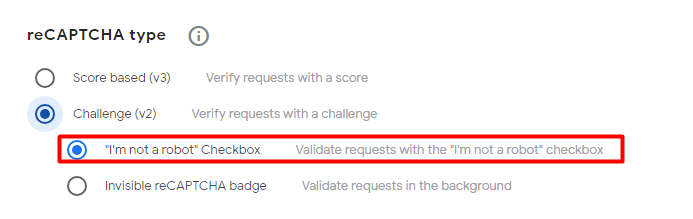
- The Addon supports both v2 and v3. Choose the version that works for you.
- Agree to the terms and conditions
- Now, copy the site key and the secret key
- Go back to the PostX Front End Submission Addon Settings
- Enable reCAPTCHA
- Choose the version
- Paste the keys
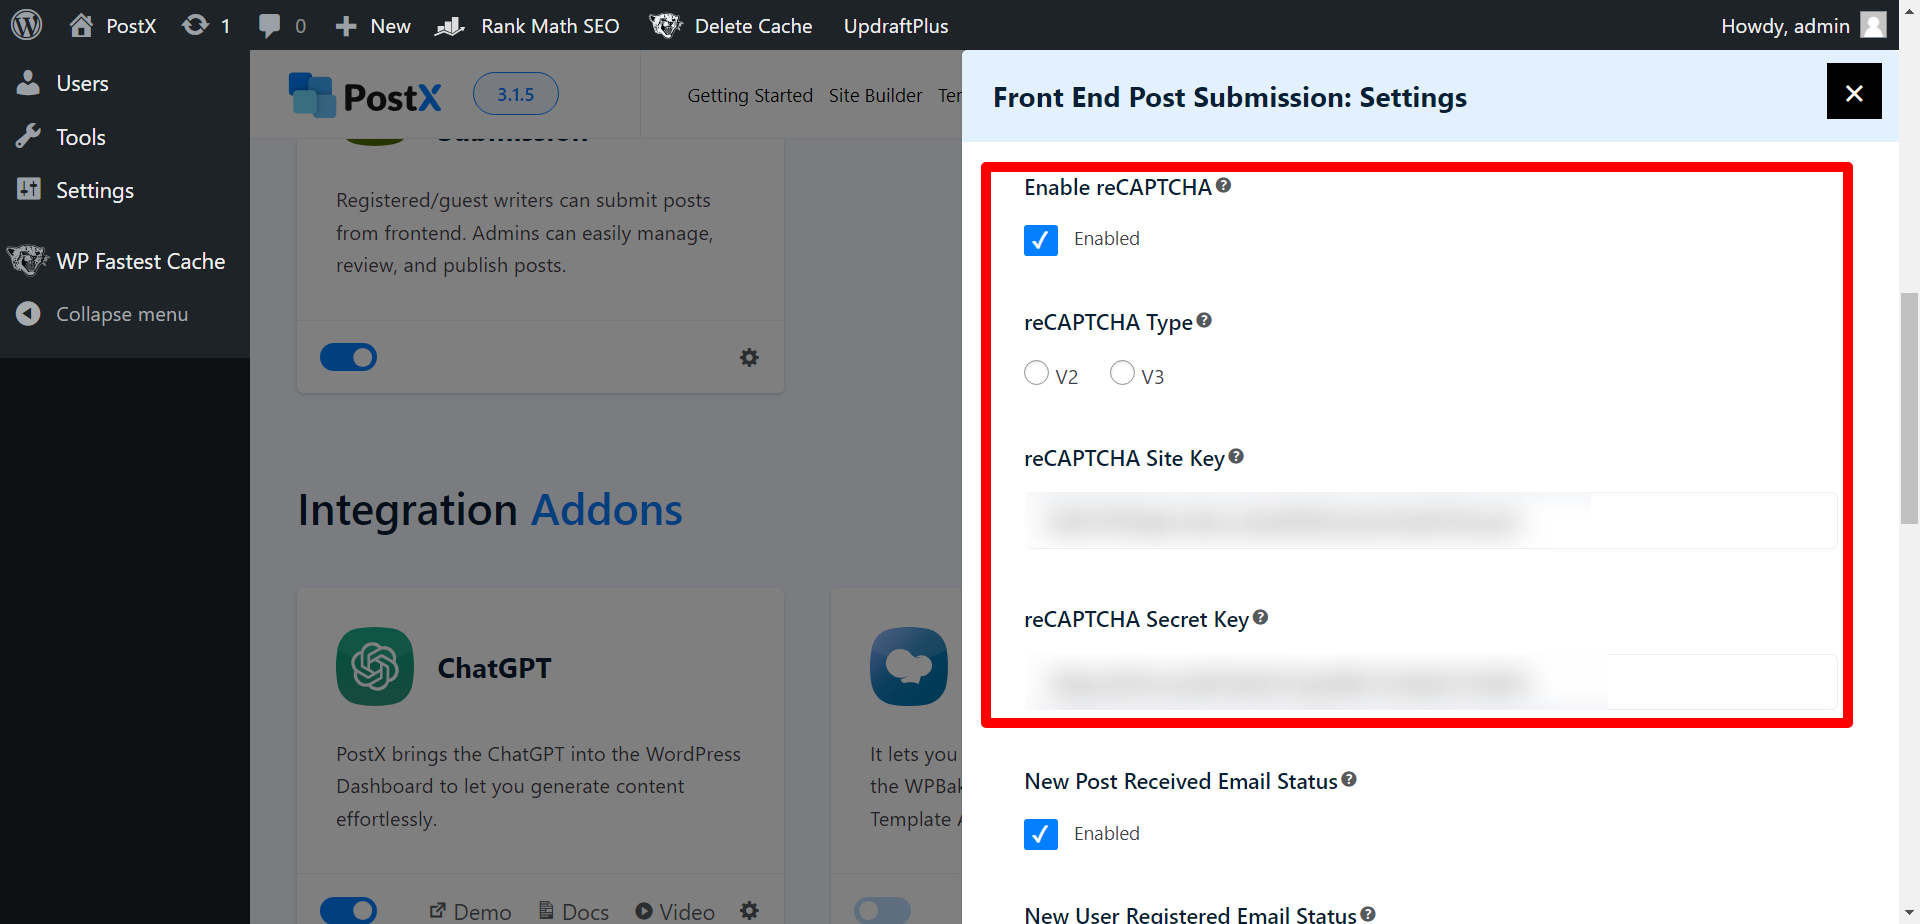
- Save the Settings
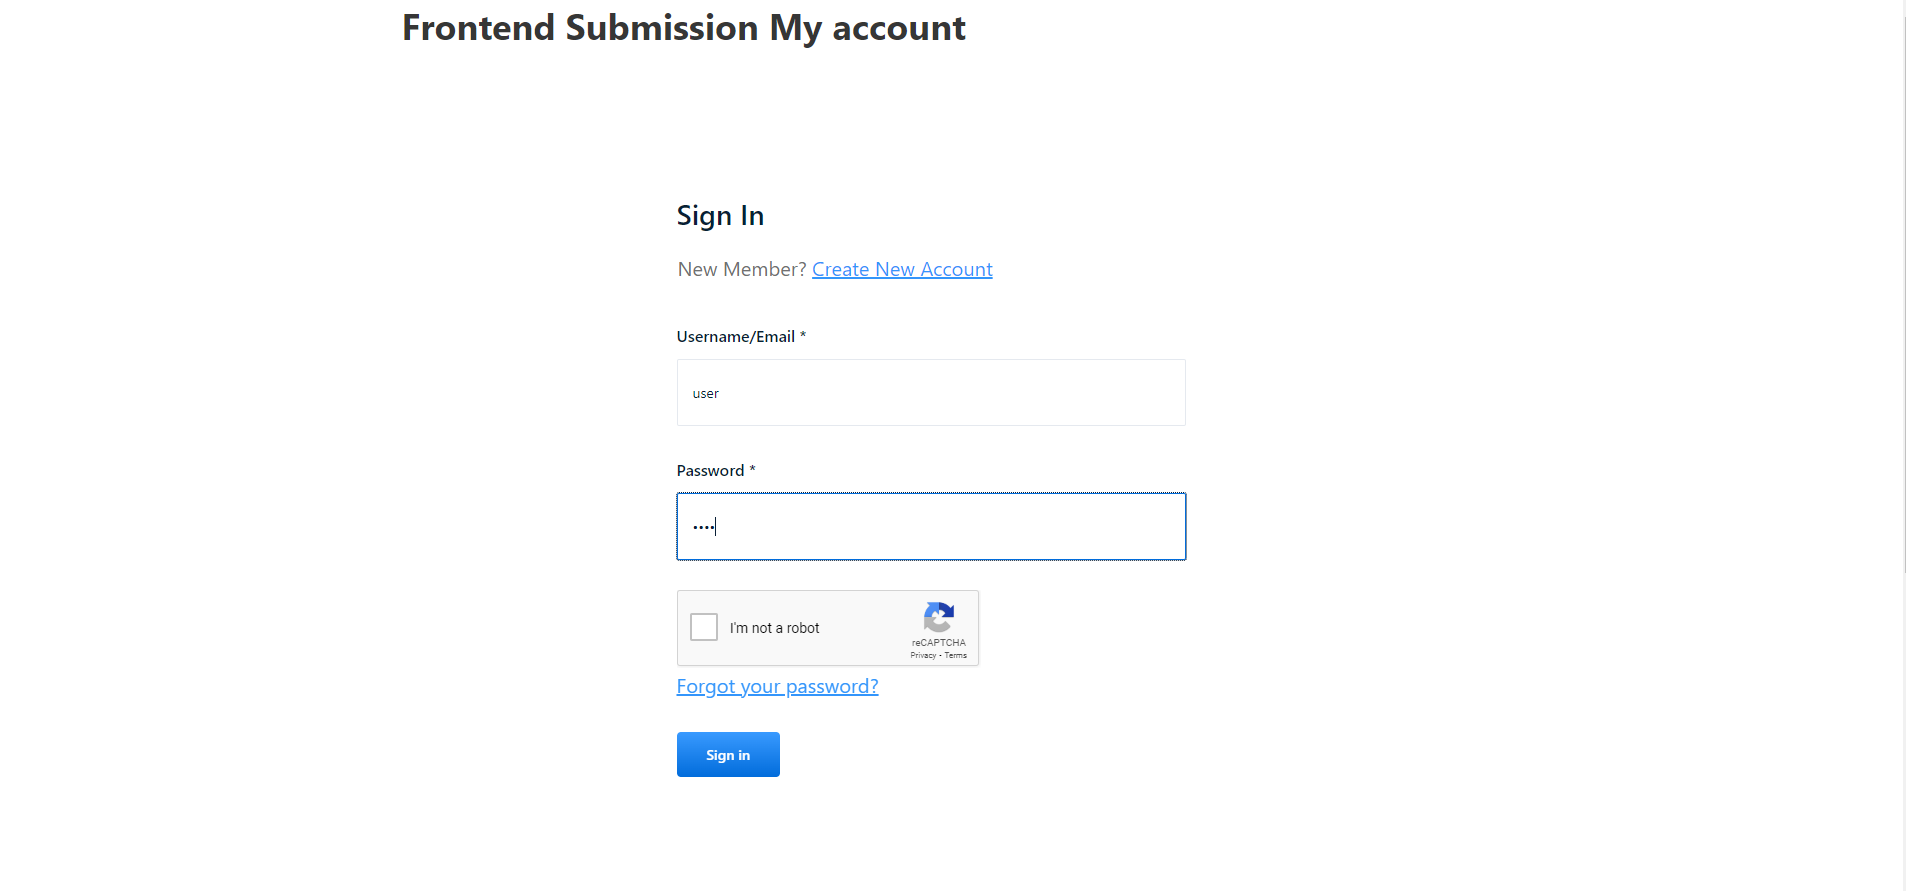
Now, whenever someone tries to log in, they will have to pass the spam filter! Here’s an example with Google reCAPTCHA v2:
Guest Post Submission from the Front End
The process for enabling your site to receive guest posts is easy. Follow the steps below:
Enable Guest User Submission
You need to “Enable Guest User Submission” for this to work. You can create a custom page or keep all the settings default as is.
But, if you want to create a custom page, you need to:
- “Enable Guest User Submission” from the Addon Setting
- Copy the “Guest User Block Editor” Shortcode
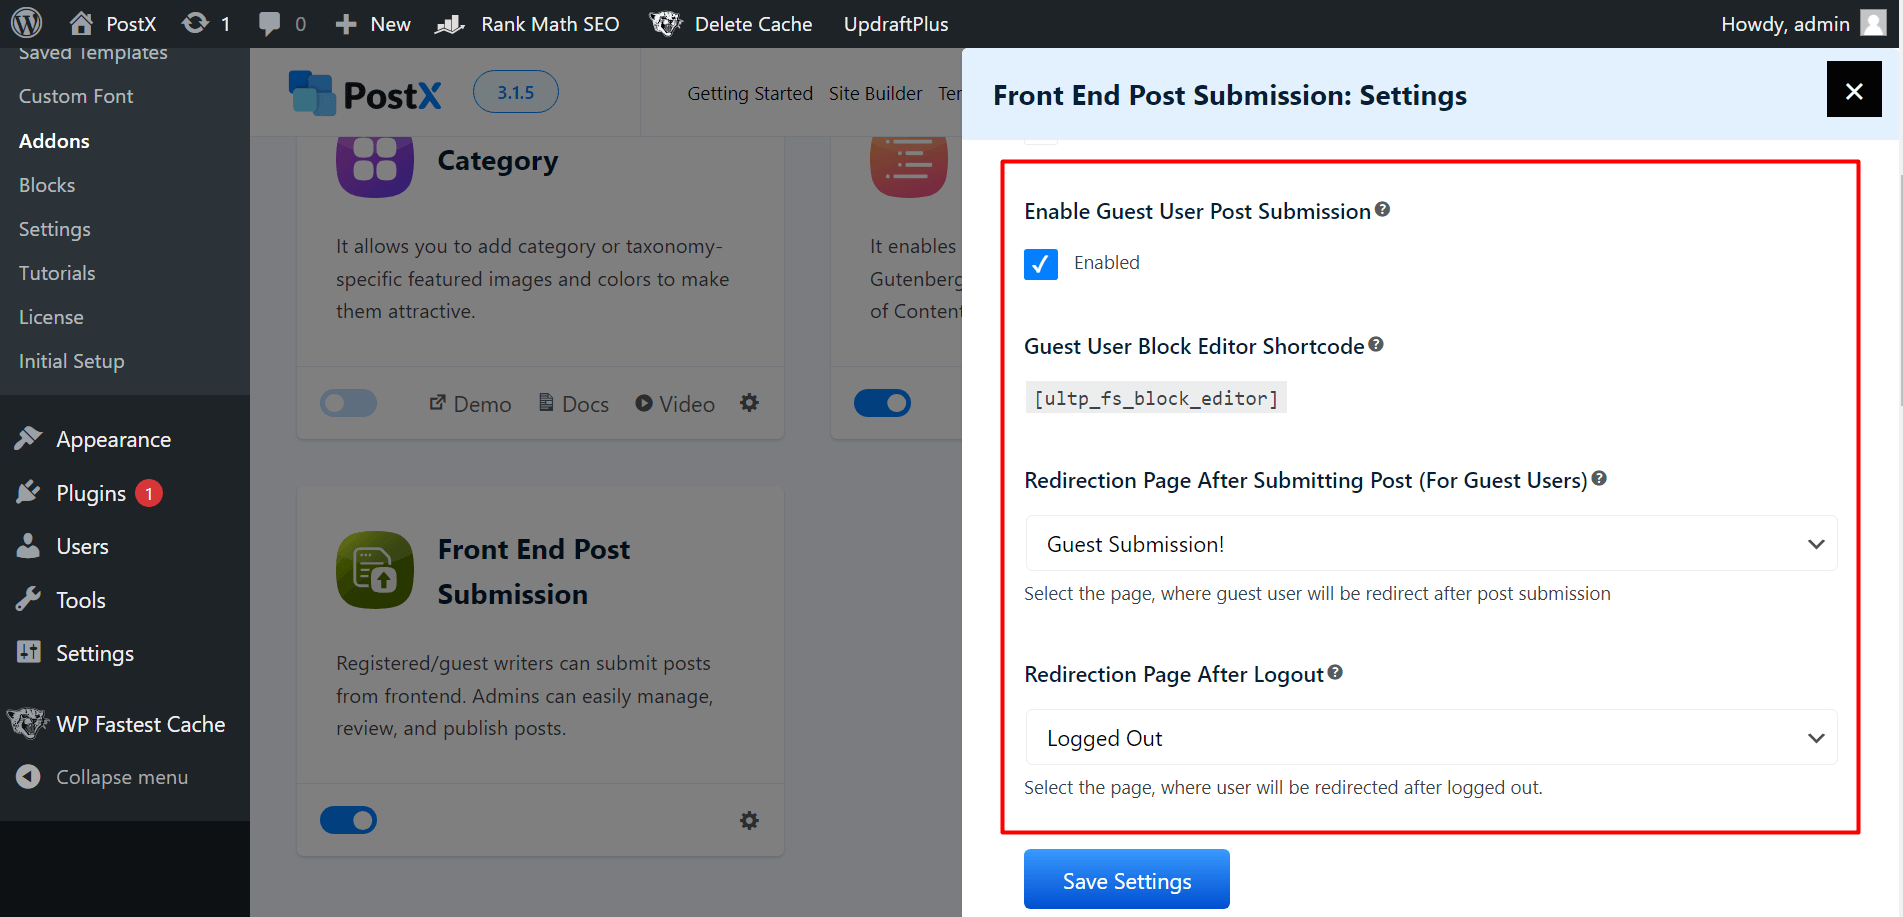
- Paste the Shortcode on the page and publish/update it
- Go back to the Addon Settings
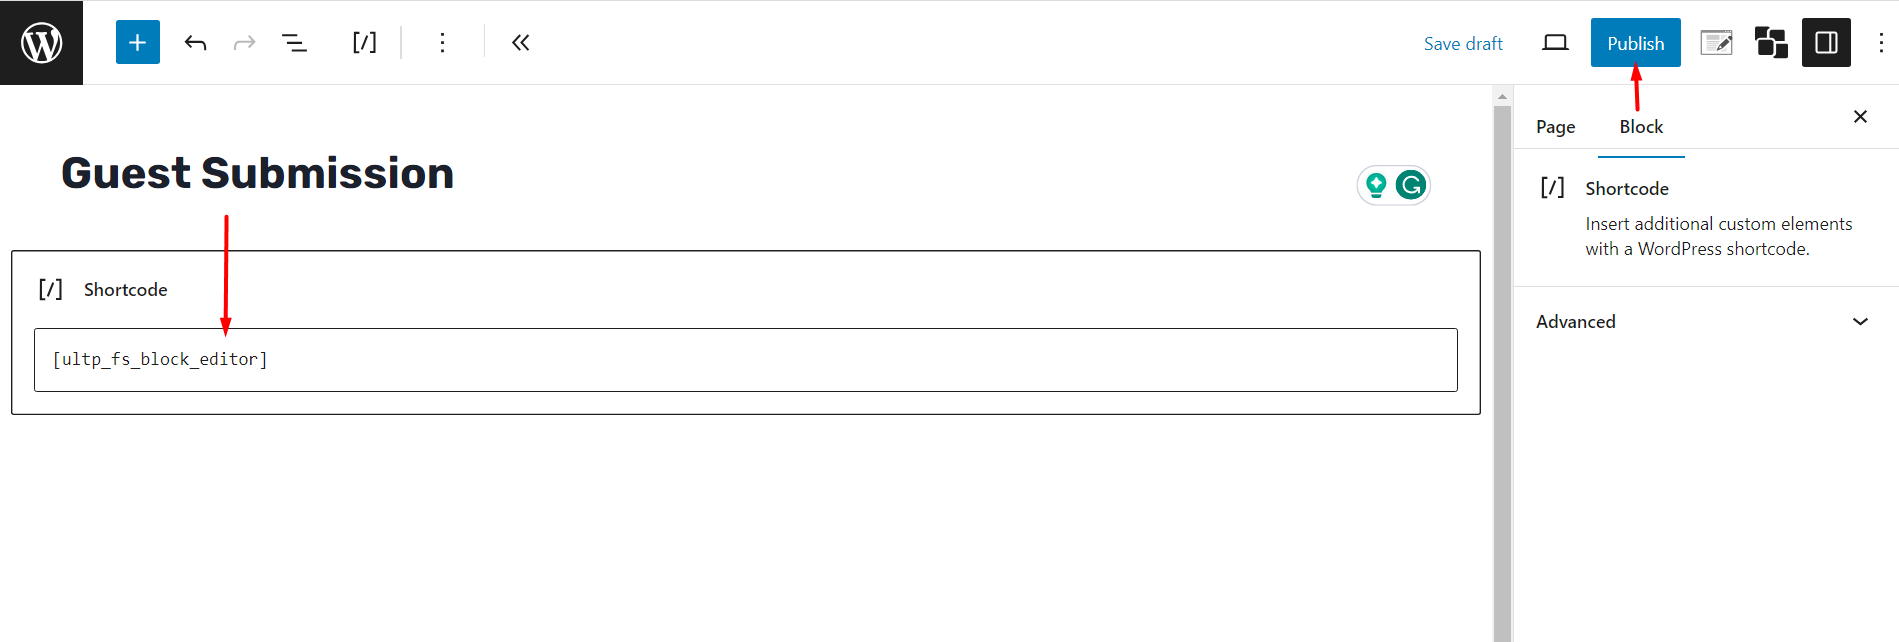
- Select the Page where you pasted the shortcode
- Save the Settings
Now, if a writer goes to that page, they will find a Gutenberg Editor ready for publishing posts from the front end:
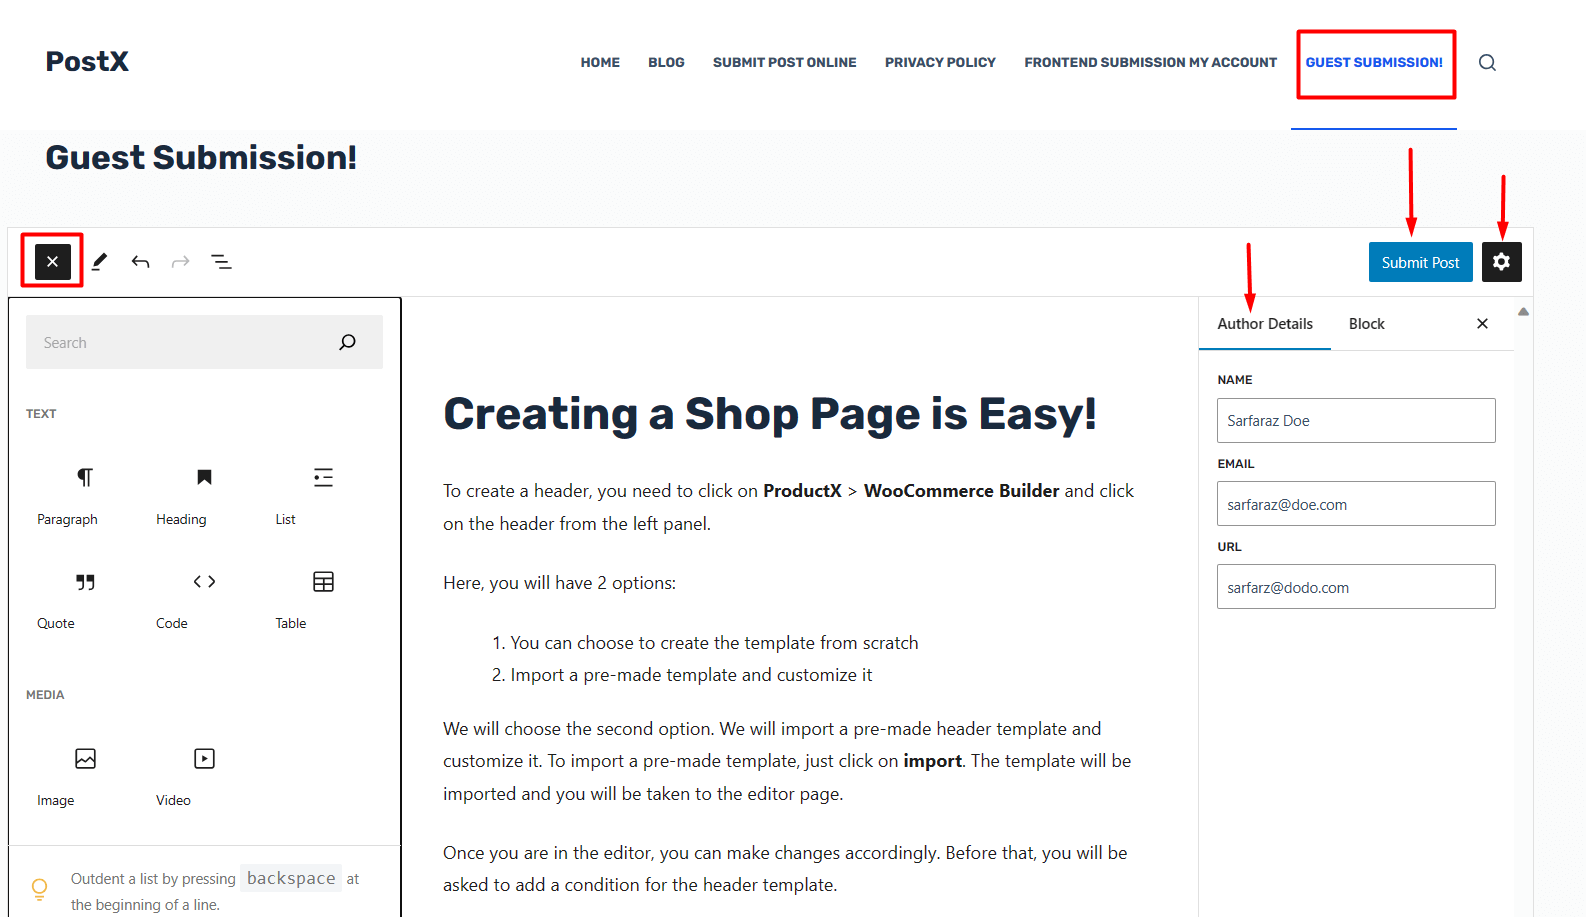
In the Editor, the writer has access to Gutenberg blocks that are necessary for publishing a post. The writer can write the post and submit it.
The gear icon lets the user add information like:
- Their name
- Email Address
- Site URL
Once they click on “Submit Post” it comes to the admin for review.
In the “Posts” Section of the WordPress site, the admin finds the post ready for review with the relevant information.
***Please note that the admin will not be able to save the posts for review by the guest writers. The admin is free to keep the post in draft, make necessary changes, and publish it on the site.
Redirect the Guest User After Logout
You can redirect the guest user to a different page. To do that:
- Create a page where you want the guest user to go after the guest post is submitted
- Go to the Front End Post Submission Addon Page
- Select the Page from the Dropdown under “Redirection Page After Logout”
- Save the Settings

