Dynamic content lets you fetch various data from different posts on your site and showcase it dynamically as custom fields. So, you don’t need to change information for each post individually.
It also integrates effortlessly with custom field plugins ACF, Metabox, and Pods. So you can easily showcase data created through those plugins in your blog posts without any issues.
***Please note that you need the Pro version of PostX to use it with plugins like ACF, Meta Box, and Pods. You can use the general features of the Dynamic Content Addon for free, but using it with ACF, Meta Box, and Pods requires you to have the Pro Version of PostX.
Enabling Dynamic Content
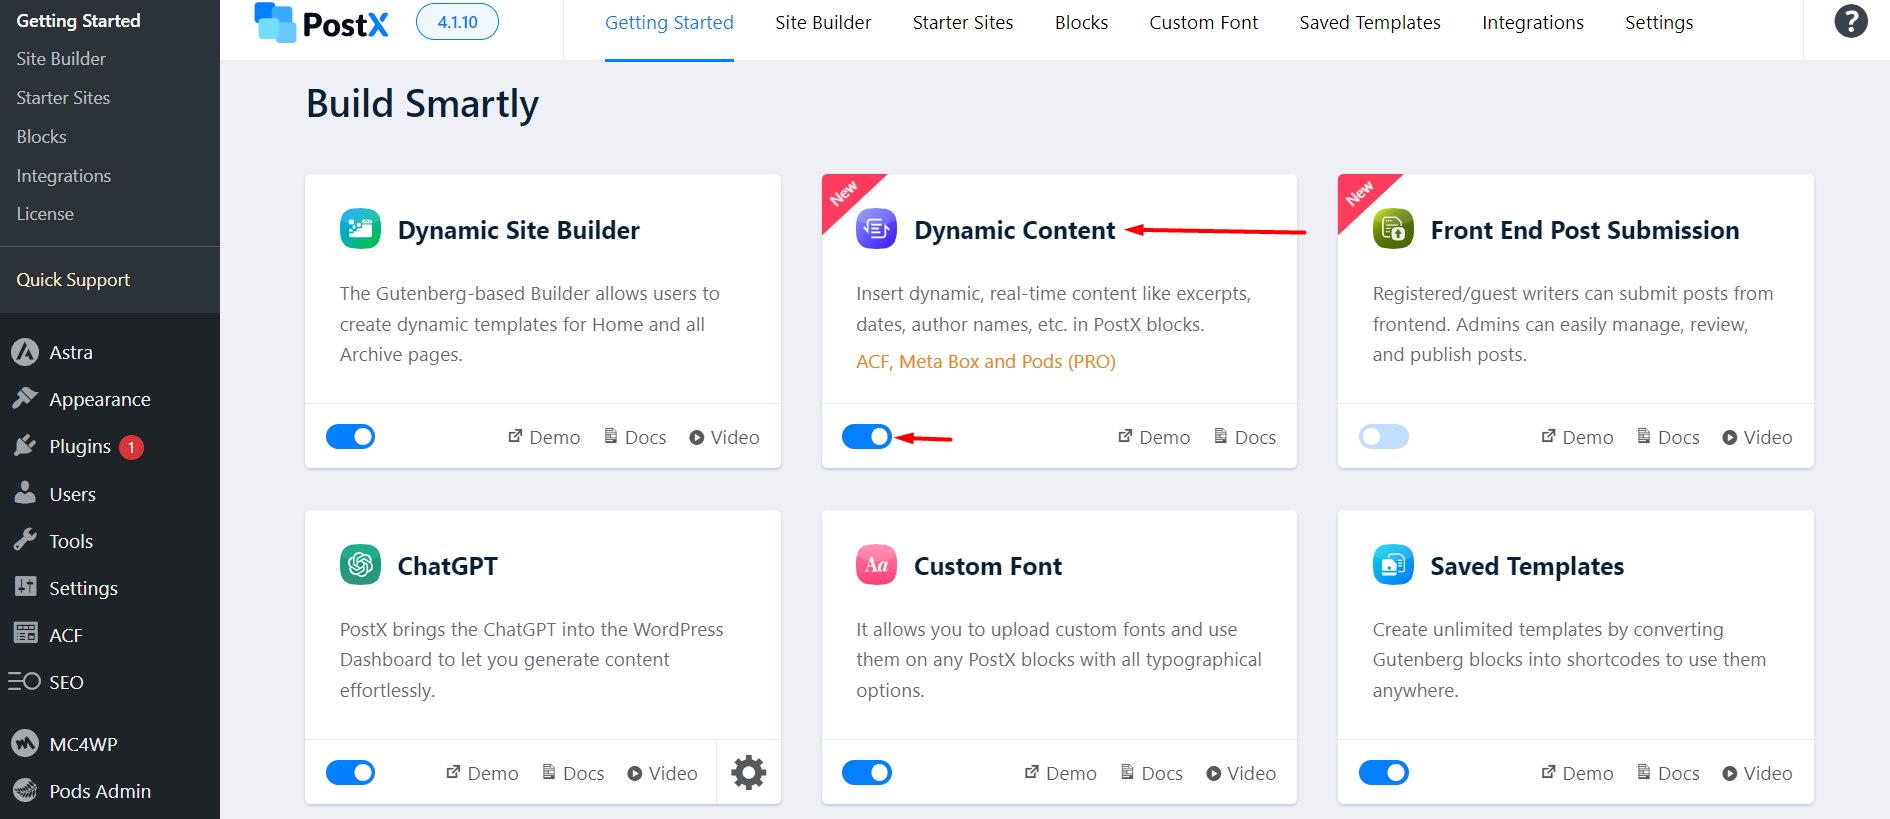
Before you begin, you need to make sure that the PostX Dynamic Content Addon is enabled. You need to go to PostX > Getting Started. From there, you need to enable the Dynamic Content Addon:
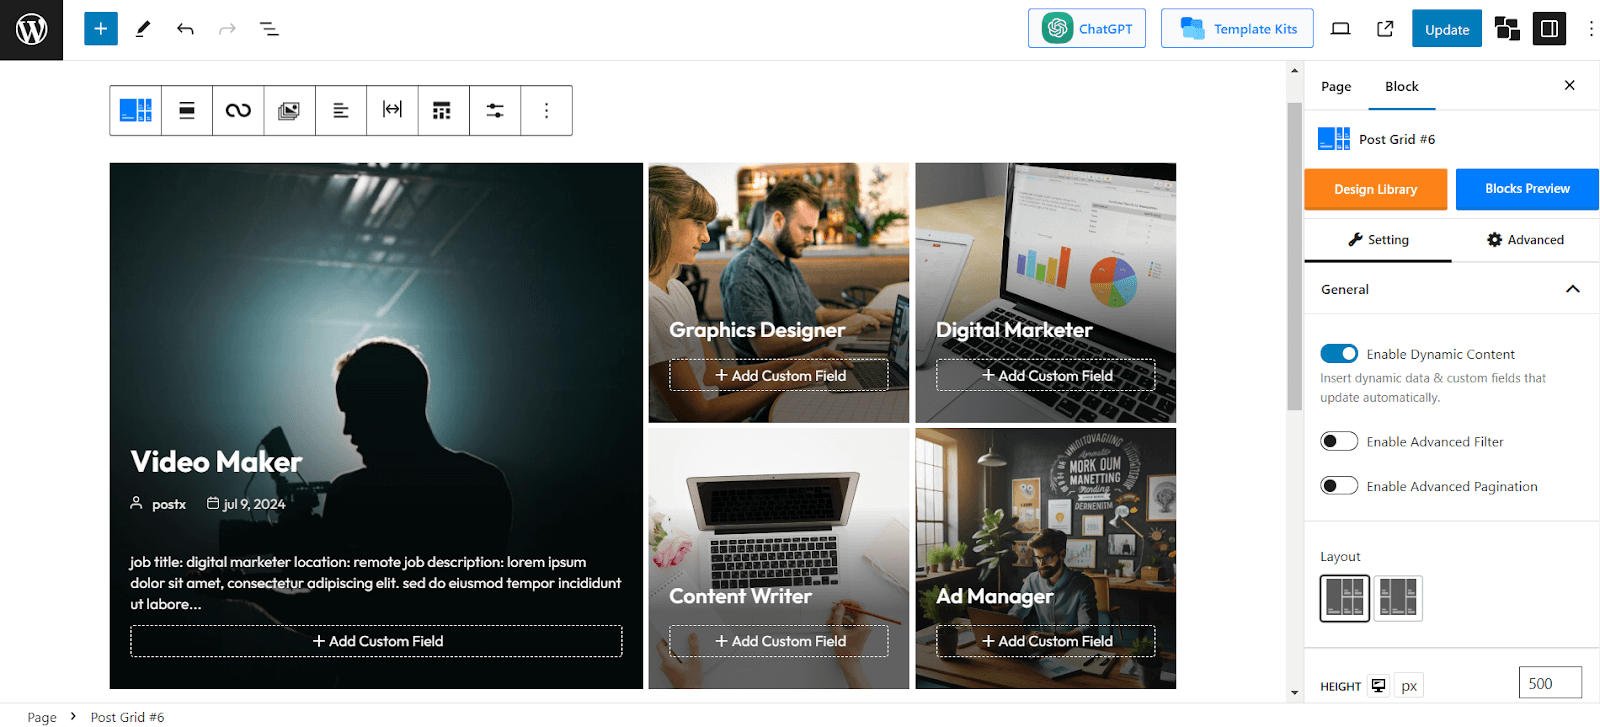
To enable dynamic content simply select a Post List, Post Grid, or Post Slider block, and click on the Enable Dynamic Content button.
Please note that the features of the PostX Dynamic Content Addon only work with the Post Grid, Post List, Post Slider, Image Block, Heading block, and Button block Support for other PostX blocks will be coming soon. You can only show custom post contents with the PostX blocks mentioned above.
You can also use the Dynamic Content feature on PostX blocks, such as headings, lists, images, and button blocks.
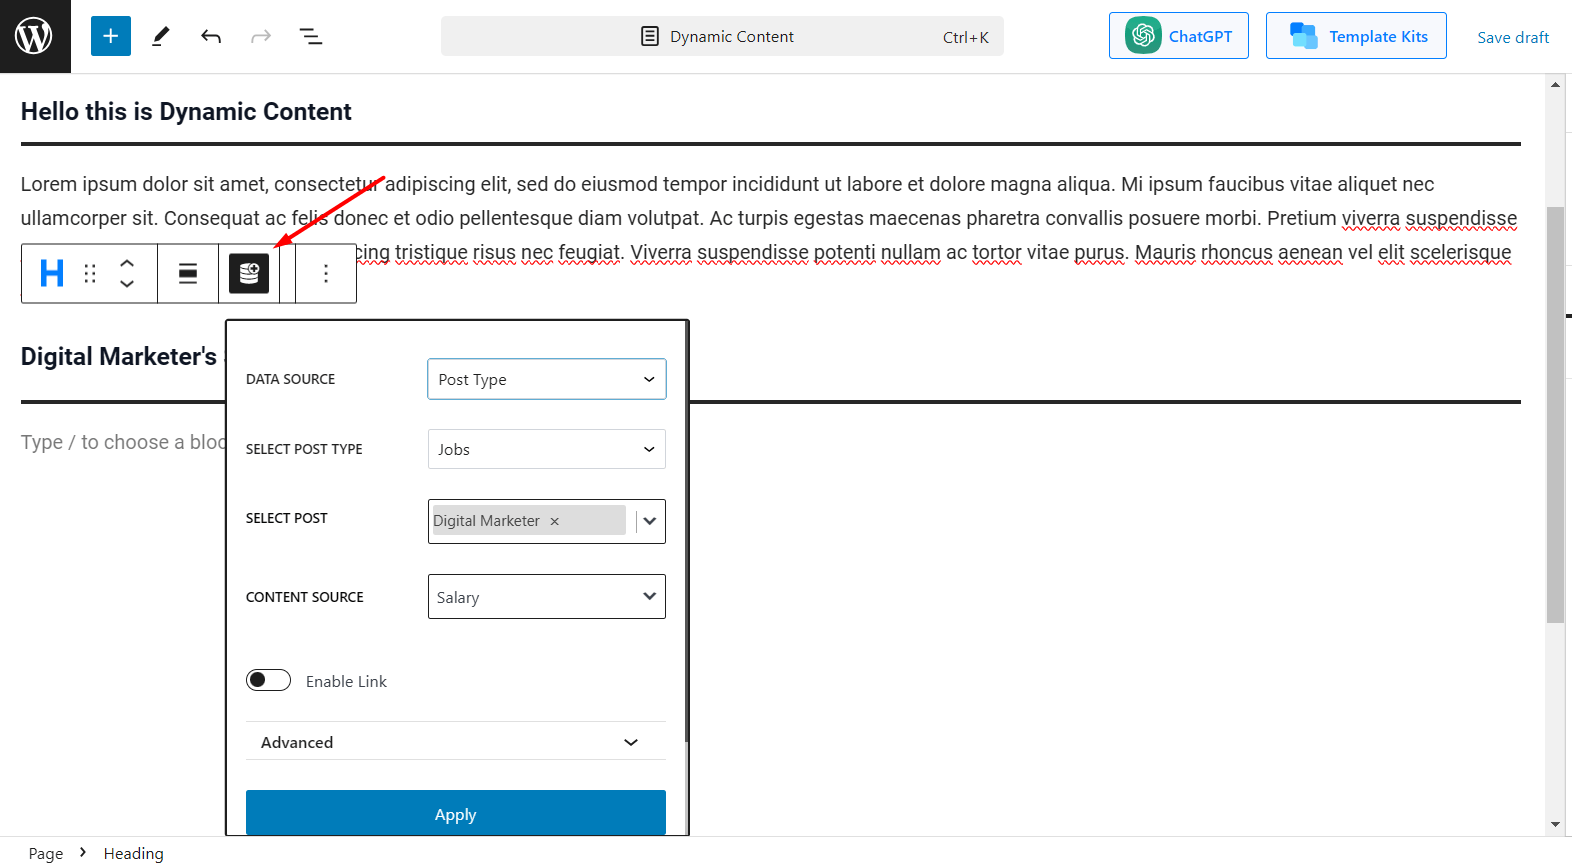
To do that, simply select the block, let’s say the Heading block, and click on the Dynamic Content button.
This brings up several options that allow for showcasing data from different posts on your site.
Adding Custom Field
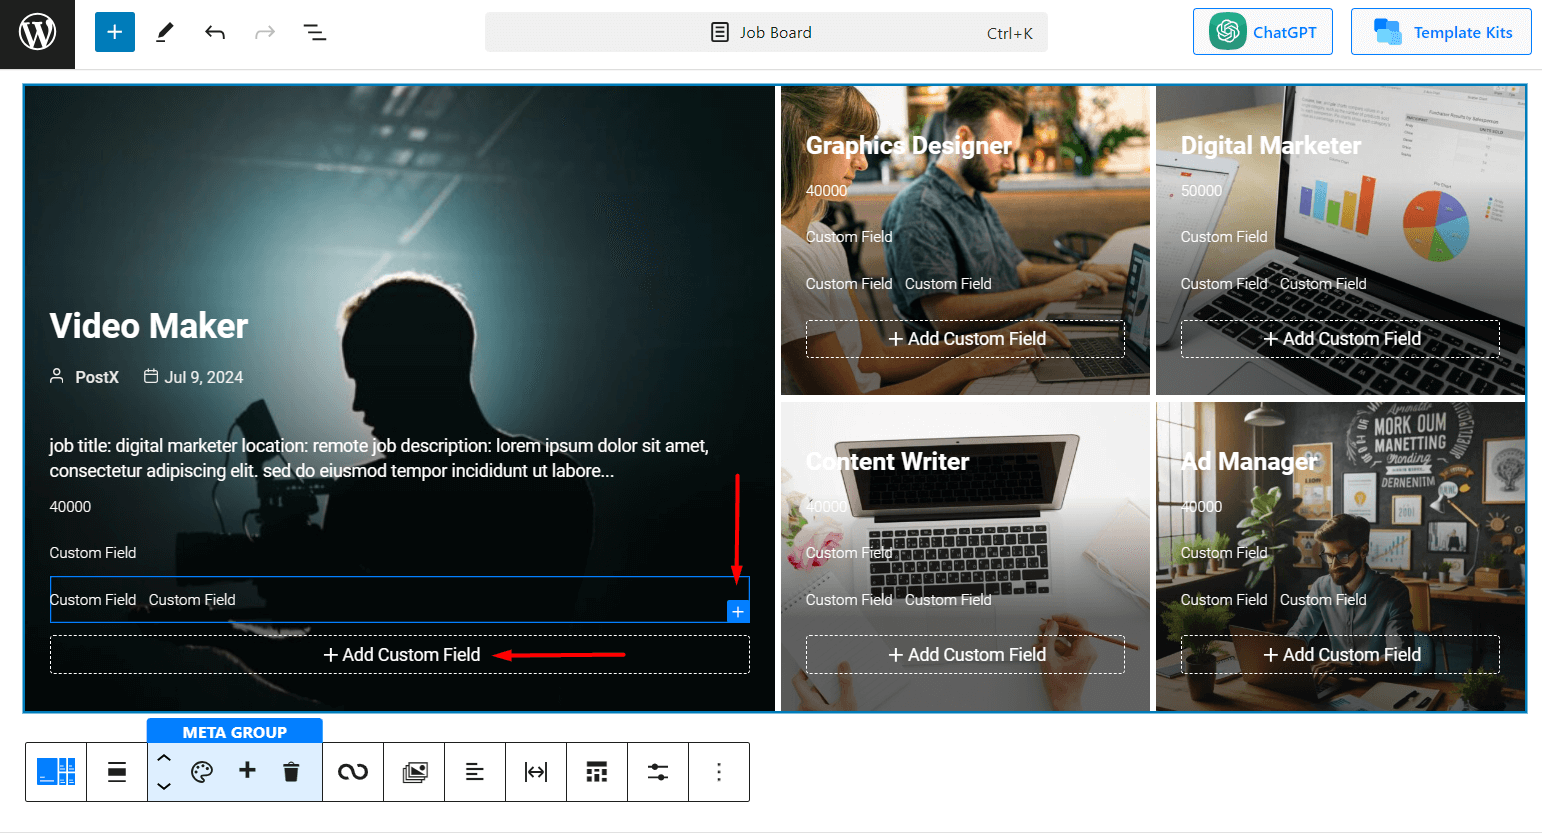
After enabling the dynamic content option, you will see buttons to “Add Custom Field” on posts. Clicking on this button will bring up several fields that can dynamically bring in various data from posts.
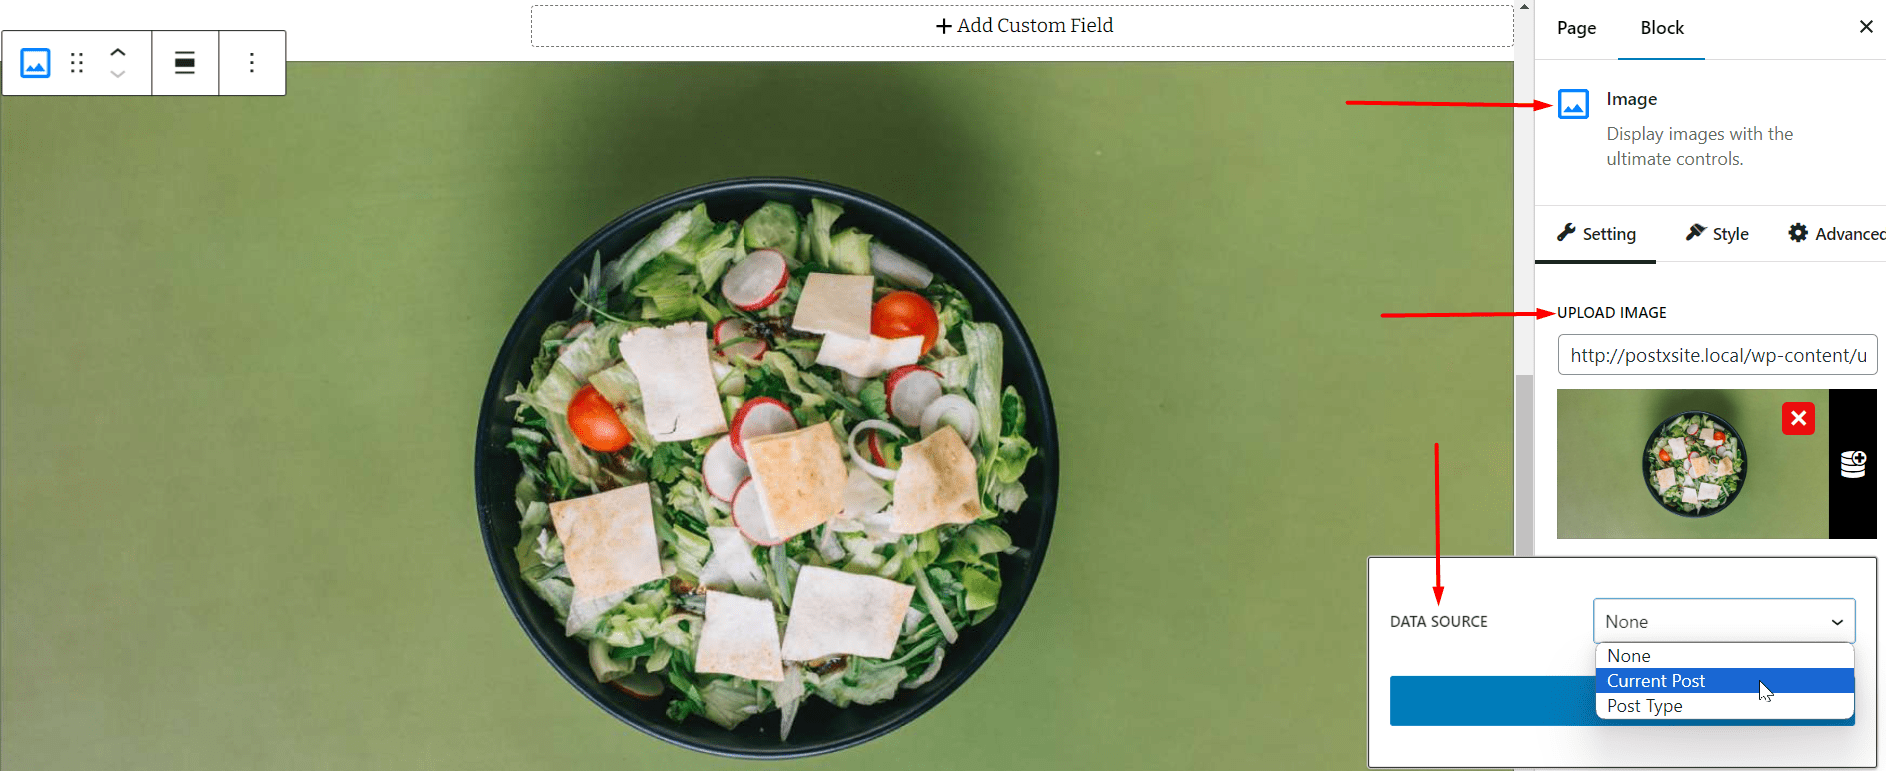
After clicking on the Add Custom Field button, you will see a Data Source option. Clicking on it will allow you to select what kind of data you want to show.
You have the option to add multiple custom fields and showcase various information as you like. Simply click on Add Custom Field to add a new field. You can also add custom fields on the same line by clicking on the little “+” icon beside an existing custom field.
Support for the PostX Site Builder
You can use the Dynamic Content Addon Functionality with the PostX Site Builder. However, there are some things you need to follow:
You can enable the dynamic content addon only for the supported blocks of the PostX plugin. For example, if you were to show custom post-type data on one of the starter templates of PostX, it would only work with the blocks that are currently supported. Custom blocks like the Post Title, Post Heading, Social Icons, etc. do not have support with the dynamic content addon at this time. This is true for all other elements in the PostX Site Builder that are custom.
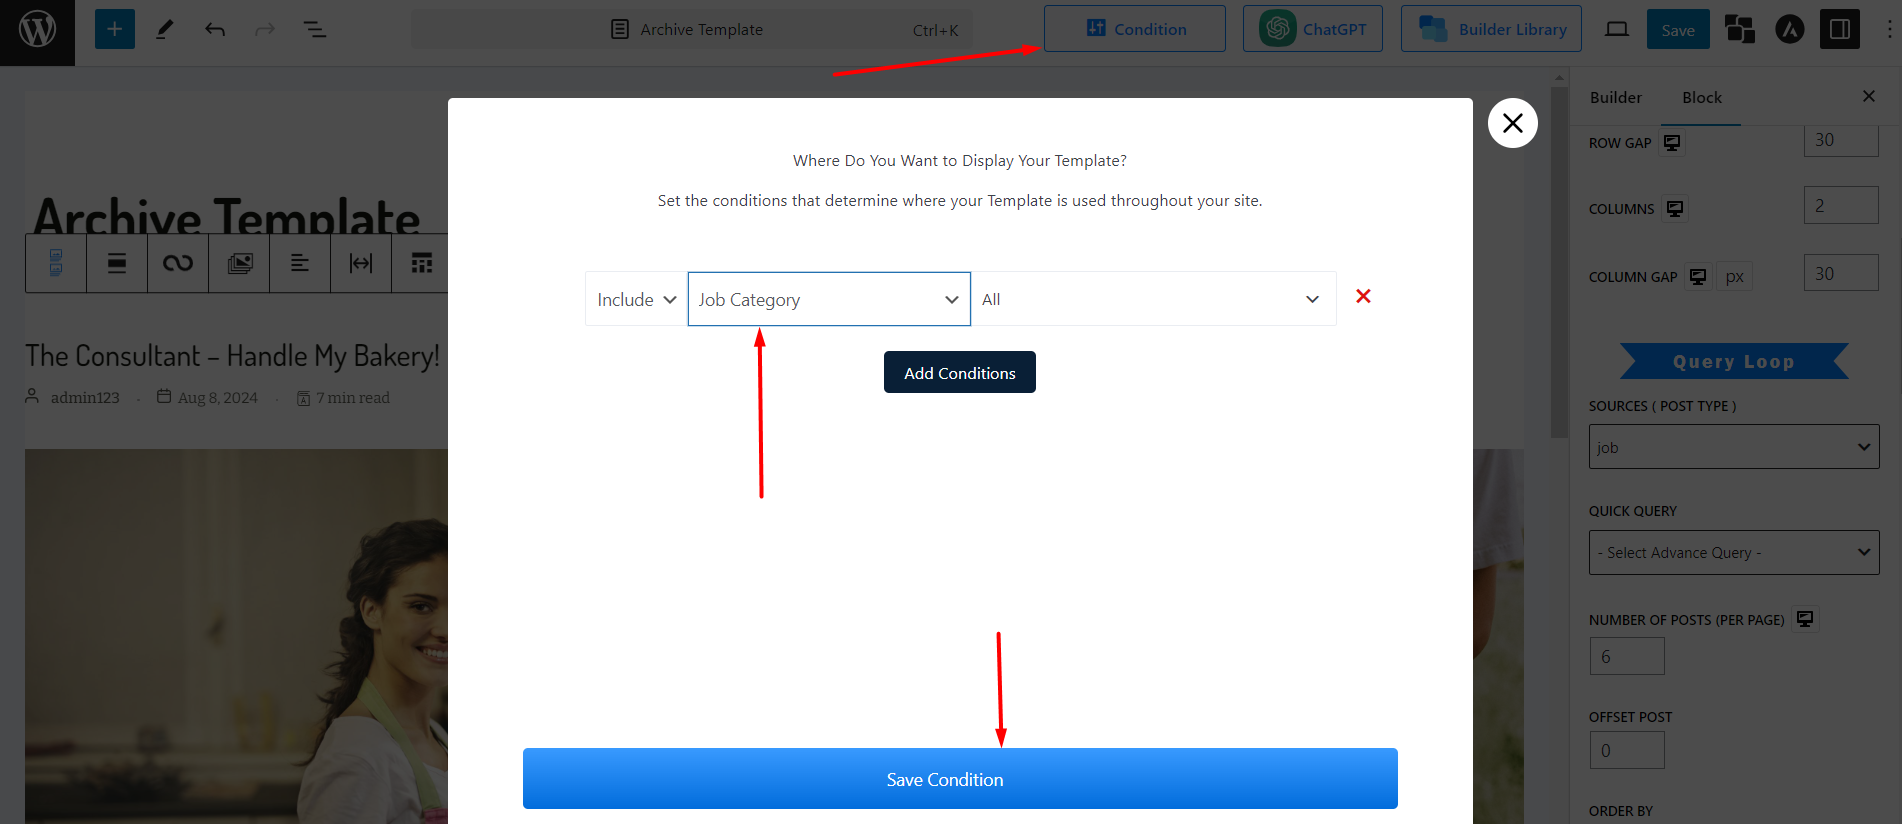
Changing the conditions for the custom post type is necessary to show the custom post data in a particular archive. When creating a new archive page, you need to select the correct category for the archive page.
Support for Full Site Editing
Support for sull site editing is limited. You can only show the custom post data with the selected PostX blocks as mentioned above – support for custom blocks will be coming soon.
Choosing Data Source
After adding custom fields, you should choose the data source from where you want to fetch data.
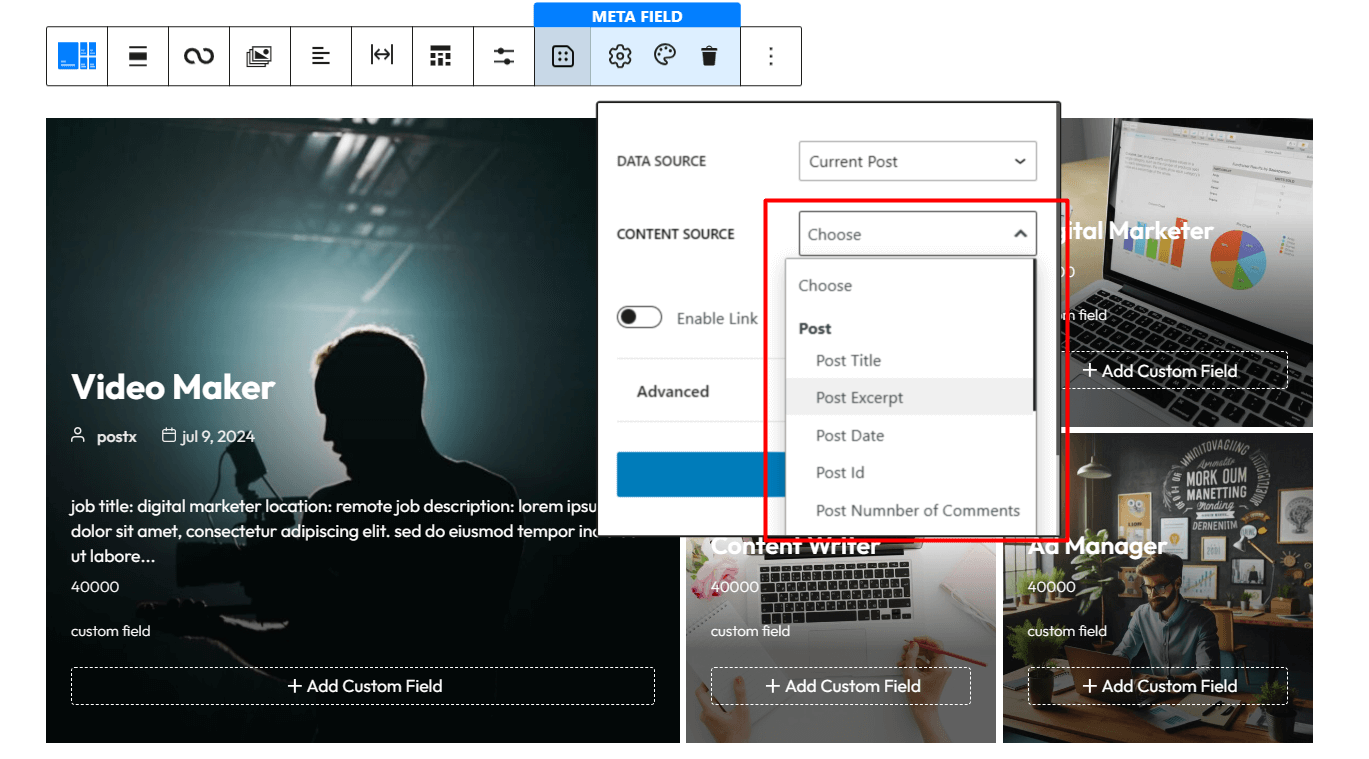
Current Post
If you want to source data from the current post, select the Current Post option.
You can show data such as Post Title, Post Excerpt, Post Date, Post ID, and Post Number of Comments. Also, you can showcase information such as the author’s name, bio, email, etc.
Post Type
Posts
You can select Posts as a data source to display data from a specific post. It will allow you to showcase data such as Post Title, Post Excerpt, Post Date, Post ID, Author’s name, bio, email, etc.
Custom Post Type
If you have created custom post types on your site, you can select those as Data Sources as well.
For instance, we have created a custom post type called Jobs. Now choosing this as a data source will let us bring data from the posts of this post type.
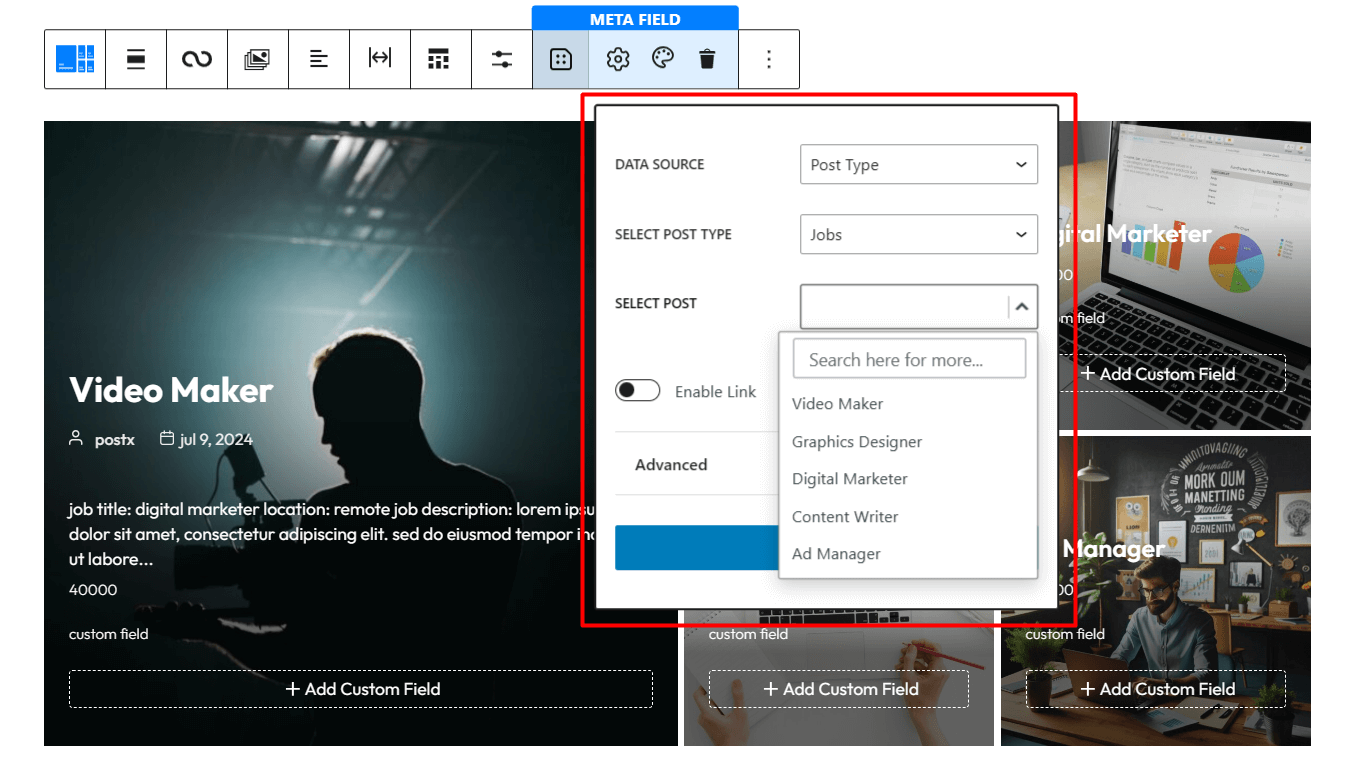
After selecting a specific post from the Jobs post type, we can showcase data such as Post Title, Post Excerpt, Post Date, etc. from that particular post.
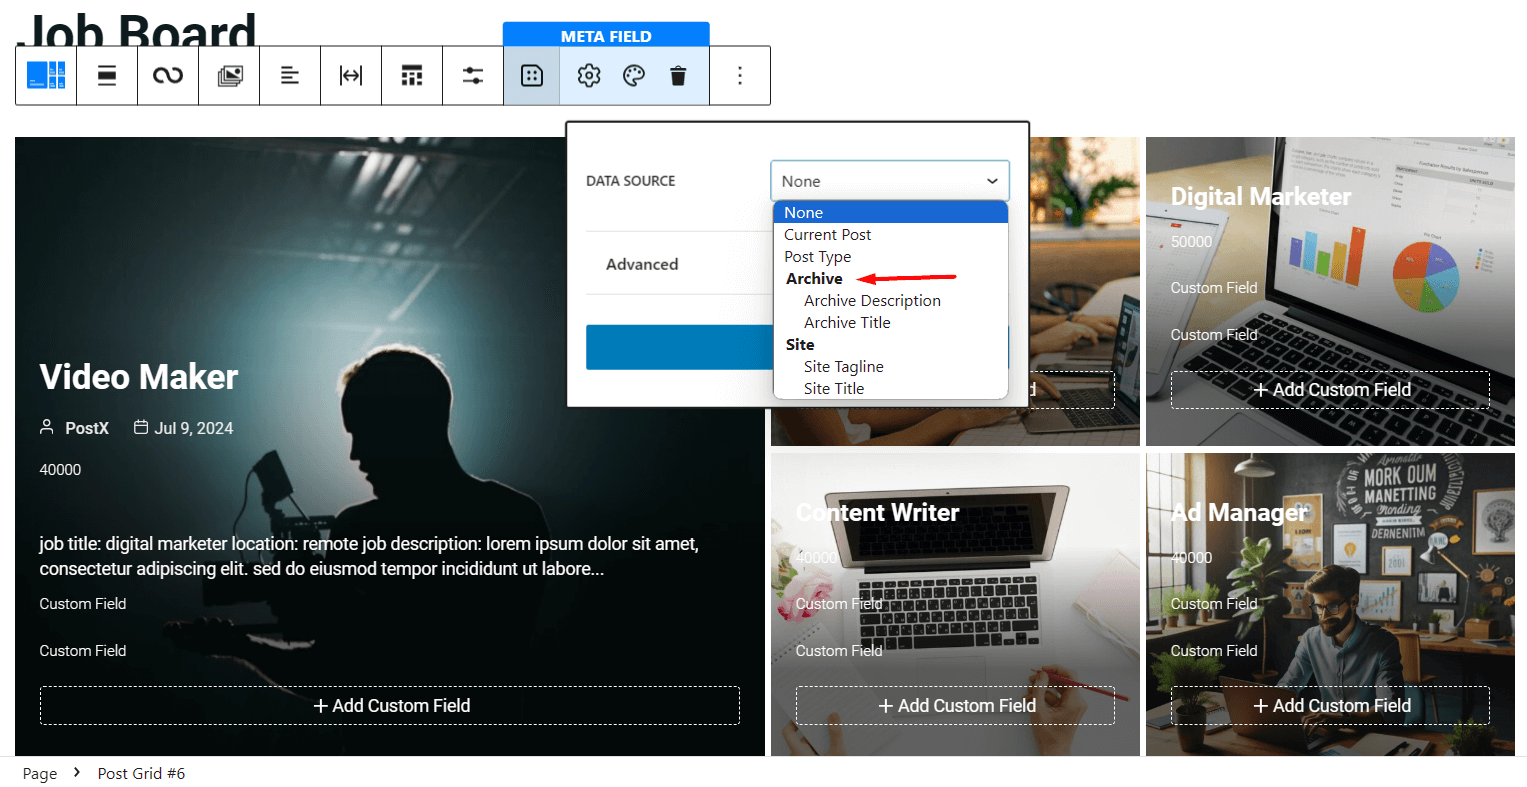
Without Selecting A Source
If you don’t select any source, you can showcase information such as the Archive Description, Archive Title, Site Tagline, and Site Title.
Meta Data Display Options
Data from Selected Post
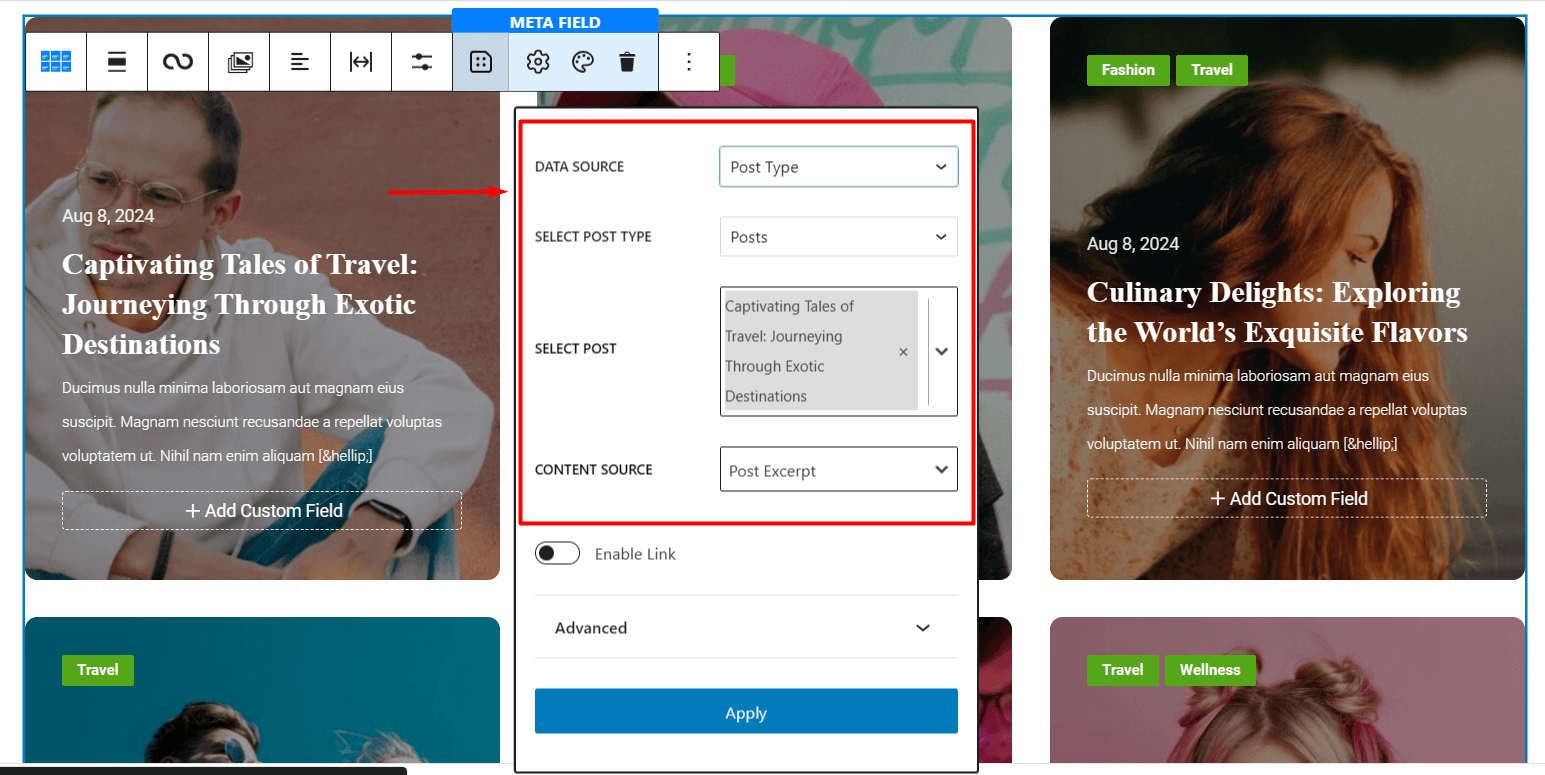
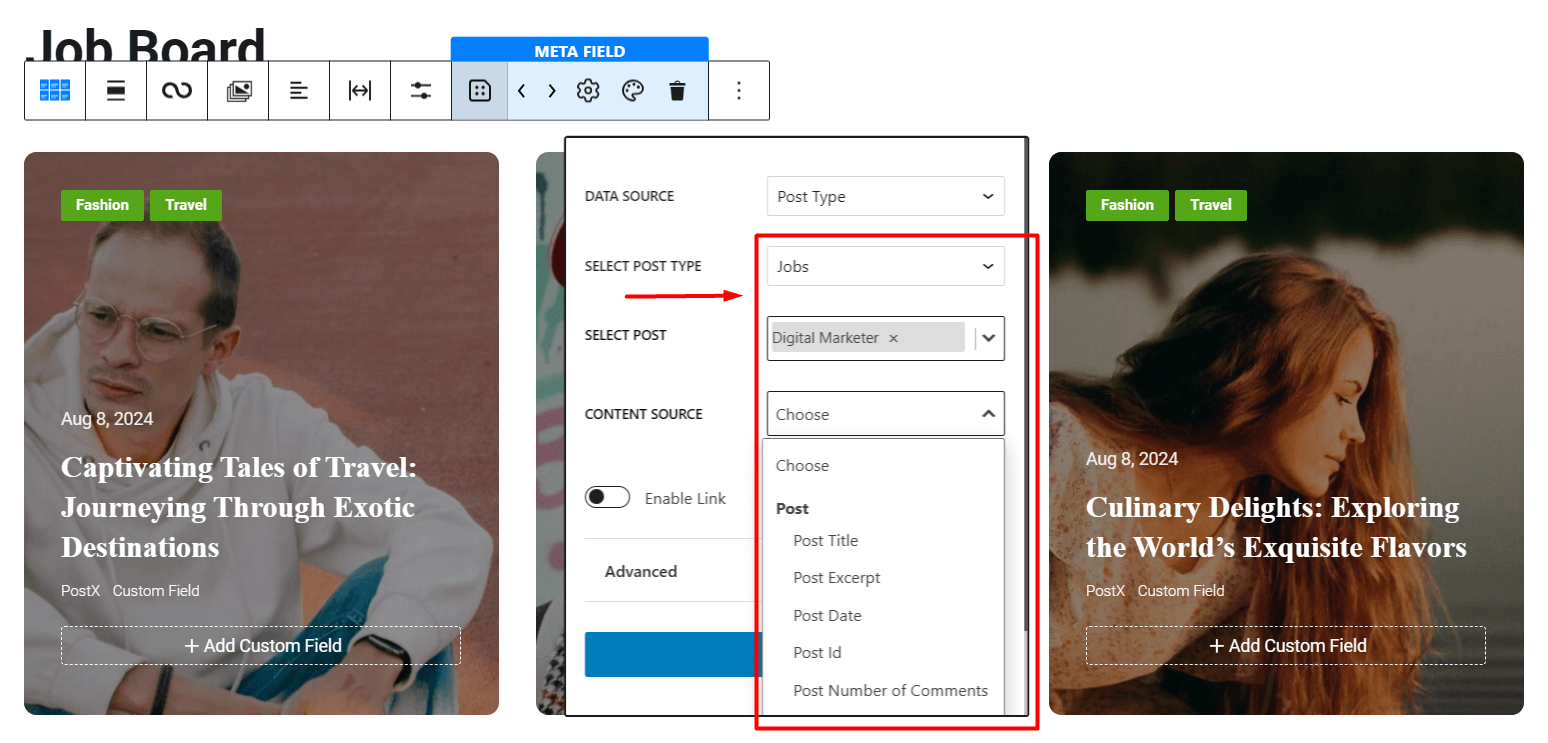
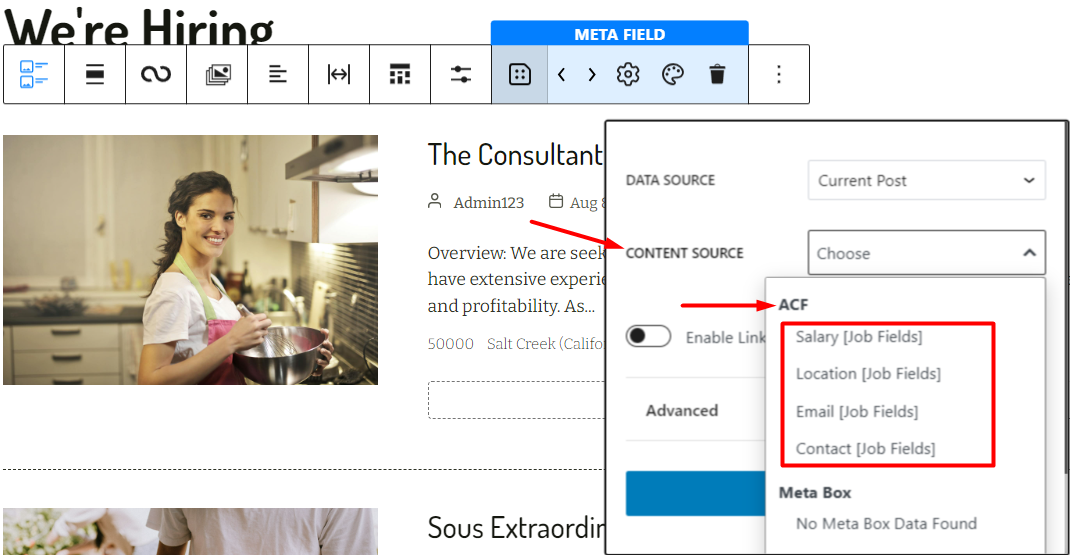
If you want to show specific metadata from your selected post, you can do so with Dynamic Content. Select Post Type as a data source. Under post type select the Posts or any Custom Post Type and then choose the specific post you want to bring data from.

From Content Source, simply choose the type of data you want to showcase and it will be shown as metadata for all posts in the block.
Enable Link
You can showcase various data with clickable links. Here’s how to do it:
- Simply click on Enable Link.
- Now choose your preferred Link Source from the dropdown.
- Make sure to choose an appropriate Content Source that is relevant to the link.
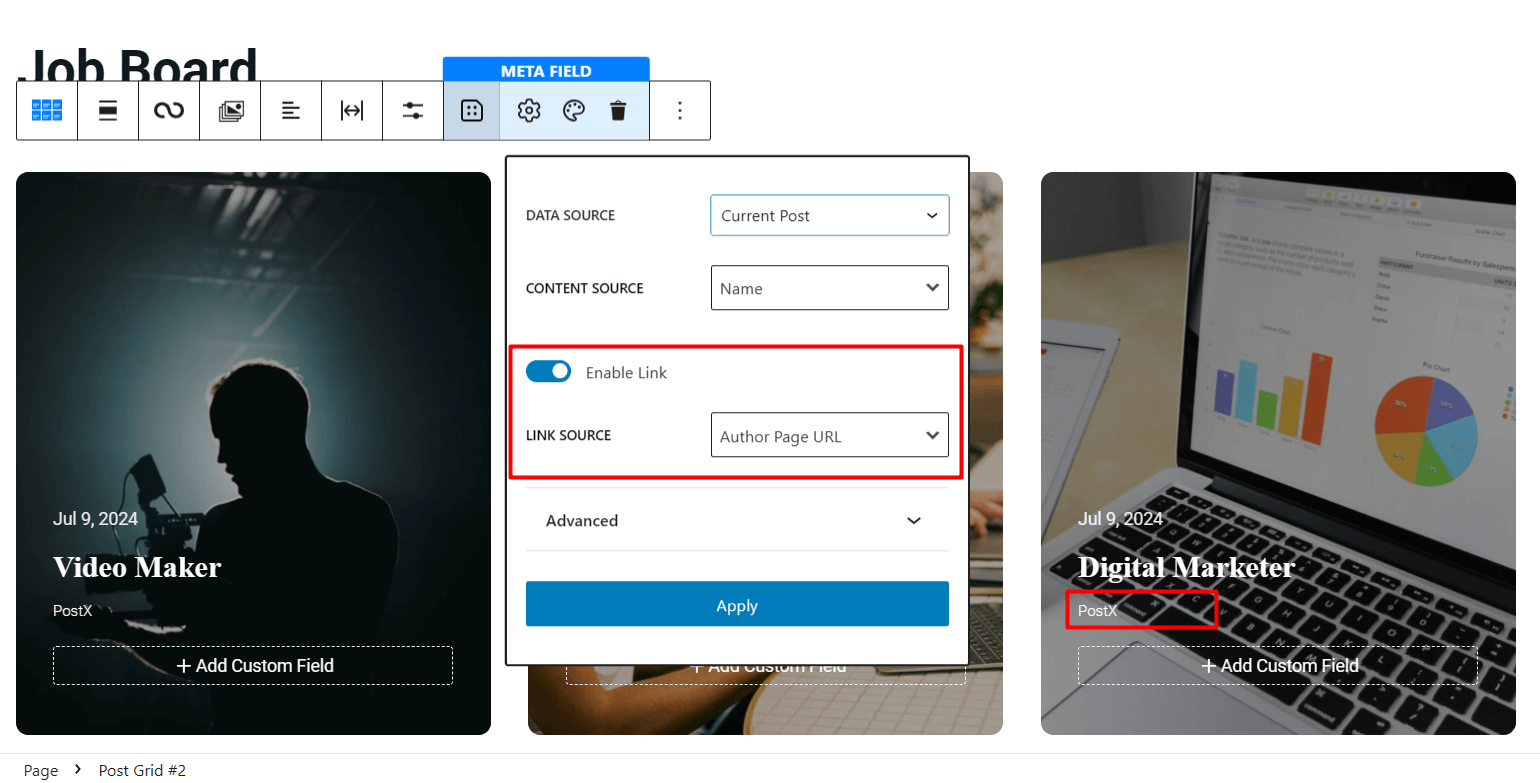
For instance, if you want to show the Author’s Name for posts and want your users to send them to the author page when they click on the name, you can easily do that using this feature.
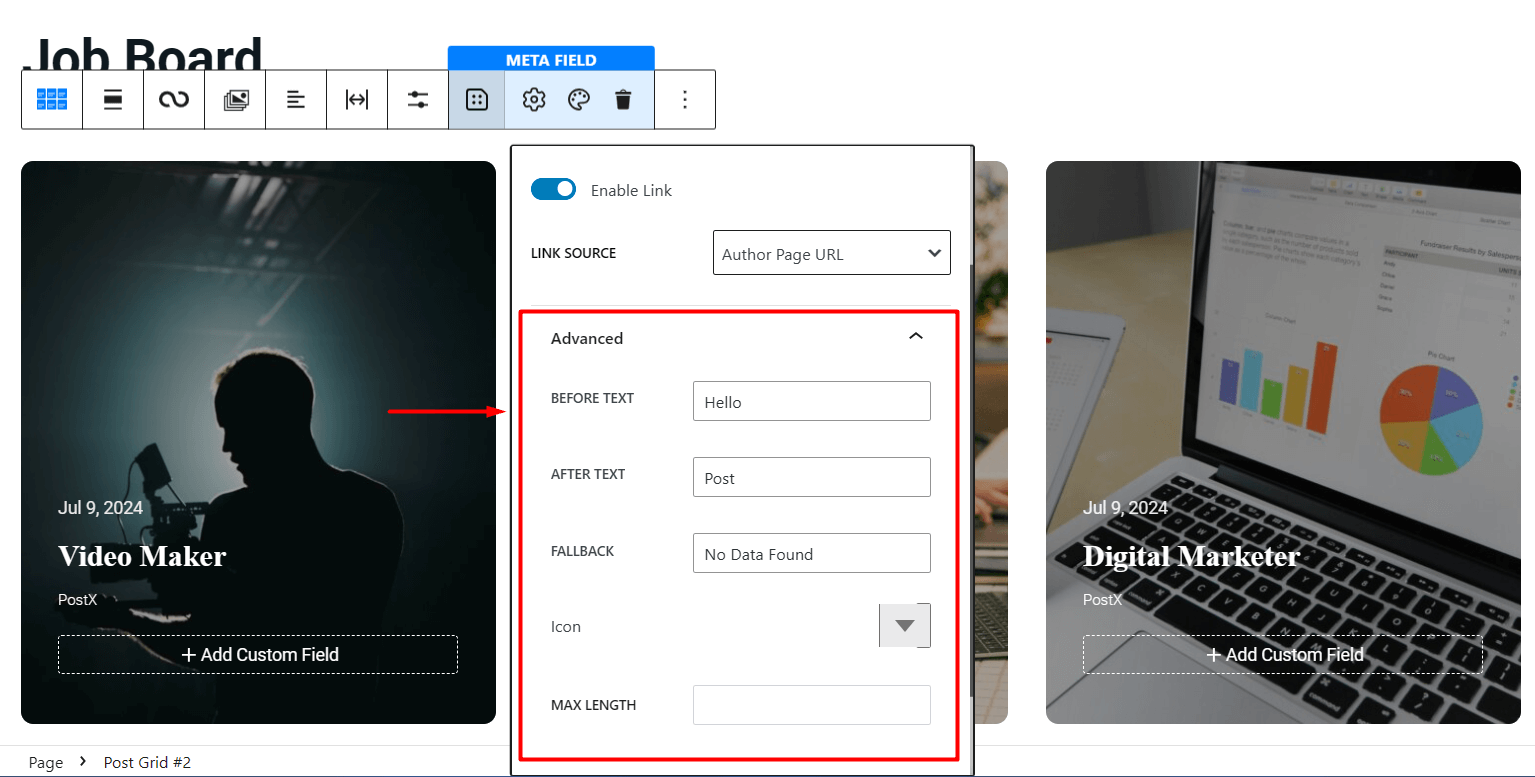
Advanced Options
Dynamic content also has several advanced options to further enhance the showcase of metadata.
Before Text: Type the text you want to showcase before the custom field data
After Text: Type the text you want to showcase after the custom field data.
Fallback: Type the text you want to showcase when there is no valid data to display.
Icon: Choose eye-catching icons to display alongside the metadata.
Max Length: Set the maximum character length of the metadata.
Integration with Custom Field Plugins
Dynamic content seamlessly integrates with Custom Fields plugins such as Advanced Custom Fields (ACF), Metabox, and Pods and lets you showcase data from these plugins easily.
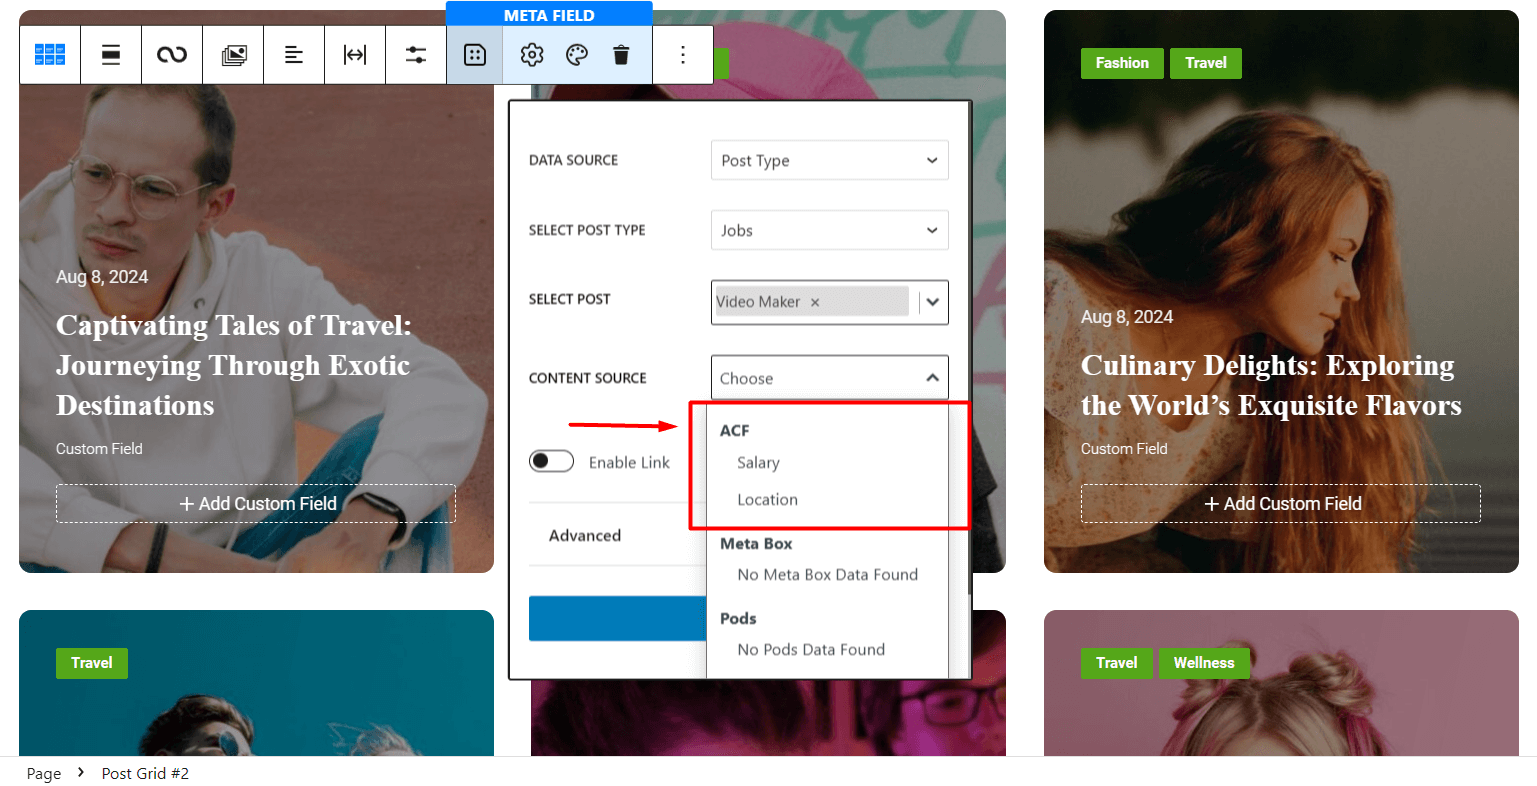
Showcasing Plugin Data on Posts
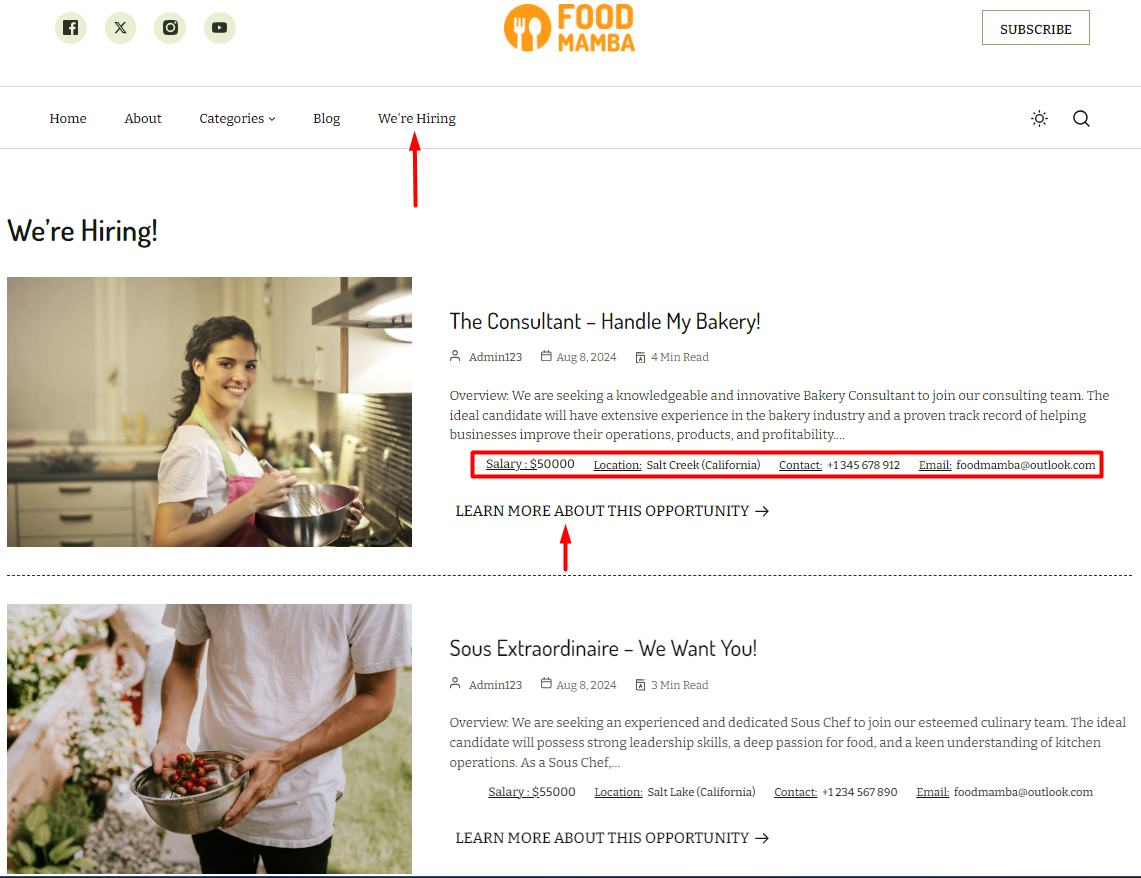
If you want to show the plugins’ data on the blog posts using the Posts type, you can easily do so. For instance, we created a Post Type called Jobs using the ACF plugin.
Now, on our blog posts, we can show metadata such as Salary & Location from specific posts from this post type.
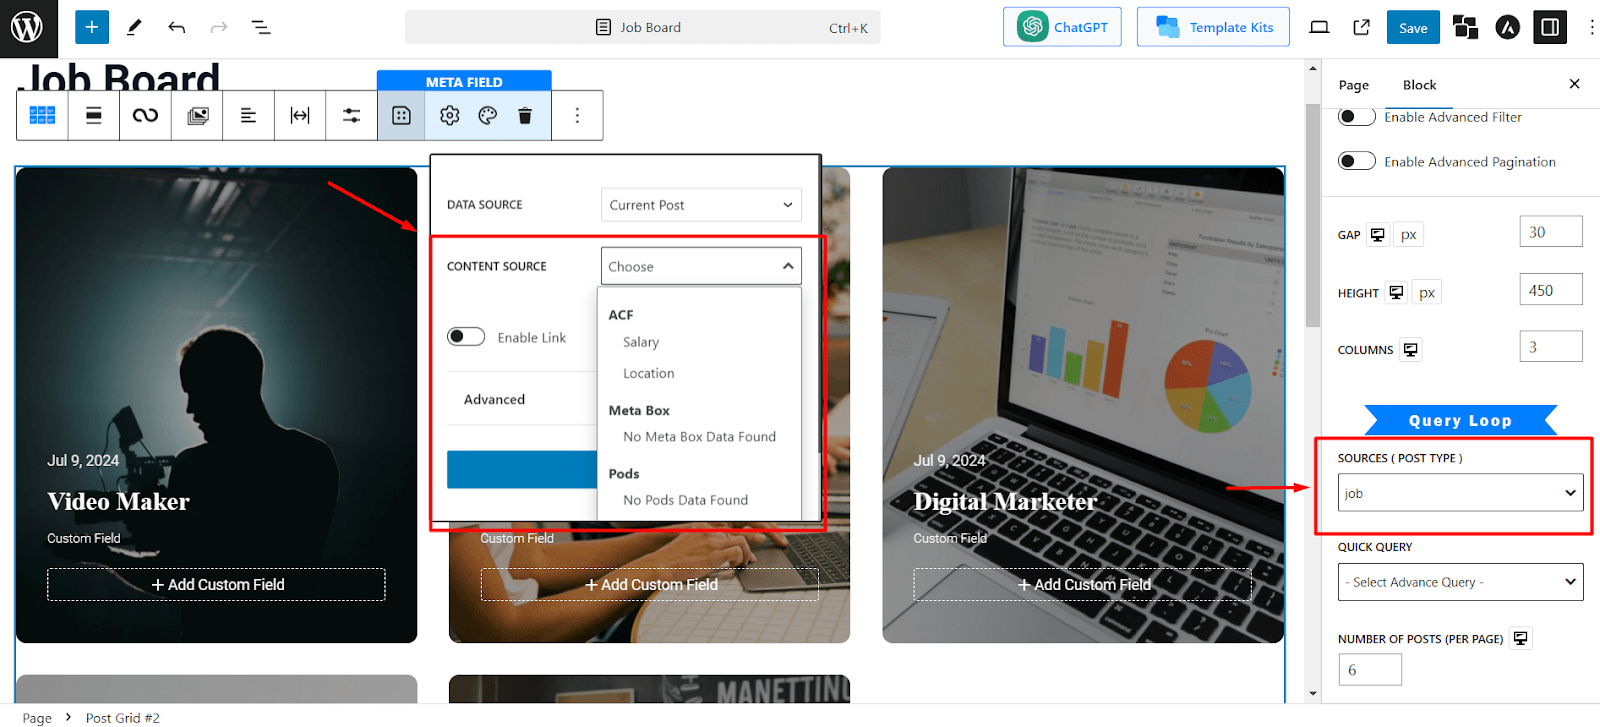
Showcasing Current Post Data of Custom Post Type
Using the Query Loop feature of PostX, you can easily select the type of post you want to present in a block.
Now, if we select our custom post type Jobs, it will let us select Data Source as Current Post and show metadata such as Salary and Location easily.
**In the same manner, you can showcase data from Meta Box and Pods.
Customizing Meta Field Settings
PostX lets you customize the custom field’s appearance. Click on any custom field and then click on the “Color Palette” icon to view all the available settings.
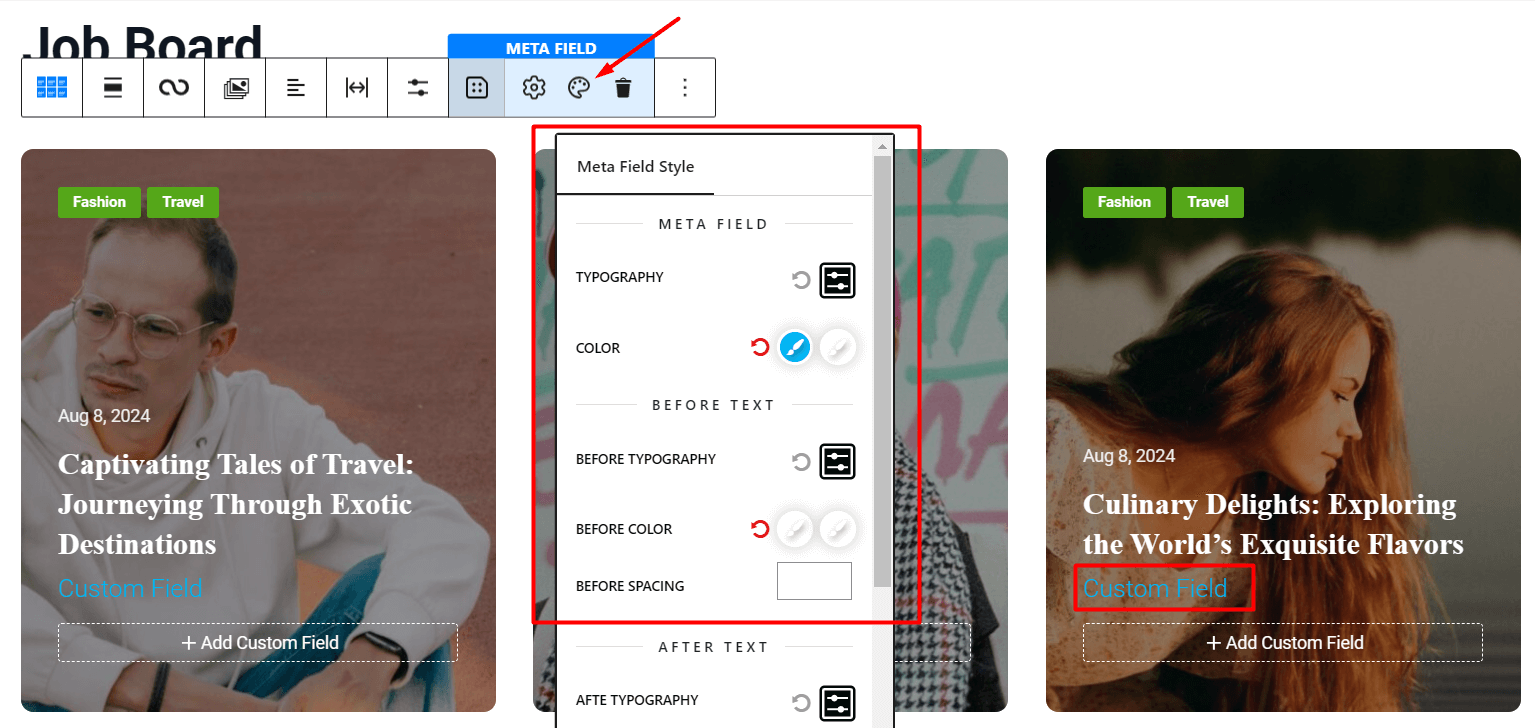
You can easily change the typography, color, customization for before and after texts, and the appearance of icons.
Since the use cases of these plugins are similar, we will share the way you can use dynamic content with ACF in detail. There may be some differences in processes while using Meta Box or Pods. However, the way to pull data from the PostX Dynamic Content remains the same.
How to Use Dynamic Content with the ACF Plugin?
Once you install PostX Pro and the ACF plugin on your WordPress website, you need to do the following:
Creating the Custom Post Type
To create the custom post type, you need to:
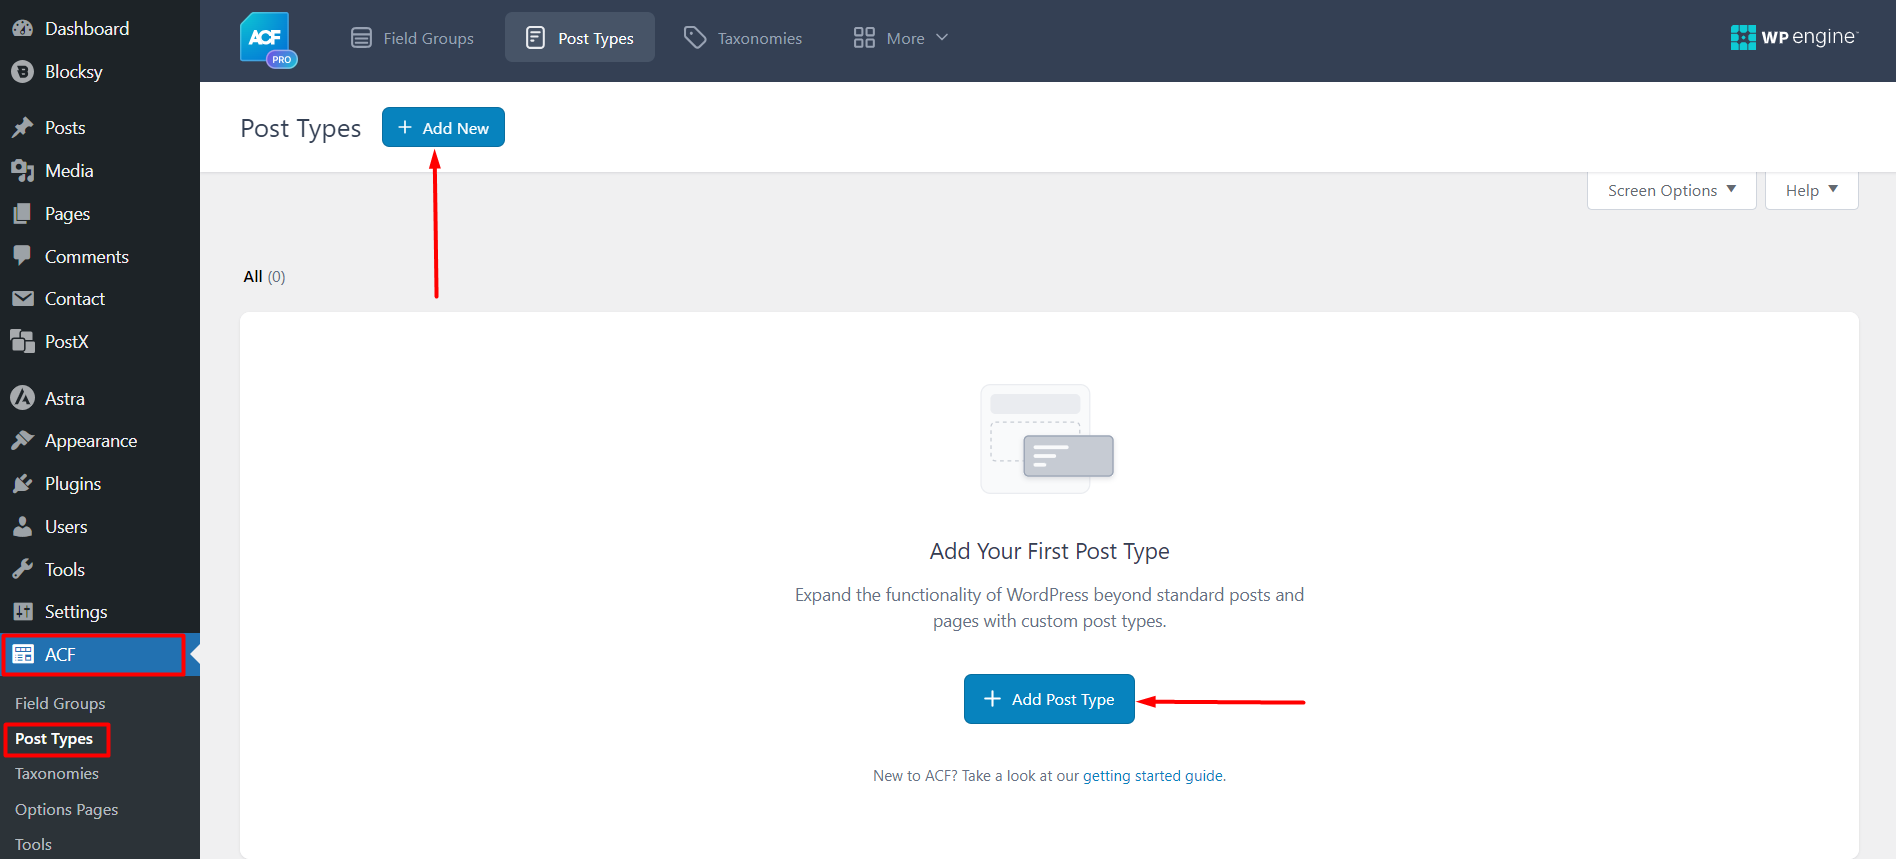
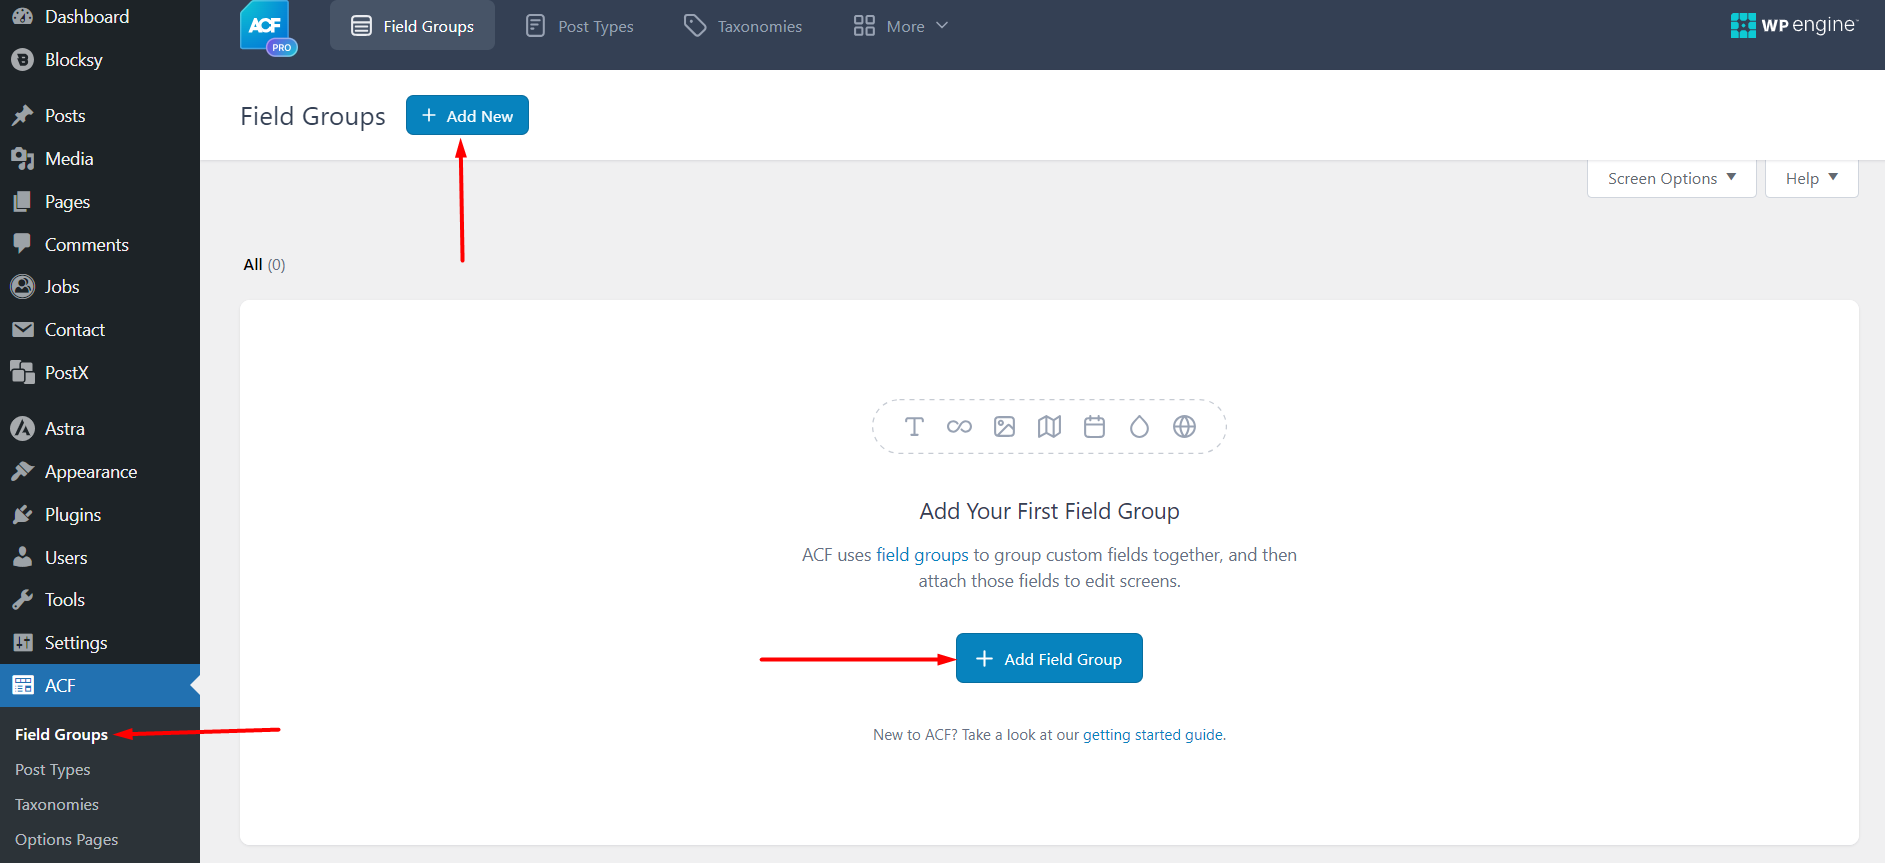
- Click on the ACF plugin and select “Post Types”
- Now Click on “Add New” (or “Add Post Type” if you’re using the plugin for the first time).
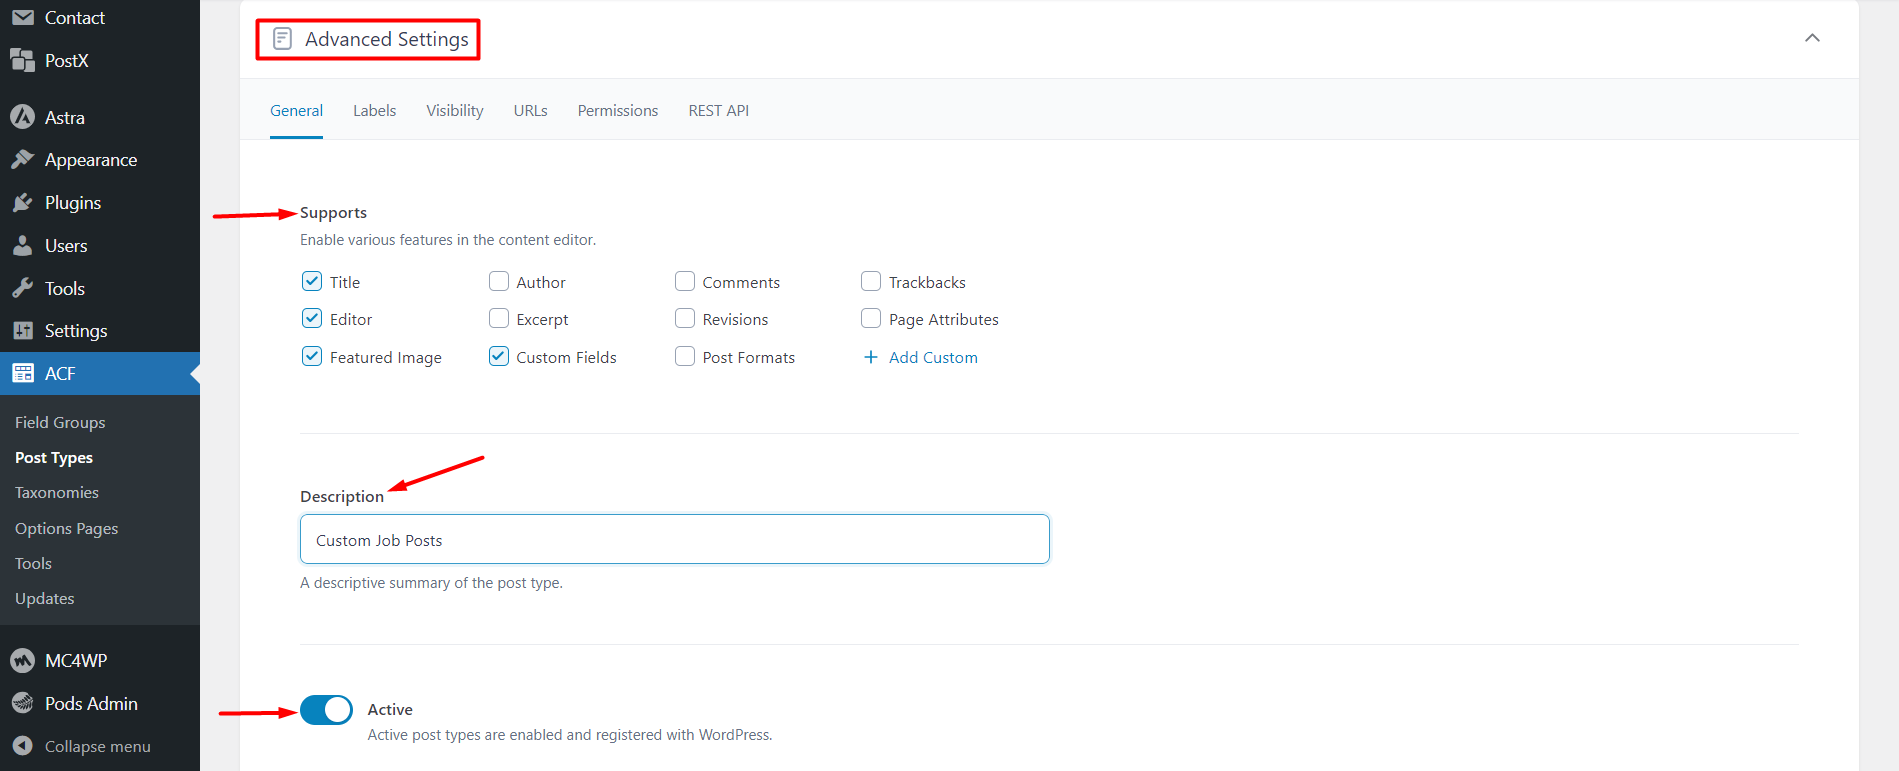
Now, you need to add the necessary information for the post type. We will be creating a custom post type called “Jobs”. Here’s how the information was filled out:

Once you’re done, you need to enable “Advanced Settings” and enable the following settings (these should be enabled by default):
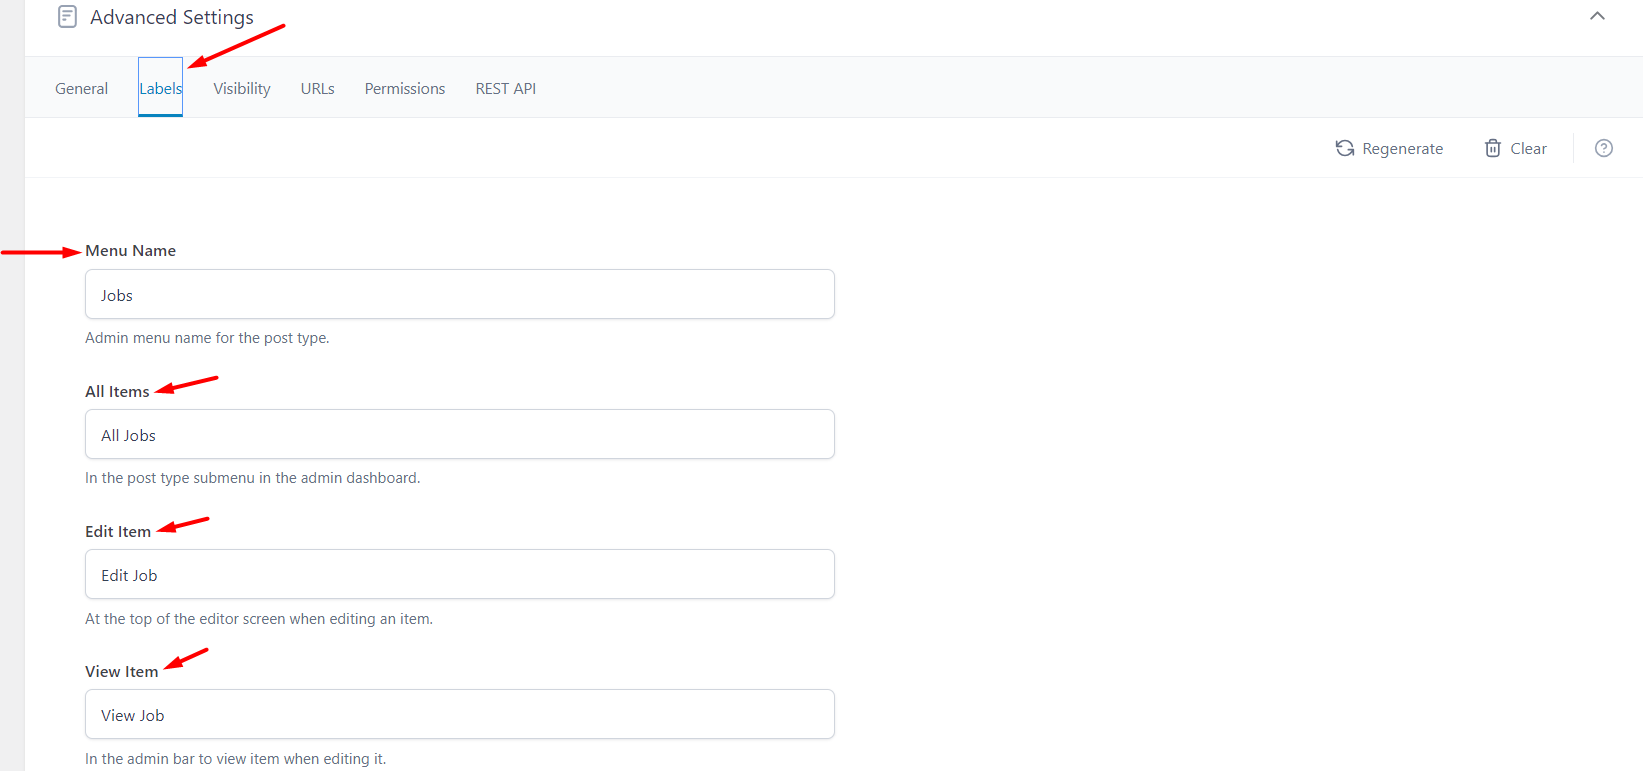
Next, you need to go to the labels section and make changes – this is an optional part and you don’t really need to change anything here.
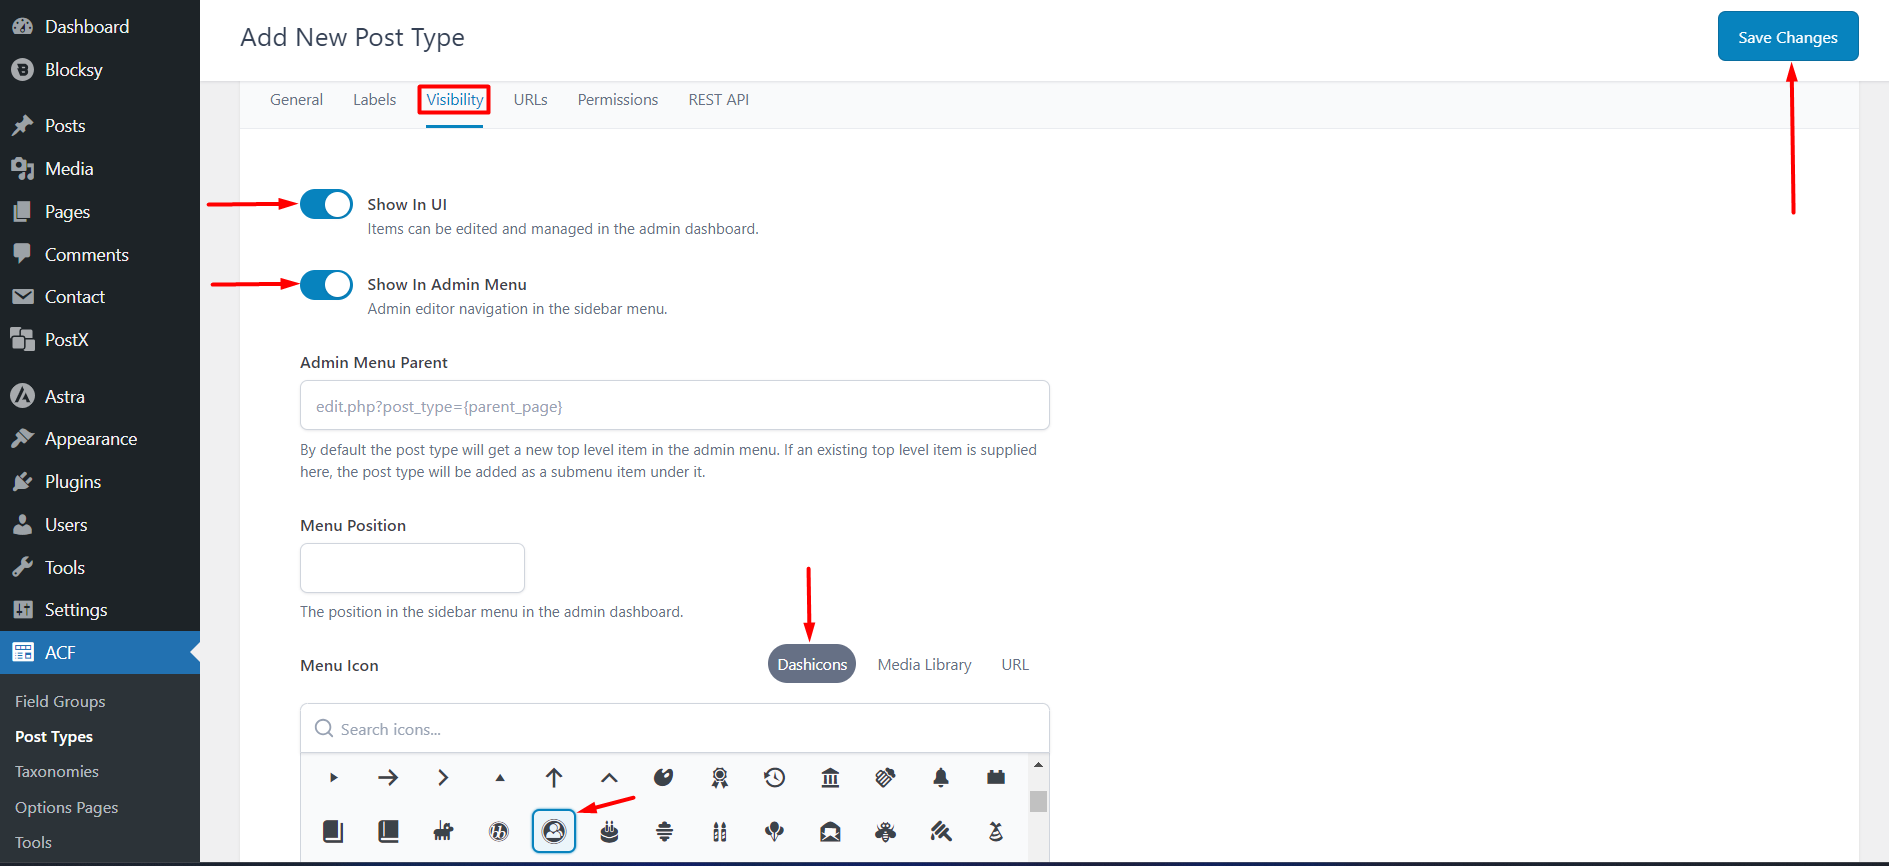
Once you’re done, you need to go to the visibility settings. From there, you can enable the post type to show up on your dashboard. You can also choose an icon to show for the particular post type.
Once done, you can save the changes.
Create the Meta Fields
The meta fields are the ‘options’ for specific job posts. For example, in a job posting, you have things like the salary, location, etc. These are the meta fields – you can dynamically use them on the front end using PostX dynamic content.
Follow the image below to create a new meta group. Under this meta group, you will have the specific meta fields.
To create the different meta fields, you need to:
- Give a name to the specific meta-group
- Select a meta field type (for a specific meta option)
- Fill out the necessary data
- Save the changes
You can select different meta field types for different meta field types. Also, you need to select the custom post type for the meta fields to work properly.

Create Custom Taxonomies
Custom taxonomies are like post categories. For example, a job has many different categories, these categories are the taxonomies.
You need to go to ACF> Taxonomies to create the custom post-taxonomy.
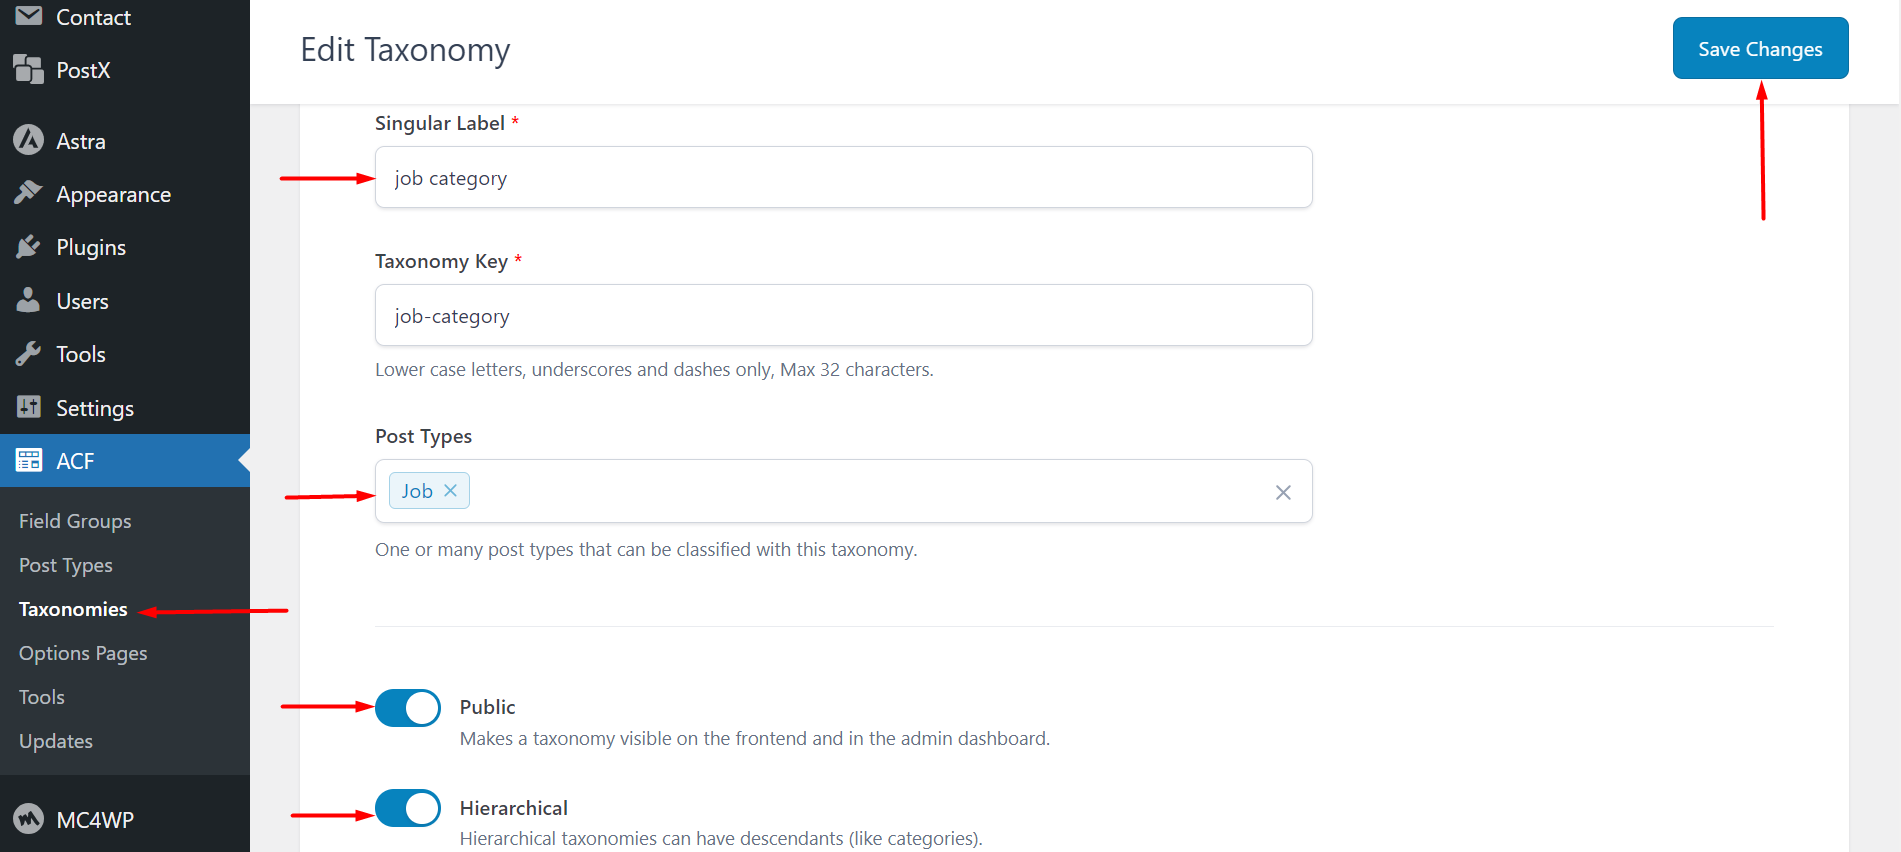
Once the custom taxonomy is created, you can create the categories for the specific post type you created.
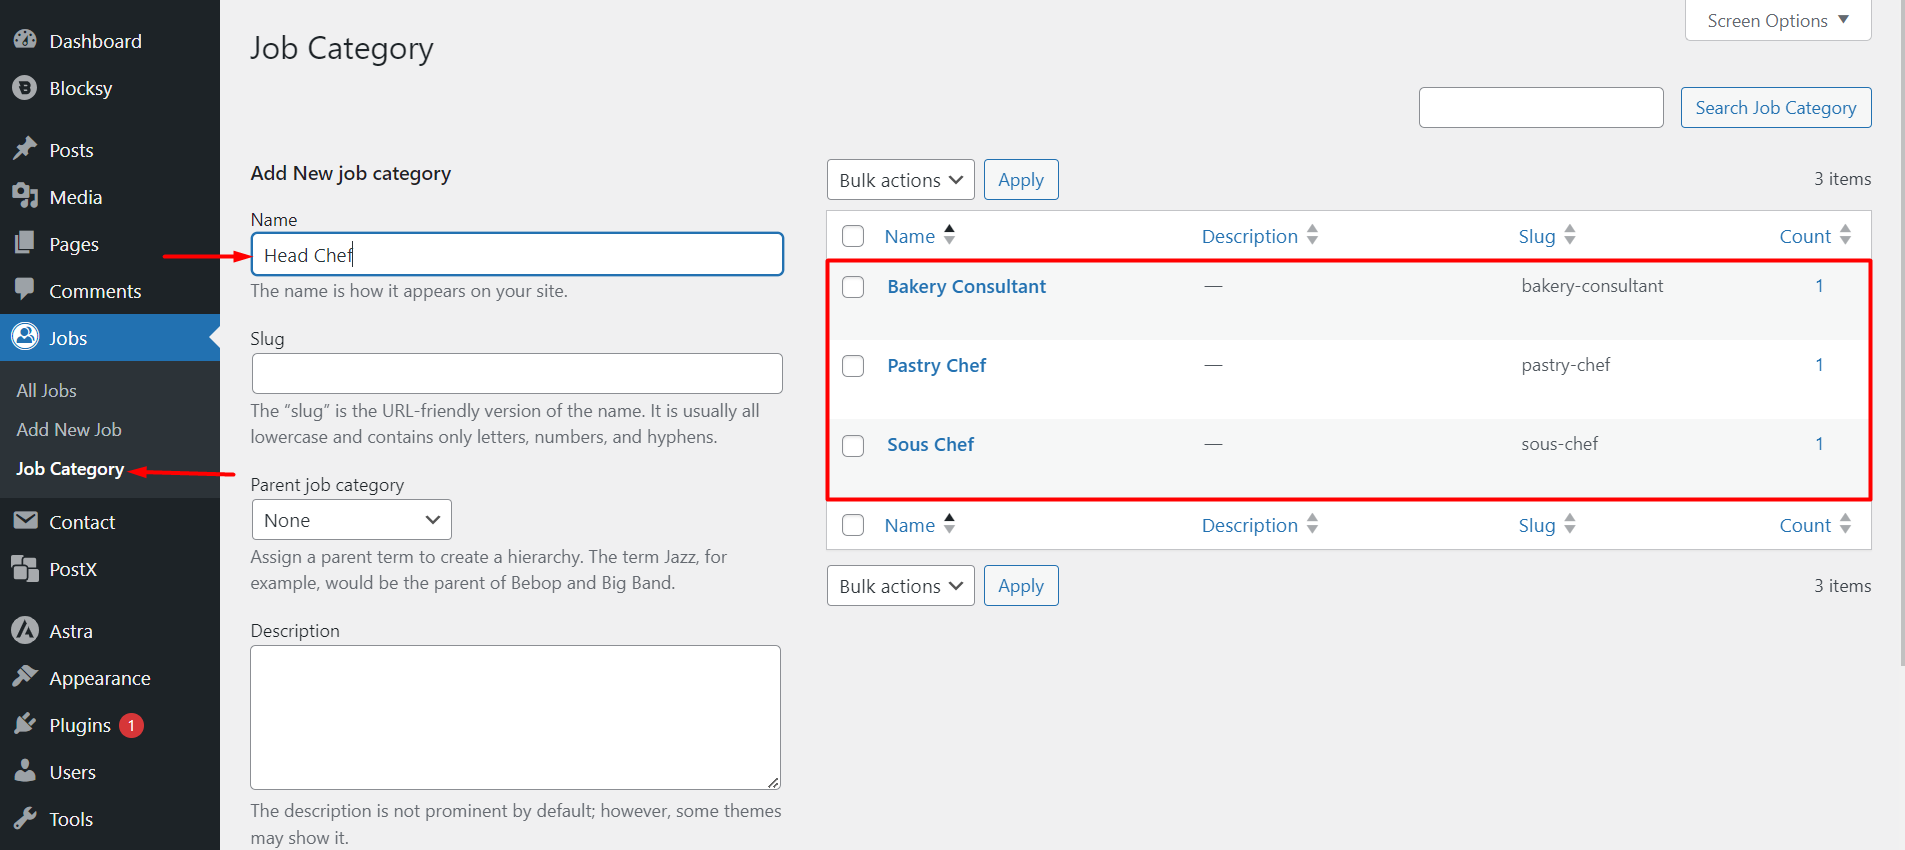
To create the categories for your post, you need to go to the custom post type – click on the taxonomy section.
For example, we created a taxonomy called ‘job categories’, under here, we will create different job post categories.
Using the PostX Dynamic Content with ACF
You can dynamically bring the data you created with ACF. You need to enable the dynamic content and dynamically bring the data to the custom posts.
Here’s an example:
- Create a page on the WordPress site
- Import the Post List Block
- In the PostX Query Loop, choose the custom post type (‘job’ in this case)
- Enable the dynamic content feature for the block
- Add the custom meta fields
- Save the changes
Here’s an example of how we did it:
Here’s how it looks on the front end:
Using the Dynamic Content with MetaBox and Pods
PostX Dynamic content has support for MetaBox and Pods. Creating the custom post type, meta, and taxonomies may be different. But pushing the data with PostX Dynamic Content is similar to working with ACF. Just creating the custom post types may vary from plugin to plugin.

