We are proud to introduce FSE (Full Site Editing) support with the PostX Dynamic Site Builder plugin. With PostX, you can work with themes like the 2023 WordPress theme, Neve, Bricksy Pro, etc. – all that have proper site editing support.
Here’s a quick guide to get you started with the concept using the ‘Twenty Twenty-three WordPress Theme’ and PostX.
Template Parts and Page Templates
If you are working with full site editing, you need to understand the concept of template parts and templates.
Template Parts
Template Parts are small chunks of a WordPress page that behave like reusable blocks. These are your headers, footers, sidebars, and other such parts of a page.
Note: To access these settings, you need to go to Appearance > Editor > WordPress dashboard. Also note that all FSE themes will have the “Editor”. You can also access the editor by going to Appearance > Themes > Customize.
You can make changes to them individually. If you change or update any part of a pattern (like a header template part for example), it will be updated on all the pages that have that particular template part.
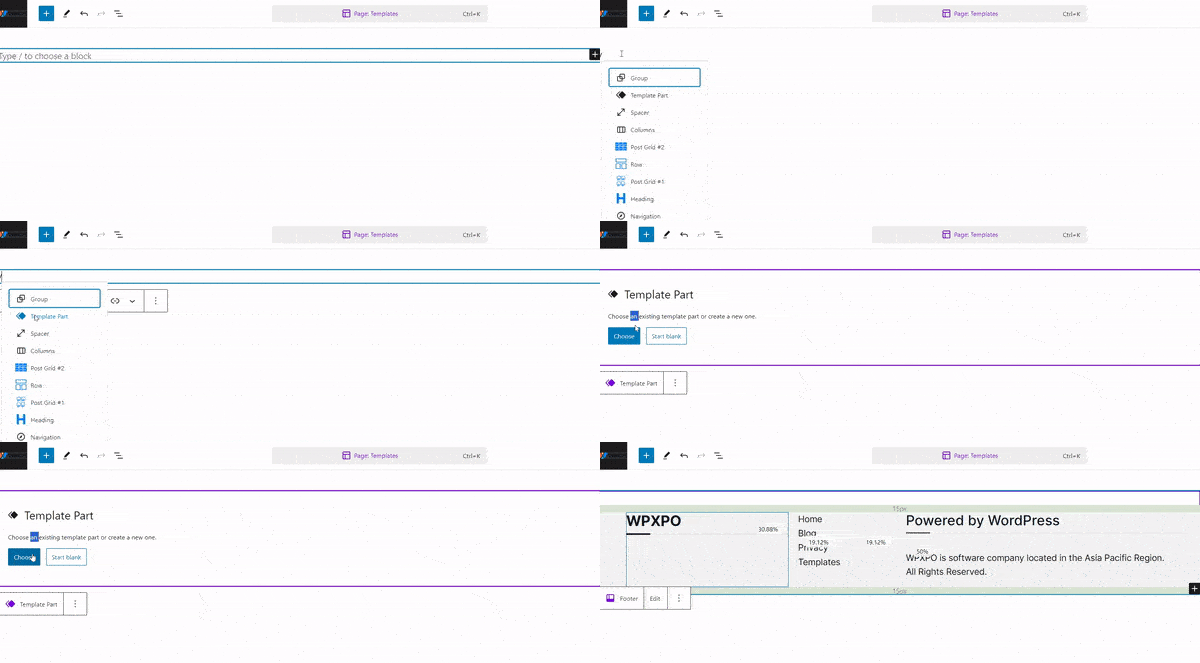
Note: When you are adding a header or footer to the page, you are adding it as a template part. Just search for “Template Part” in the default block library or use a forward slash to add a template part to a page.
Page Templates
Page Templates behave similarly to template parts. However, the fundamental difference here is the fact that page templates are used in pages.
For example, if you have a blank page where you want to show specific blocks with PostX, you can just use that template for the page. Then that page will have that particular template.
To add a new page template, you need to:
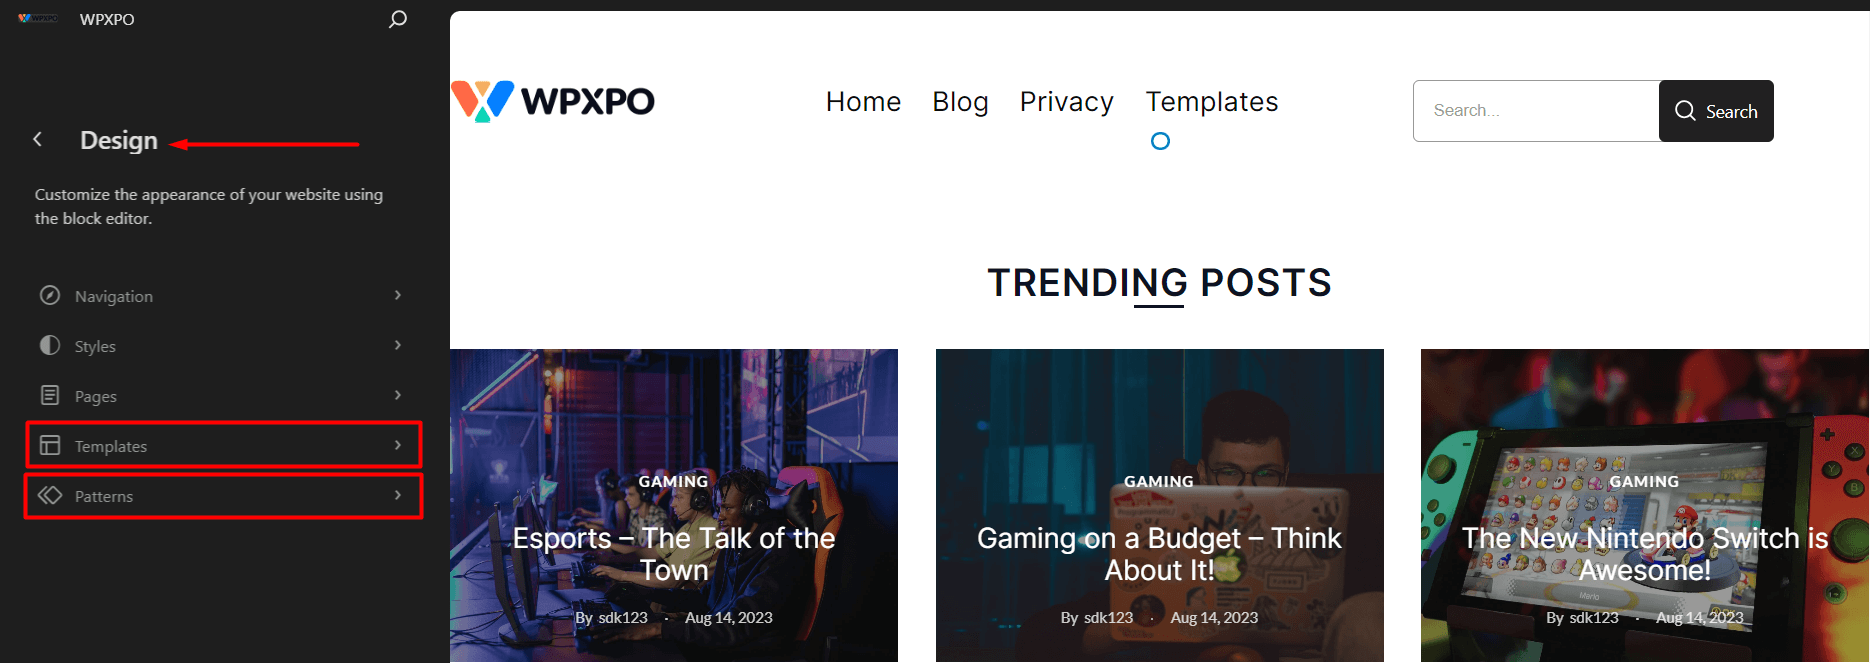
- Go to Appearance > Editor
- You are now in the Design Page. Click on Templates.
- You can use one of them or click on the “+” icon to add a new page template.
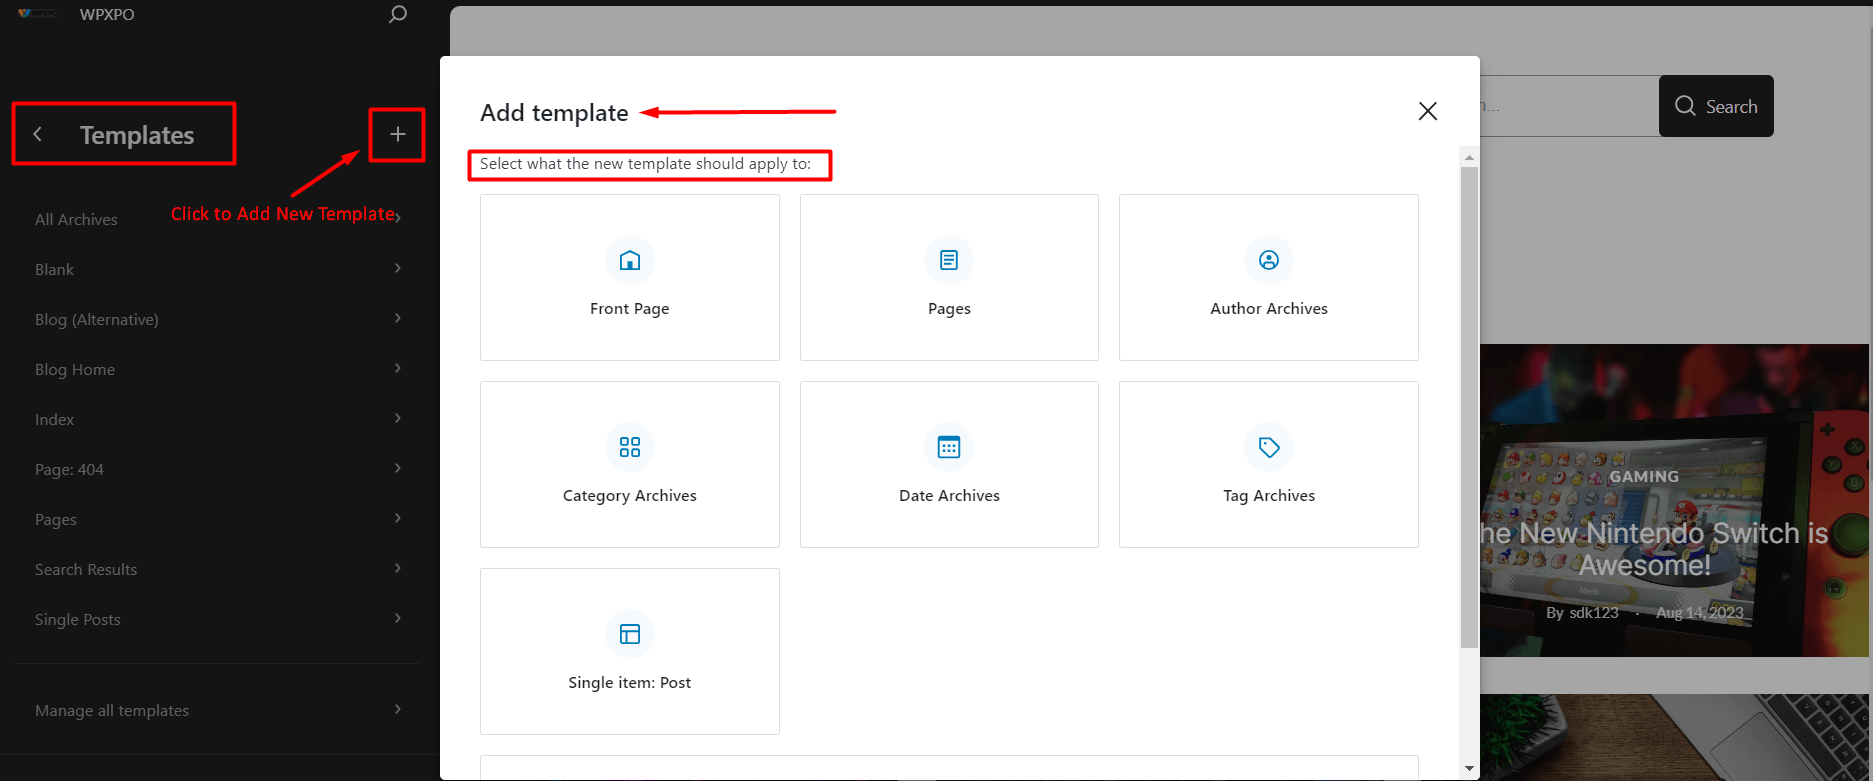
But the the ‘Twenty Twenty-three’ WordPress theme comes with a couple of default page templates. You can easily update one of them with PostX and add them to the pages where you want to show the specific designs.
Note: If you are using a new template, you will be prompted to use to a particular page. See the example below:
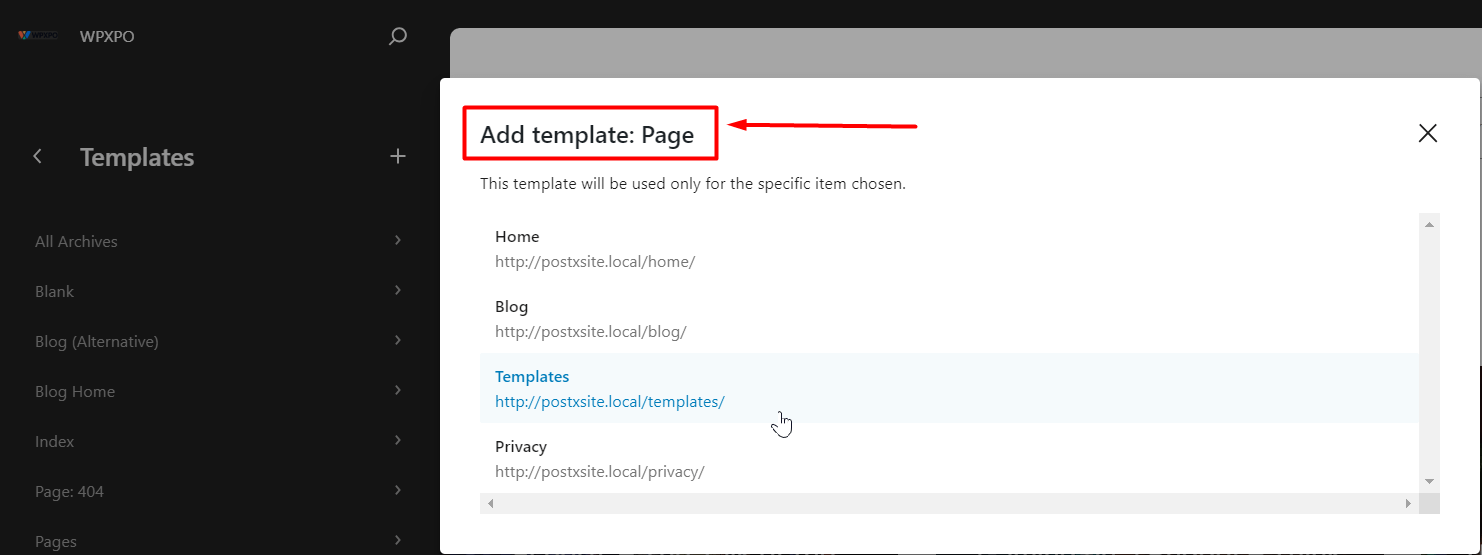
You may also be prompted to use a pre-made pattern to the new template. You can do so or add a template part.
Header and Footer Template Parts
The process of building a header and footer template part is quite similar. Do note that we are using the default header and footer patterns.
However, you can create a new template part and save it as a different header or footer design. If you click on the ‘+’ icon on the patterns page, you will have two options:
- Create a new template part
- Create a pattern
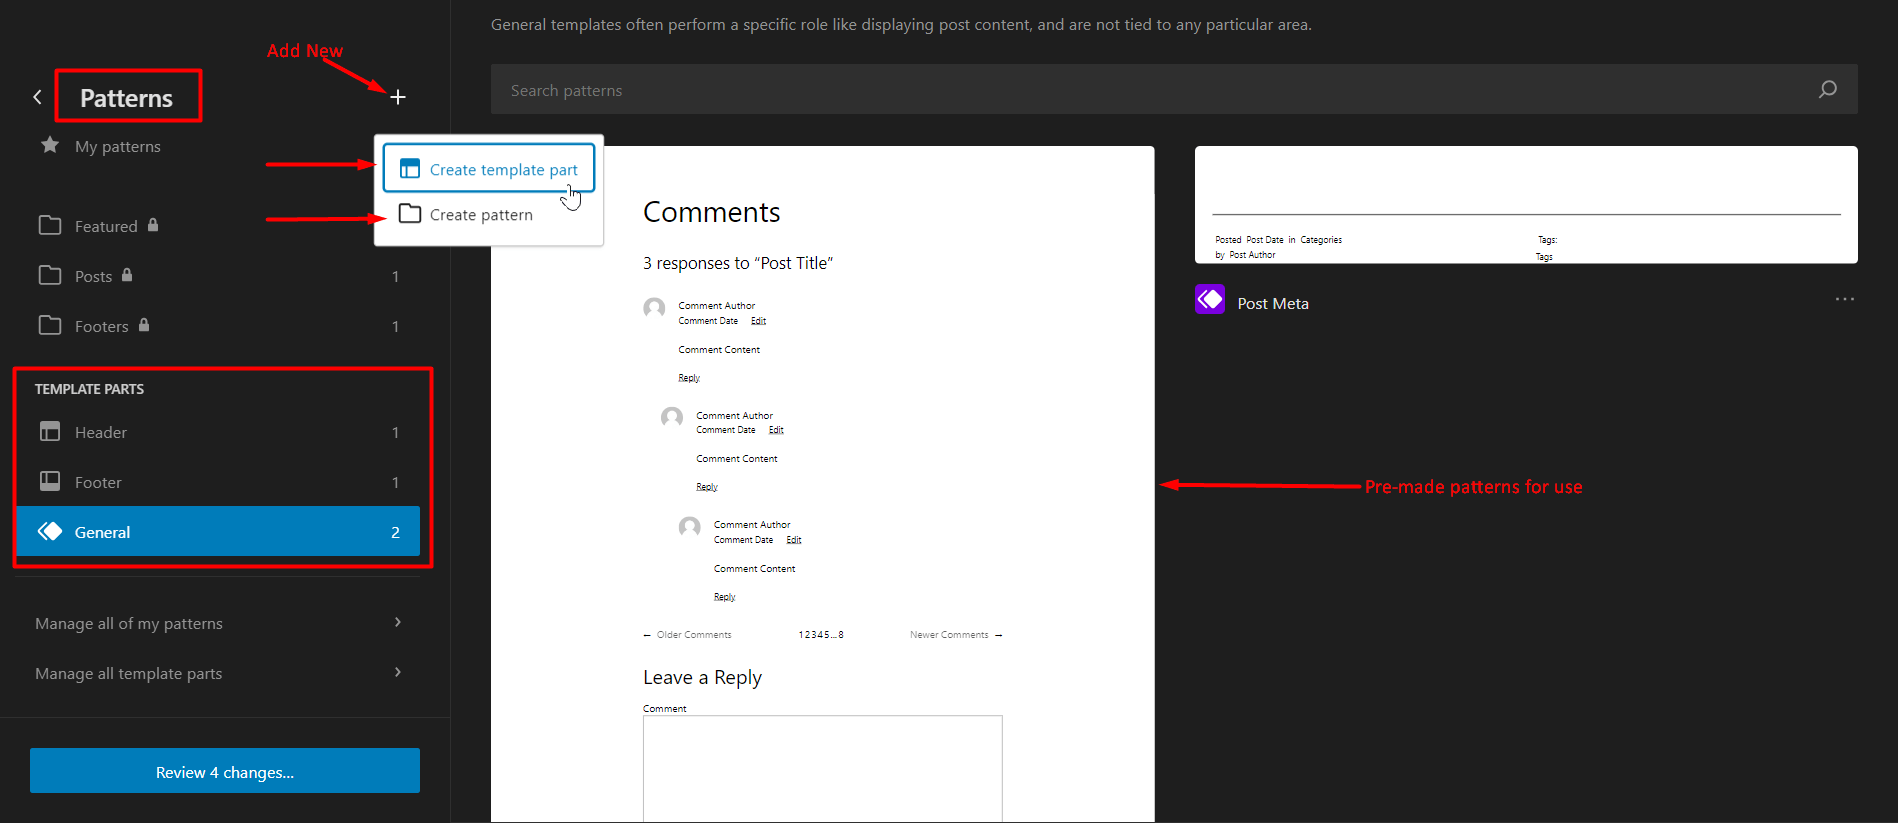
We will create a new template part to use on our blog page. Also, we are changing the default header and footer template parts using the PostX row block, search block, and other assets. We are also using the default logo and navigation block from the default WordPress library.
Adding the various elements is very simple. You can simply use the “+” icon from the left and search for the elements or use the forward slash (“/”) to add new elements directly to the page.
Here’s a quick demo to add the footer to a page template:
Building a Page Template [for Full Site Editing]
We will be configuring the default “Blank” Template from the templates library.
Just click on Design > Templates > Blank. The blank template will pop up to the right. You can click on the pen icon or click on the template itself to make changes to it.
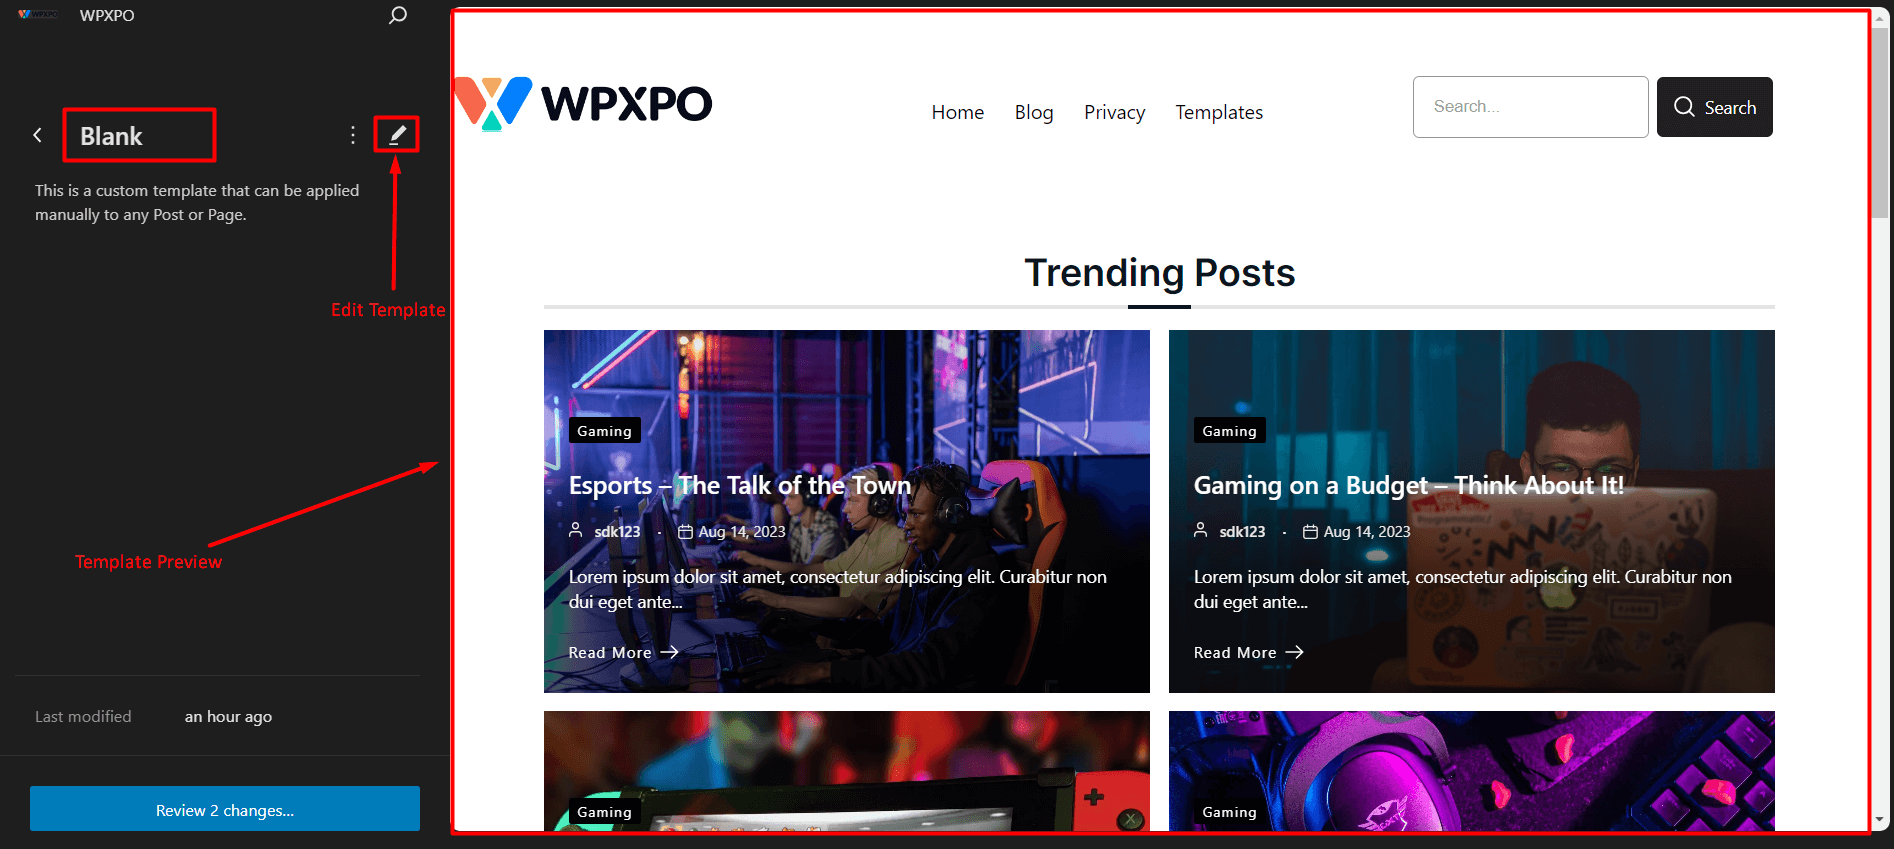
To bring the header and footer to the page, you need the template part block. It is a default WordPress block that comes with the latest version of WordPress.
Just bring the template block to the page template. You will have 2 options (Shown in the image above) :
- Create a new template part.
- Choose from the existing designs.
We will choose the header and footer we designed previously and add it to the page.
Then, we will add the PostX list and grid blocks to make the body of the blog. Here’s the final outcome:
Using the Page Template
It’s time to use the template for a page.
One way to do this is to go to Pages > All Pages and go to the desired page (we are using the blog page as an example).
If you don’t see the page settings, you can look for the “Settings” icon at the top right. However, the page settings should pop up by default.
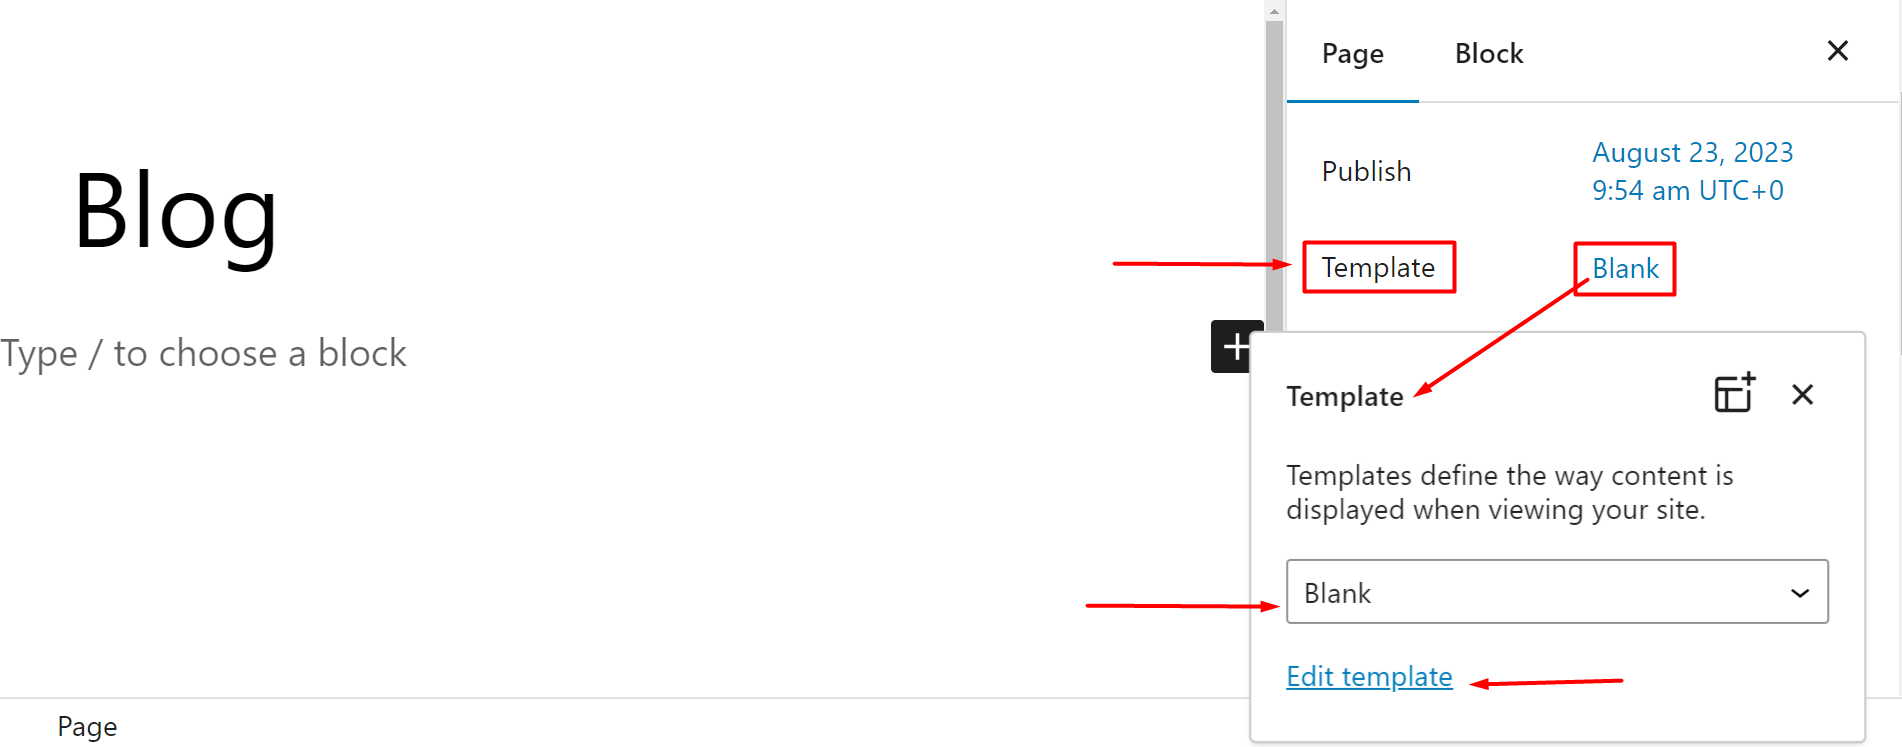
In the page settings, you will see the template option. Click on it and select the blank page template.
Now update the page.
Here’s how the page looks with full site editing support:
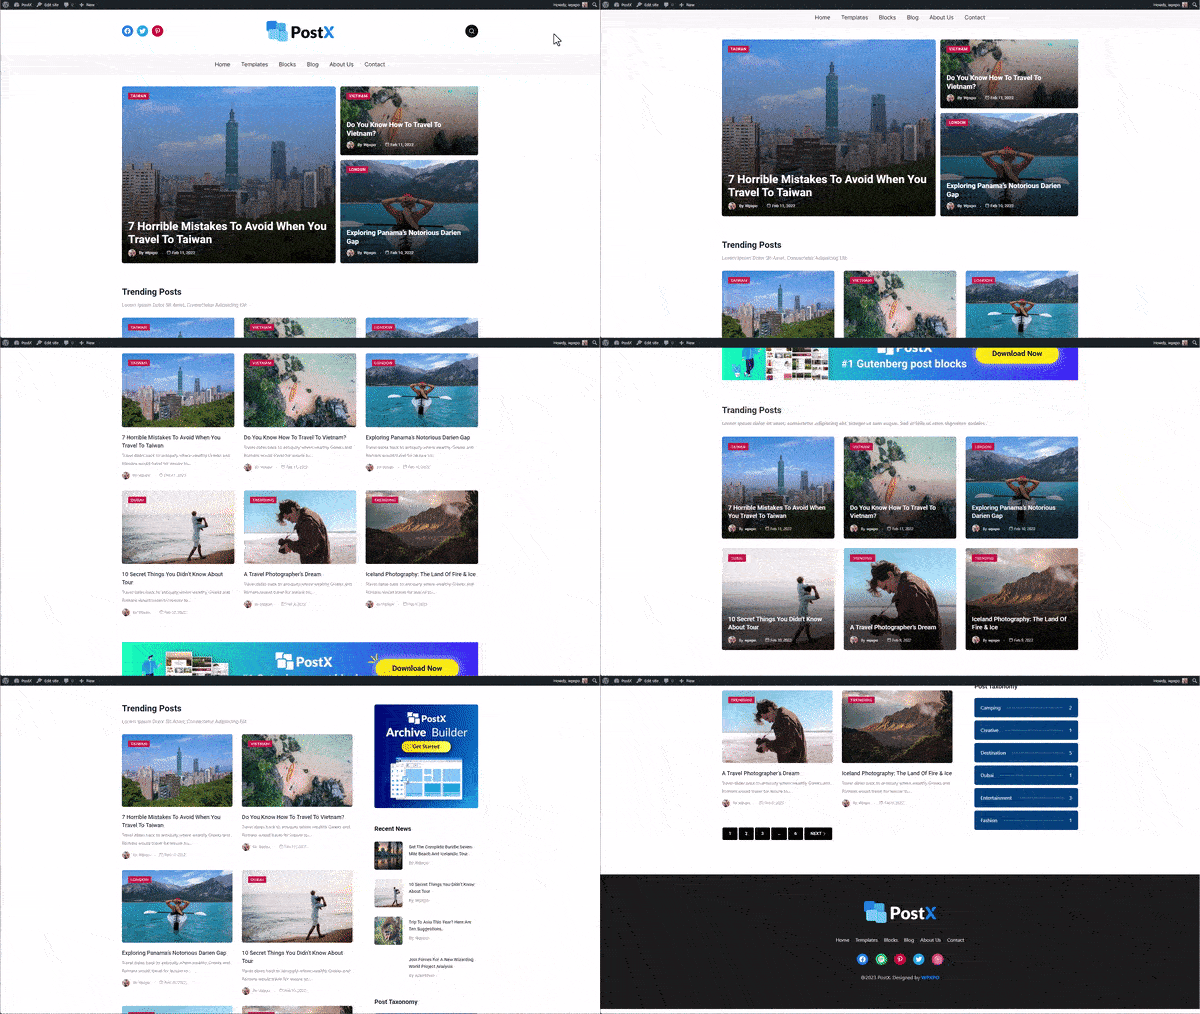
If you go to the front end, you will see the following page:
You can do it for new WordPress pages as well.
