Including pagination on your WordPress website is the simplest approach to make it possible for users to find and read your older content.
The Next and Previous links are automatically included towards the bottom of archive pages by most WordPress themes. The problem is that they aren’t particularly user-friendly, which is a limitation. Because of this, many popular blogs use plugins to add WordPress numeric pagination to make it simpler for readers to navigate the pages in their blogs.
However, using numeric pagination is recommended if your website has many entries. According to our findings, WordPress numeric pagination is not only simpler to use but also more attractive and search engine optimization (SEO) friendly.
You’ve arrived at the correct place if you’re interested in learning how to use numeric pagination in WordPress for your website. This section will demonstrate how to use WordPress numeric pagination in a very straightforward method.
Why Add WordPress Numeric Pagination?
Most themes come equipped with an archive page that lists all the content. As you continue to publish new blog entries using WordPress, the archive page will eventually cover numerous pages.
Links to the next and previous pages in an archive are known as pagination links, and they may often be found at the very bottom of a WordPress website.
When it comes to pagination, several WordPress themes make use of links labeled “Older posts” and “Newer posts.” However, the visitor can only navigate ahead or backward by one page due to this.
Additionally, it does not display where the visitor is within the archive when accessing it. Visitors to your site may need help exploring your blog’s archive. The use of WordPress numeric pagination is necessary at this point.
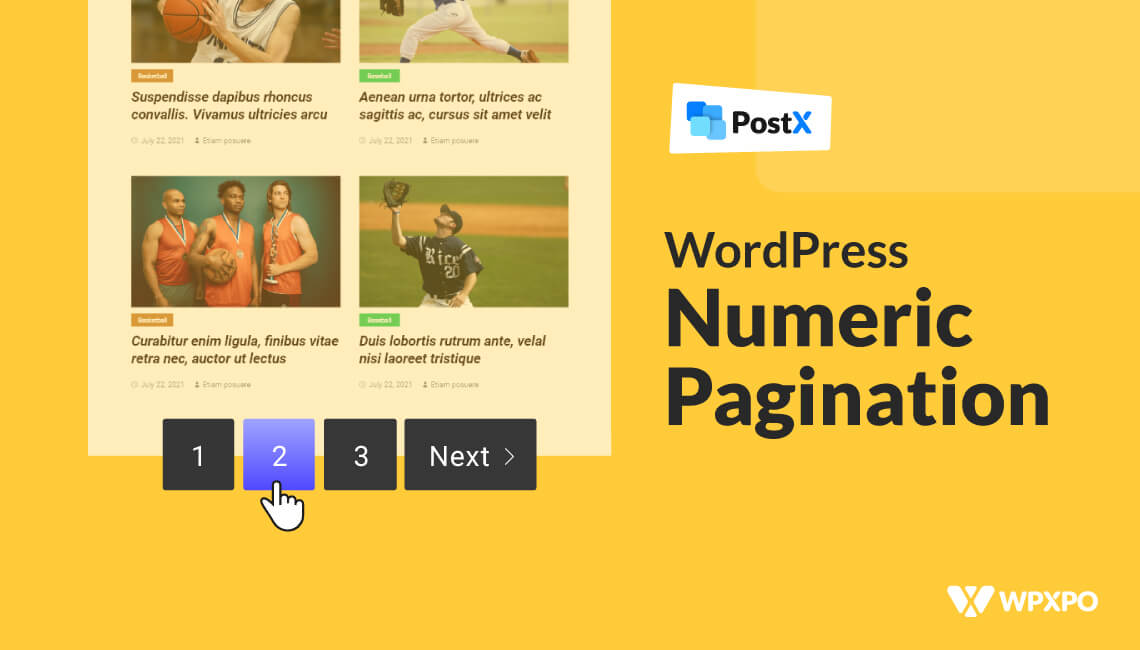
Instead of displaying links labeled “Older” and “Newer” or the WordPress Load More button, numeric pagination displays a sequence of numbers that users may use to go directly to the desired page inside the archive.
To ensure that the visitor is constantly aware of where they are located within the archive, numeric pagination can additionally use highlights or various colors to indicate the current page number.
How to Add WordPress Numeric Pagination
Following three simple steps, you can add numeric pagination to your existing site.
Step 1: Install PostX
From the WordPress dashboard, go to the plugin section and Click on add new button. Then type “PostX” on the search bar, and click “install.” Then click “active,” and the plugin will be ready to use.

Step 2: Create A New Page or A Dynamic Template
To use numeric pagination, first, you need to create a page. You can do it from the default WordPress menu or PostX dynamic site builder.
To create a page with the default WordPress menu:
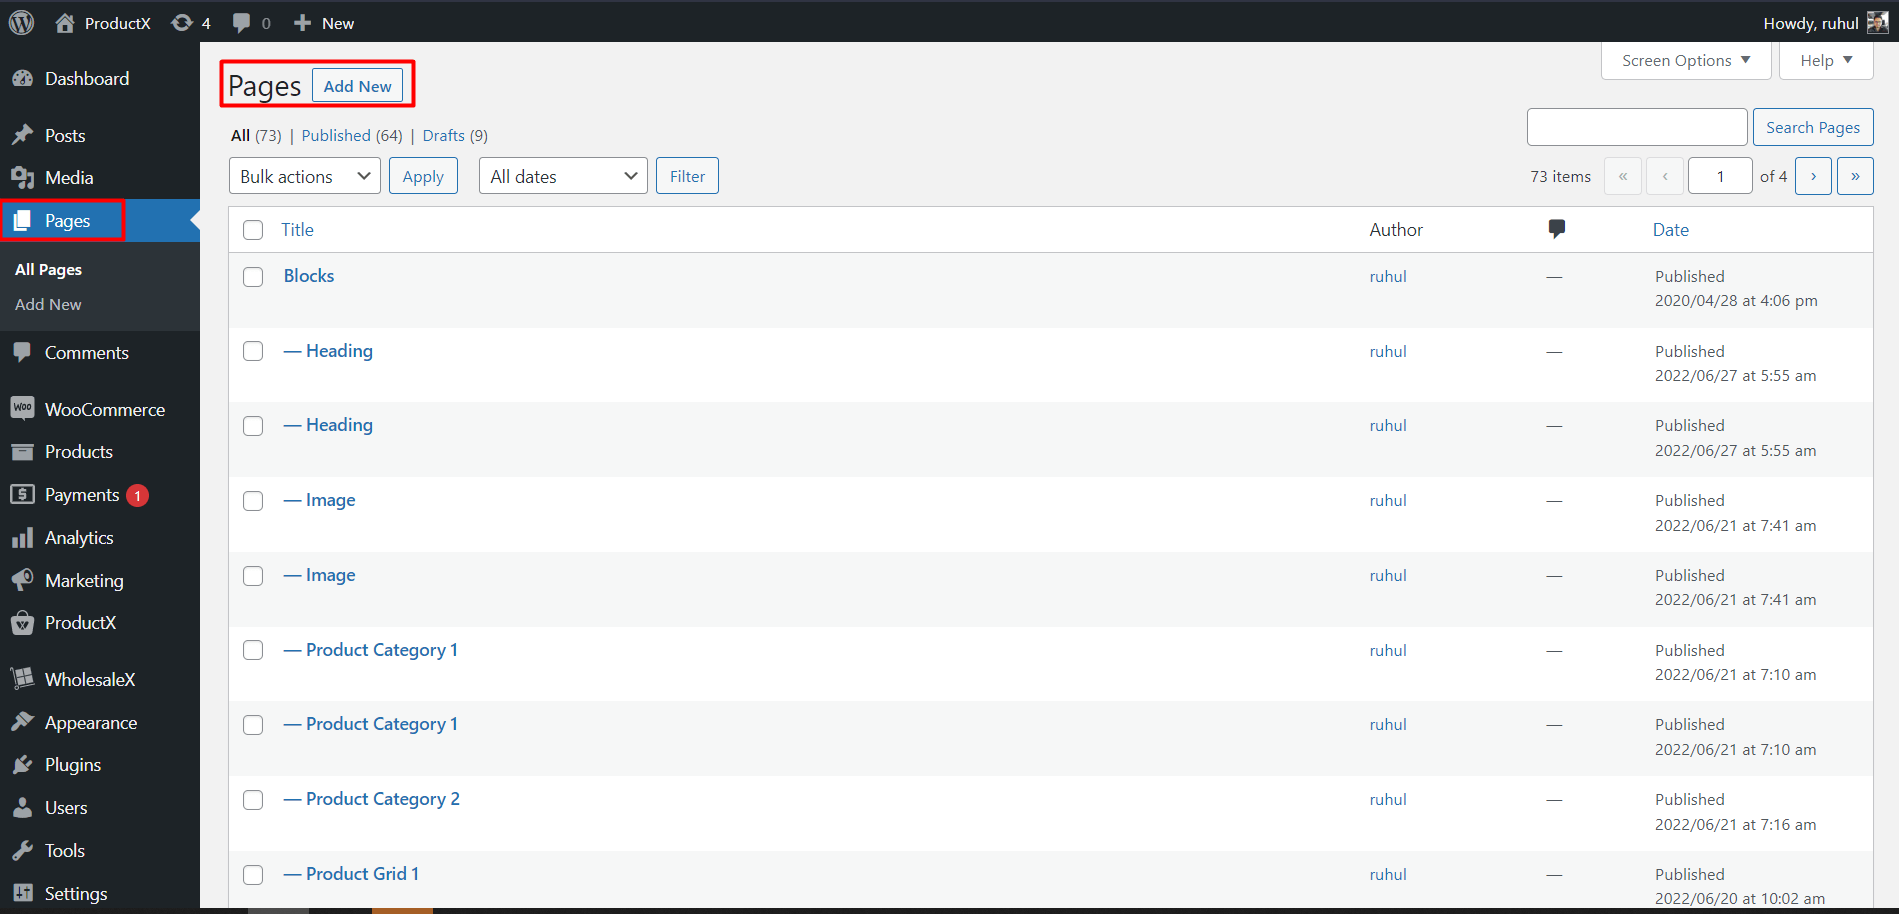
1. From the WordPress dashboard, go to Pages and click add new.
2. Then, add the post blocks or import premade templates offered by postX.
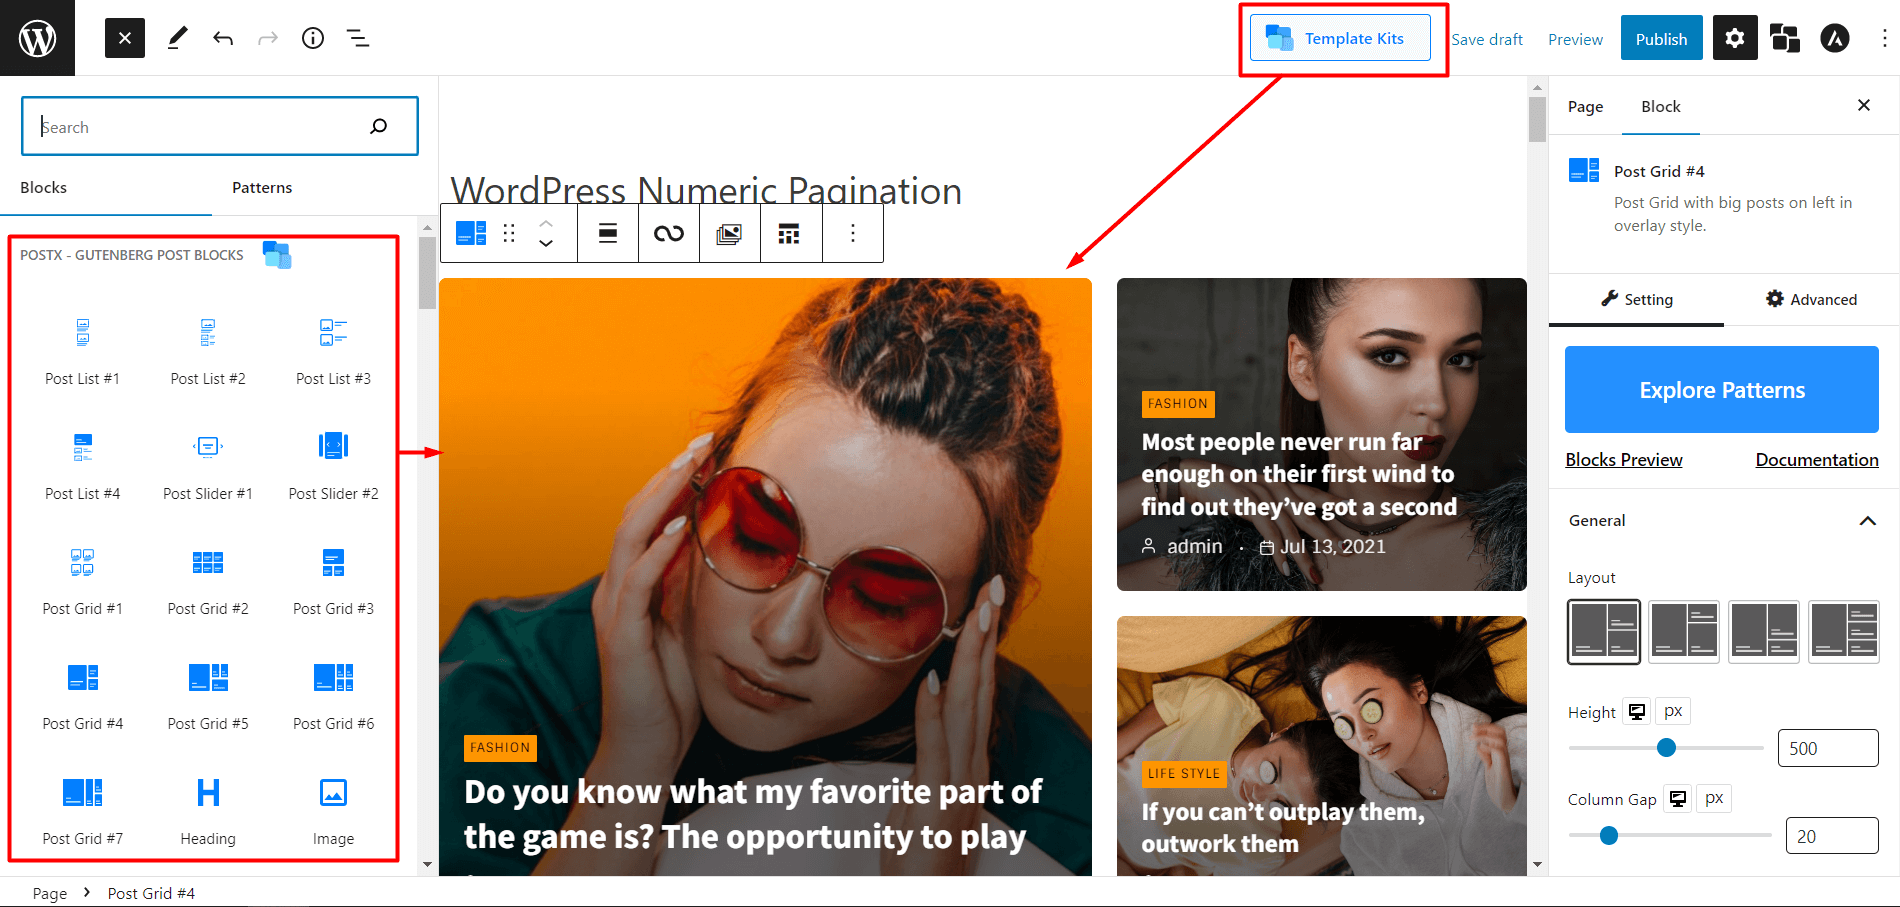
To create a page template with a dynamic site builder:
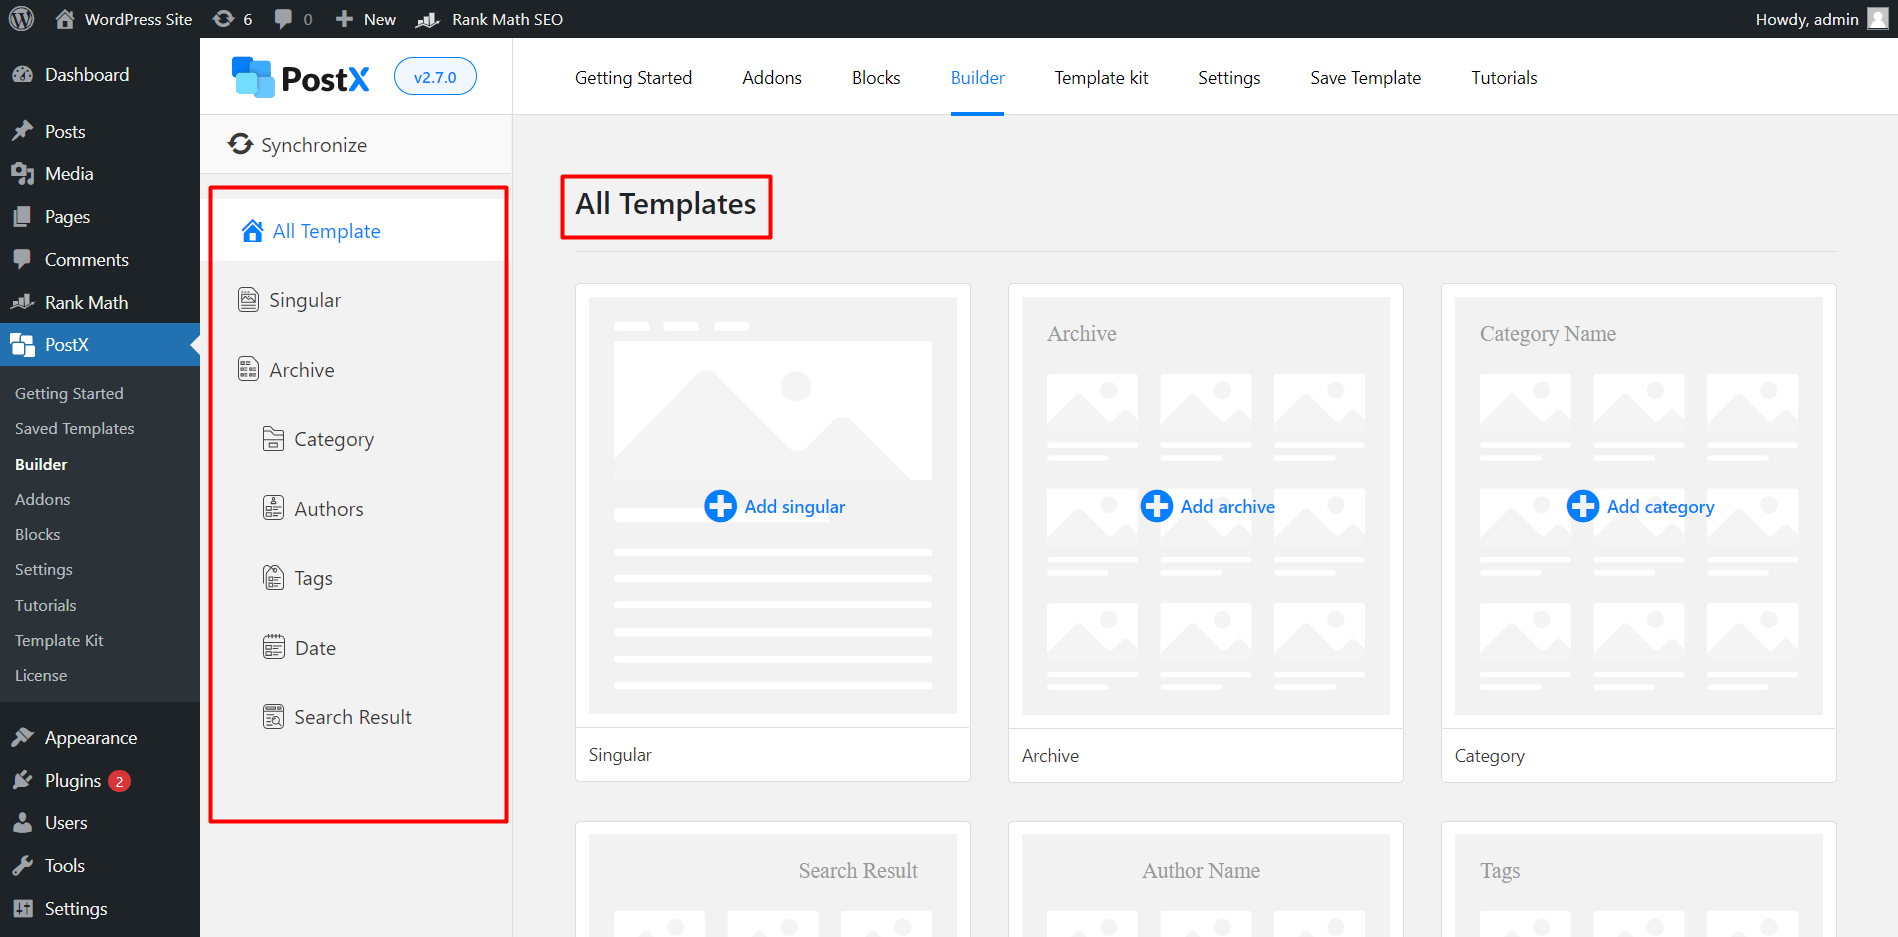
You can create all of the pages templates with PostX Dynamic site Builder including Archive/Category/Search Result/Author/Tag/Date.
However, for now, we will create a custom category page template.
1. From the WordPress dashboard, select PostX and then go to the site builder.
2. Select Add Category.
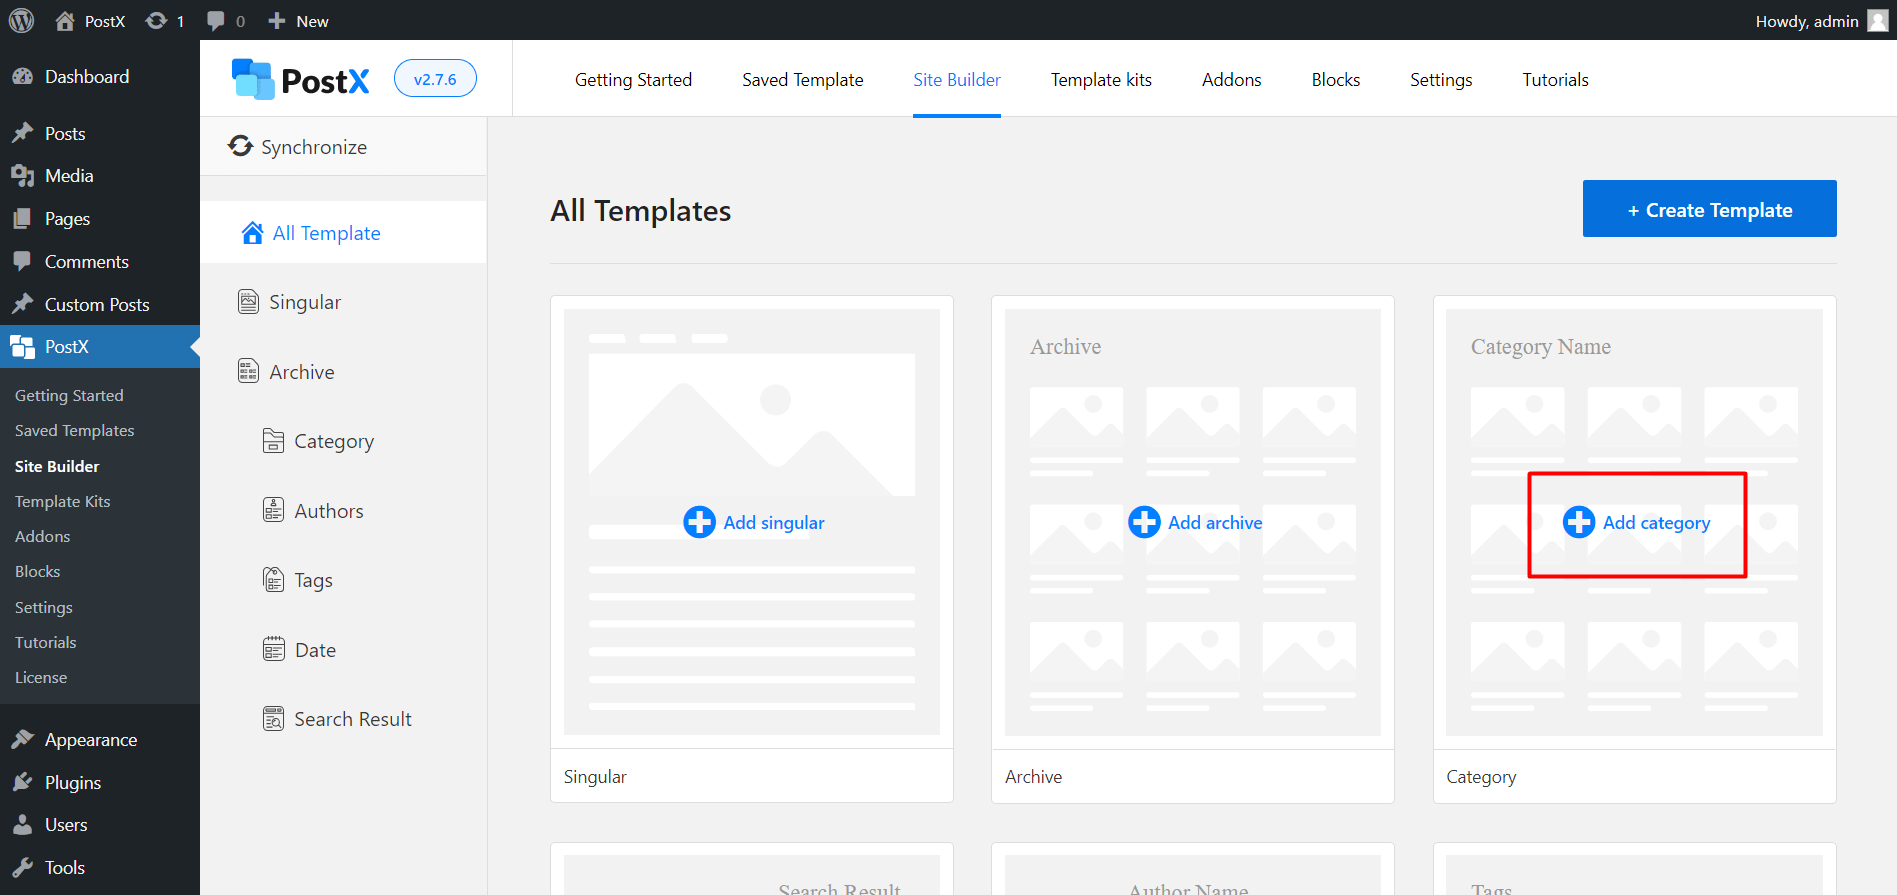
3. Then, Select start from scratch and add the post blocks or import premade templates offered by postX.
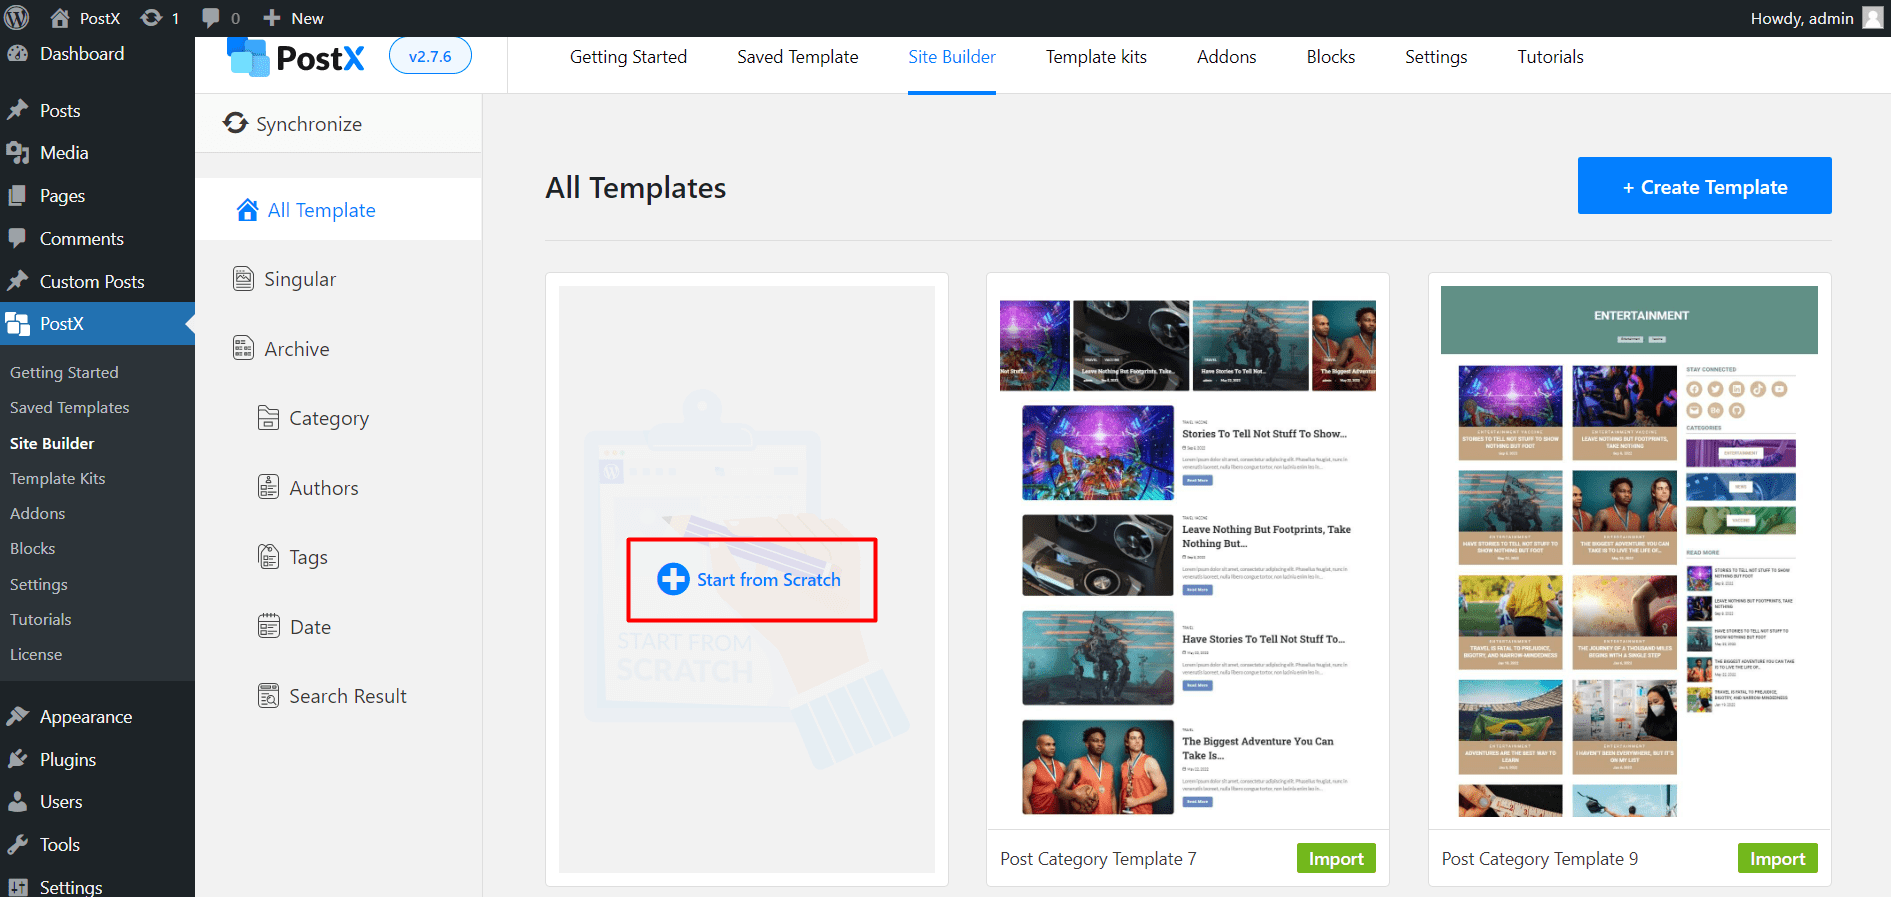
[N.B All premade templates consist of post blocks by PostX, and hence you will be able to add numeric pagination in it.]
And you’re done with the prerequisites to adding numeric pagination.
Step 3: Add Numeric Pagination
Before telling you how to add numeric pagination, let’s not forget to mention that PostX offers AJAX pagination. Adding numeric pagination with PostX is easier than you can imagine. Also, PostX provides other types of WordPress pagination rather than just numeric.
All you need to do is:
1. Select the post block you want to add the pagination.
2. Now, go to settings (right panel). And scroll until you see pagination.
3. Tap the toggle bar of the pagination settings to enable it.
4. Click on pagination to expand the dropdown menu.
5. In the pagination type, select pagination for numeric pagination.
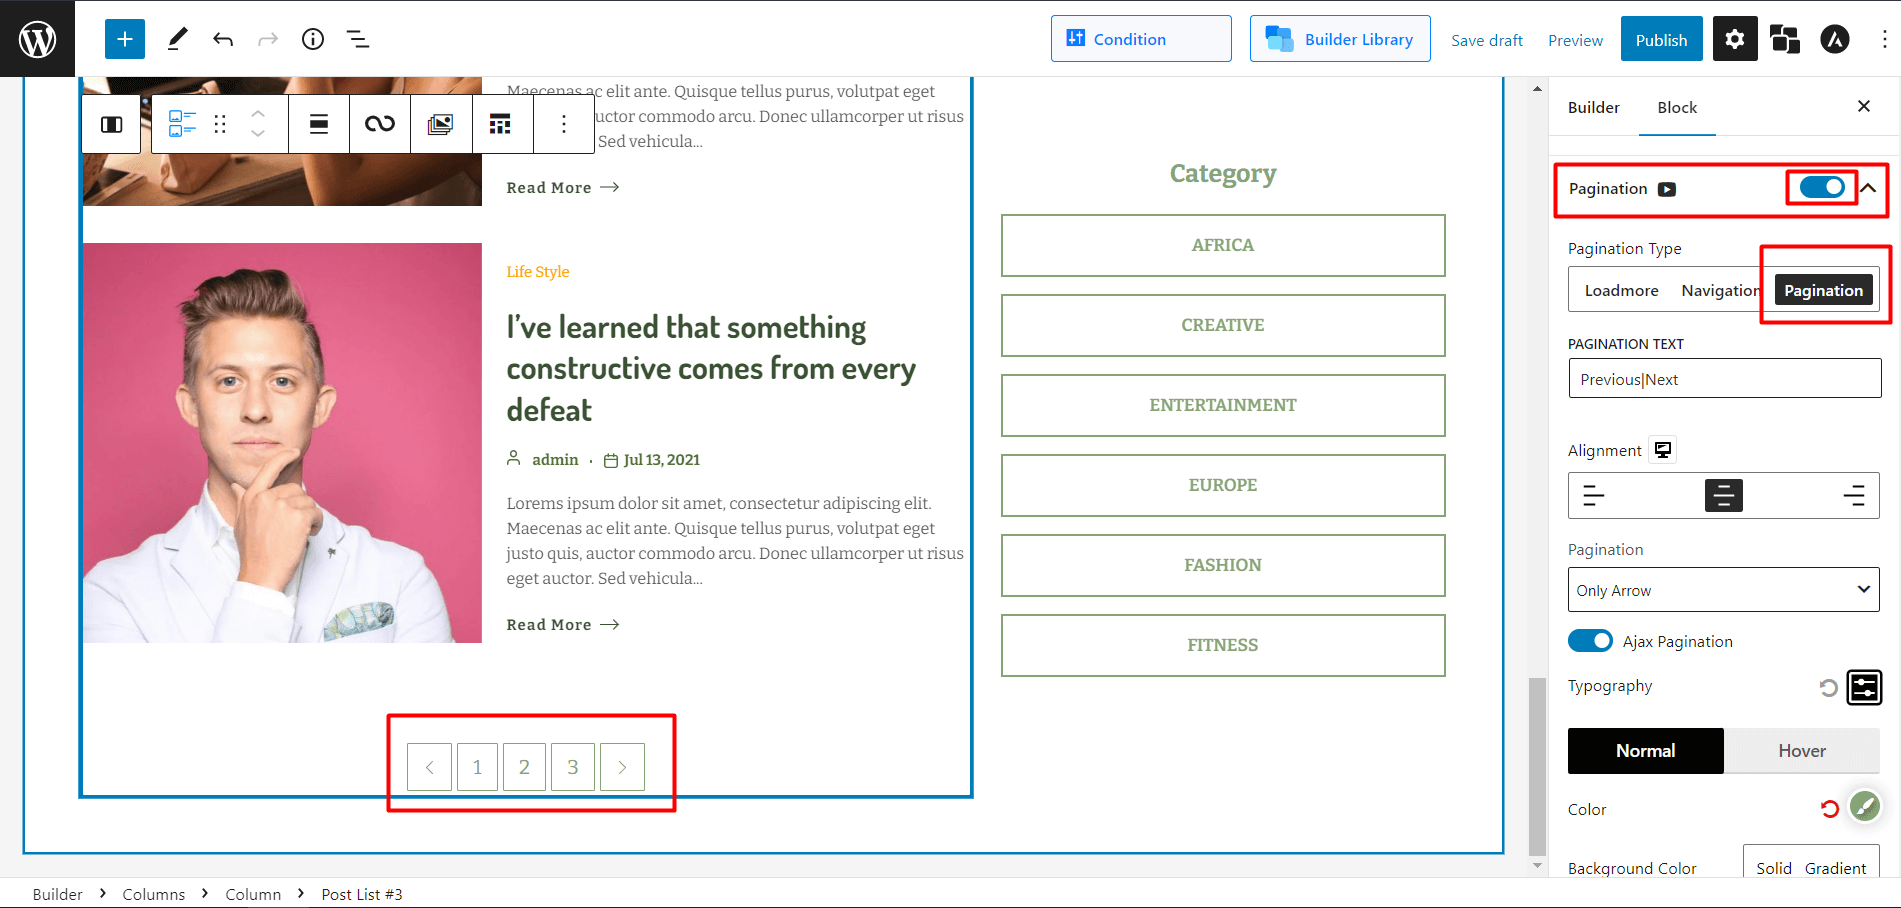
And you have successfully added a numeric pagination on your page.
Step 4: Customize the Numeric Pagination
If you are a PostX user, you already know how much customization it offers. But if you are new to PostX, allow us the time to show you some fantastic customization options it provides.
So, when adding the numeric pagination to your page, you must see other options.
Changing Texts:
If you want to change your texts of Previous/Next, you can do it in the Pagination text box.
Type your desired texts, emojis, or symbols, and separate them with a vertical bar ( | ). Any text on the left side of the vertical bar will show on the very left of the pagination and vice versa.
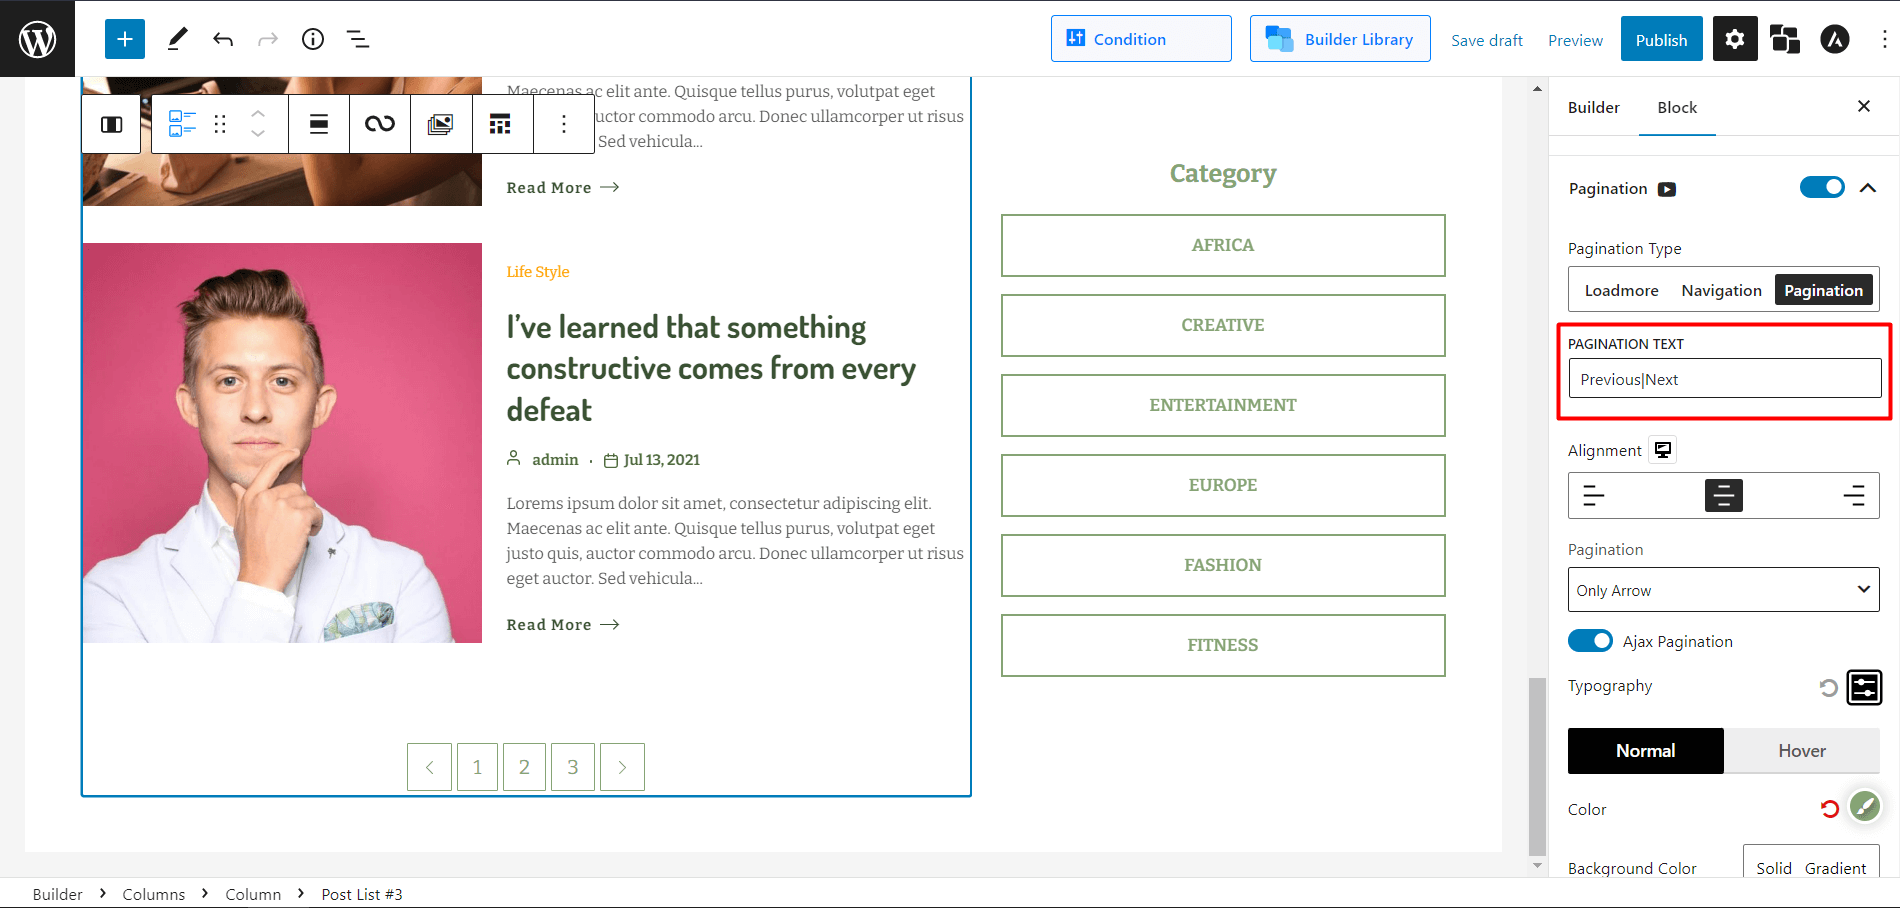
[N.B the default text is Previous|Next]
Changing Alignments:
You can also change the alignments depending on your page design.
In the Alignment option, you can select left/mid/right to show your pagination accordingly.
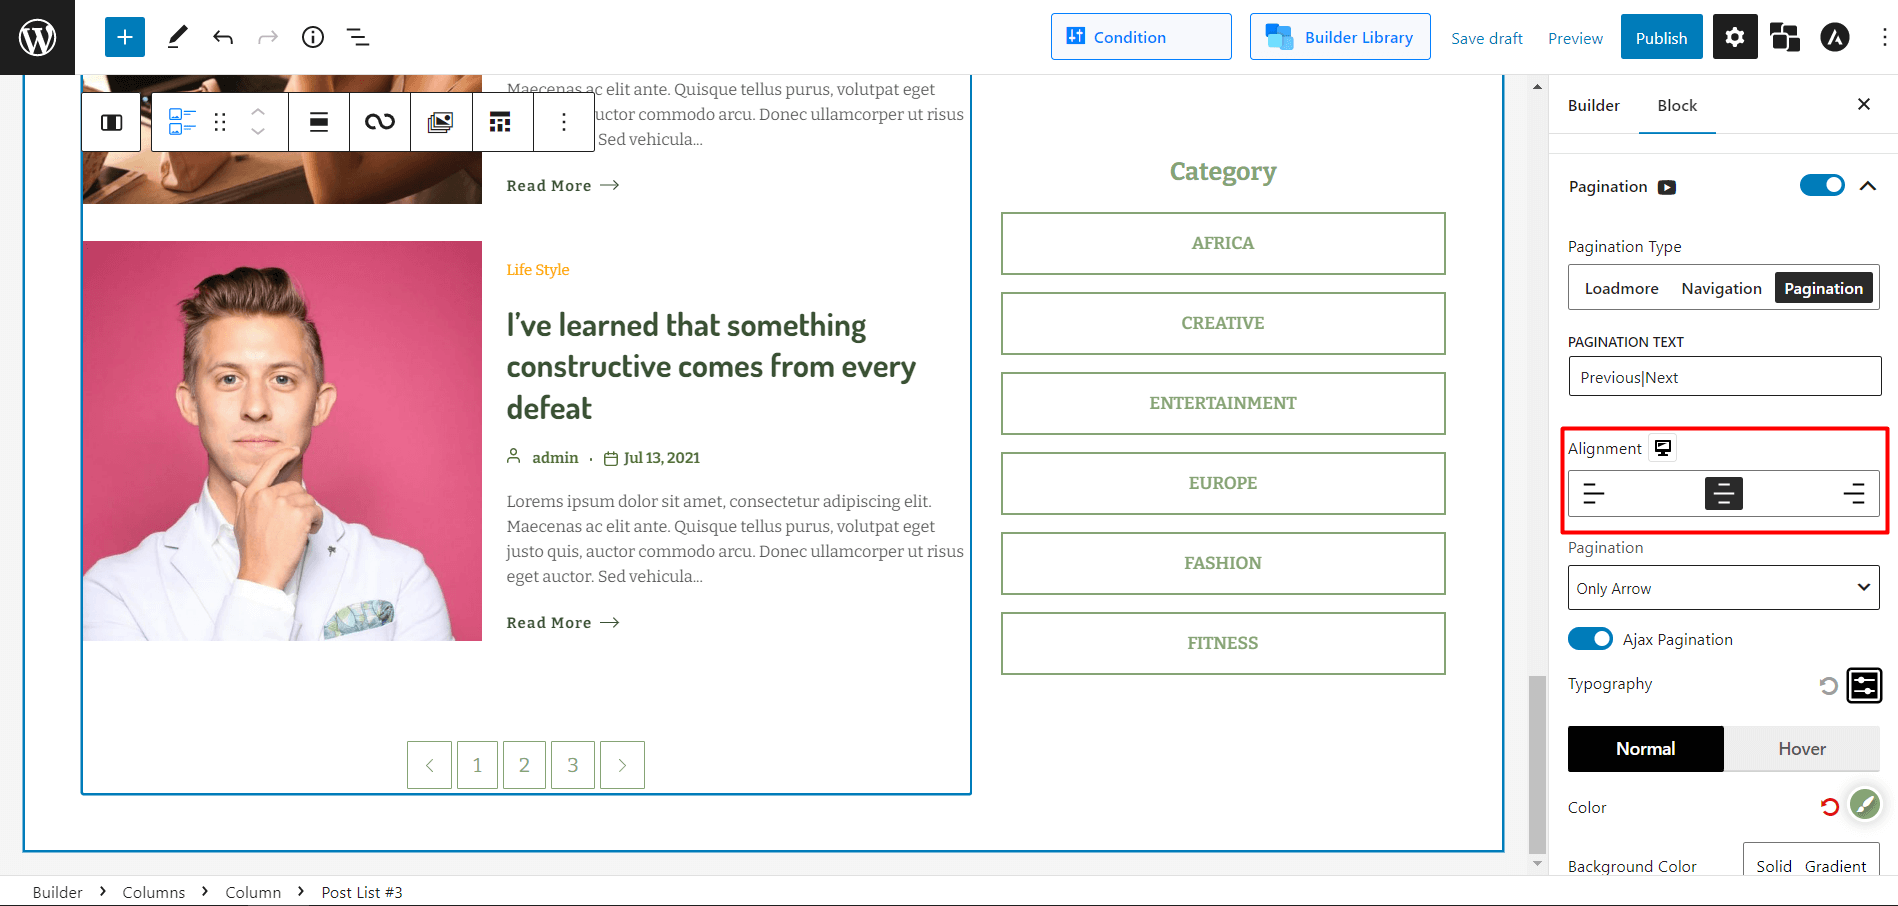
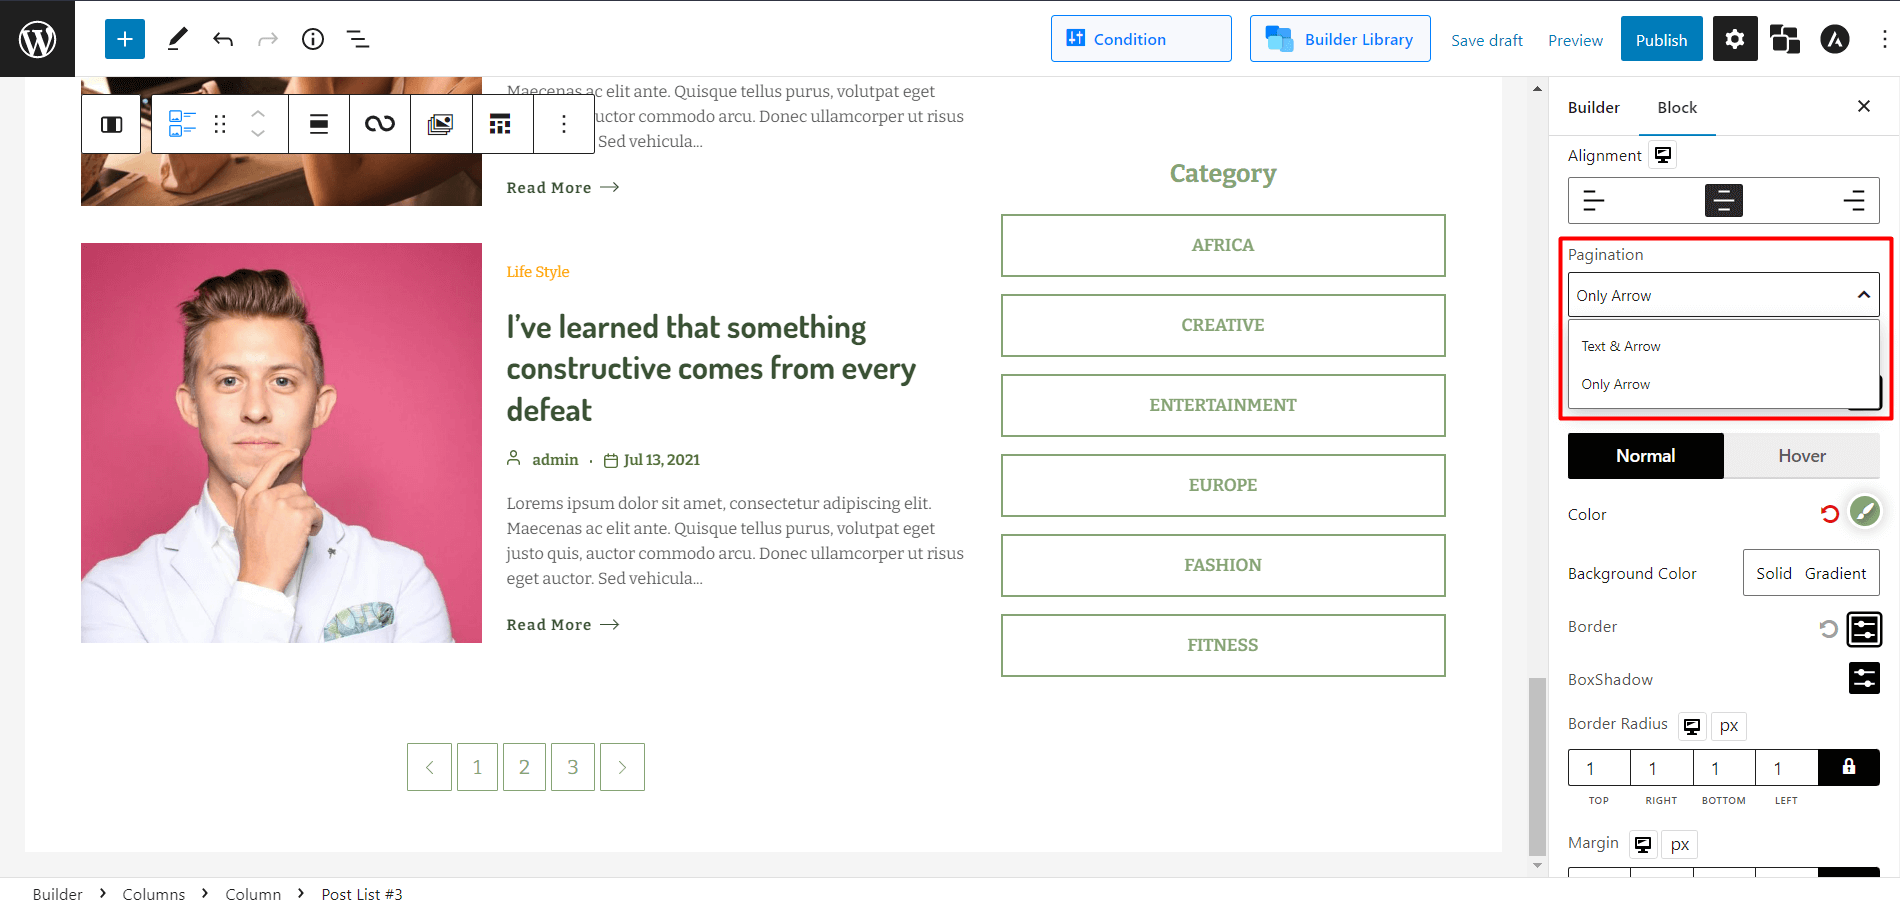
Show/Hide Text or Arrow:
If you want to show only texts beside arrows or just the arrow and not the text, you can do it with PostX.
In the Pagination dropdown menu:
Select Text & Arrow to show both text and arrow in your numeric pagination bar.
Select Only Arrow to show just the arrows in your numeric pagination bar.
Change Typographies:
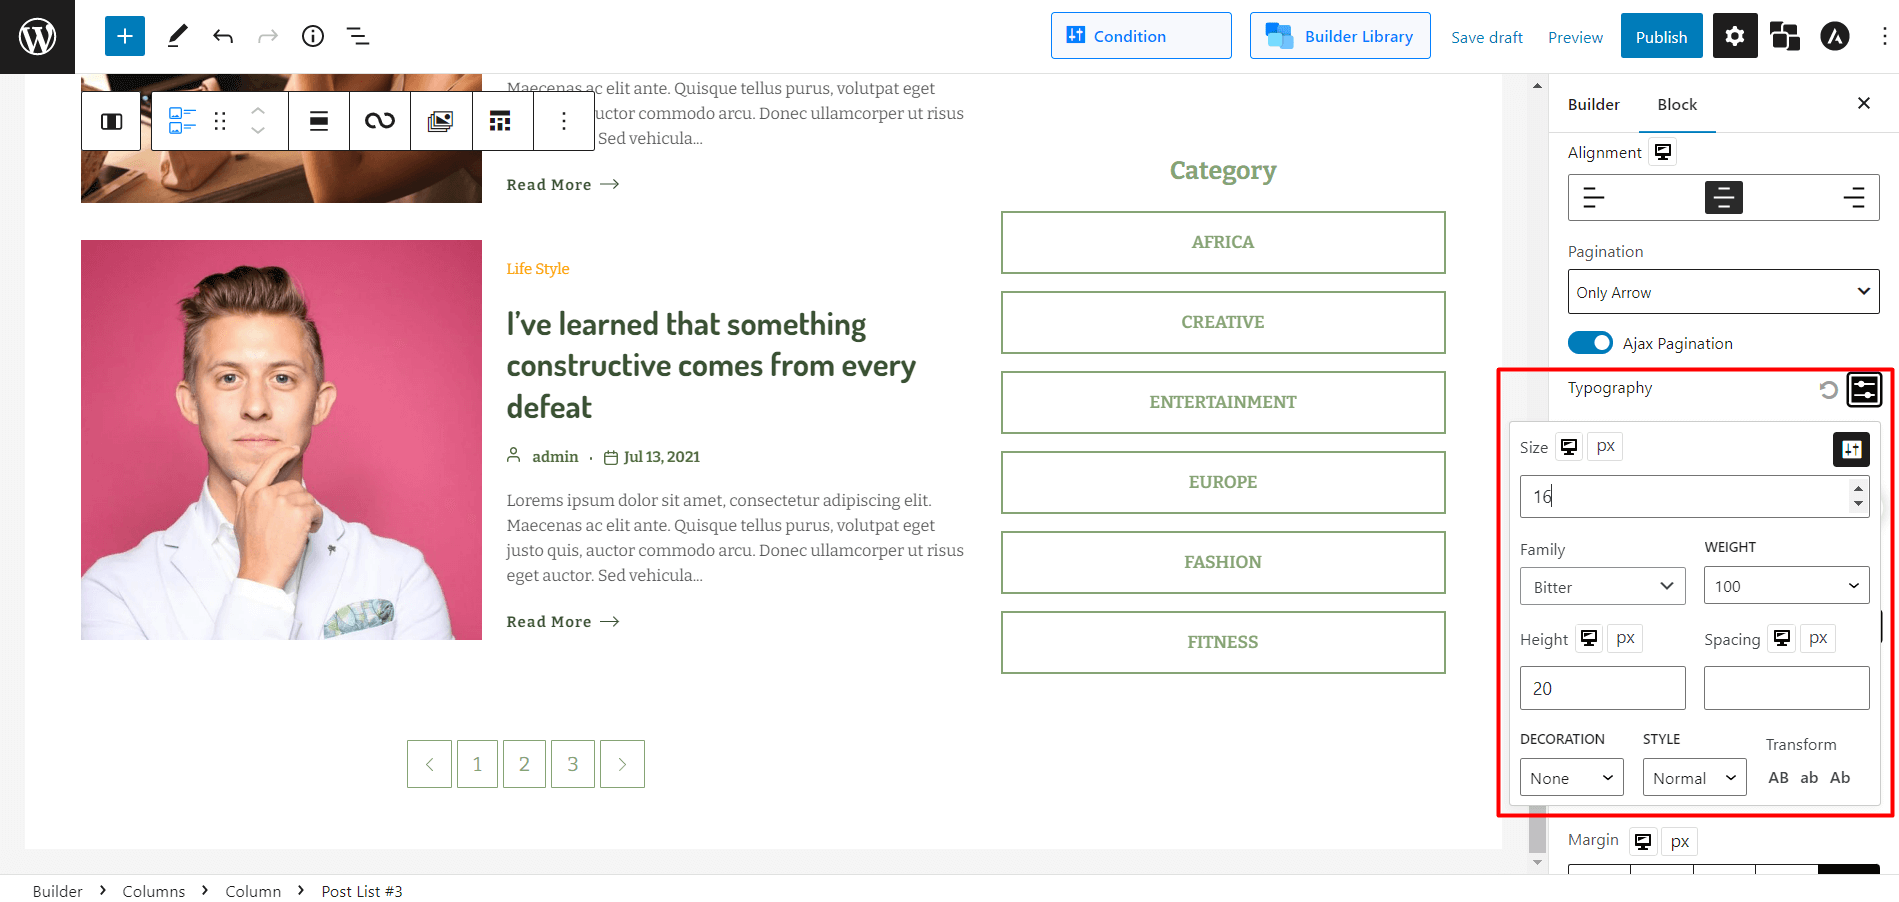
To create a perfectly designed website, you need the perfect typographies that go alongside. PostX serves you just that.
Click the icon to open the typographical settings menu in the Typography settings. From here, you can:
- Change the size of the numeric pagination bar.
- Change fonts.
- Customize Weight, height, and spacing.
- Change the text decoration (Inherit/Underline/Overline/Line Through).
- Pick styles (Italic/Oblique/Initial/Inherit).
- Transform Texts to upper/lower/capitalized cases.
Change Color:
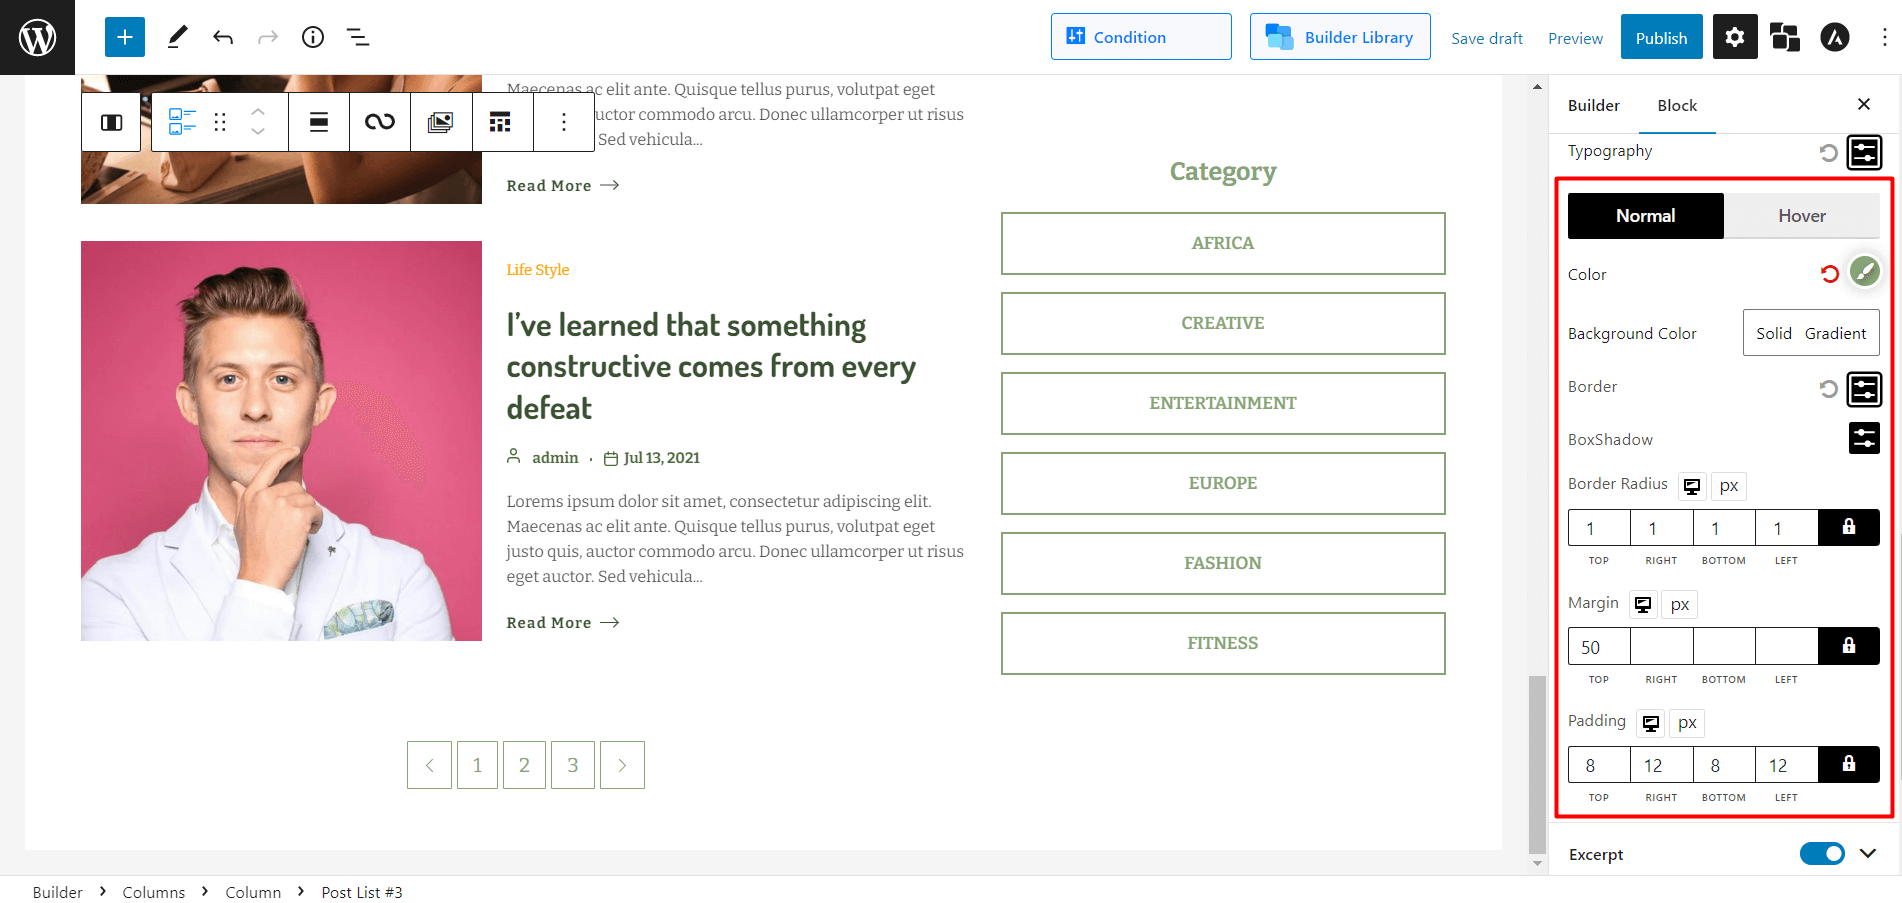
PostX also provides options to modify color, background color, border, box shadow, border radius, margin, and padding for both default and hover. PostX has a color picker when you select the solid or gradient option to choose your desired color. Also, it supports hex codes.
So, now you have a complete overview from adding a numeric pagination to customizing it accordingly.
Conclusion
PostX has a proper pagination function. The WordPress numeric pagination has been upgraded with many new features to give you complete creative control over its usage and ensure it fits seamlessly with your site’s aesthetic. Use it well and enhance the curb appeal of your site from the core.
You can check out WordPress video tutorials on our YouTube Channel. Also, find us on Facebook and Twitter for regular updates!
