For WooCommerce store owners, building customer trust is essential in today’s competitive e-commerce landscape. A highly effective method to achieve this is through the use of sales push notifications.
Studies have shown that push notifications can attain open rates as high as 90%, and this impressive statistic applies to sales push notifications as well.
These real-time sales alerts not only inform customers about current purchases but also enhance trust. When visitors observe that others are buying a product, they gain increased confidence. This converts more visitors into loyal customers.
This article will guide you, step-by-step, on how to set up live sales notifications in WooCommerce. Let’s dive in!
What are Live Sales Notifications?
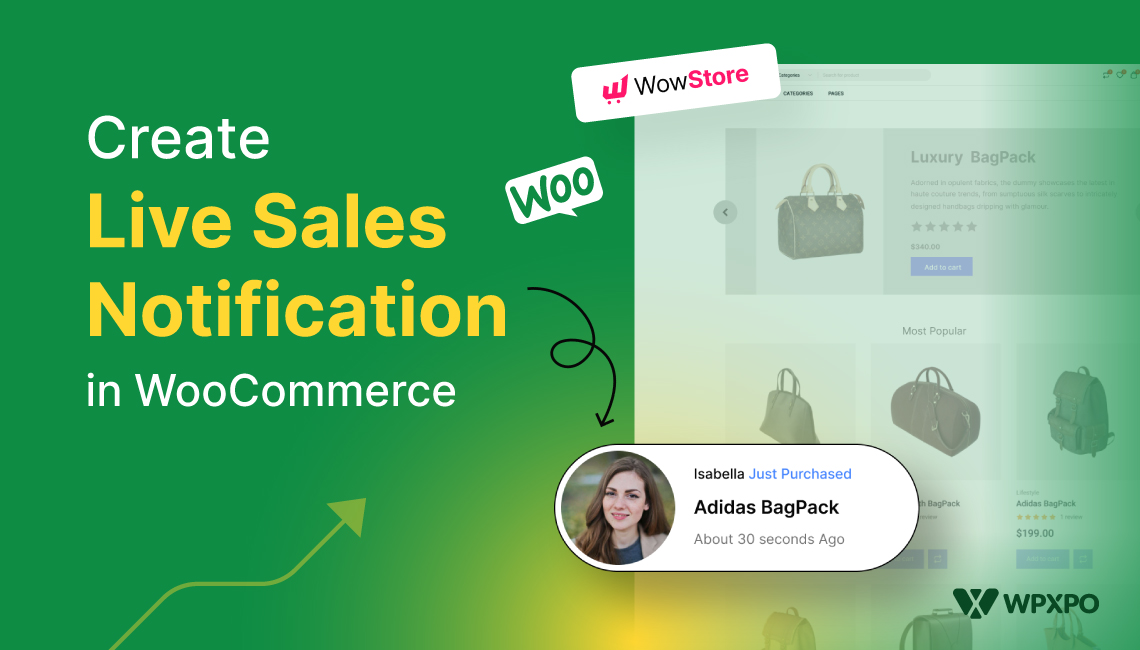
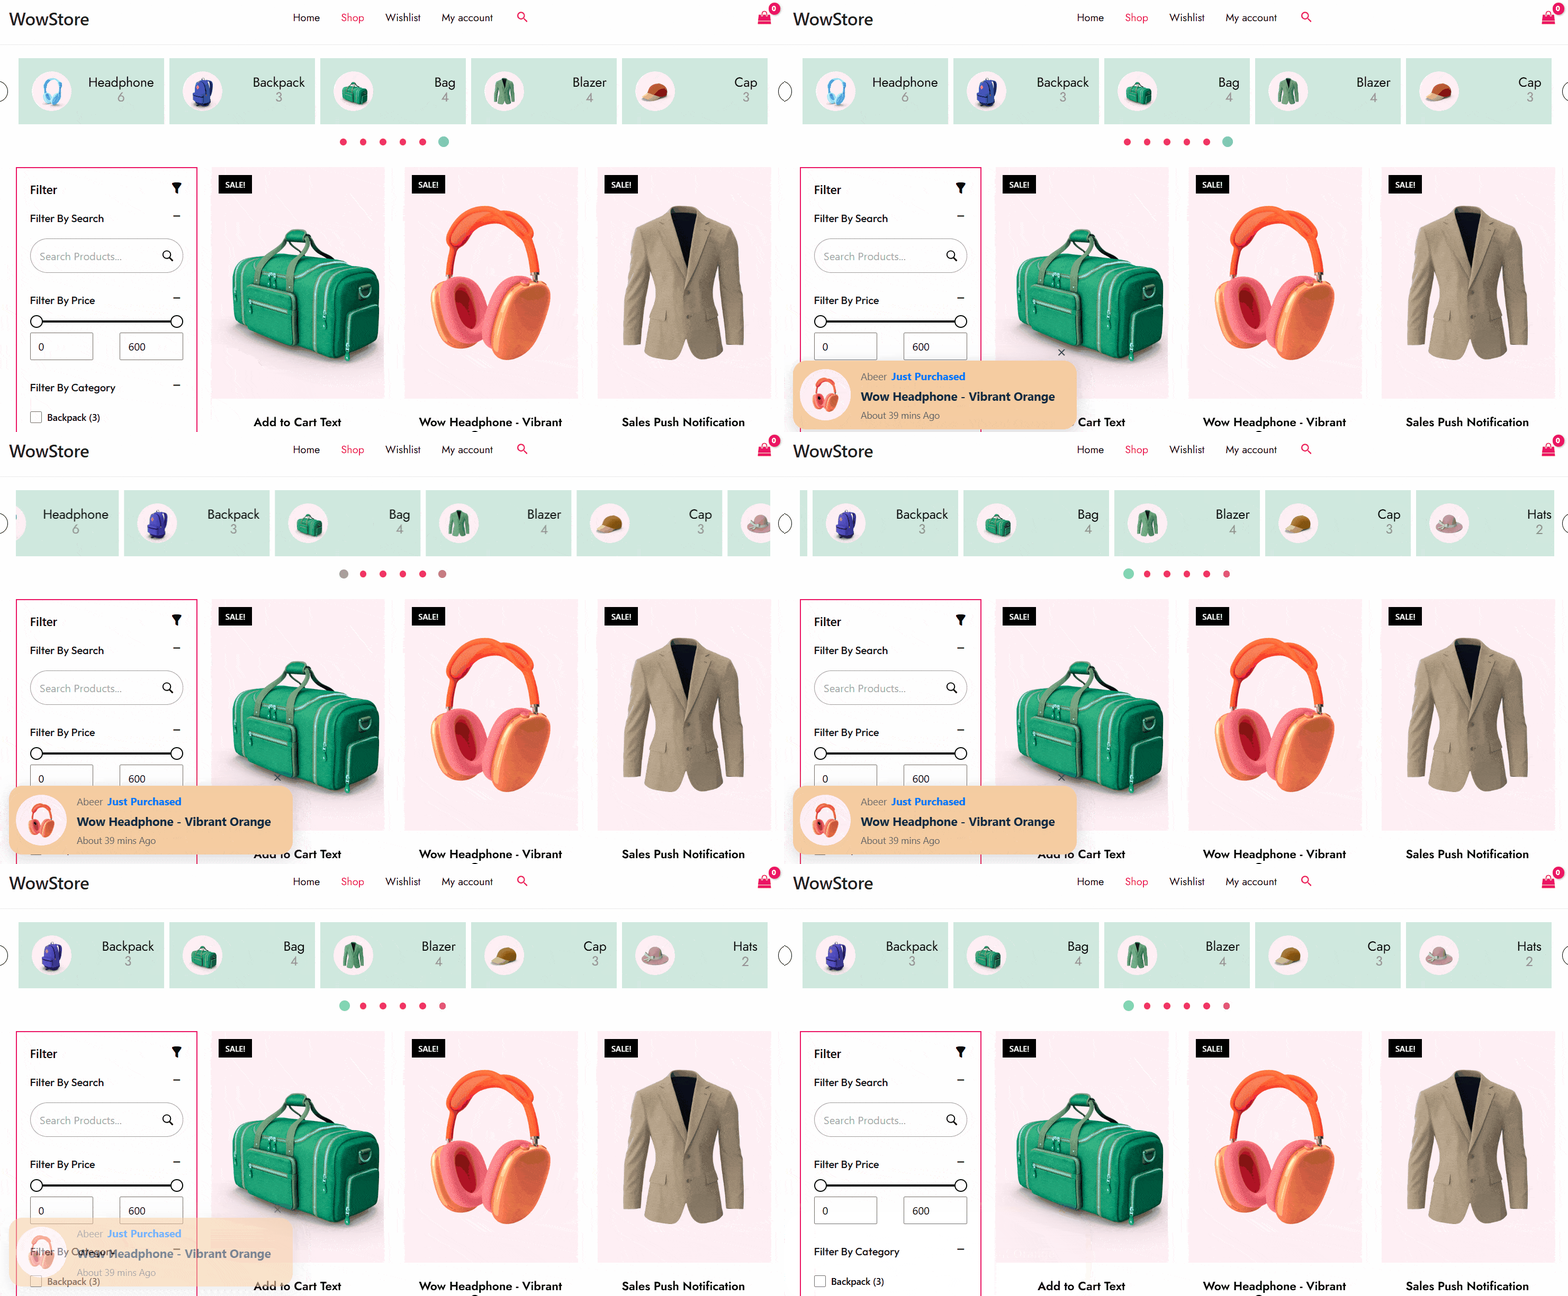
Live sales notifications are real-time alerts that pop up on your website to inform visitors about recent purchases. These notifications typically include:
- Buyer’s Name
- Buyer’s Location
- Purchased Item
- Time of Purchase
These pop-ups inform website visitors about recent purchases made by others. This helps build social proof and enhance credibility. As a result, visitors are more likely to feel confident in making their purchases from your store.
How and Why Live Sales Notifications Work
The operation of Live sales notifications is straightforward. When a user purchases an item from your online store, the system captures the transaction details. This information is then displayed as a sales notification to other visitors.
The timestamp of each purchase is continuously refreshed. It provides accurate information about when the product was sold. This creates a live sales notification experience.
Now, you are thinking why does it work? Take a look.
The live sales notification pop-up follows a fundamental psychological principle known as social proof. When potential customers notice that others are buying, they feel more confident in their own choices.
This leads to more sales. Sometimes, these notifications also create a sense of urgency and encourage visitors to complete their purchases.
Benefits of Live Sales Notifications
Live sales push notifications offer great benefits. Here are some of the major ones:
- Establish credibility
- Reduce cart abandonment
- Build social proof automatically
- Increase customer confidence
- A cost-effective way to reach customers
- Guide customers directly to the product page
- Customers stay informed about new offerings
Best Plugins for Live Sales Notifications in WooCommerce
Here are three popular live sales notification plugins for WooCommerce that can be highly beneficial:
01: WowStore – Gutenberg First Woo Builder
WowStore is more than just a live sales notification tool—it’s a complete Gutenberg-first WooCommerce store builder. Alongside live sales notifications, it offers a wide range of essential features to enhance your WooCommerce store.
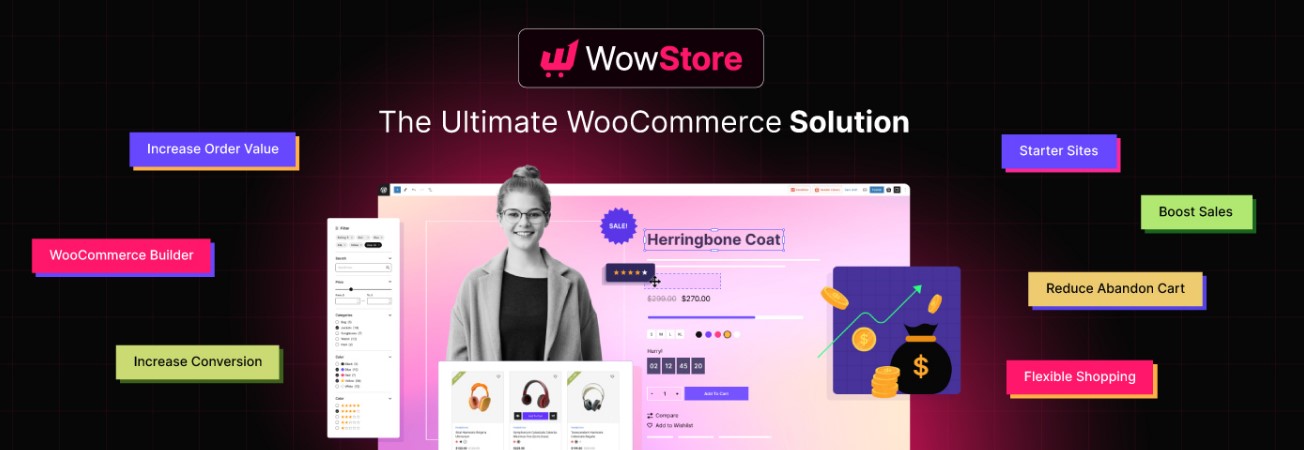
Key features include product videos, size charts, pre-order and backorder options, partial payment capability, call-for-price functionality, a currency switcher, stock progress indicators, animated add-to-cart buttons, customizable add-to-cart text, free shipping bars, cart reservation timers, pre-built templates, and much more.
02: Notification for WooCommerce
WooCommerce Notification by VillaTheme boosts product visibility by displaying recent and virtual order pop-ups on your WooCommerce store. It can promote real or fake orders for selected products or categories.

The premium version unlocks advanced features like time settings, loop displays, and notification sounds. It’s a valuable tool for improving customer engagement and driving sales.
03: Live Sales Notifications for WooCommerce
The WooCommerce Live Sales Notification plugin boosts sales by showing real-time sales notifications and recent popups. This helps create urgency and social proof.
It allows you to customize messages, design, and schedule notifications for a personalized experience across your store. It also adds trust with visitor details and gives you control over how notifications look and sound.
Which WooCommerce Live Sales Notification Plugin Is the Best?
While all three plugins we’ve discussed allow you to display live sales notifications, only WowStore offers a complete solution.
Live sales notifications alone won’t bring you profit if your online store isn’t modern, well-designed, and feature-rich. WowStore can help you craft an aesthetically pleasing online store.
Here’s why WowStore stands out:
🌟 Great Value: Why pay nearly the same for just one feature elsewhere? WowStore offers all essential WooCommerce tools at an unbeatable price, including live sales notifications.
🌟Complete Store Management: WowStore is your all-in-one toolkit for building and running a successful WooCommerce store.
🌟 Endless Customization: With WowStore, you have the power to shape your store’s appearance without writing any code. The options are virtually huge.
🌟 Built for Speed: WowStore leverages the latest technologies to deliver a fast, sleek, and responsive shopping experience.
🌟 Top-notch Support: The WowStore team provides outstanding customer service. Whether you’re setting up or encountering issues, their support staff is always on hand.
How to Set Up Live Sales Push Notifications in WooCommerce: Step-by-Step Guide
Let’s look at how you can set up live sales push notifications in WooCommerce. Here’s a simple step-by-step guide to set it up in WooCommerce using the WowStore plugin.
Step 1: Install the WowStore Plugin
First, ensure the WooCommerce plugin is installed and activated on your WordPress site. After that, go to your WordPress Dashboard
- Click on Plugins > Add New and search for “WowStore.”
- Click Install Now and Activate it.
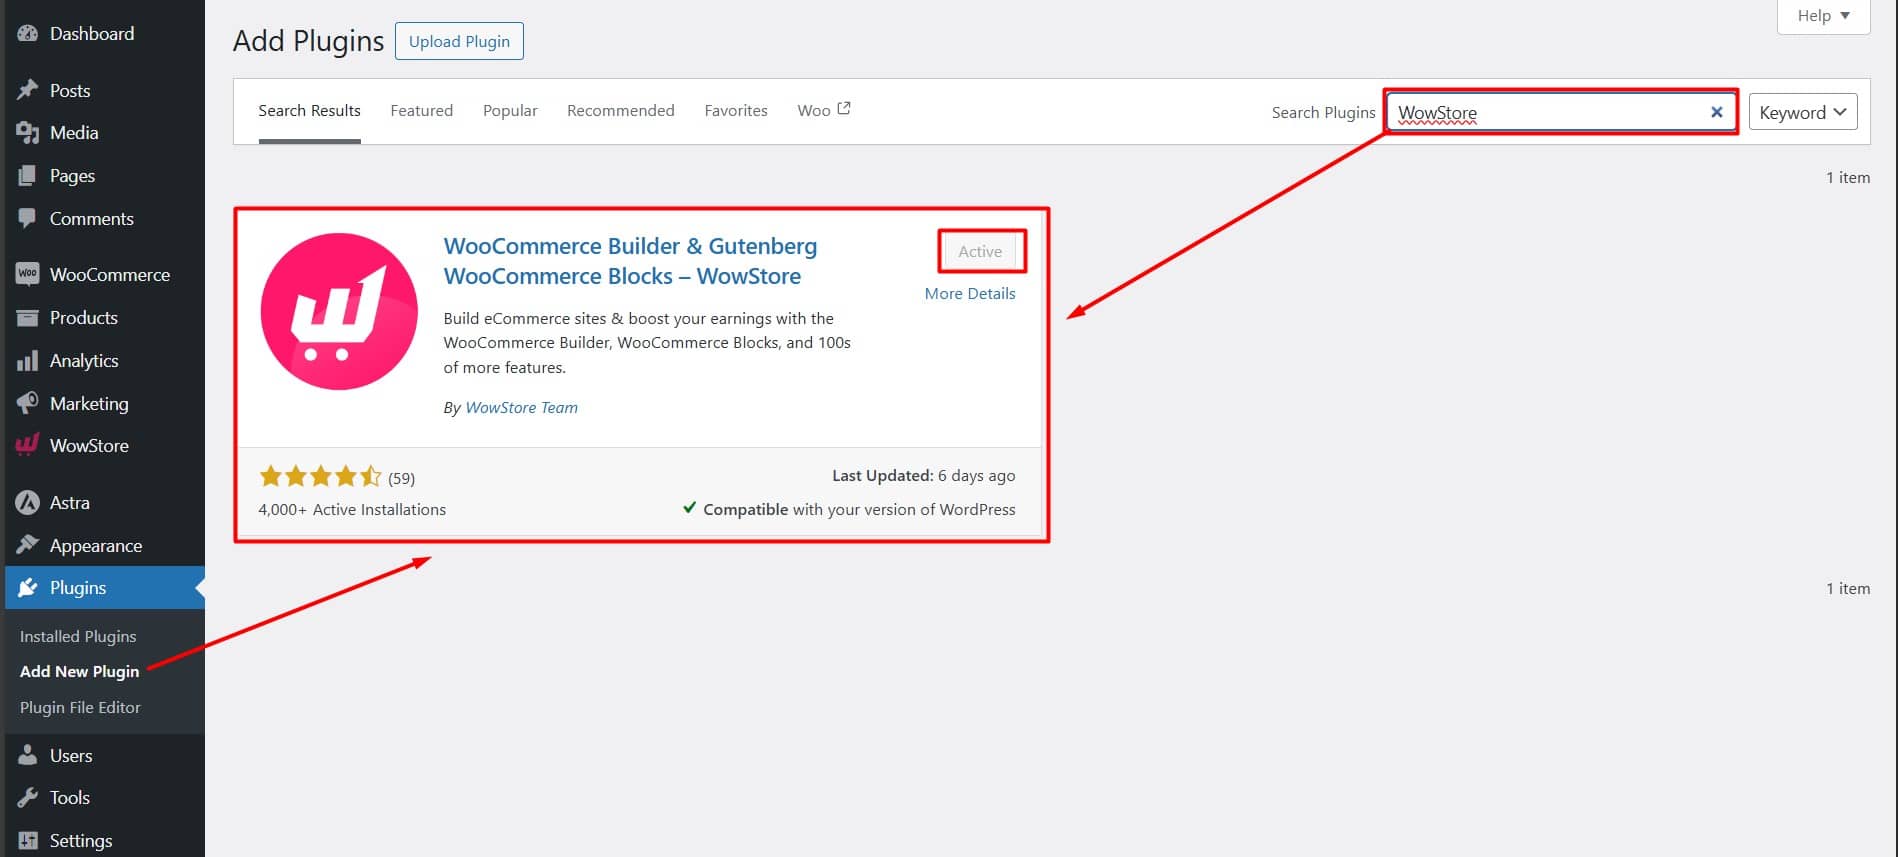
This plugin helps you add live sales push notifications to your WooCommerce store.
Step 2: Enable the Sales Push Notification Add-on
After activating the WowStore plugin,
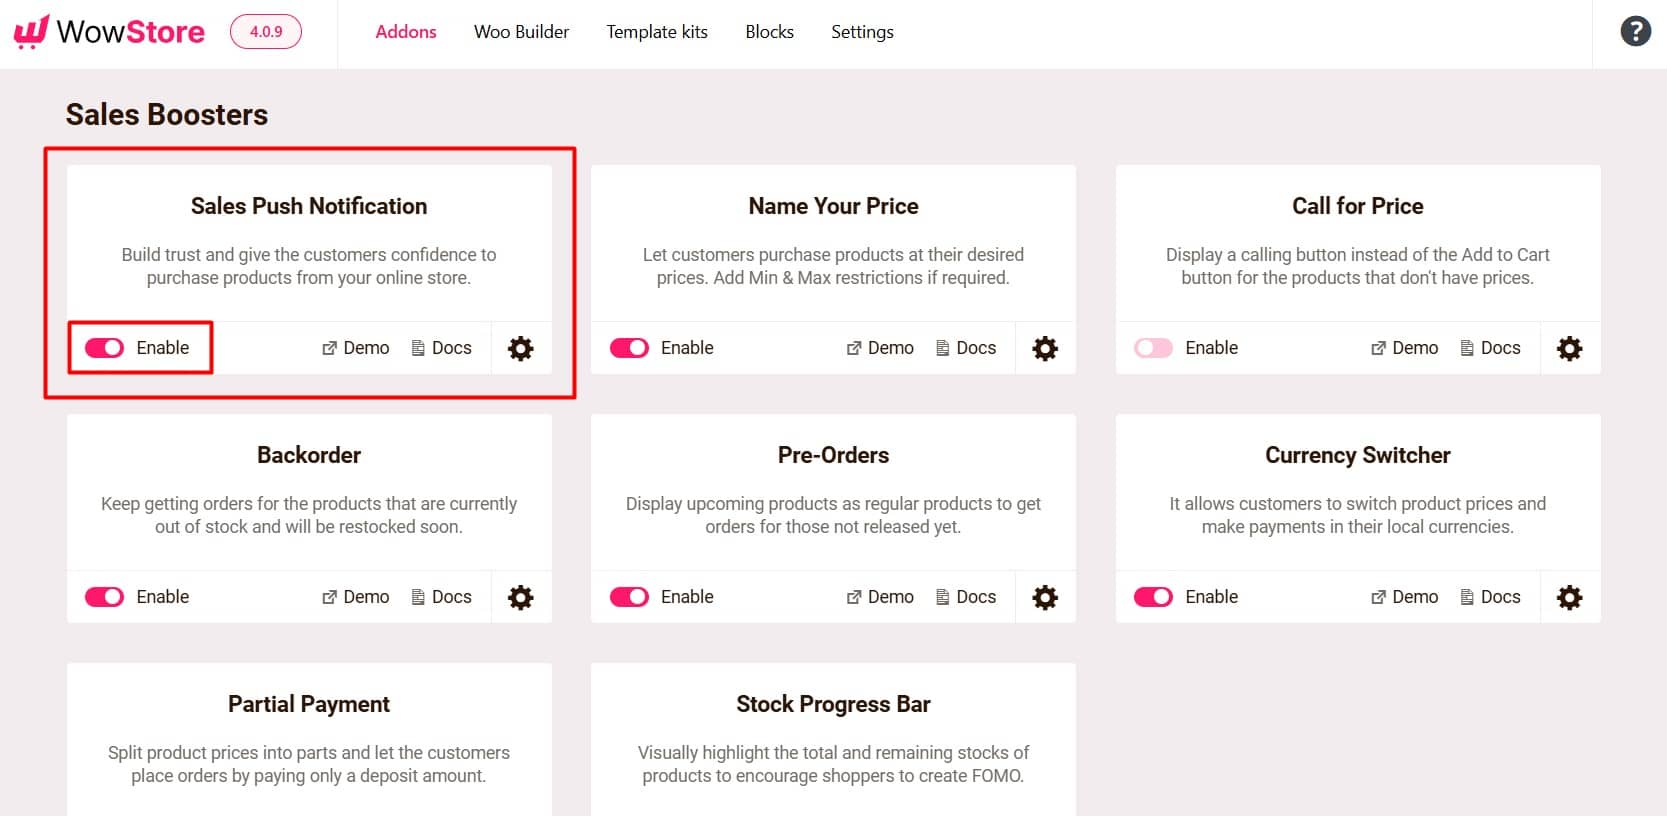
- Navigate to the WowStore tab and look for the “Add-ons” tab
- Find the “Sales Push Notification” add-on and toggle the switch to enable it.
Step 3: Configure the Live Sales Notification Settings
Now, click on the gear icon and start configuring the settings. Here, you will find many options to play around. Choose the right options to ensure notifications are user-friendly and effective.
Display Position: Choose to display the notification on the left or right side of the screen.
Number of Recent Orders: Set the number of recent orders to display (e.g., 10).
Name: Choose the display name format for the notification.
Label Text: Customize the label text shown in the notification (e.g., “Just Purchased”).
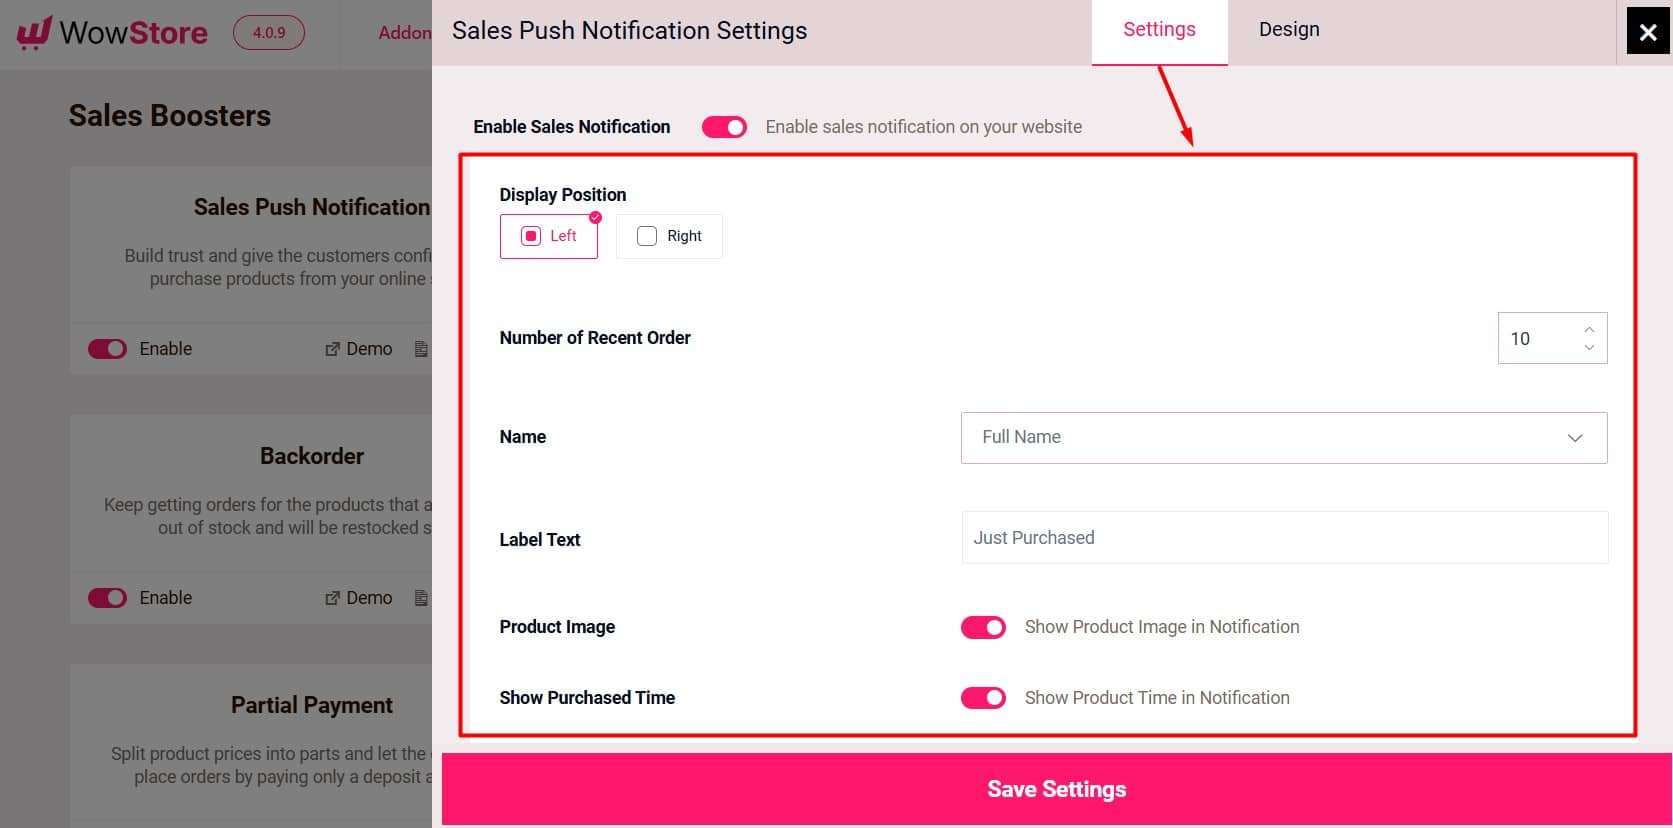
Product Image: Enable or disable showing the product image in the notification.
Show Purchased Time: Enable or disable showing the time of purchase.
Time Prefix: Set the prefix text to display before the time (e.g., “About”).
Time Postfix: Set the postfix text to display after the time (e.g., “Ago”).
Gap Time Between Two Notifications (Seconds): Adjust the interval between two notifications (e.g., 5 seconds).
Stay Notification on Screen (Seconds): Set the duration for how long each notification remains visible on the screen (e.g., 5 seconds).
Adjust the settings according to your preferences to optimize the effectiveness of the notifications.
Step 4: Customize the Live Sales Notification Appearance
Head over to the Design tab within the add-on settings. You can change the colors, fonts, and radius notification box. Here you can tweak the following options:
Background Color: Set the background color of the notification box.
Typography: Control the font size, boldness, italics, underlining, and color for the Name, Purchase, title, and Time texts.
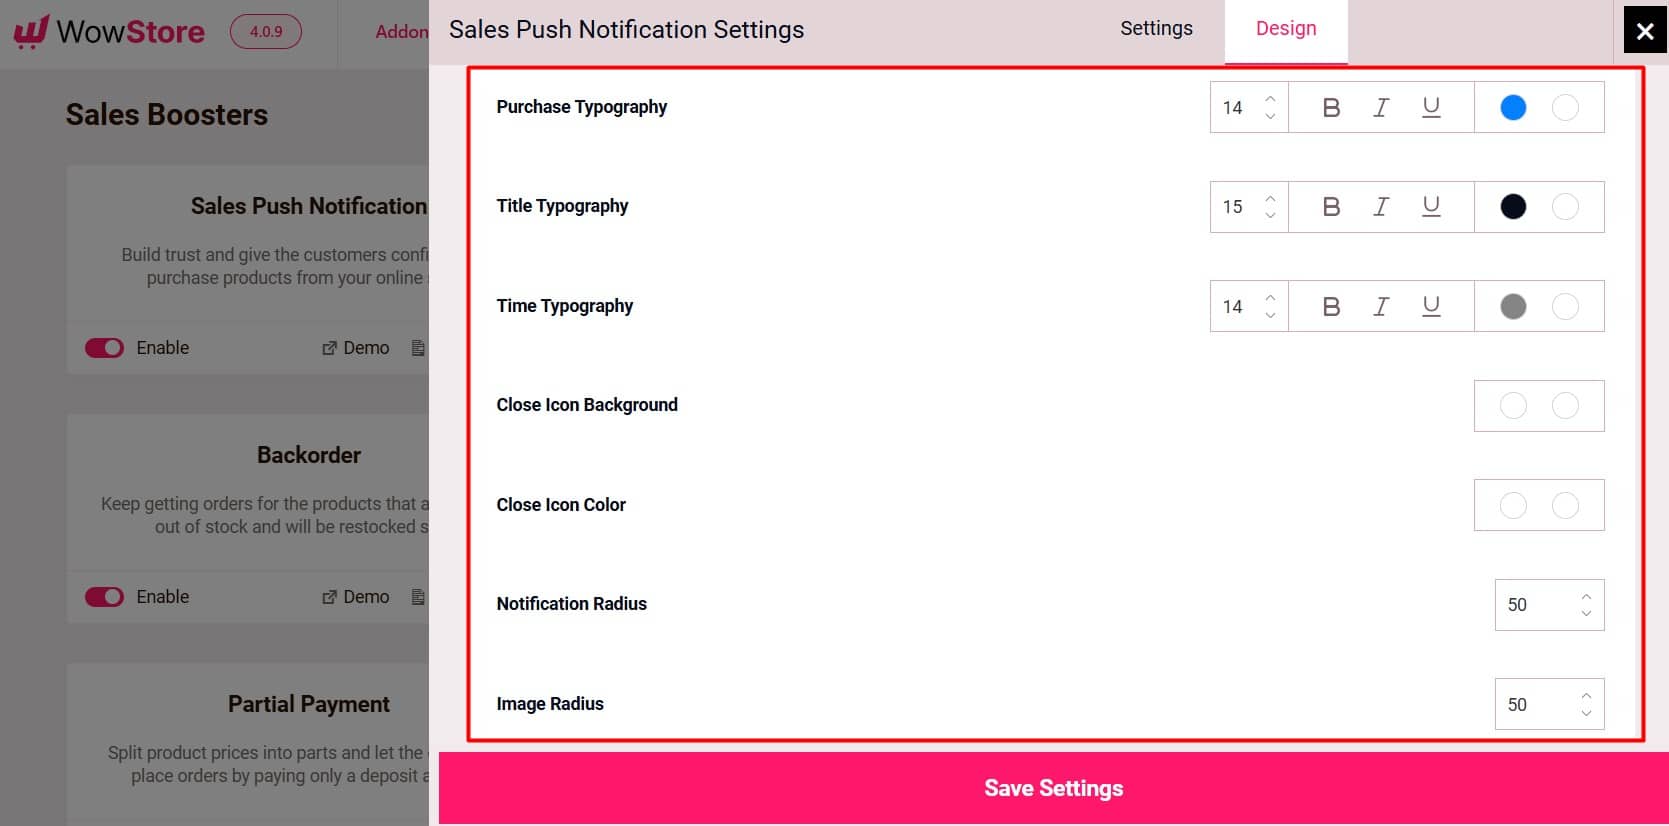
Close Icon Color: Control the color of the close icon background color and the color of the icon itself.
Notification and Image Radius: Adjust the corner radius (roundedness) of the notification box and product image within the notification with a numerical input (in pixels).
Step 5: Add Products to WooCommerce
Make sure you have products added to your WooCommerce store. Go to Products > Add New in the WordPress dashboard. Enter product details, including name, price, images, and descriptions.
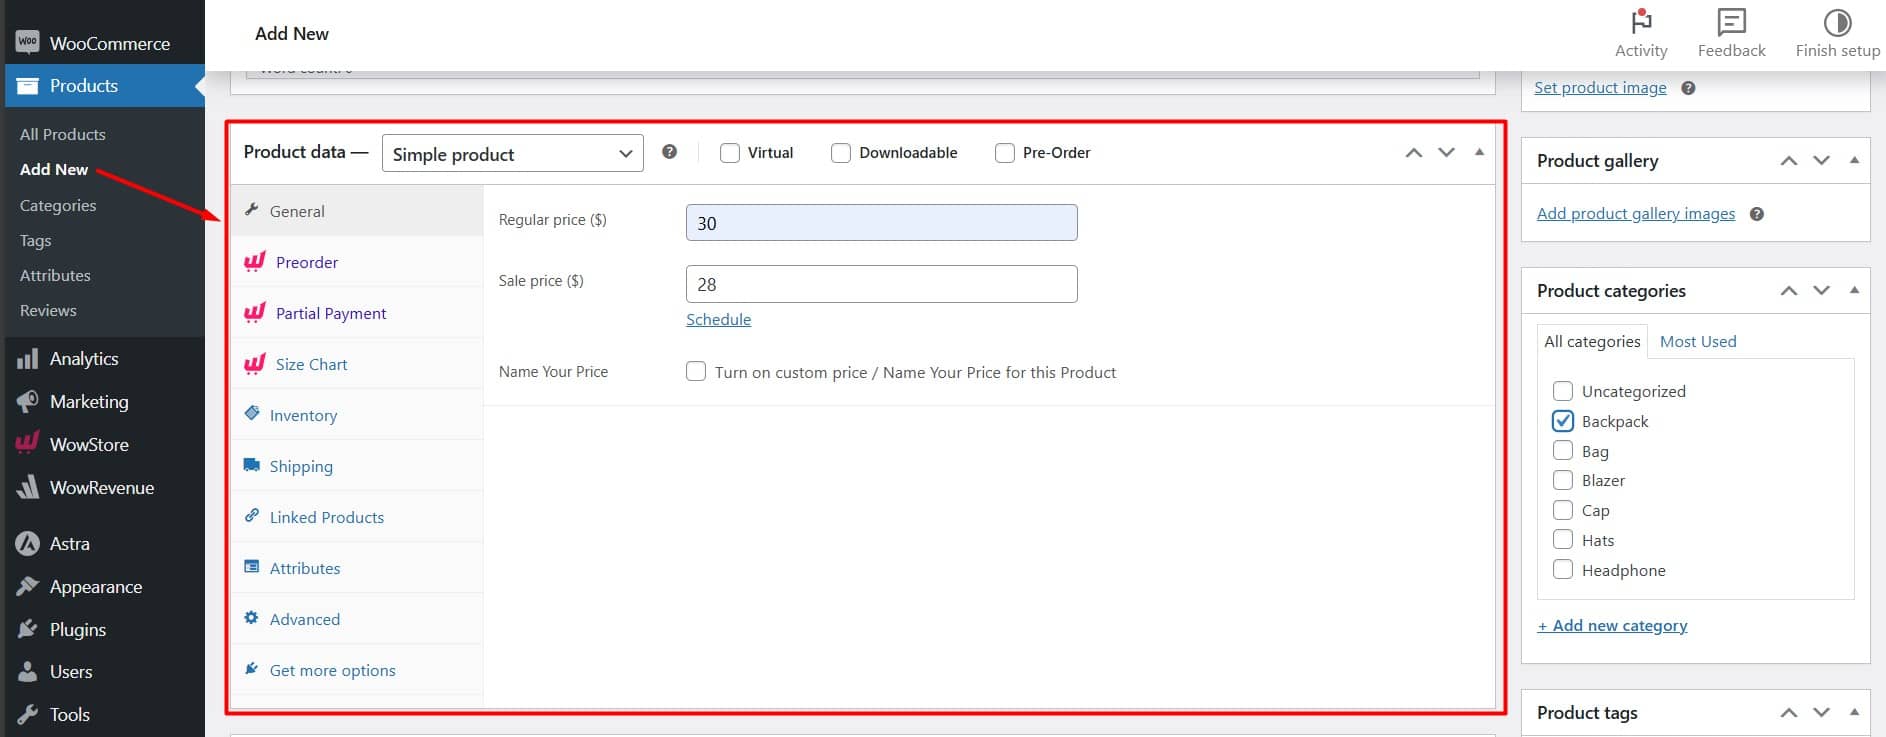
This step ensures that the sales push notifications have product information to display.
Step 6: Preview the Live Sales Push Notifications
After setting up the product sources, click on the Preview button. This will give you an idea of how the notifications will appear on your website. Make any necessary adjustments for better visibility and engagement.
Step 7: Test and Activate
Before launching your campaign, make a test purchase on your WooCommerce store. Look out for a pop-up notification indicating the recent sale.
Make sure it appears in the chosen position with the correct design and timing. Ensure the notifications appear correctly on different devices (desktop, mobile, tablet). Make any necessary adjustments and then activate the campaign
Measuring the Impact of Live Sales Push Notifications
To assess the impact of sales push notifications on your WooCommerce store, monitor these key areas:
Conversion Tracking: Use Google Analytics to see how many users who view a notification make a purchase.
Bounce Rate Analysis: Check if notified users stay longer or leave quickly with tools like Rank Ranger and Pingdom RUM.
Sales Growth Measurement: Compare sales before and after adding notifications using platforms like HubSpot.
Customer Feedback: Collect customer’s feedback about their experience with the live sales notifications. This can help.
Common Mistakes to Avoid with Live Sales Push Notifications
Sales push notifications can be effective, but using them poorly can backfire. Here are some common mistakes to avoid:
- Too many notifications annoy visitors and drive them away.
- Using generic messages like “Someone bought” fails to engage.
- Showing out-of-stock items frustrates buyers and damages trust.
- Outdated sales push notification makes your website look unreliable.
- Ignoring mobile optimization results in displaying notifications poorly and losing traffic.
- Not tracking results keeps you unaware of what works and limits improvement.
Tips to Optimize Live Sales Push Notifications
To ensure your sales push notifications are effective, you’ll need to monitor their performance and make adjustments as needed.
↗️ Track Conversion Rates: Monitor how many visitors who saw a notification made a purchase. This will help you assess the notification’s effectiveness.
↗️ A/B Test Different Notification Styles: Test various designs, messages, and timing settings to see what works best.
↗️ Adjust Timing Based on User Feedback: If visitors complain about too many notifications, reduce the frequency.
Summing Up!
Sales push notifications require minimal effort once set up and continually provide social proof as new sales come in.
When done correctly, these real-time alerts can significantly enhance your store’s performance. It encourages potential customers to purchase.
Follow the steps outlined in this guide and use the tips provided to maximize the impact of your sales push notifications.
Start crafting today and unlock your revenue potential!
FAQs
Do Sales Push Notifications Work for All Types of Products?
Yes, sales push notifications can effectively promote any type of product being sold.
Can Push Notifications Annoy Customers?
Yes, if used excessively. You should set appropriate frequency limits and personalize notifications to avoid overwhelming users.Yes, if used excessively. You should set appropriate frequency limits and personalize notifications to avoid overwhelming users.
Are There Any Privacy Concerns with Using Push Notifications?
Yes, privacy is important. Get clear permission from users before showing their names and what they bought in live push notifications. Include this information in your privacy policy. Make sure to handle user data securely and openly.
Is Live Sales Push Notifications Automated?
Yes, it is automated. You don’t have to do it manually once you set it up in the settings.

