Introduction
We’ll be showing you how to use a wishlist plugin for WooCommerce in today’s short tutorial.
But first, we need to get something out of the way:
There are plenty of solid WordPress WooCommerce plugins out there that can help you set up an online store. As a matter of fact, all of these individual WooCommerce plugins are totally capable of what they do.
But, having too many ‘individual’ plugins can take a toll on your website’s performance. So, you’d need something that’s a ‘Jack of All Trades’.
Thankfully, The ProductX Gutenberg WooCommerce Plugin can help you out in this regard. And yes, there is the Wishlist functionality that you can set up on your online store.
All you have to do is:
- Install and activate the pro version of the plugin to use all the features.
- Choose the options from the settings.
- Deploy your settings.
So let’s see how you can set up an online store with ProductX with the WooCommerce Wishlist functionality.
How to Use the ProductX Wishlist Plugin?
Installing the ProductX Plugin
ProductX is now WowStore! We’re very excited to bring you this experience, packed with exciting features. Please note that the features, blocks, starter packs, etc. all work the same. If you have used ProductX, you’ll feel right at home with WowStore.
In order to get started, you need to have the ProductX WooCommerce blocks plugin installed on your WordPress site. It’s pretty straightforward if you want to get started with the free version.
All you have to do is go to Plugins>Add New> Search for ‘ProductX’> Install and Activate the plugin. You can do all of this from your WordPress dashboard.
However, if you want to take full advantage of all the features of the ProductX plugin [we highly recommend you do so!], you will need to create an account with WPXPO. You can buy the pro license, check the respective product license status, upgrade, and do other related tasks from your account dashboard.
You will also be able to download the Pro version of ProductX from your account dashboard.
*** Take note that you need to have the free version of the ProductX plugin installed on your WordPress dashboard if you wish to use the Pro version of ProductX. Otherwise, you will not be able to activate your product license. Check out the ProductX Documentation to learn more about the features of the plugin.
Just log in to your WPXPO account and go to ‘Order’ from the dashboard menu. You will see all the licenses you purchased. From here, you’ll be able to download the Pro version of the ProductX plugin.
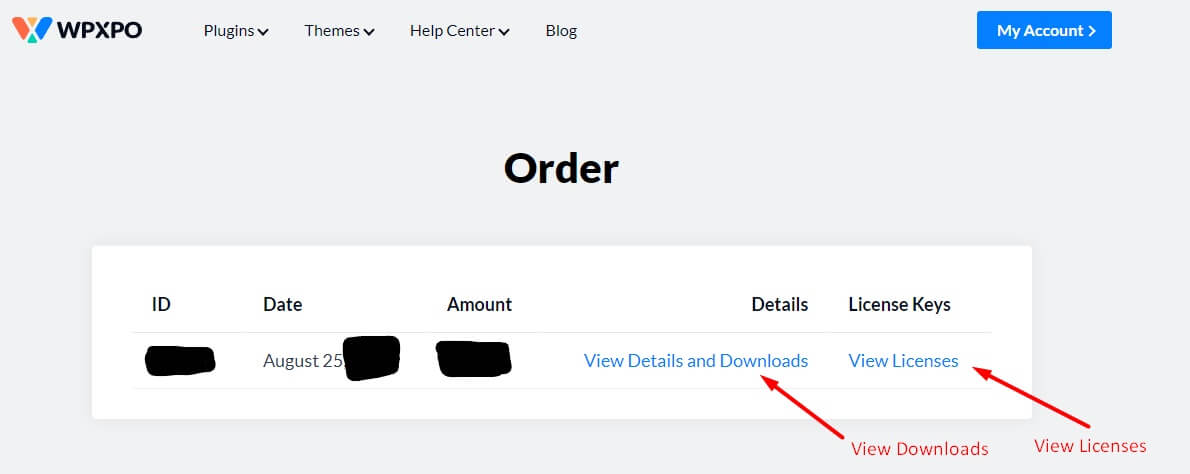
Once you’ve done that, go to your WordPress dashboard and select plugins. Now choose ‘Add New’. Then choose ‘Upload Plugin’.

All you have to do now is upload the plugin from your device. You’re pretty much set.
Now, all you have to do is copy the license key from your WPXPO site and ‘Check and Save’ it from the ProductX licensing tab.
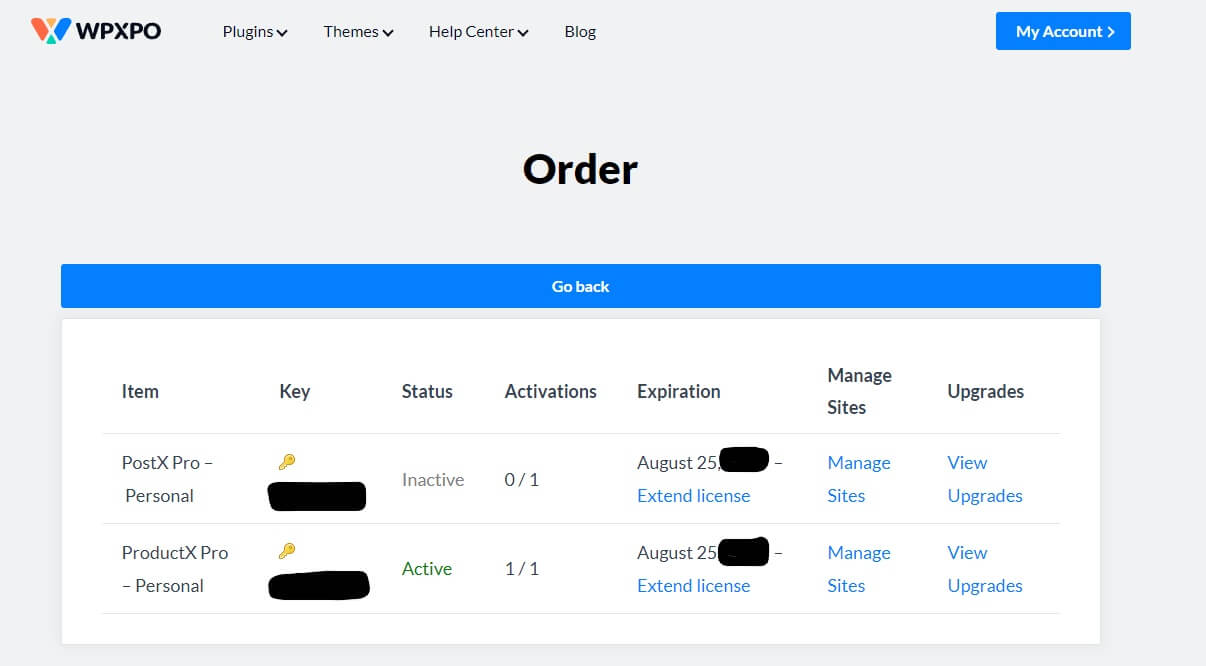
Once you’ve done that, you’re ready to use the Pro version of ProductX.
So, if we wanted to put the whole process in a list, it would look something like this:
- Download the free version of ProductX from your WordPress dashboard.
- Purchase the ProductX Pro version license through your WPXPO account.
- Download the Pro version from your WPXPO account to your device.
- Upload the Pro Plugin to your WordPress website.
- Copy the license from your WPXPO account.
- Paste and activate it from the ‘License’ section of your WordPress dashboard.
Changing the ProductX Wishlist Settings
*** You will need to have a Pro License of ProductX if you wish to use the full wishlist functionalities. Do keep that in mind.
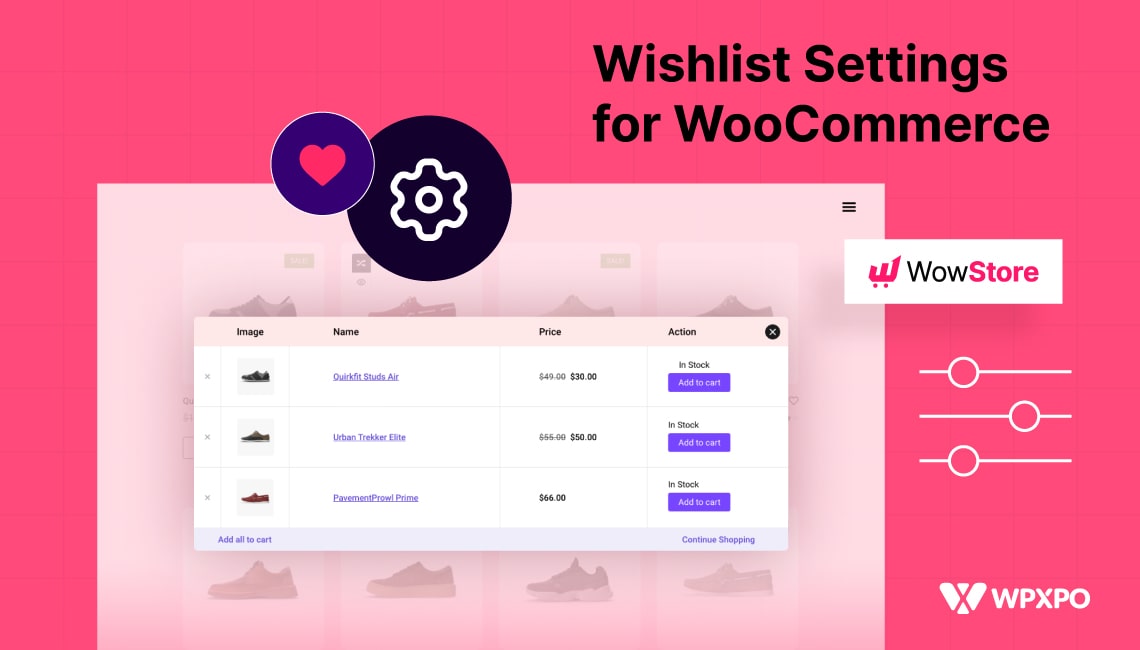
We’ll be showing you how to enable a pop-up wishlist. Users will be able to add the products to their wishlist and a pop-up will show what items they have on their wishlist. They can choose to add it to their cart individually or add all the products to the cart at once.
First of all, you need to make sure that the Wishlist Addon is turned ON in the ProductX addons settings. All you have to do is:
- Go to ProductX from your WordPress dashboard.
- Choose Addons.
- See if the Wishlist Addon is ON.

It should be turned on by default. If not, make sure to turn it on before moving on to the next section.
Now we’ll change the settings to show you how to enable the wishlist pop-up:
- Go to the ‘Settings’ from the ProductX menu on your WordPress dashboard.
- Navigate to ‘Wishlist’.

Here, you’ll see the different settings for the ProductX WooCommerce Wishlist Addon. Now, let’s change the settings to make a pop-up wishlist for your E-store users.
- We’re going to change the Button Text to ‘Wishlist Item’. You can set it to whatever title you wish.

- We’ll then enable the Wishlist in a Single Page.
- After that, we’ll change the Position on the Single Page to ‘Before Cart’.
- Furthermore, we’ll choose the Action to be ‘Popup Wishlist’.
- Finally, we’ll choose the ‘Action After Added’ to ‘Popup’.
Now save changes and see the settings in action.
*** ProductX lets you add a dedicated wishlist page as well. You can copy the shortcode and paste it to the dedicated Wishlist Page. The rest of the settings will allow you to take the user directly to the Wishlist page once an item is added to the list. Furthermore, you can enable or disable customer login for Wishlist, Empty the wishlist after a click, and other options.
Wishlist Plugin for WooCommerce: ProductX Demo
In order to show you the settings in action, we’re adding a small demo using the ProductX plugin. Here’s what we did:
- We created a ‘Personal Shop’ Page with Product Grid #4 from the ProductX library. We also chose a layout with a distinct wishlist design.

- We’ve enabled the ‘Show Wishlist’ option from the block settings. Also, we’ve added pagination as well to scroll through the different products.

- We’ve also chosen to show the products that are on ‘Sale’ from the Settings of the particular block.
- Finally, we saved the changes and added them to the Menu.
Now if you go to the site and choose a product to add to the wishlist, a pop-up will appear and show you which products you have on your wishlist. You can choose to add them to your cart or continue shopping.

Now let’s look at some quick questions/answers you may have.
FAQ
Q: Which Wishlist plugin is the best for WooCommerce?
Ans.: There are several plugins out there that are excellent to use with WordPress WooCommerce. However, not many plugins out there can achieve the level of accuracy such as ProductX. It’s pretty much an all-in-one E-commerce solution.
However, if you are looking for a different choice, then the YITH WooCommerce Wishlist Plugin can be a decent choice as well.
Q: How can I add products as a demo?
Ans.: We have an excellent tutorial on that where we show how you can add demo products to WooCommerce and change the “Add to Cart” button text for your shop page.
Q: Why should I use a WooCommerce Gutenberg Blocks plugin?
Ans.: A Gutenberg blocks plugin will help you run your site smoother and faster. WordPress is constantly adding updates to Gutenberg, which is all the more reason to move to a Gutenberg plugin for WooCommerce.
Q: Is a faster site better?
Ans.: As a whole, it is 100% better to have a fast website than a slow website with too many things going on. As Gutenberg SEO is becoming more and more important, you may want to put some thought into that.
Final Thoughts
As you can see, setting up a WooCommerce Wishlist with ProductX is simple enough for anyone to understand. However, if you’re having trouble with any other functionalities in ProductX, then you may want to consult the ProductX documentation to get up to speed.
Although ProductX is a very capable WordPress plugin that allows you a full-fledged experience, there are other options that may help you to set up a decent product wishlist. We would love to hear from you which wishlist plugin for WooCommerce you think is the best.
Cheers!
