Comments are essential elements that enhance user engagement for a WordPress site. To make it even more engaging you can customize its look and other options.
There are several ways to customize WordPress comment form. However, the easiest option is to use PostX to fully customize each part of a comment form for different sections of your site. Alternatively, you can do basic customizations by editing WordPress theme settings.
To know detailed steps on each option and other relevant factors about the customization of WordPress comment form, continue reading the article.
What Are Comments In WordPress?
Comments are reactions or thoughts shared by users on a particular page or post in WordPress. It is a great way to allow users to ask questions or provide feedback on a topic. Also, users can have discussions with other users and build an active community.
So, comments can be beneficial for:
- Providing Support: Users can ask questions or share their issues in the comments form. The site owner can decide to answer the queries and provide solutions.
- Receiving Valuable Feedback: Imagine you have launched a product and made a post about it. When users make comments about it, you get to know how well your product is performing and how you should improve it.
- Increasing Engagement: When users comment, they also expect to get replies. So, they visit your site repeatedly. This results in increased engagement, page views, and dwell time.
- Building A Community: As users share their thoughts through comments, it helps to grow the community surrounding your brand.
How to Customize WordPress Comment Form with PostX
A great way to increase engagement on your WordPress site is creating a unique unique-looking comment form. So that users are more interested in sharing their thoughts.
With the help of the PostX plugin, you can fine-tune every part of a comment form with just a few clicks. Not only that, you can create custom post templates to customize each section of a blog and set specific conditions.
In this section, we provide all the steps on how to customize the comment form in WordPress easily.
Customize WordPress Comment Form for Blog Posts
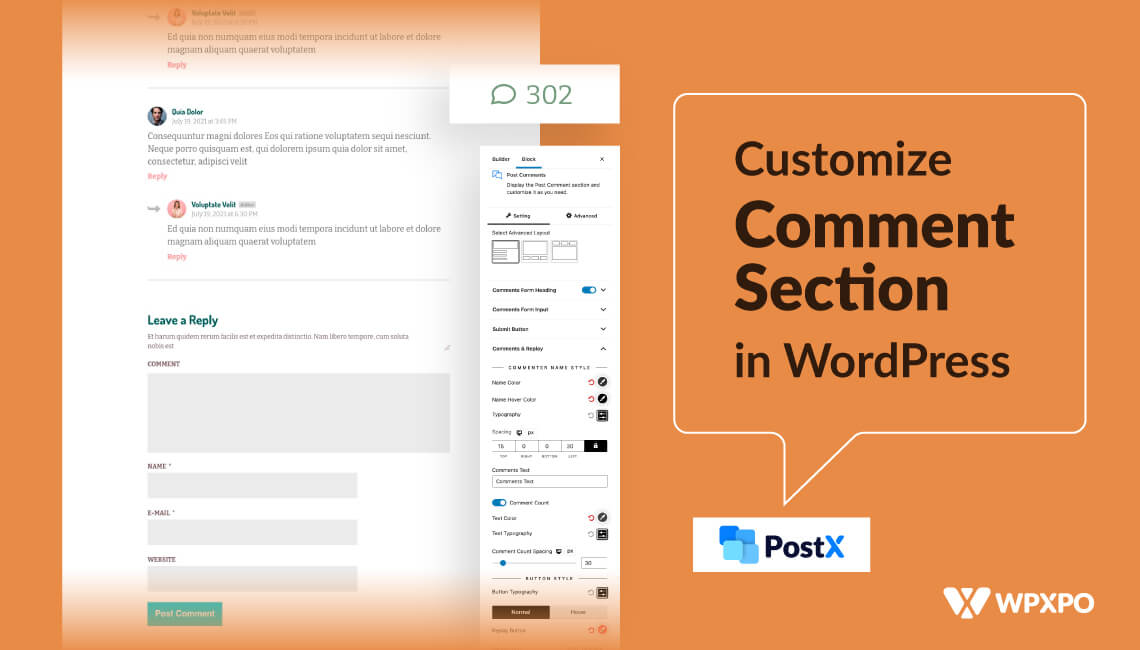
PostX offers a powerful and feature-rich Comments Block that you can use to create a custom WordPress comment form.
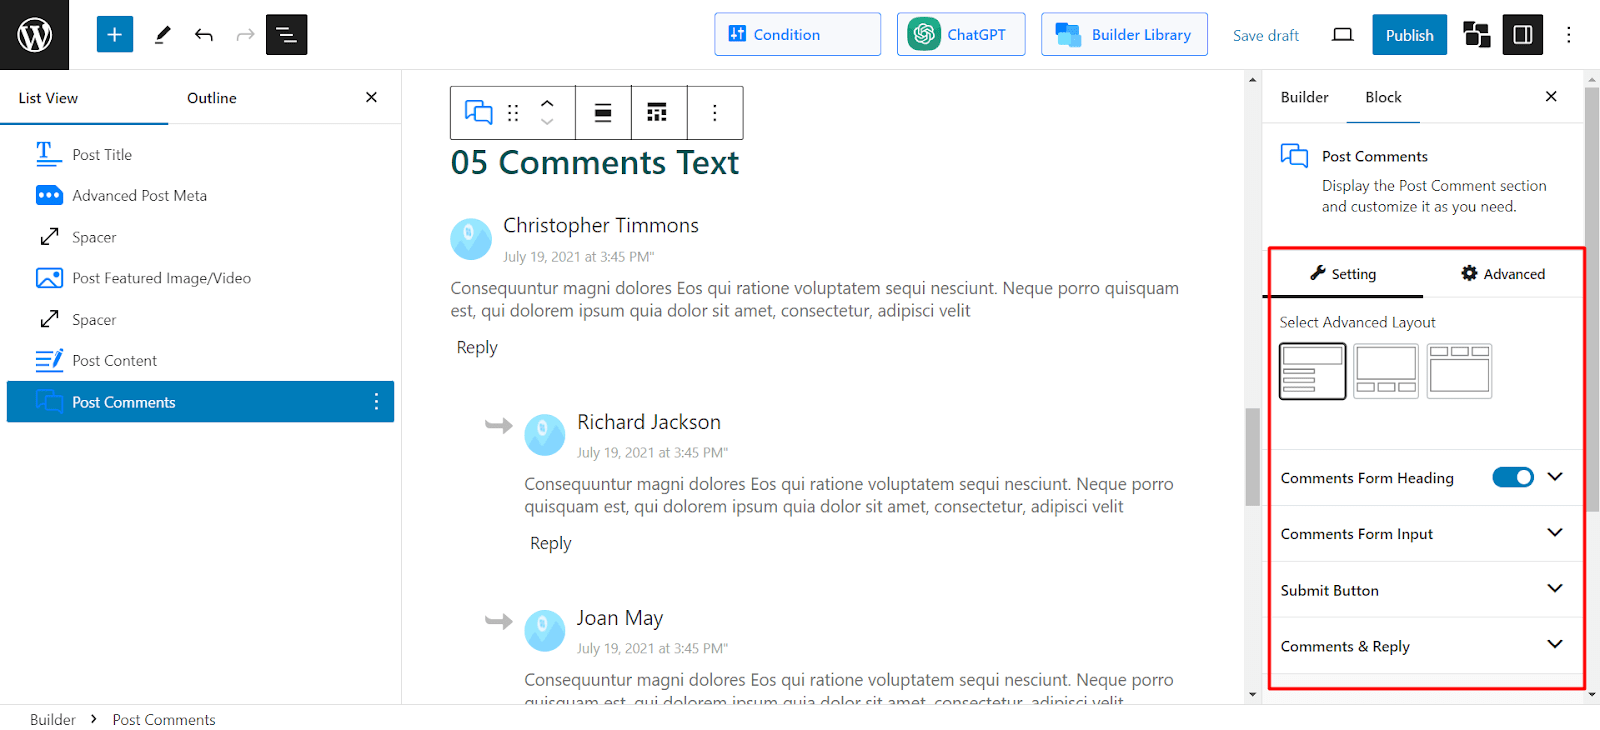
The Post Comments Block allows you to change text, color, background color, typography, spacing, border, padding and so much more for different parts of a comment form.
Here are the steps to create a customized WordPress comment form.
1. Edit The Comment Form Heading
Customize the form heading with PostX. For example, you can use a custom heading such as “Please Share Your Thoughts” instead of the default “Leave A Reply”.
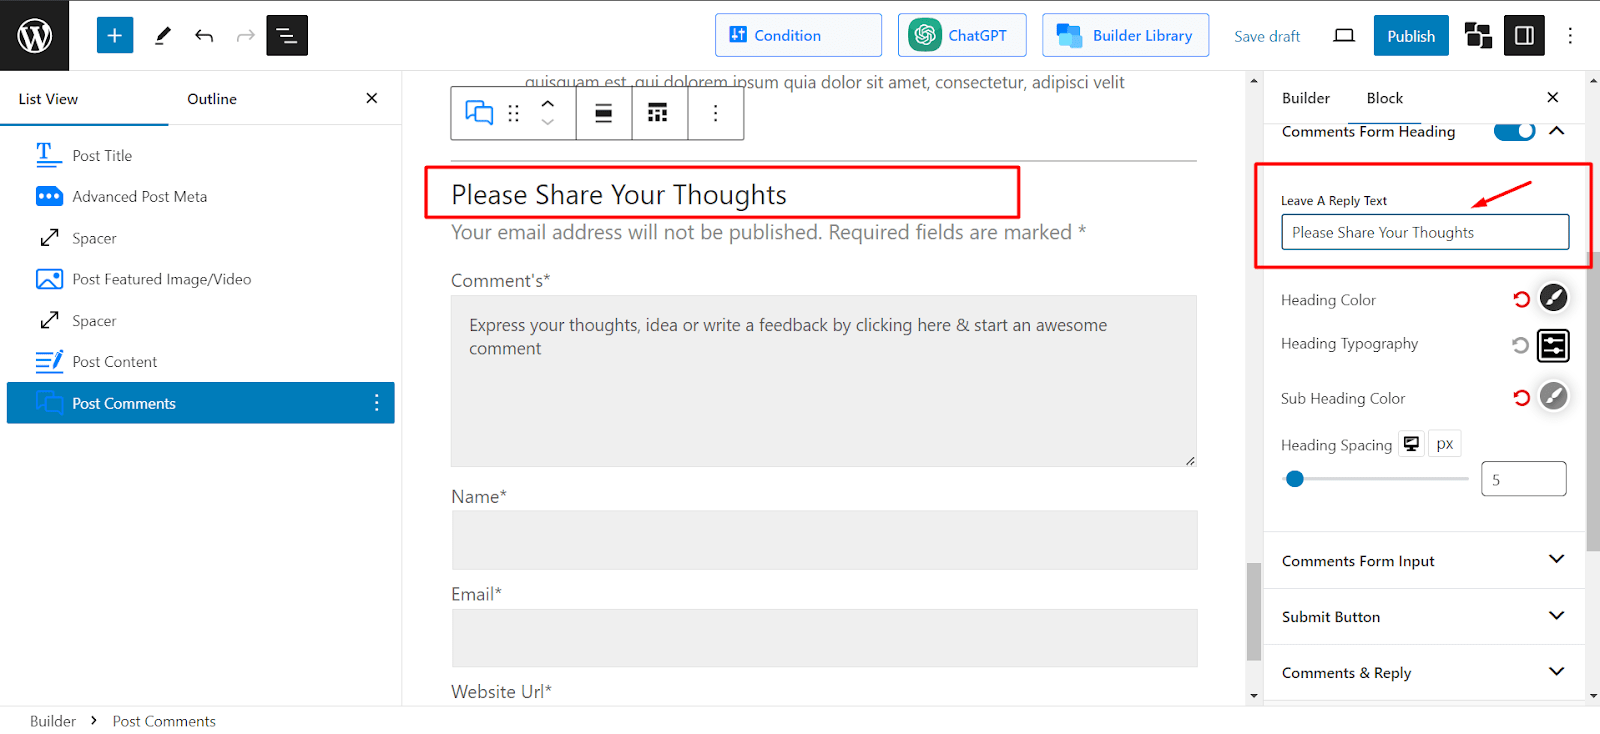
In addition to the text, you can also change the heading color, typography, subheading color, spacing, and so on.
2. Customize Form Input
Change the form input settings such as Placeholder text. Here you can set the custom text your users will see before they make a comment.
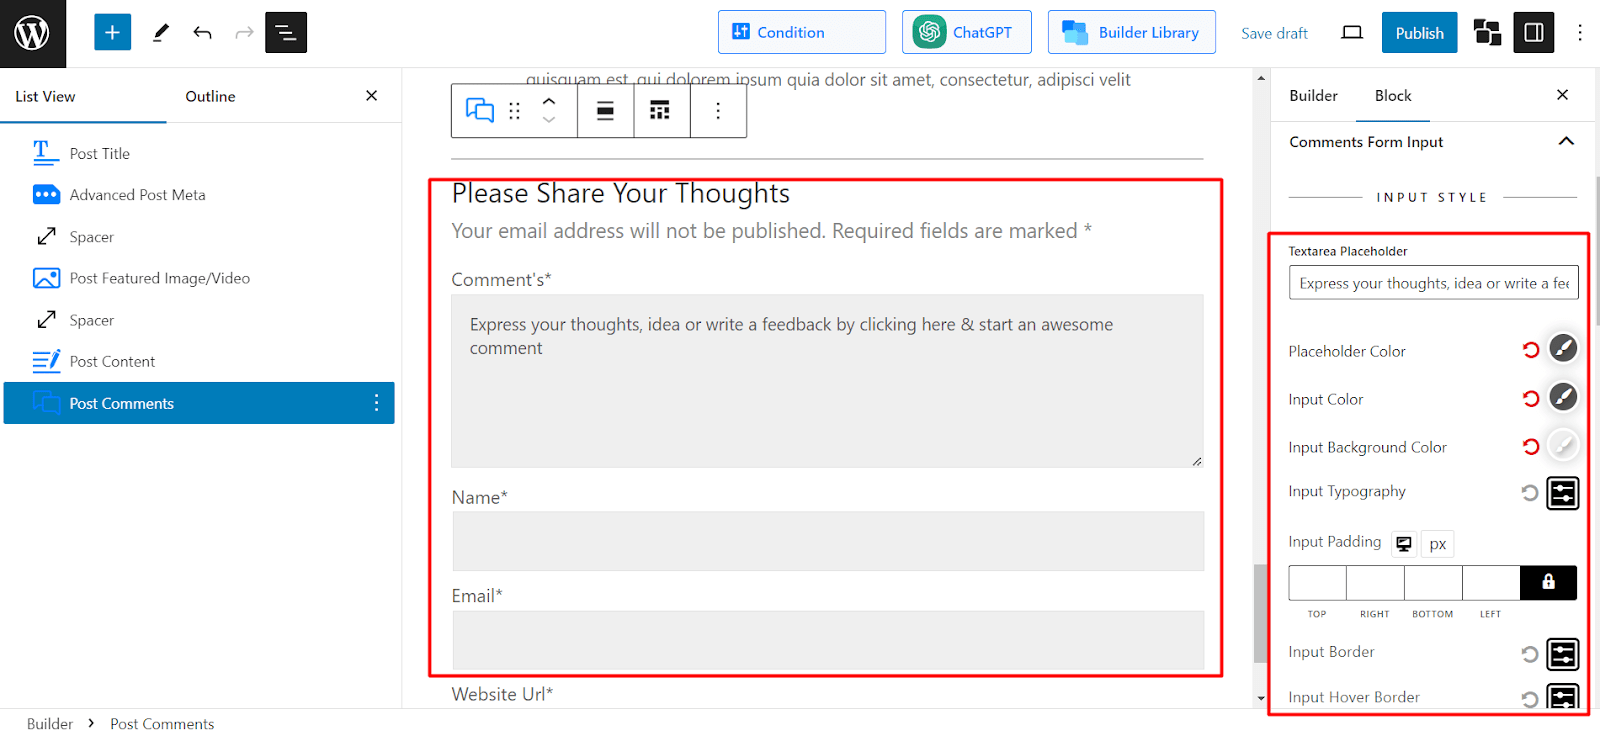
Also, you can change the placeholder color, input color, background, typography, padding, border, and so on. In addition, you can give the labels a unique style.
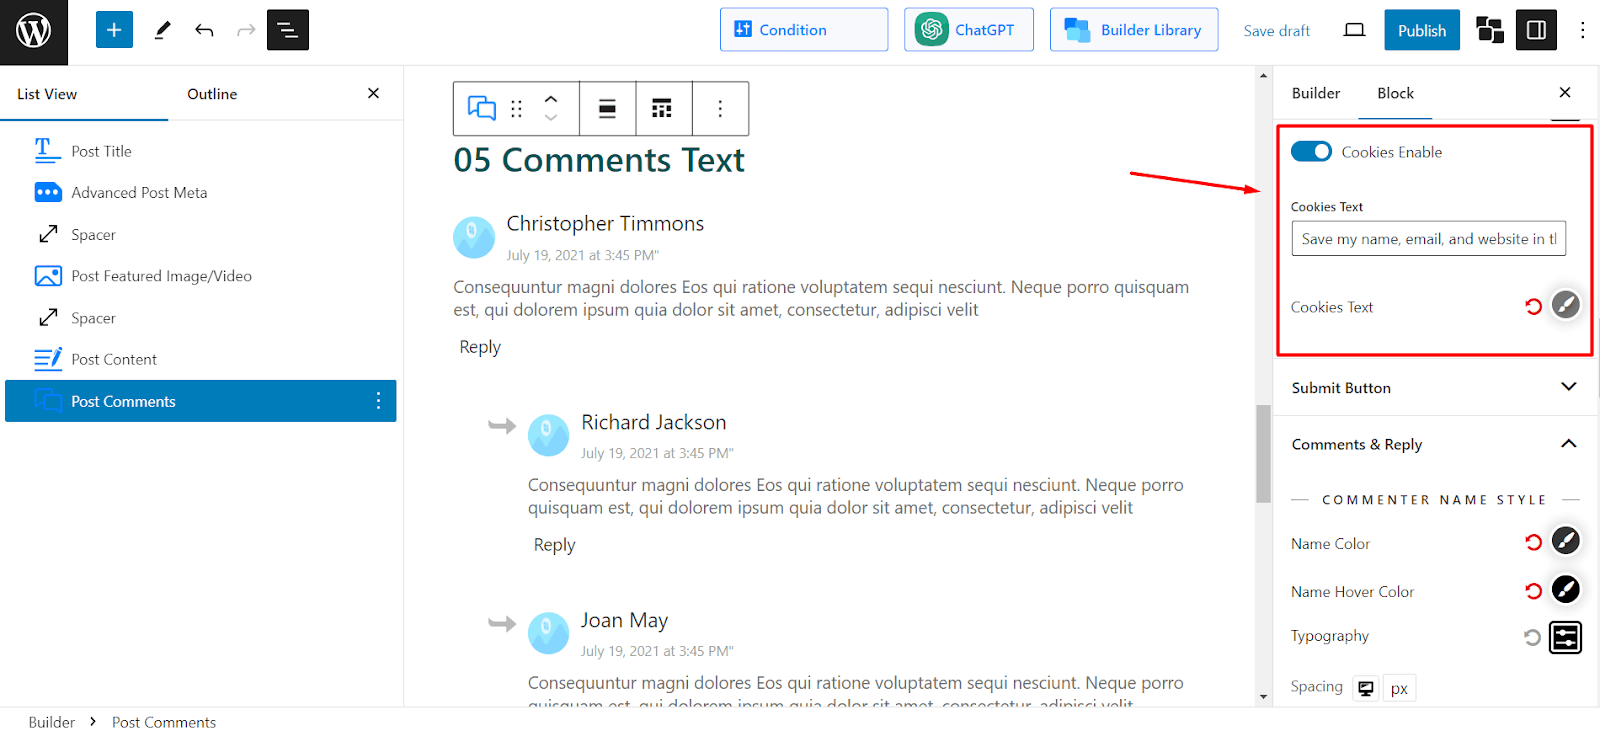
If you want your users to save their name, email, and website URL for the next time they comment, you can use the “Cookies Enable” option. Change the color and text for the option as you like.
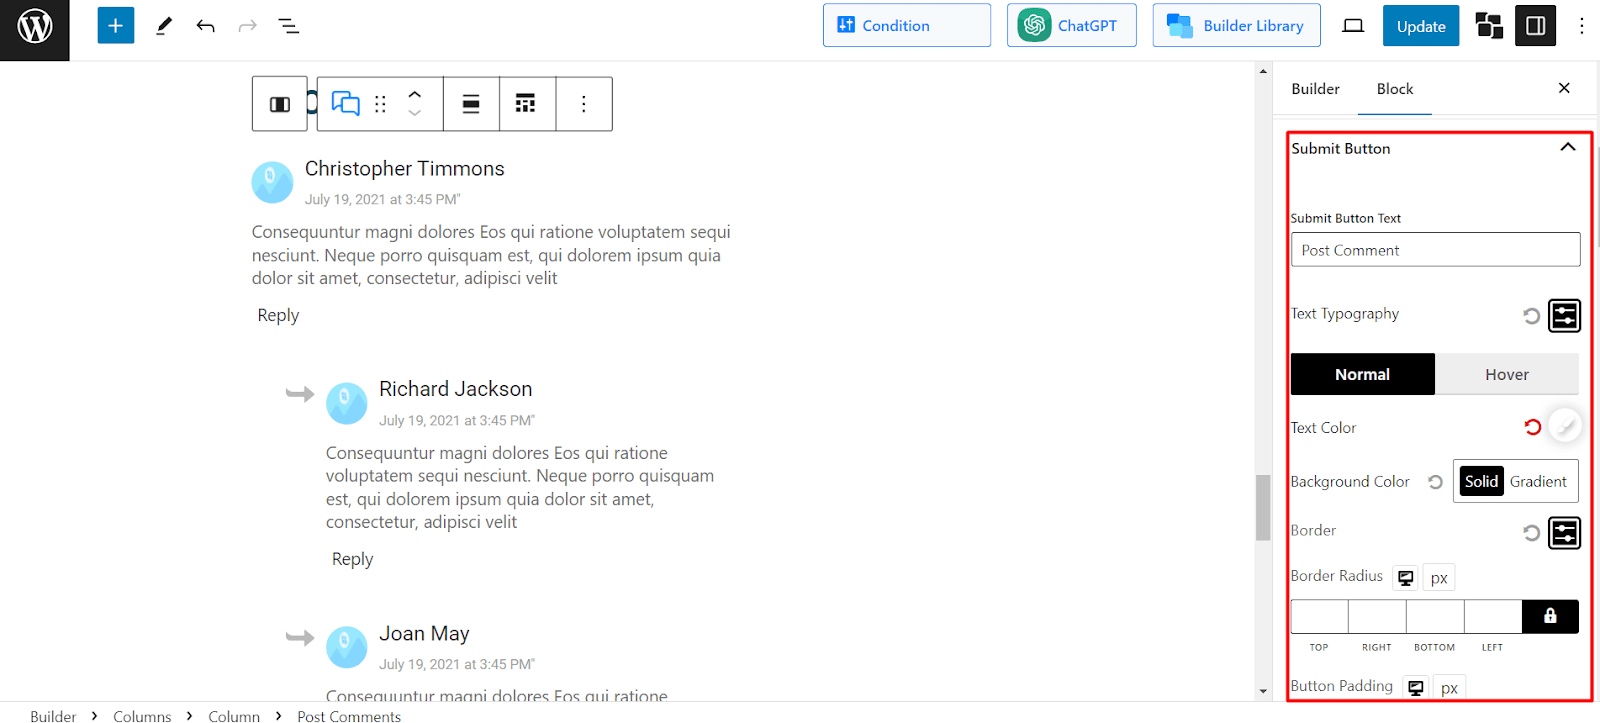
3. Change The Look of the Submit Button
You can customize the look of the Submit button as well. Change the button text, its typography, color, background color, and so on.
Also, you can further customize it with options such as border, border radius, button padding, spacing, and alignment.
Customize WordPress Comment Form For A Specific Post
You can easily change the look of the comment form for all blog posts on your WordPress site. But what if you wanted to customize it for a single post?
Well, using PostX, you have the option to customize WordPress comment form for a specific post by following these steps:
- Install and activate the PostX plugin
- Create a singular custom post template by going to PostX > Site Builder > All Template > Singular
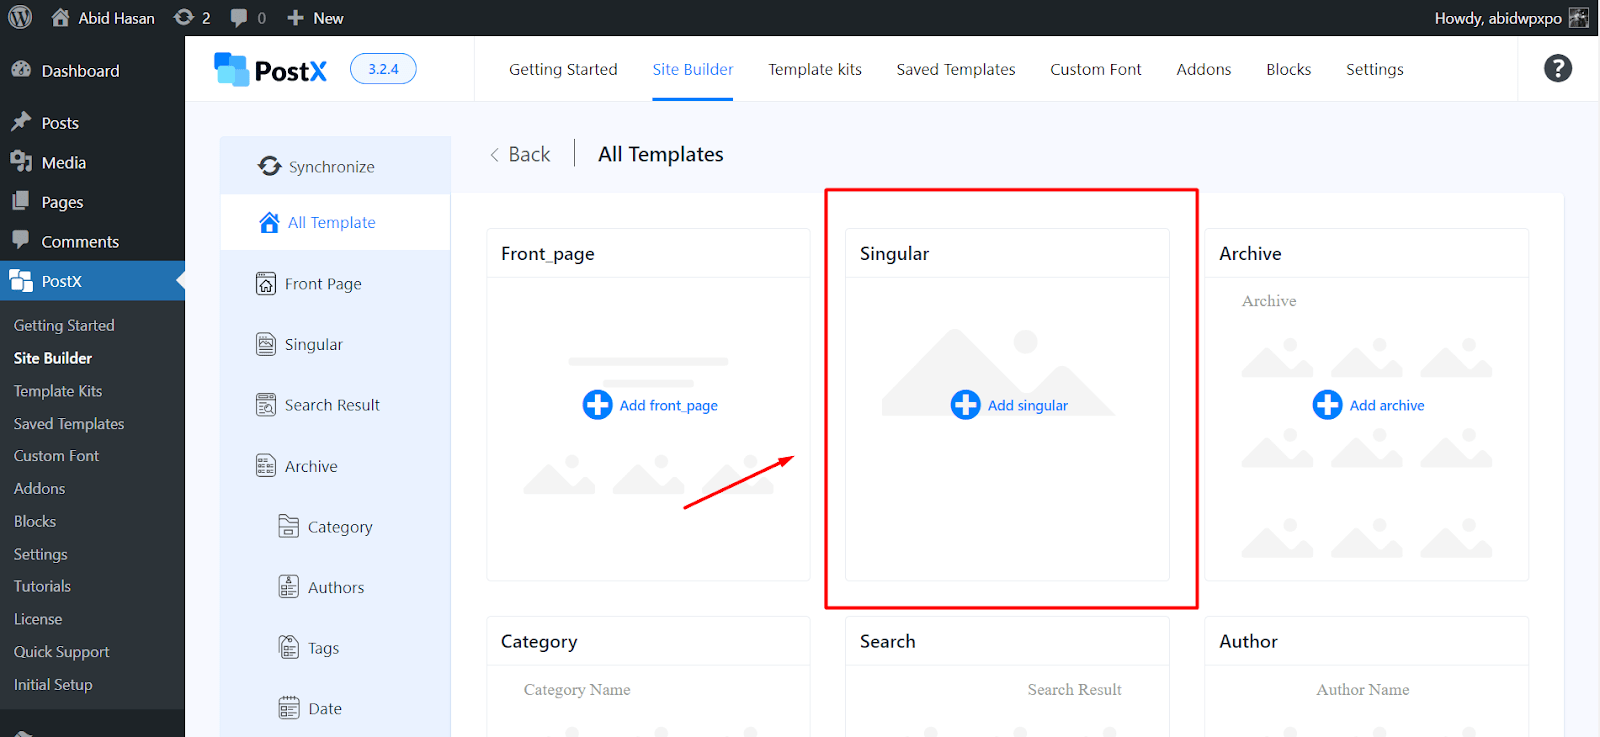
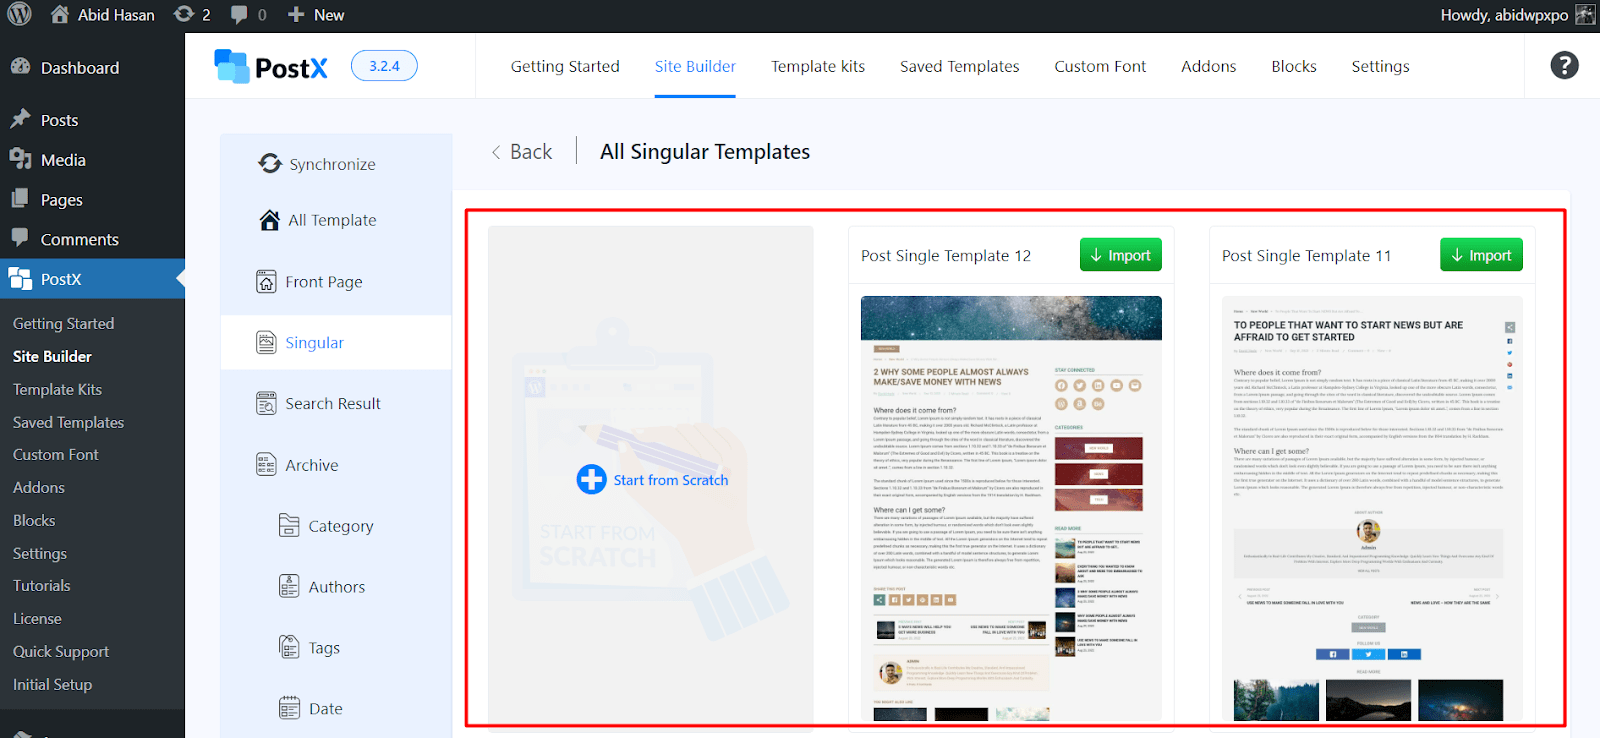
- Choose from the templates or create one from scratch
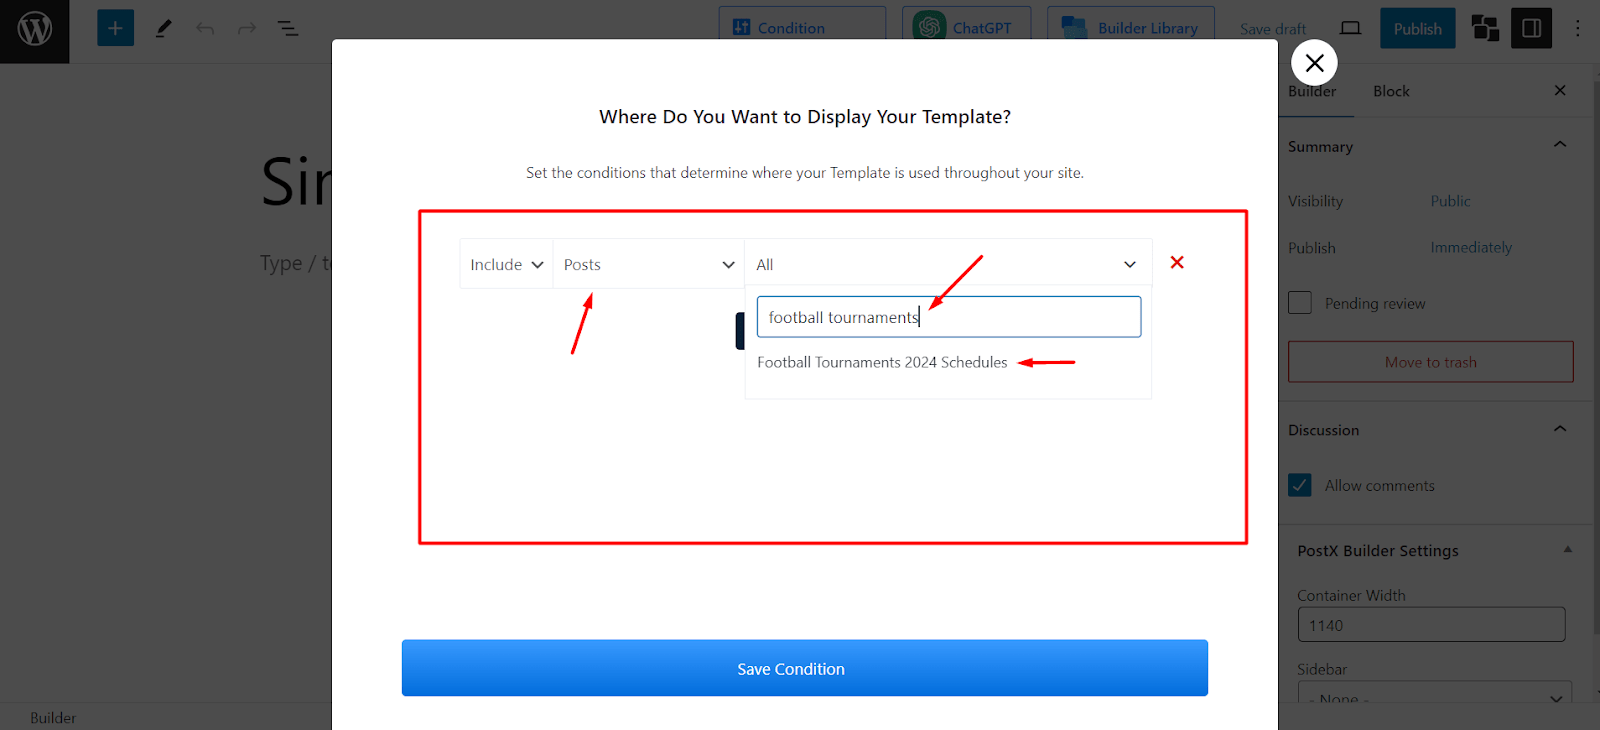
- On the Conditions section, type the name of the post inside the dropdown on the right side and then click on Save Condition.
- Now select the Post Comments block and fine-tune settings to your liking.
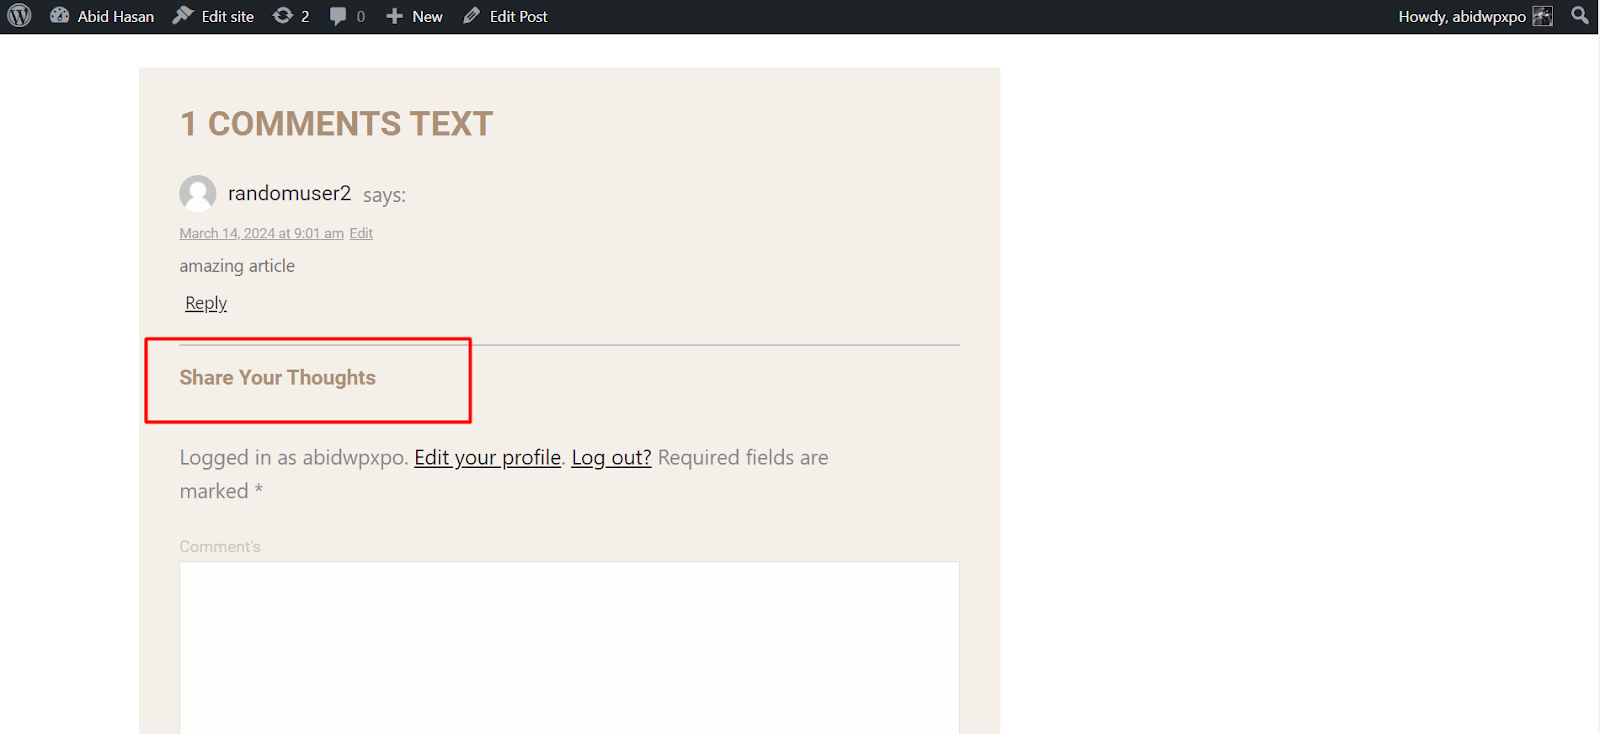
For instance, I changed the default comment form heading of “Leave A Reply” to “Share Your Thoughts” for the specific post that I chose.
Customize WordPress Comment Form for Specific Category Posts
Sometimes, you may want to customize a comment form for posts from a specific category. For example, I have a Sports News blog where I cover topics on Cricket, Football, Tennis, and so on.
Now, I want to show a unique comment form for posts from the Cricket category. Well, using PostX, I can easily accomplish this.
The steps are quite similar to customizing a comment form for a specific post.
To customize the WordPress comment form for specific category posts, simply follow these steps:
- Create a Singular post template using the Site Builder feature of PostX
- On the Conditions page, type the name of the Category inside the dropdown on the right section.
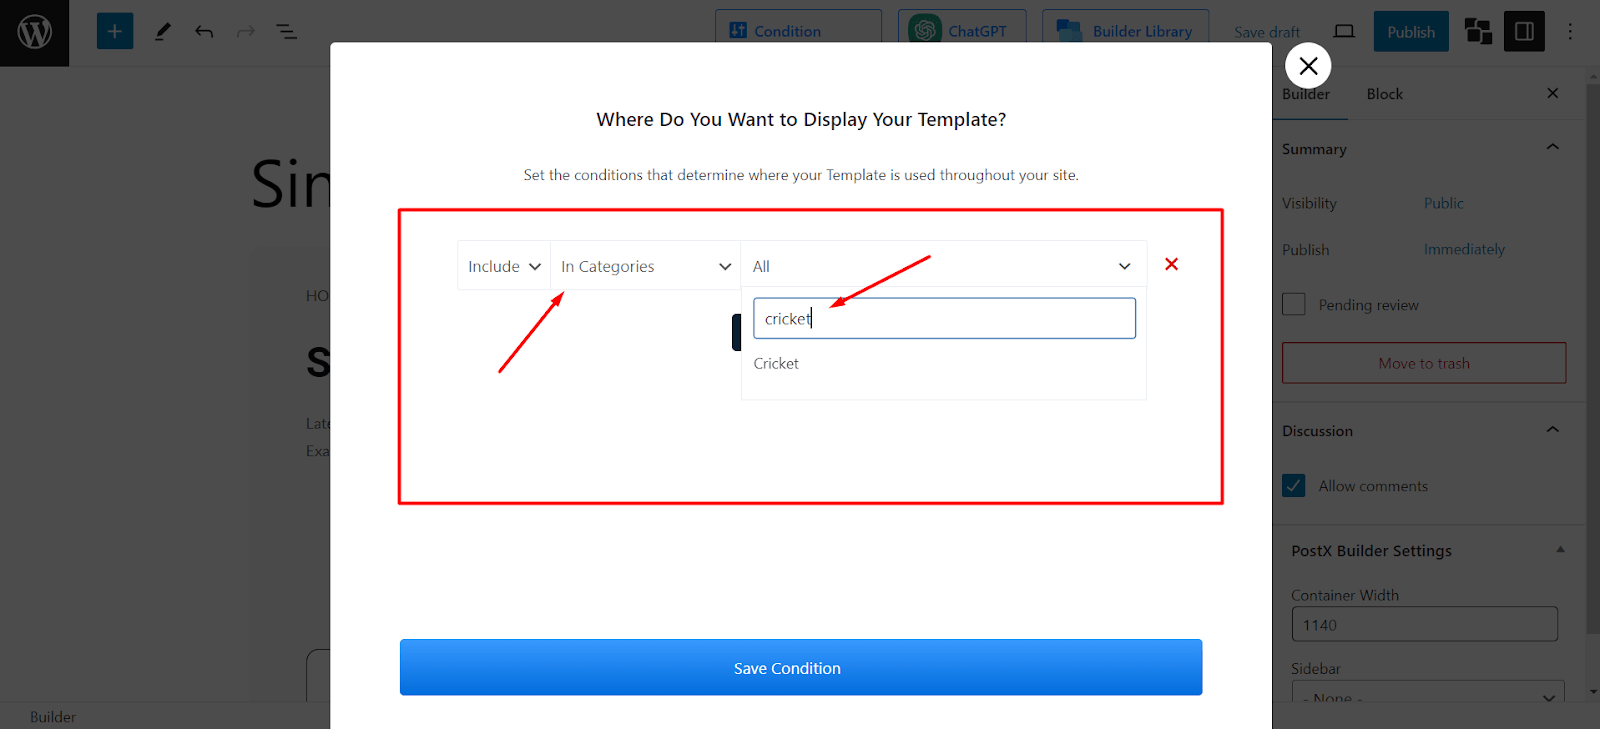
- After selecting the Category, click on Save Condition.
- Now select the Post Comments block to set your unique design
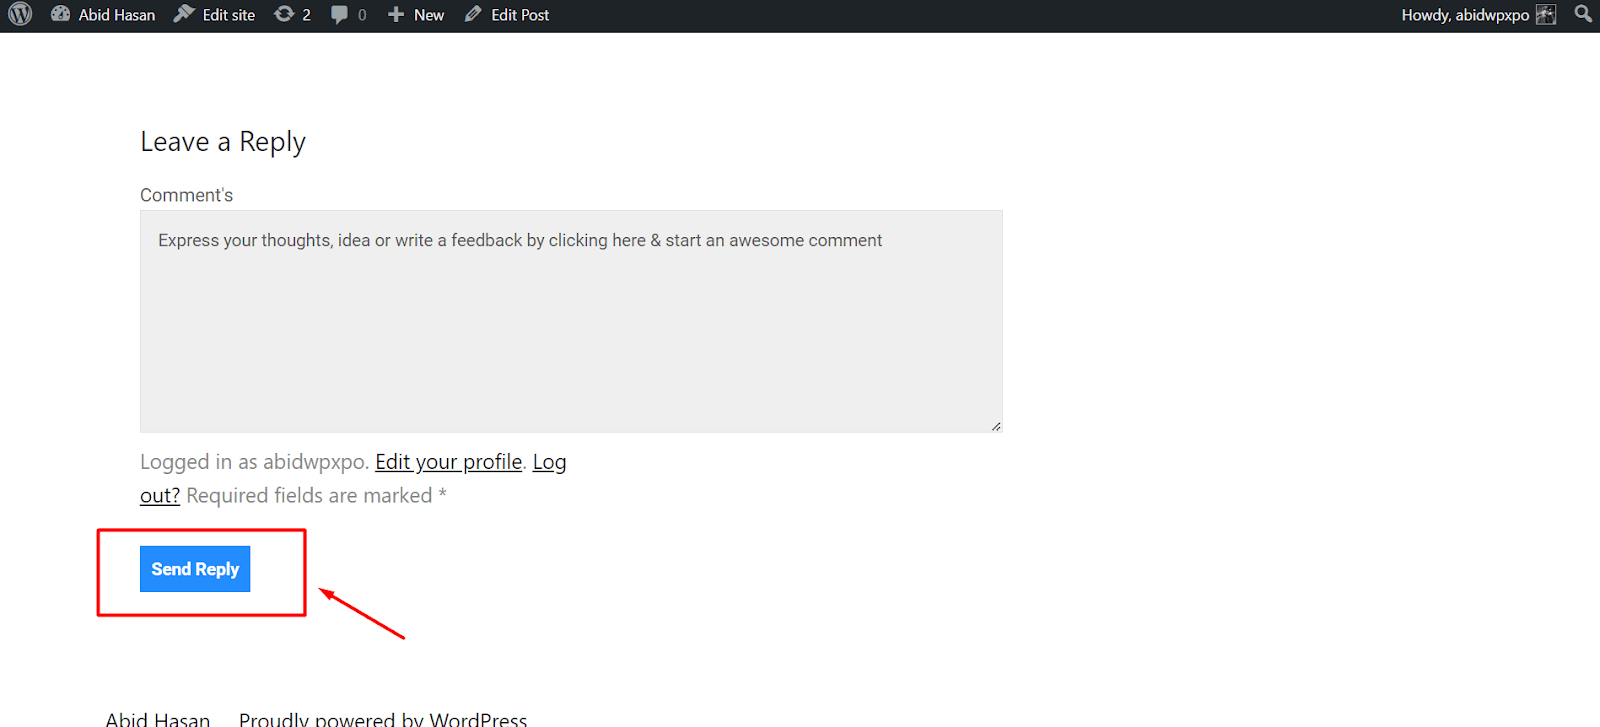
For example, I changed the default submit button text of “Post Comment” to “Send Reply” for the specific category that I set a condition for.
How to Create Custom Comment Form in WordPress Without Plugin
If you don’t want to use a plugin to edit a comment form, there’s an alternative way to customize it. We are talking about FSE themes which allow you to do basic customizations for WordPress comment form.
Customize The Look
By editing settings in your FSE theme, you can customize the comment form for blog posts.
Follow these steps to get started:
- On your admin dashboard, click Appearance > Editor
- Now select Single Posts from the list of templates
- Click on the Pencil icon to get to the edit view
- Now scroll down to the Comments Form section and select the block.
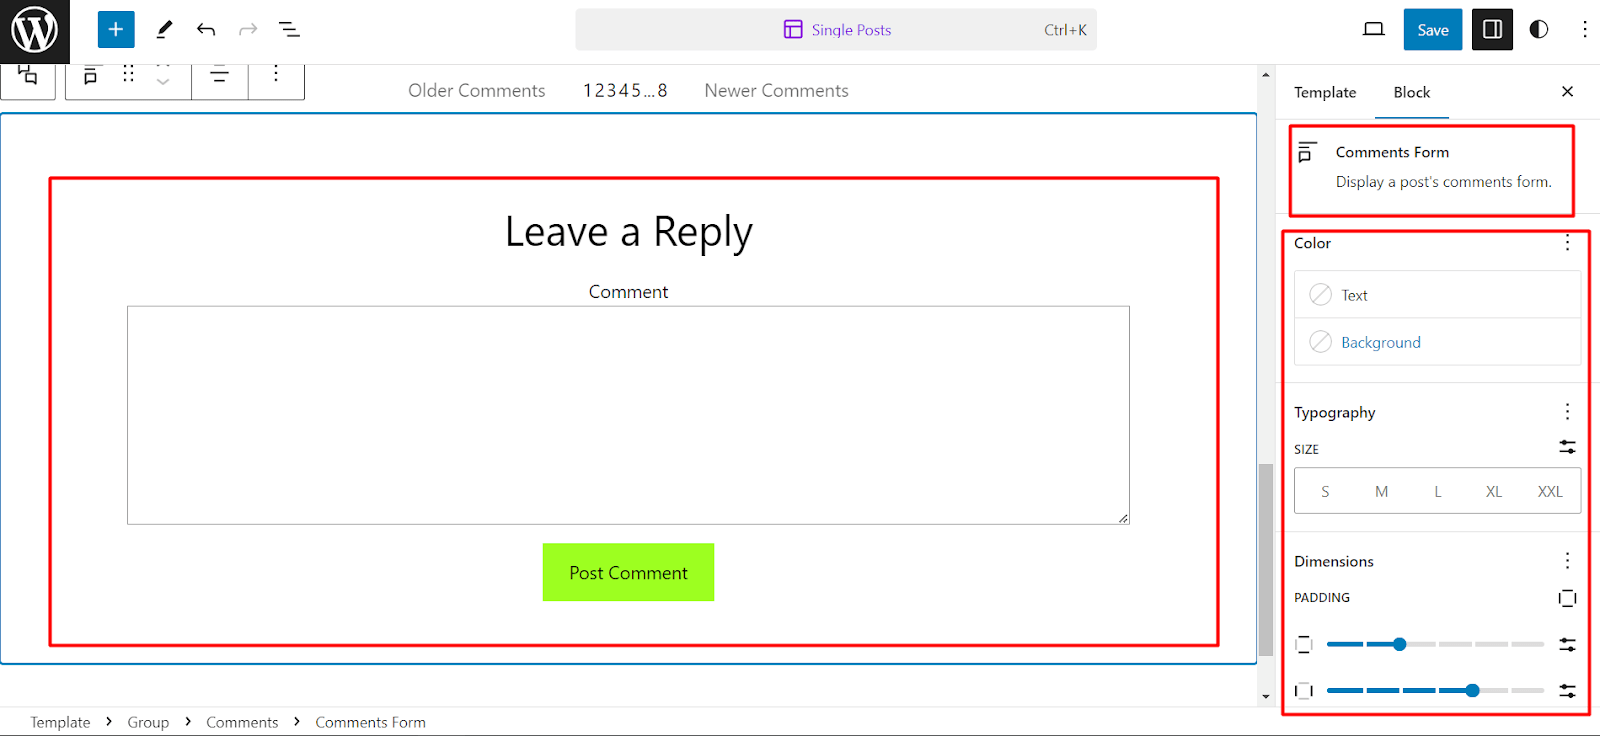
- From here, you can customize options such as color, typography, padding, margin, and so on.
Move Comment Form Above The Comments
In most cases, the comment form is shown under the comments. So you may ask, is it possible to move the comment form above the comments?
Yes, you can easily do this in your theme settings:
- Go to the Site Editor of your theme
- In the edit view of Single Posts, select the Comments block
- Within this block, select the Comments Form block
- Now you can reposition the block by clicking the Move Up icon from the Tooltip
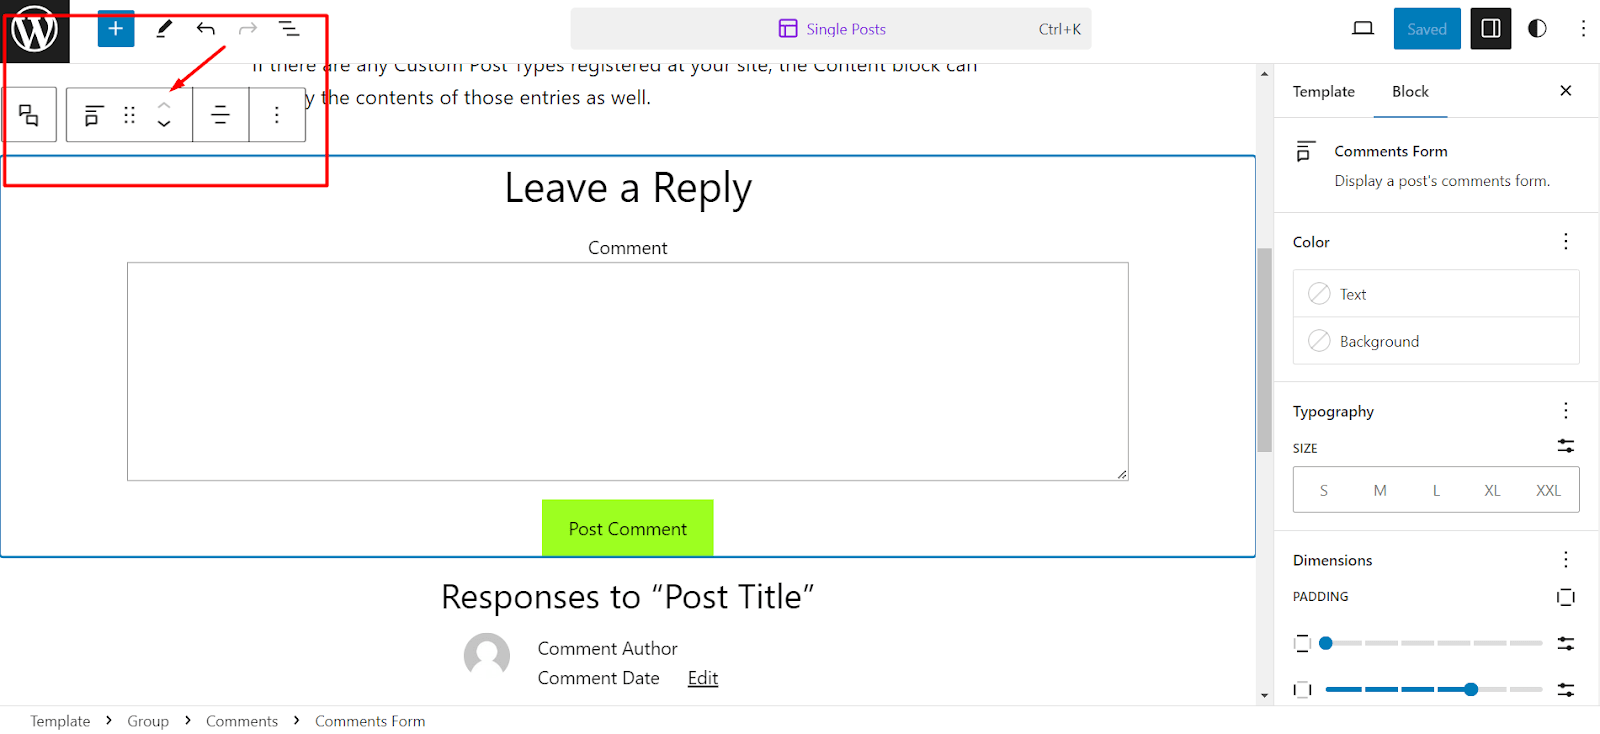
This way you can easily place the Comment From above the comments.
FAQs
How Can You Show the Comment Count in WordPress?
You can show the comment count in WordPress with PostX.
Simply follow these steps:
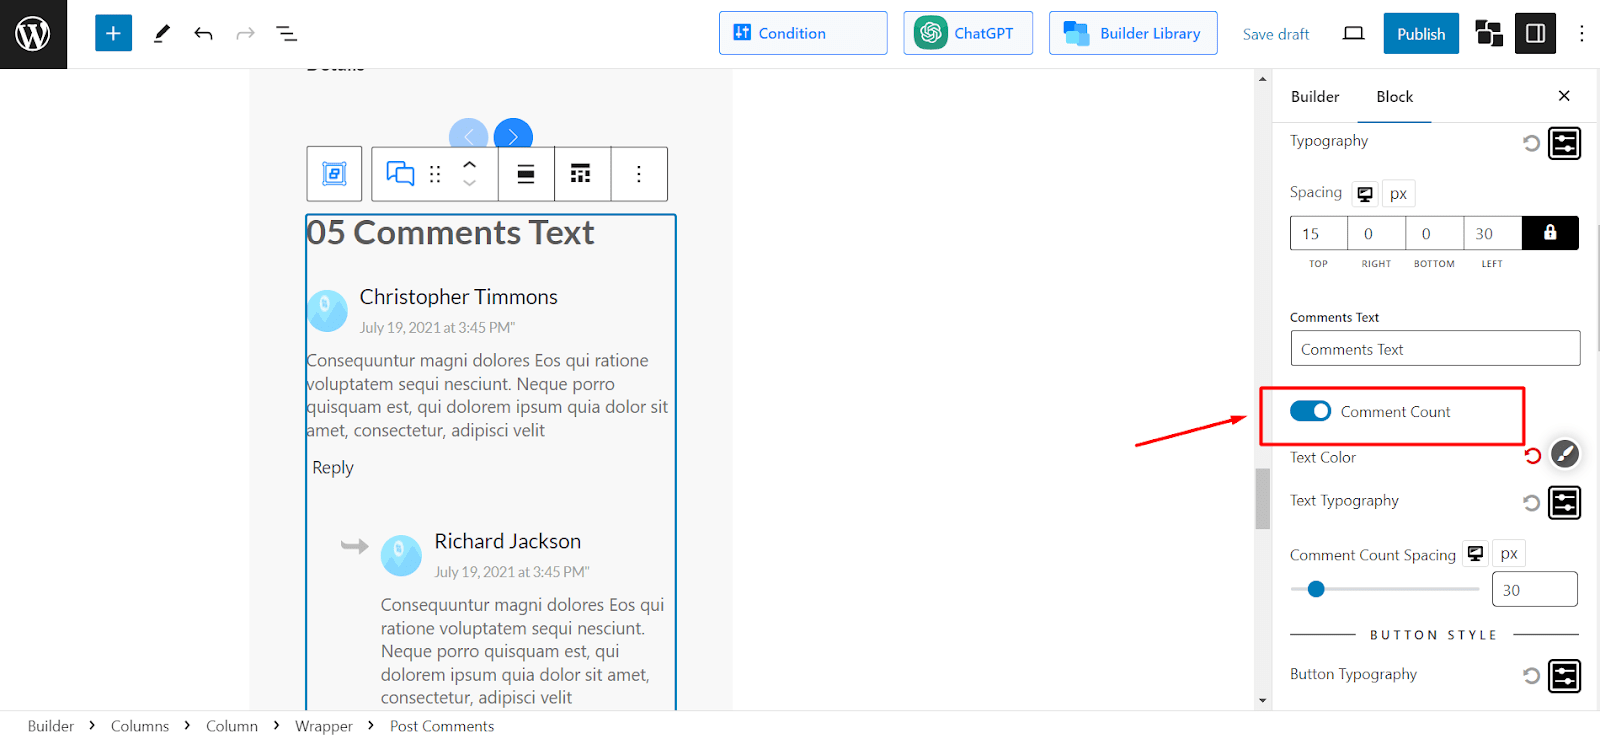
- Create a custom post template with PostX
- Go to Edit view of the template and select the Post Comments block
- Scroll down to Comments & Reply and under this form, you will find the option Comment Count
- Enable the option to see the total number of comments on a post
How to Solve WordPress Comment Form Not Showing?
If you are not seeing the comment form for any of your blog posts in WordPress, follow these steps:
- On your admin dashboard, click on Settings > Discussion.
- Under Default post settings, make sure the option “Allow people to submit comments on new posts” is enabled.
If you are not seeing the WordPress comment form for a specific post, you need to follow these steps:
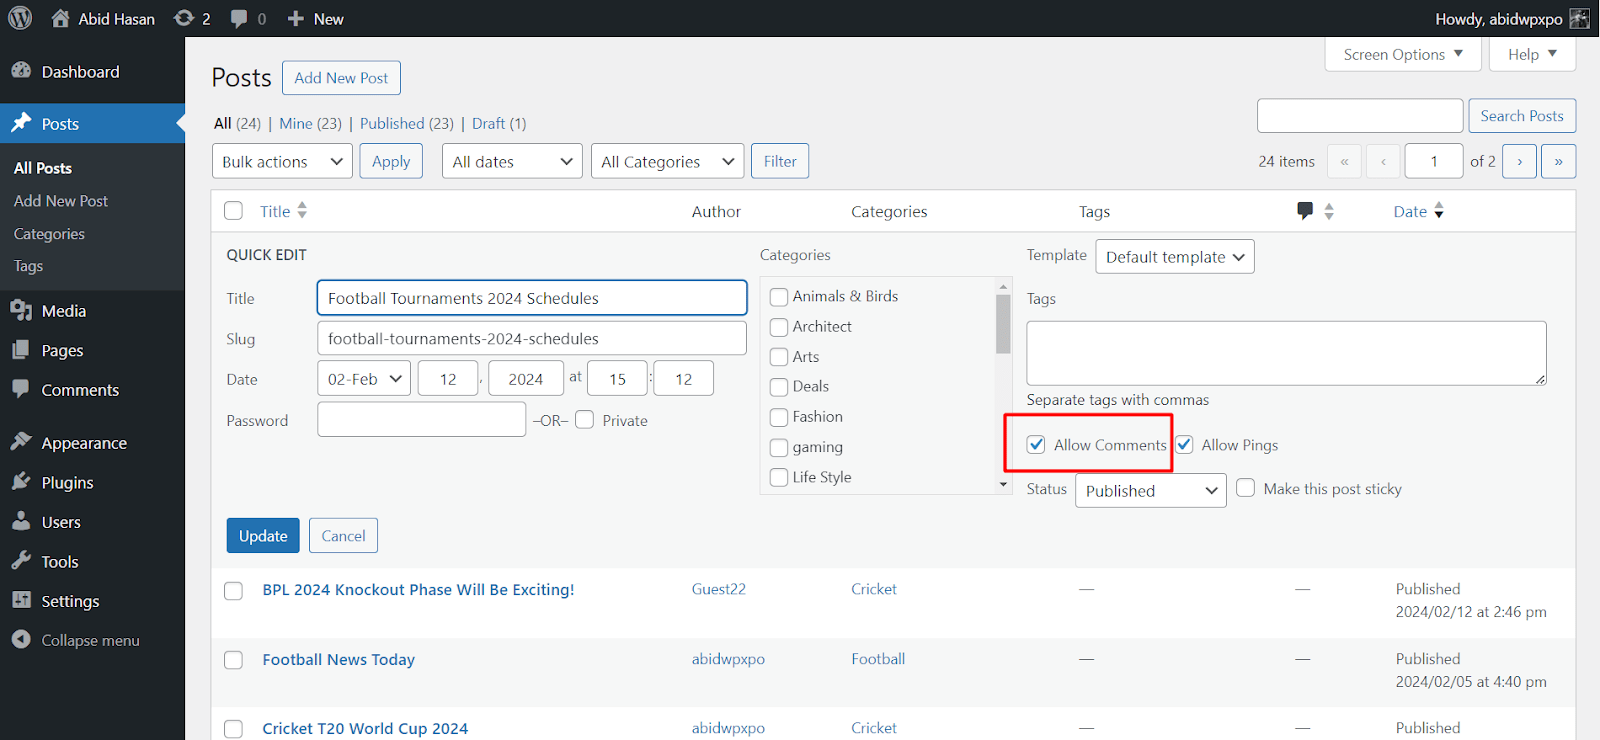
- On your admin dashboard, click on Posts > All Posts
- Click on Quick Edit for the post where the comment form is not showing
- Now make sure the option Allow Comments is enabled.
Can You Moderate User Comments in WordPress?
Yes, you can moderate user comments in WordPress. To be able to do this:
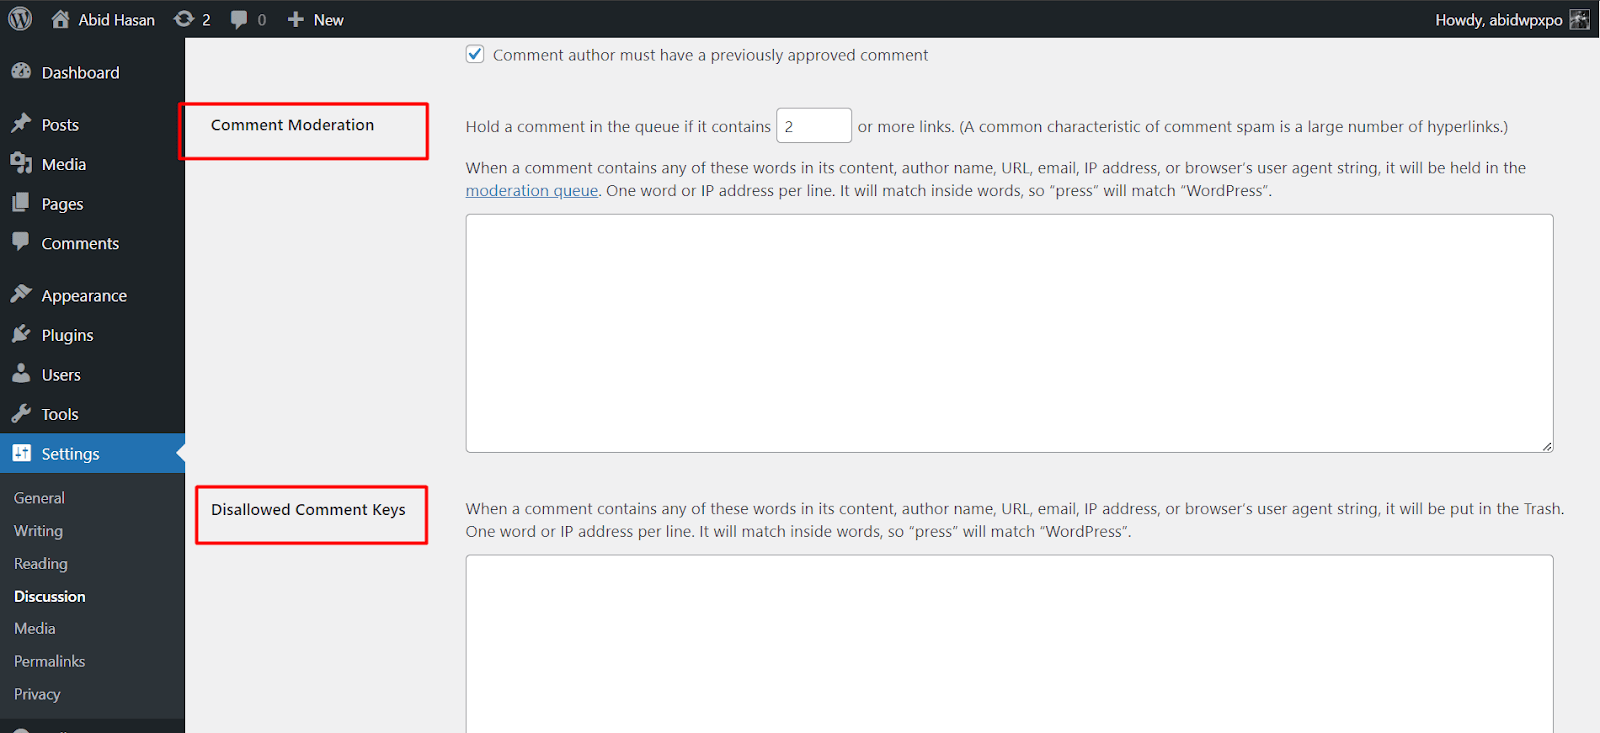
- Visit your admin dashboard and go to Settings > Discussion
- Scroll down to where it says “Comment Moderation”.
- Here you can set conditions for specific words that can trigger comments to go to Moderation Queue or Trash.
Closing Words
Hopefully, this article has answered all your questions regarding how to customize the WordPress comment form. If you are ever in doubt, feel free to check the information once again.
