WooCommerce is a blessing as we can start an ecommerce journey without coding knowledge and with a small budget. However, having only a WooCommerce store is not enough to be successful in the e-commerce Business.
All online store owners must satisfy their customers to build a sustainable business. One great way to ensure a better shopping experience is to help potential customers find their desired items effortlessly. How?
The Product Filtering feature is your solution. However, the drawback is that WooCommerce doesn’t offer this feature by default. So you may also have the same question: how do you add filters to the WooCommerce Shop Page?
You can follow the below steps to add a filter to your WooCommerce shop page:
- Step 1: Install the WowStore Plugin
- Step 2: Enable WooCommerce Builder
- Step 3: Create a Custom Shop Page with Product Filtering
- Step 4: Customize Filter and Publish
What is WooCommerce Product Filter?
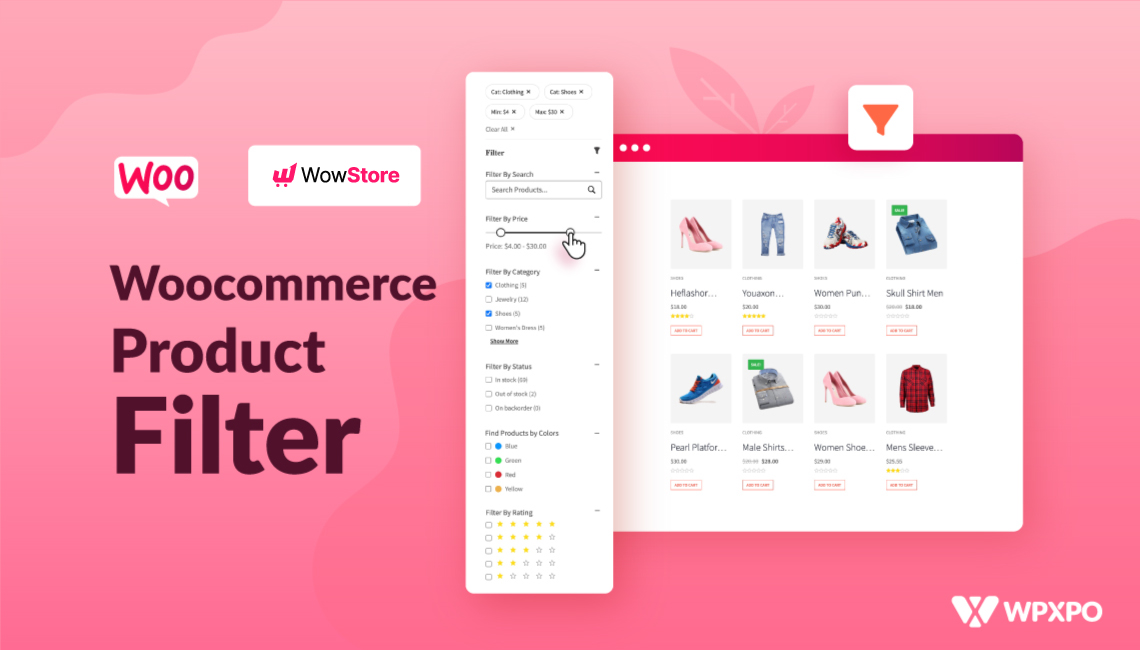
WooCommerce Product Filter refers to letting the shoppers find their desired products based on multiple criteria that include product attributes, categories, price, rating, color, sizes, etc. It helps shoppers find their desired products effortlessly.
For example, one wants to buy a red t-shirt of medium size within the budget of $5 to $10. For that, he/she can use the clothing category or t-shirt subcategory, choose the medium from the size selection option, and set the desired price range. So, the shopper can easily get the product if that is available in the store.
Why We Should Add Product Filter to WooCoommerce Stores?
Before going into the in-depth explanation, you should know why you should add a filtering option to your store. There are many reasons behind offering product filtering. The following are some of the most common benefits of WooCommerce Product Filtering.
User Experience: The first and most crucial benefit of product filtering is that it helps shoppers find their desired items faster. It satisfied them and made the shopping experiences effortless and enjoyable. So, adding the filtering features is necessary to make your customers happy and give them a great experience.
Enhanced SEO: Smoother and easier product finding helps shoppers and search engine crawlers better understand the site’s structure. It will support your SEO efforts and help you increase your search engine visibility.
You can also keep the shoppers on your site for a longer time. As a result, the time on site metrics will increase, eventually helping your site rank higher on search engines.
Improve Conversions: If your site has a poor structure, potential buyers will get frustrated. They may not even find the items that your store has. On the other hand, an ideal filtering system will bring the exactly matched products in front of them, so chances are the conversion rate will be increased.
Increase Average Order Value: As potential buyers find the products faster, they will look for more products after adding an item to the cart, increasing your online store’s average order value.
Prerequisite of Adding Product Filtering in WooCommerce
As I already told you, WooCommerce doesn’t have a product filtering feature. However, you can add it in any of the following ways.
Custom Codes
The first way of adding product filters is by writing custom codes. You can do it yourself or hire a WooCommerce developer to do it for you. However, make sure to list your requirements and have a reasonable budget.
Product Filter Plugin
If you don’t want to use custom code, there is an easier solution. You can use a plugin that offers this feature. Multiple options are available. Explore them and choose the one that best fits your requirements. However, you need to spend between $49 and $79 to purchase an ideal Product Filter Plugin.
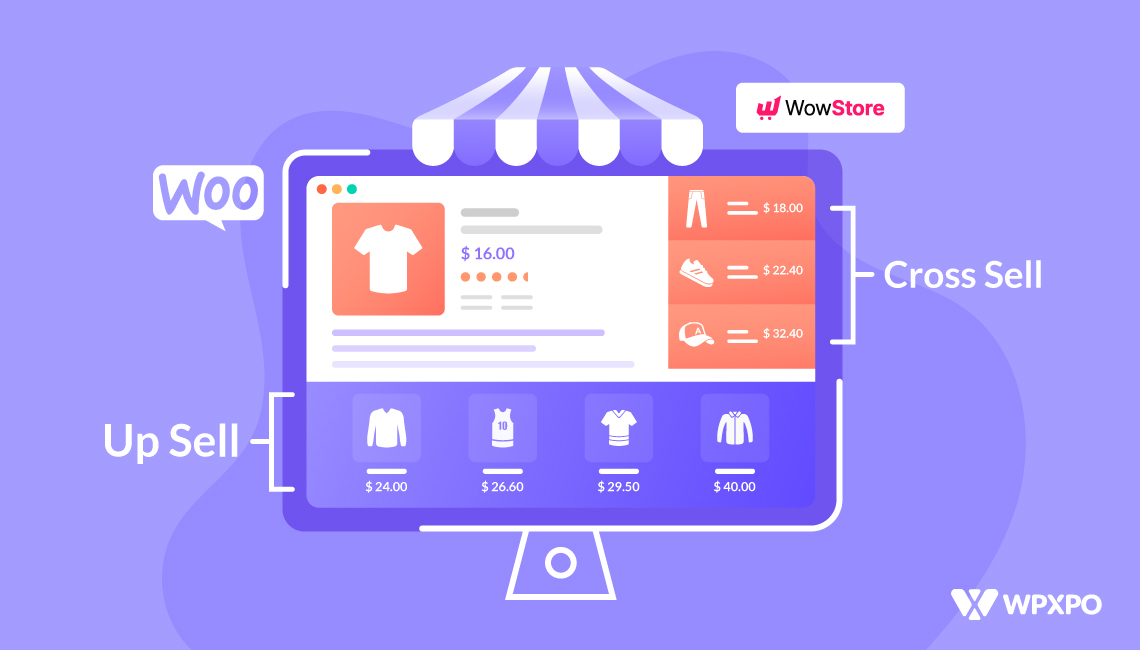
WowStore – All-In-One Woo Solution
You can also go for an all-in-one solution like WowStore that offers all essential features. This will keep the plugin count low and ensure a fast-loading shopping experience for shoppers. Not only that, but you can also save money, as WowRevenue offers all essential features at just $49. However, an all-in-one solution also has a limitation. You need to use its ecosystem.
All possible ways of adding product filtering have advantages and disadvantages. So, make sure to have a long-term plan and make a smart decision.
For now, let’s continue the discussion and explore how we can add the product filtering feature using the WowStore plugin. To follow the step-by-step guide, ensure you have already installed and activated the plugin.
How to Add in Filter WooCommerce Shop Page Using WowStore
As I have already stated, you must enter the WowStore ecosystem to use its filtering features. So, you must create a custom shop where you can add the product filtering functionality. Let’s explore the process. You can also check out the video tutorial on adding product filters if you don’t like to read.
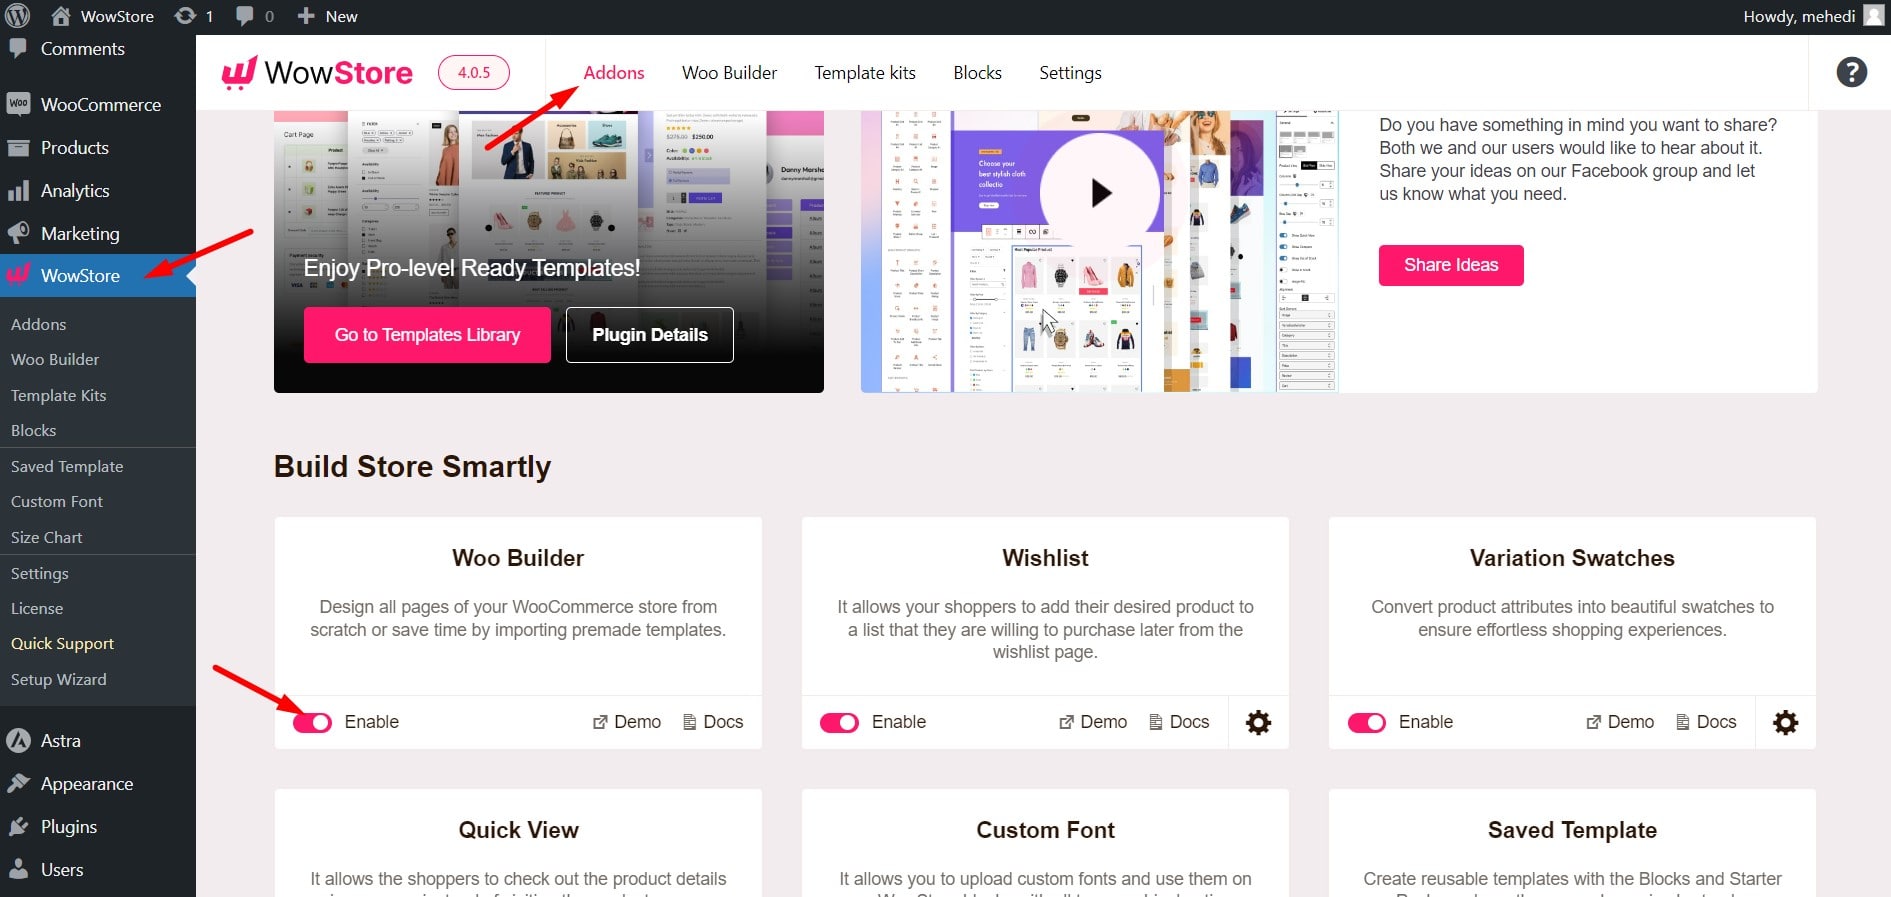
Step 1: Enable WowStore Woo Builder
We need to use the WooCommerce Builder addon of WowStore to create a custom Shop page. So, if you need to enable it, here’s how:
- Go to the WowStore Section
- Toggle the Enable Button
Step 2: Create a Custom Shop Page with a Premade Template
Upon enabling it, we see a Woo Builder section, from which we can create custom templates and replace them with the default WooCommerce Pages.

Here, you can see template-creating options for your store’s pages. Let’s choose Shop for now, as we want to create a custom shop page template for our WooCommerce store.
Here, you can see multiple premade templates. You can import any ready templates, as they all already have the product filtering feature.
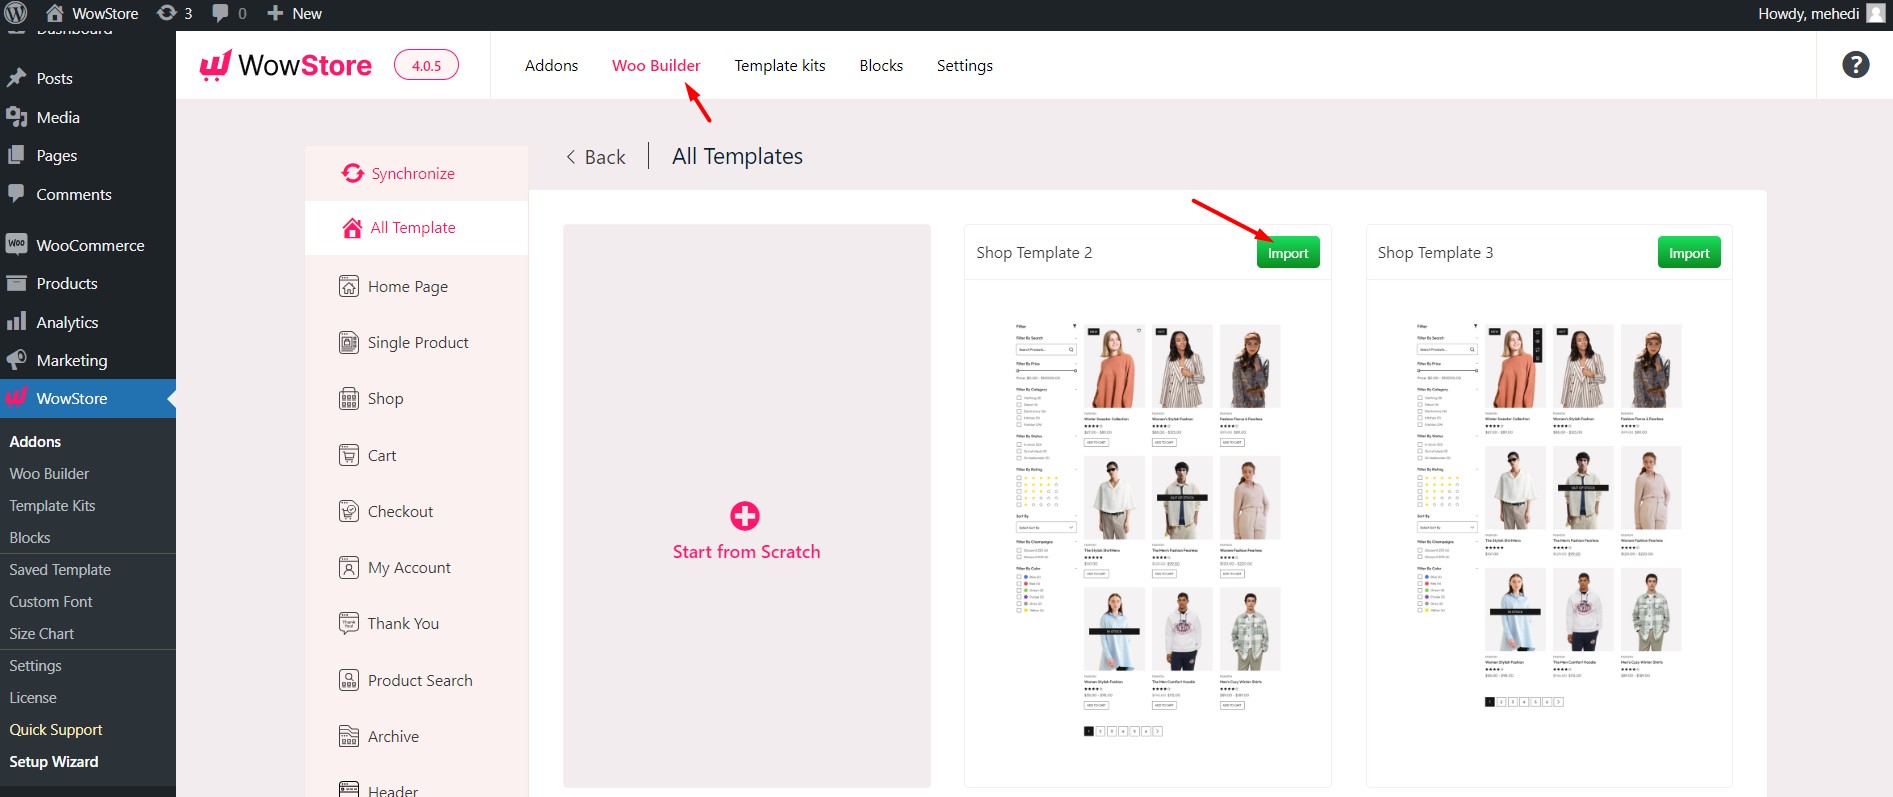
Upon importing a template, you can see that it is ready to publish. Now, we can either publish it or further customize it.
Step 3: Create a Custom Shop Page from Scratch
If you don’t want to use a premade template, click the “Start from Scratch” button. It will give you an empty canvas to page as per your requirements. Let’s explore how:
Add Two Columns
As it is ideal to show products and the filtering option side by side, we will break down the page into two columns. For that, we will be using the Row/Column of WowStore.
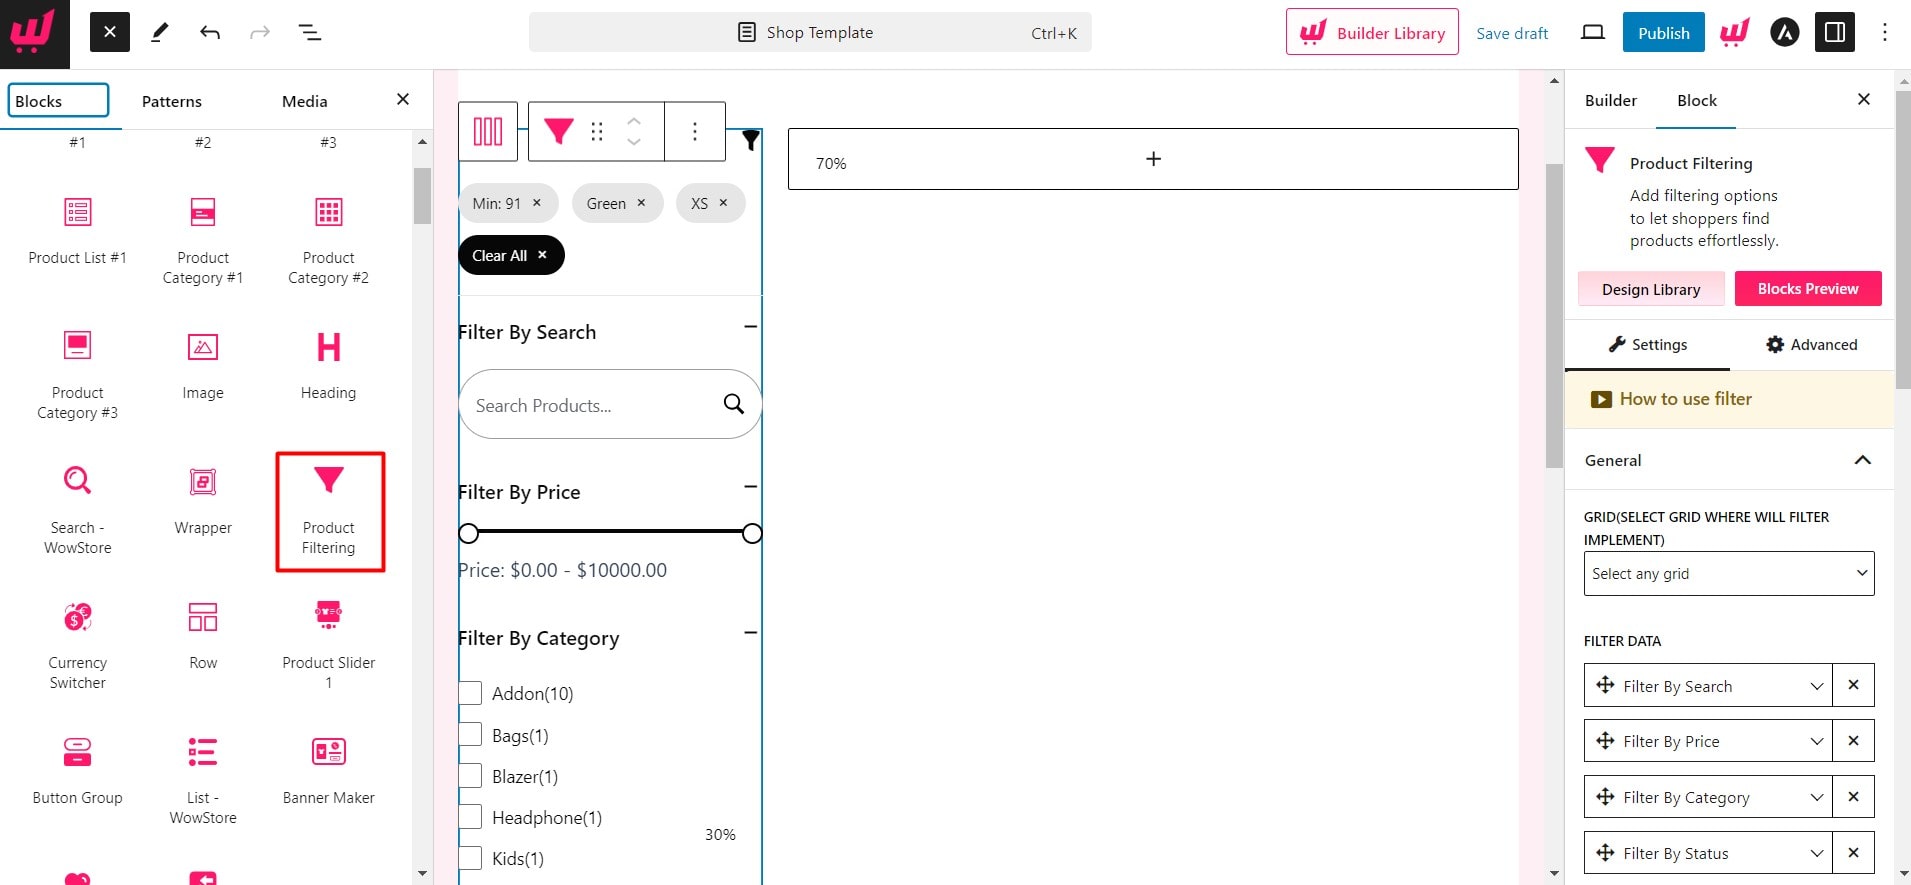
Add Product Filter Block
Now, I am adding the Product Filter Block. For this tutorial, I am adding it to the left side. However, you can also place it on the right side if you want to.
Add Product Block
To display the products in an organized way, we need to add a Product Block. For now, I am adding Product Grid Block 1. However, you can choose any of the available grid and list blocks.
Connect Filter with Product Block
We need to do the most important thing. Make sure to connect the product filter with your chosen product block. Otherwise, the filtering options will not work.

Step 5: Customize Product Filter
Then, you can go for further customization or publish it as it is. Let’s explore the possible customization options:
Add, Remove, and Rearrange: You can rearrange the filtering options and remove the ones not required for your store. Upon adding an option, you can change the label text of the filtering option.
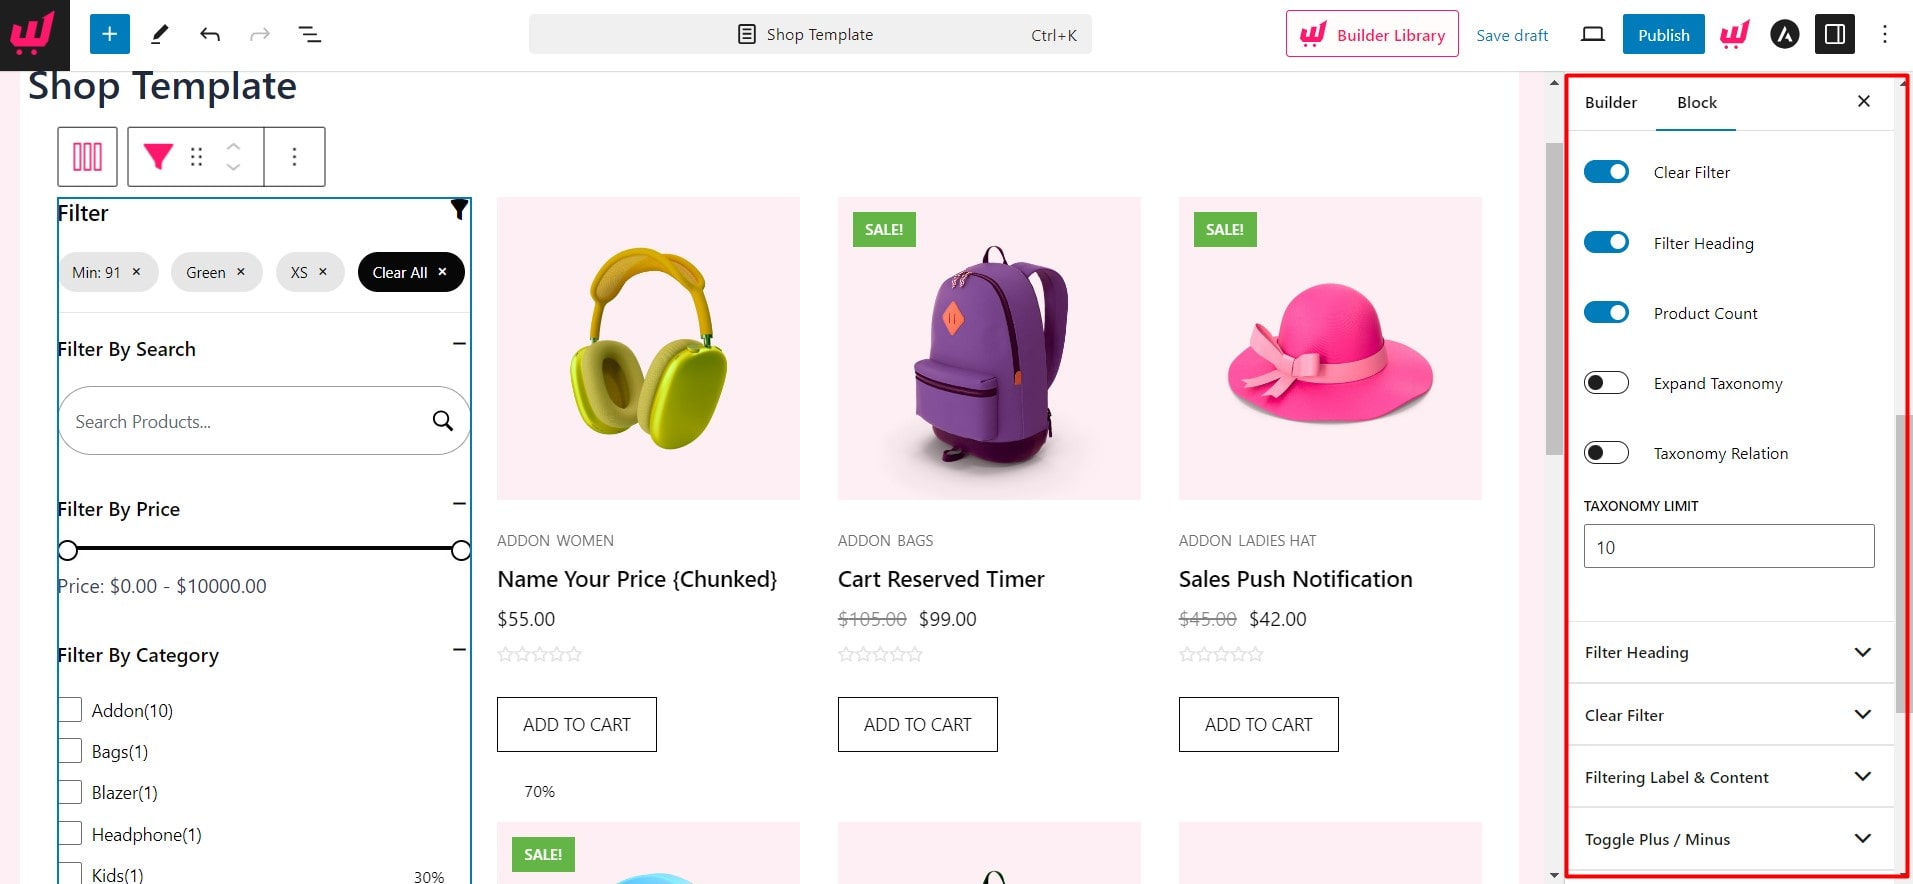
Enable or Disable Elements: Then you can turn the following elements on or off:
- Clear Filtering
- Filter Heading
- Expand Taxonomy
- Taxonomy Relation
Expand Taxonomy: If you have subcategories of the categories, you can enable this option to expand them by default.
Taxonomy Relation: This option helps you set a relationship between your categories and tags. Enabling it will display the products from the chosen category and tags.
Taxonomy Count: This is an effective option for stores with too many categories. You can set a fixed number of categories that shoppers can filter by.
Similarly, customization options are available for all other elements of the product filter. You will have the option to customize colours, sizes, and more for the following aspects:
Filter by Heading: Here, you can add custom text for the filter heading, change the colour and typography, and adjust the bottom spacing.
Clear Filter: The Clear Filter option allows you to customize the color of the text, background, typography, and so on.
Filtering Label & Content: Similarly, you have the color and typography options for the Filtering Label and content as well.
Toggle Plus / Minus: You can turn the expanding toggle on or off here. Then, you can make the filtering label expand by default and initially close for mobile devices. Moreover, you can adjust the size of the expanding toggles.
Input Fields: You can adjust padding and radius and change the field colour for the input fields.
Search Style: For the Ajax search filter, you can change colours and adjust the border-radius and padding.
You can learn more about creating custom shop page template from our detailed blog post.
Benefits of Using WowStore Product Filter
Now that you know the process of adding product filter options for your WooCommerce store, you may be thinking about whether WowStore is the right choice for you or not. Well, it depends on your requirements. The following are the main reasons why you should consider using WowStore.
All Product Filtering Options
As you consider WowStore for product filtering, let’s discuss this feature first. The main benefit of using WowStore is you get all essential filtering options with vast customization freedom. The following are the criteria by which your store’s shoppers can filter products.
- Filter By Ajax Search
- Filter By Price
- Filter By Category
- Filter By Tags
- Filter By Stock Status
- Filter By Rating
- Filter Colors
- Default Product Sorting
All-in-One Solution
Although WowStore offers the most complete and advanced product filter, it is not limited to only this feature. You will get all the other essential features that are ideal for building and managing a successful WooCommerce store. So, with WowStore, you can keep your plugin count and spend low, ensuring a better shopping experience and boosting sales without breaking the bank.
Conclusion
So, that’s how you can add the product filtering feature to your online store. Now, it’s time to start with WowStore and ensure a better shopping experience for your shoppers. Don’t forget to explore other sale-boosting and conversion-focused features of WowStore. You can leave a comment below if you still have any questions or want to share your feedback.