Searching for content on your website shouldn’t be a treasure hunt. Imagine a search bar that shows precisely what readers are looking for without endless clicking and scrolling.
Think of your site as a huge information hub, and visitors need a quick way to find what they’re looking for. That’s where a search bar comes in. You can choose from built-in options or customize your own using plugins.
Adding a search bar in WordPress is easy; I’ll show you step-by-step. Join us in enhancing the website’s usability and ensuring visitors find what they need.
Ready to make your site more user-friendly? Let’s show you how to add a search bar in WordPress menu.
How to Add a Search Bar in WordPress
WordPress offers native search widgets, and plugins can enhance this feature further. I’ve got you covered with step-by-step guidance and visuals for both methods.
Add Search Bar to WordPress Menu Without Plugin
If you search “How to add search bar in WordPress menu without plugin” in Google, you’ll find many articles. But all of them will claim to add a search bar in the menu. However, you’ll find a tutorial or guide for adding a search bar in the sidebar using WordPress’s default widget section.
But I’ve got your back! ✌?
Adding a search bar in the WordPress menu is easy if you use a theme with a header builder. For this tutorial, I’ll use the “Blocksy” theme, one of my favorite themes. You can get that for free from the WordPress Themes section.
Step 1: Get a Theme with a Header Builder
Go to the WordPress Dashboard > Themes. Then click “Add new.”
You can upload your own theme by clicking the “Upload Theme” button. Or, you can search for the free themes collection.
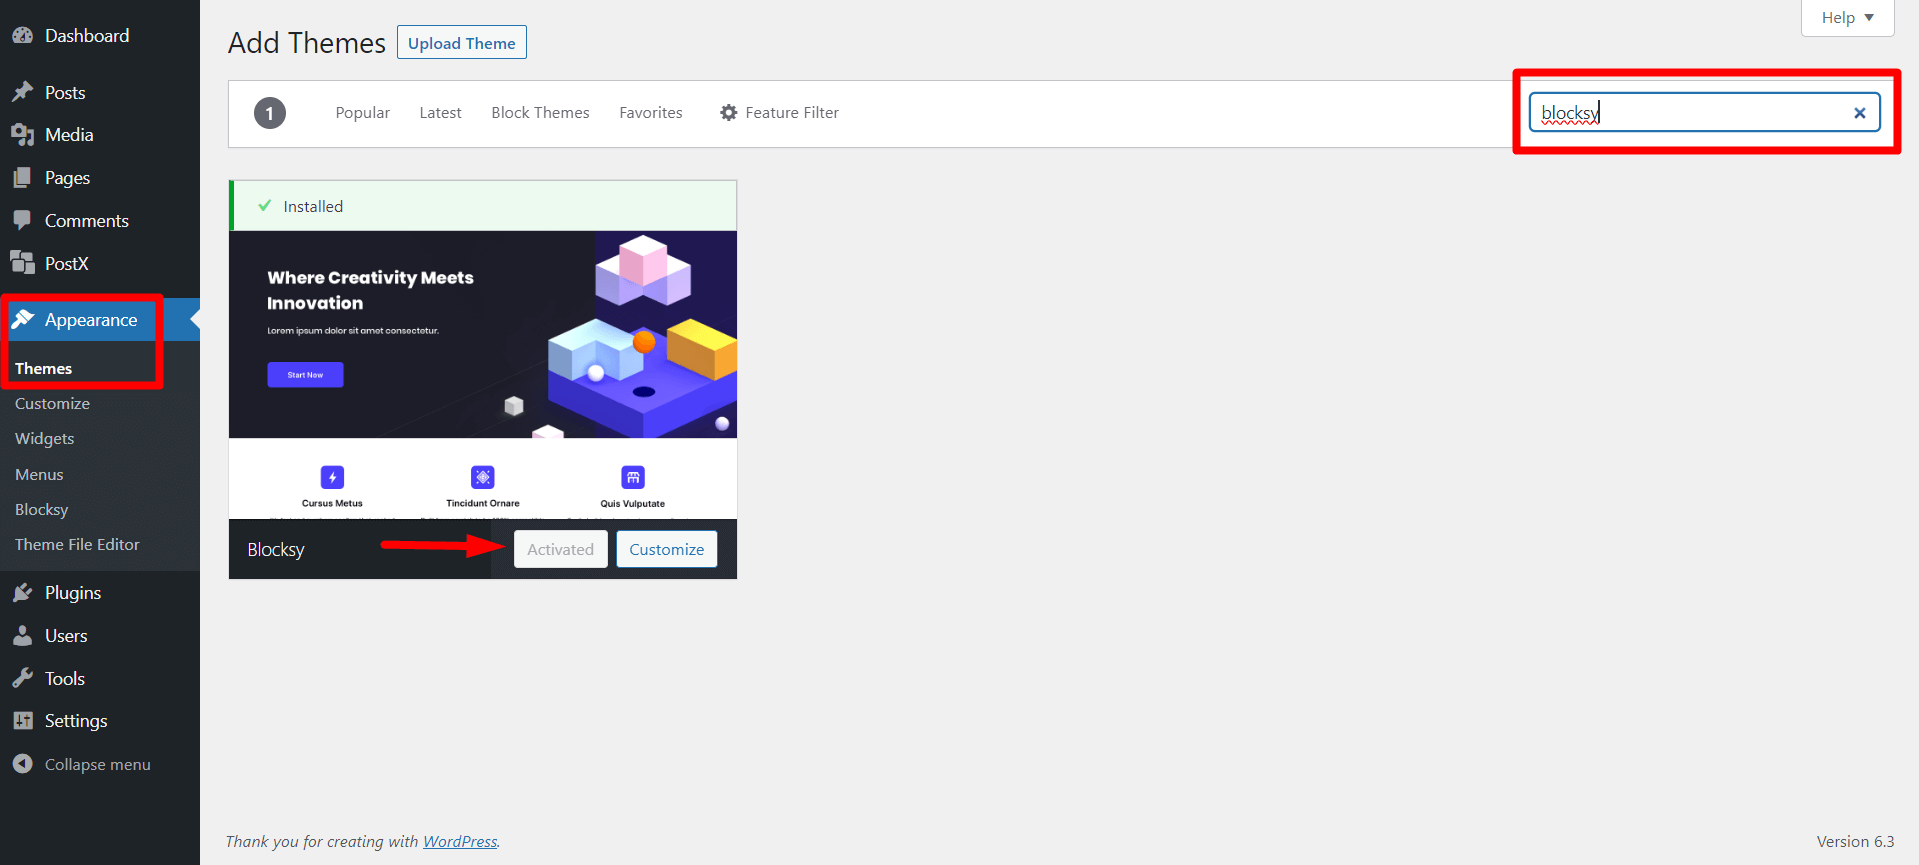
Search for “Blocksy” or any other themes with a header builder option. Then, please install and Activate it. My Blocksy theme is already activated, as I constantly use it, as I’ve mentioned earlier.
Step 2: Go to Theme Customizer
Now click “Customize” in the activated theme.

Or, you can go to WordPress Dashboard > Appearance > Customize.
Now, you’ll see a few customization options. But you need to select “Header” because the menu/menu bar is the header section in WordPress.
Step 3: Add Search to WordPress Menu
In this section, you’ll see 3 rows: Top, Main, and Bottom. I suggest using the Main Row to align more with the menu categories.
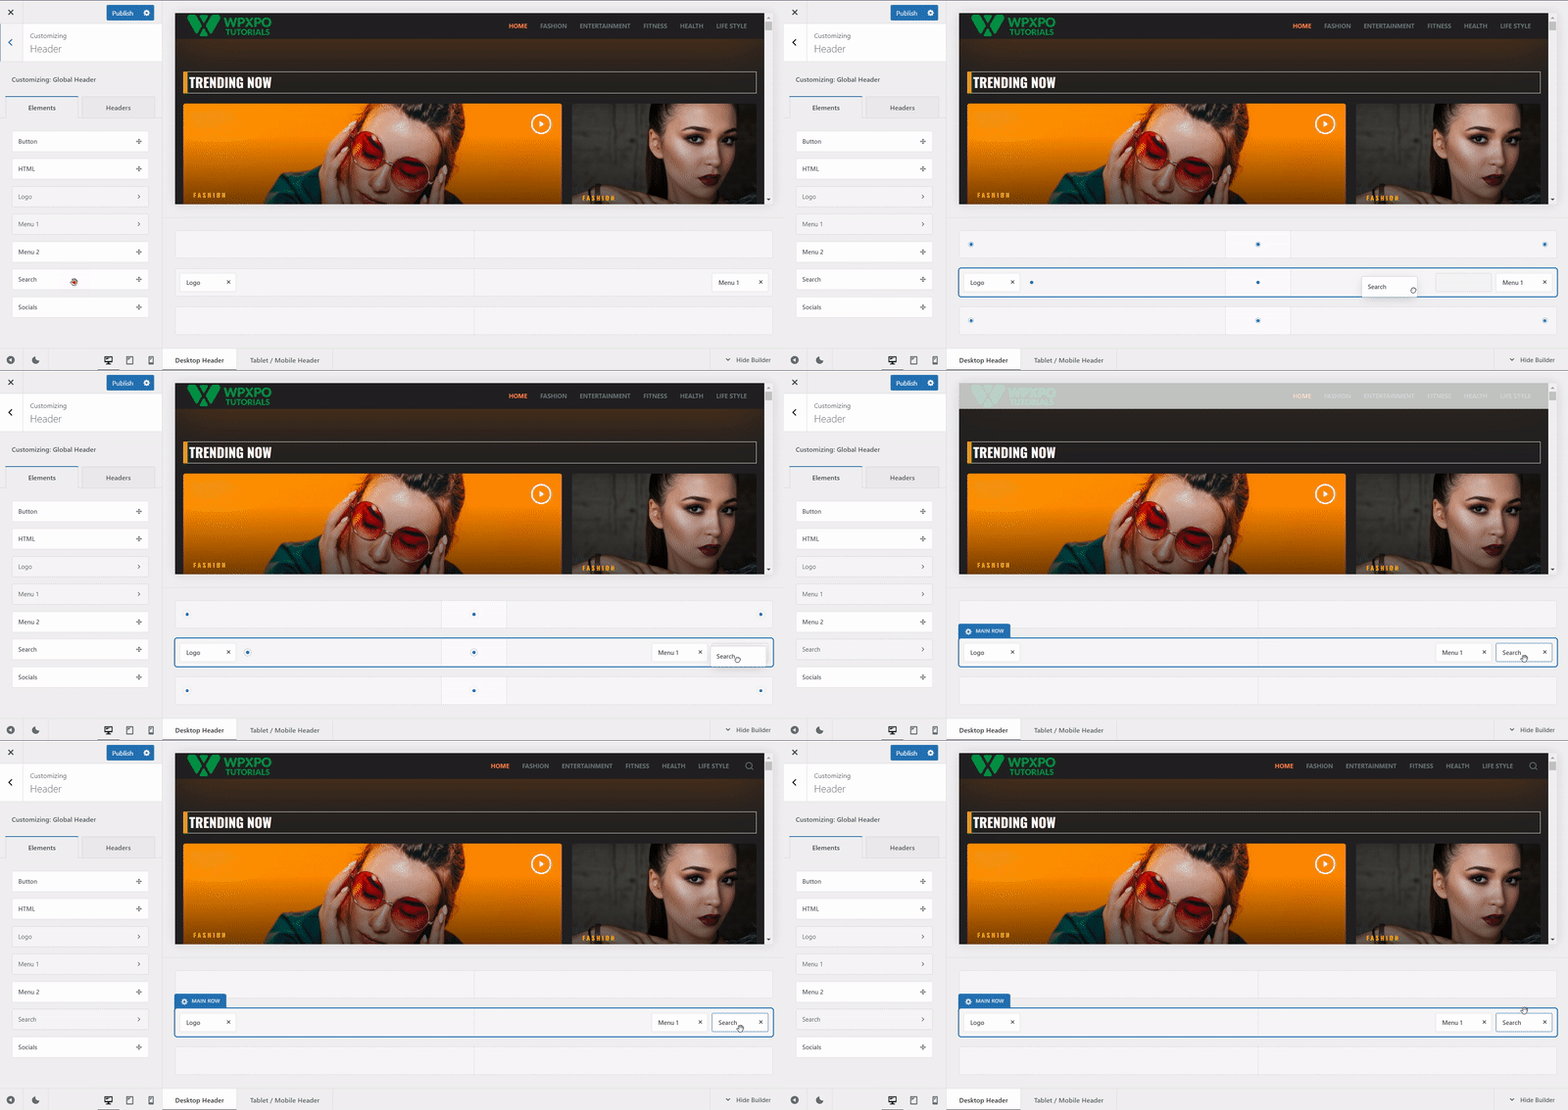
Now, Drag and Drop the Search element to the main row. And you’ll see a search icon get added to the menu.
Now, click “Publish” to successfully add a search bar in the WordPress menu.
Search Element Customization
You’ll see basic customization options when you click the added search element.
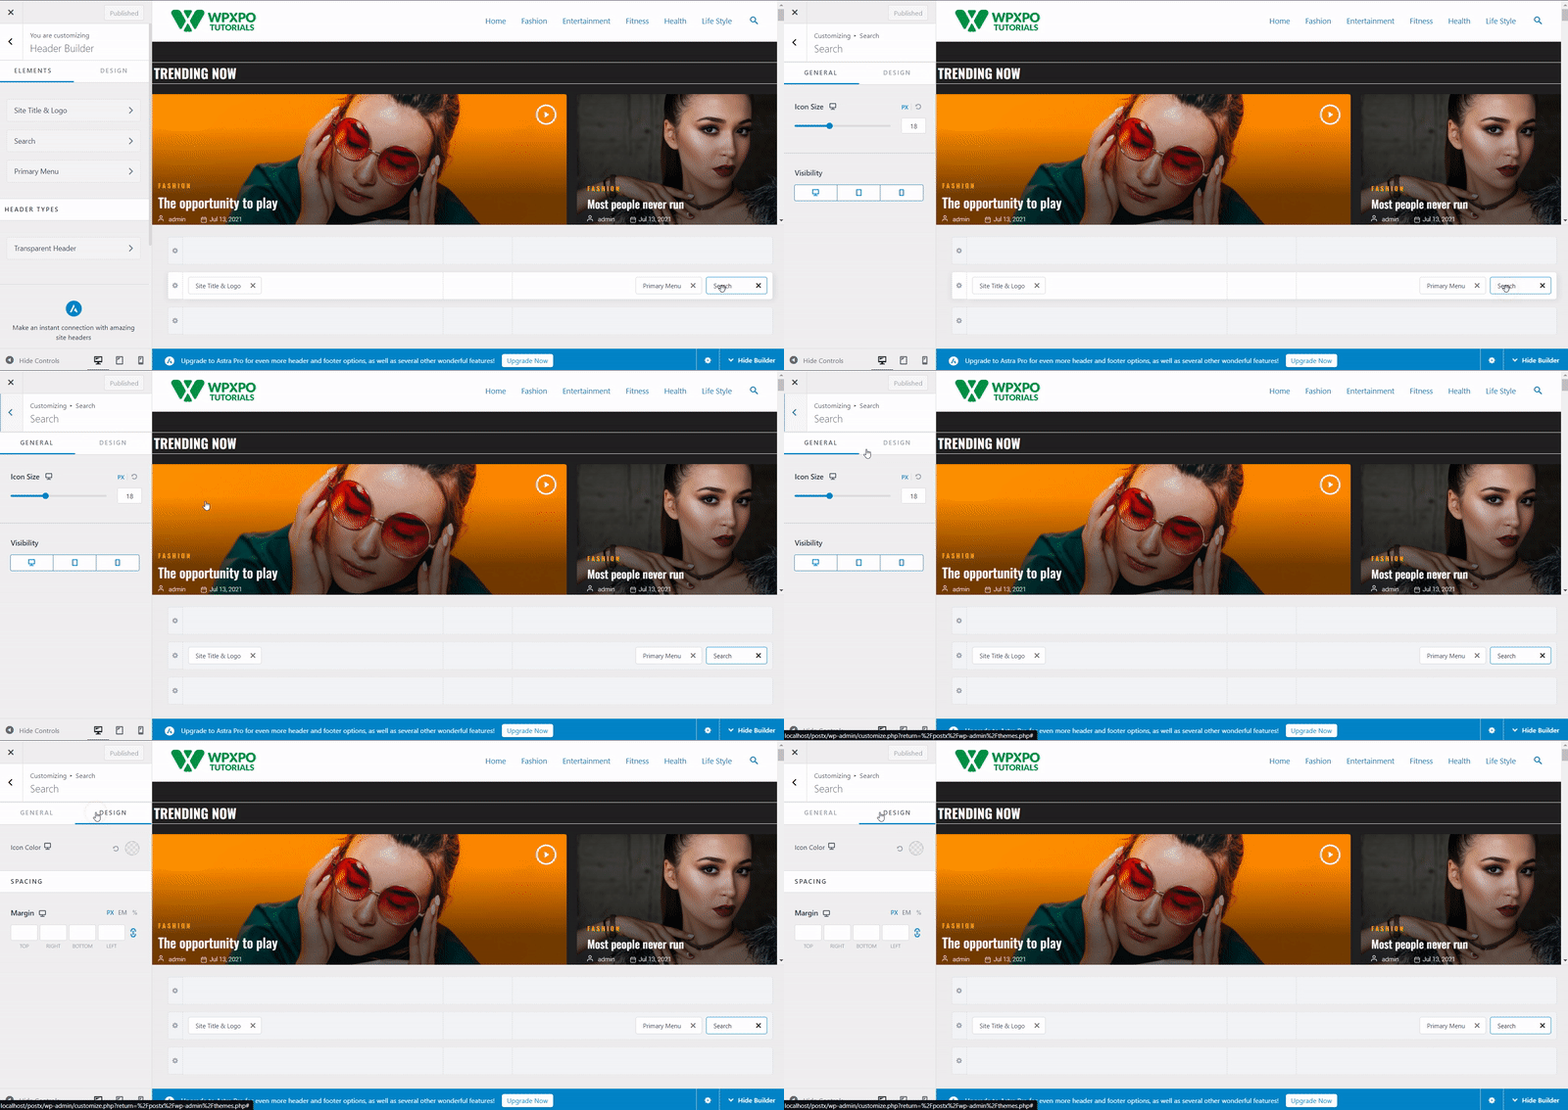
This includes:
- Icon Size
- Label Visibility
- Label Position
- Label Text
- Basic Color-Related Settings
You can customize it and hit publish to make it live.
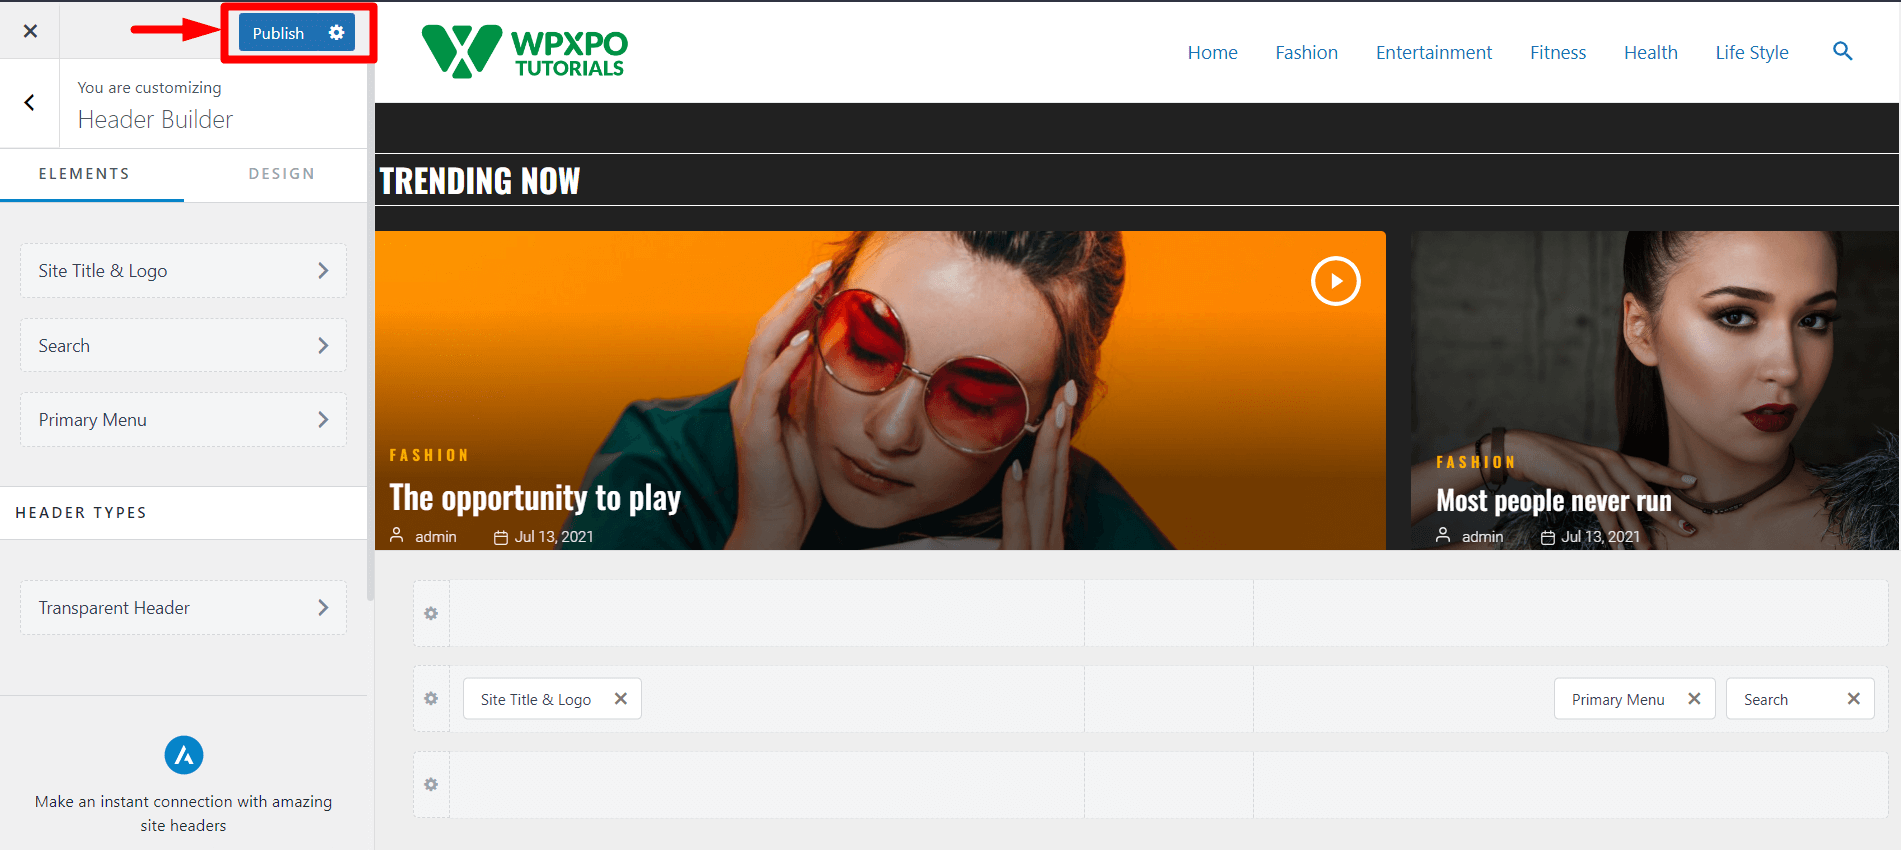
Now, let’s see the frontend view of the search bar in the website menu.

Amazed by this Homepage Layout? This was made with PostX Dynamic Site Builder. Be sure to check that out!
Add Search Bar With a WordPress Search Bar Plugin
Now, do you want the quickest way to add a customized search bar to your menu bar? If you have PostX. PostX’s advanced search block lets you add a fully customized search bar in the WordPress menu.
Just follow these simple steps to add it with PostX.
Step 1: Install and Activate PostX
To add a customizable search bar in the WordPress menu, you must install and activate the PostX plugin.
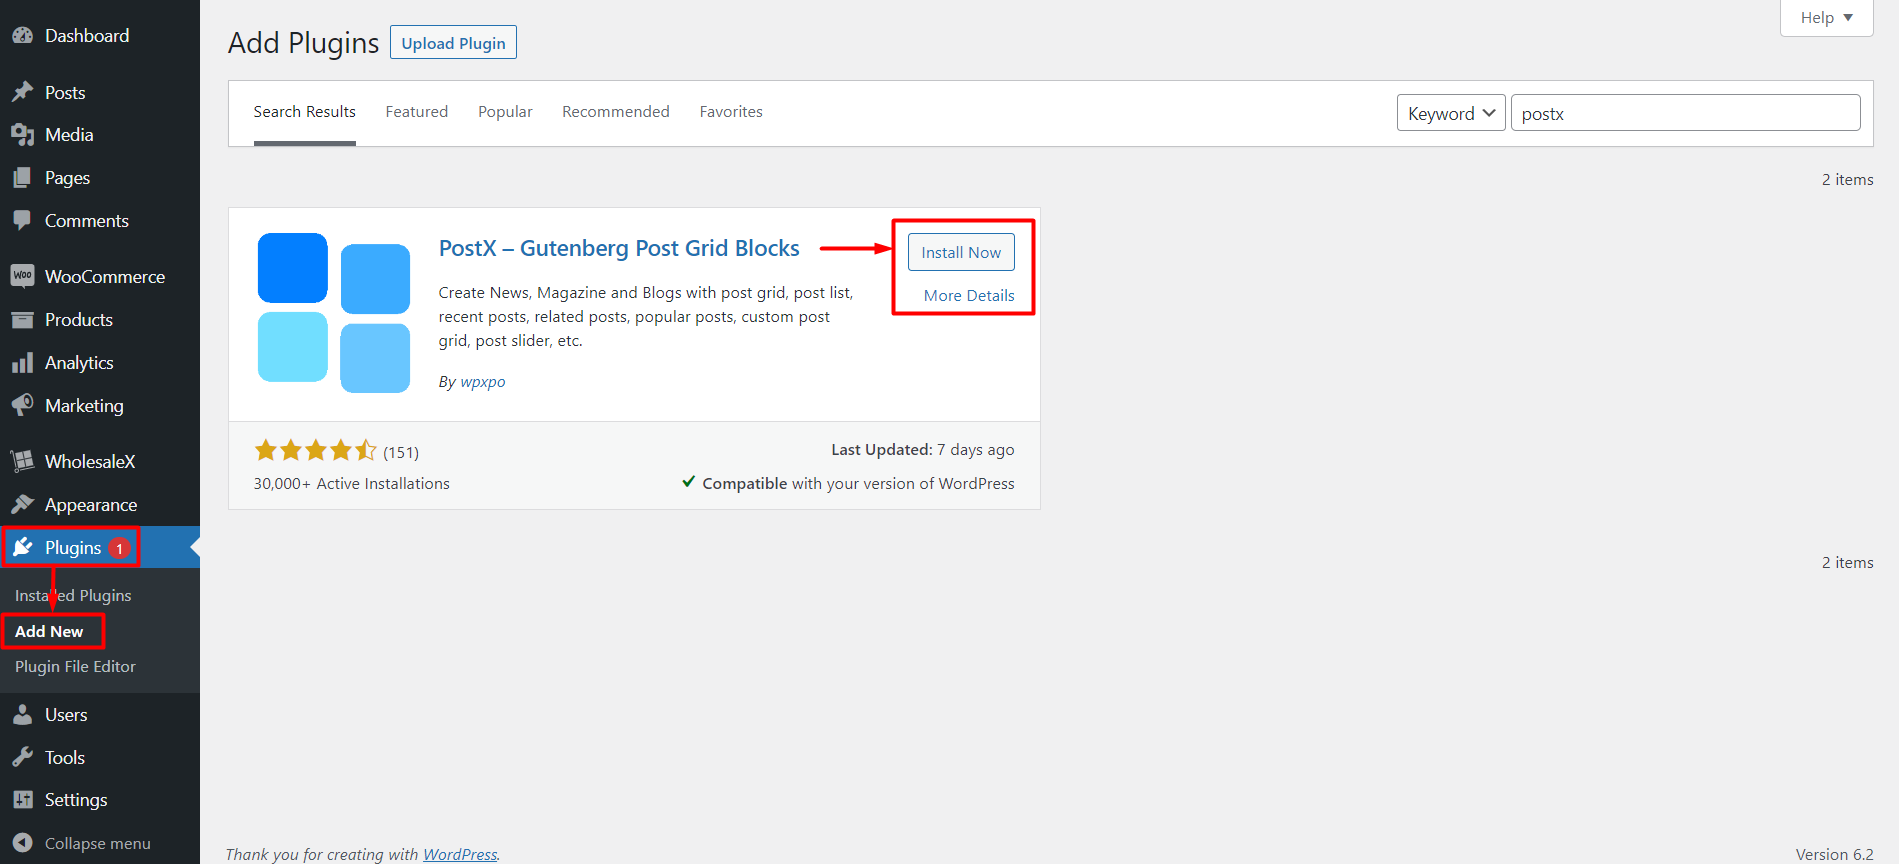
To install and activate PostX, go to Plugins > Add New, search for PostX and complete the installation process.
Once the plugin is activated, you can use its Saved Template and Search Block to add search to WordPress Menu.
Step 2: Enable Saved Template Addon
Now you must enable the Saved Template addon.
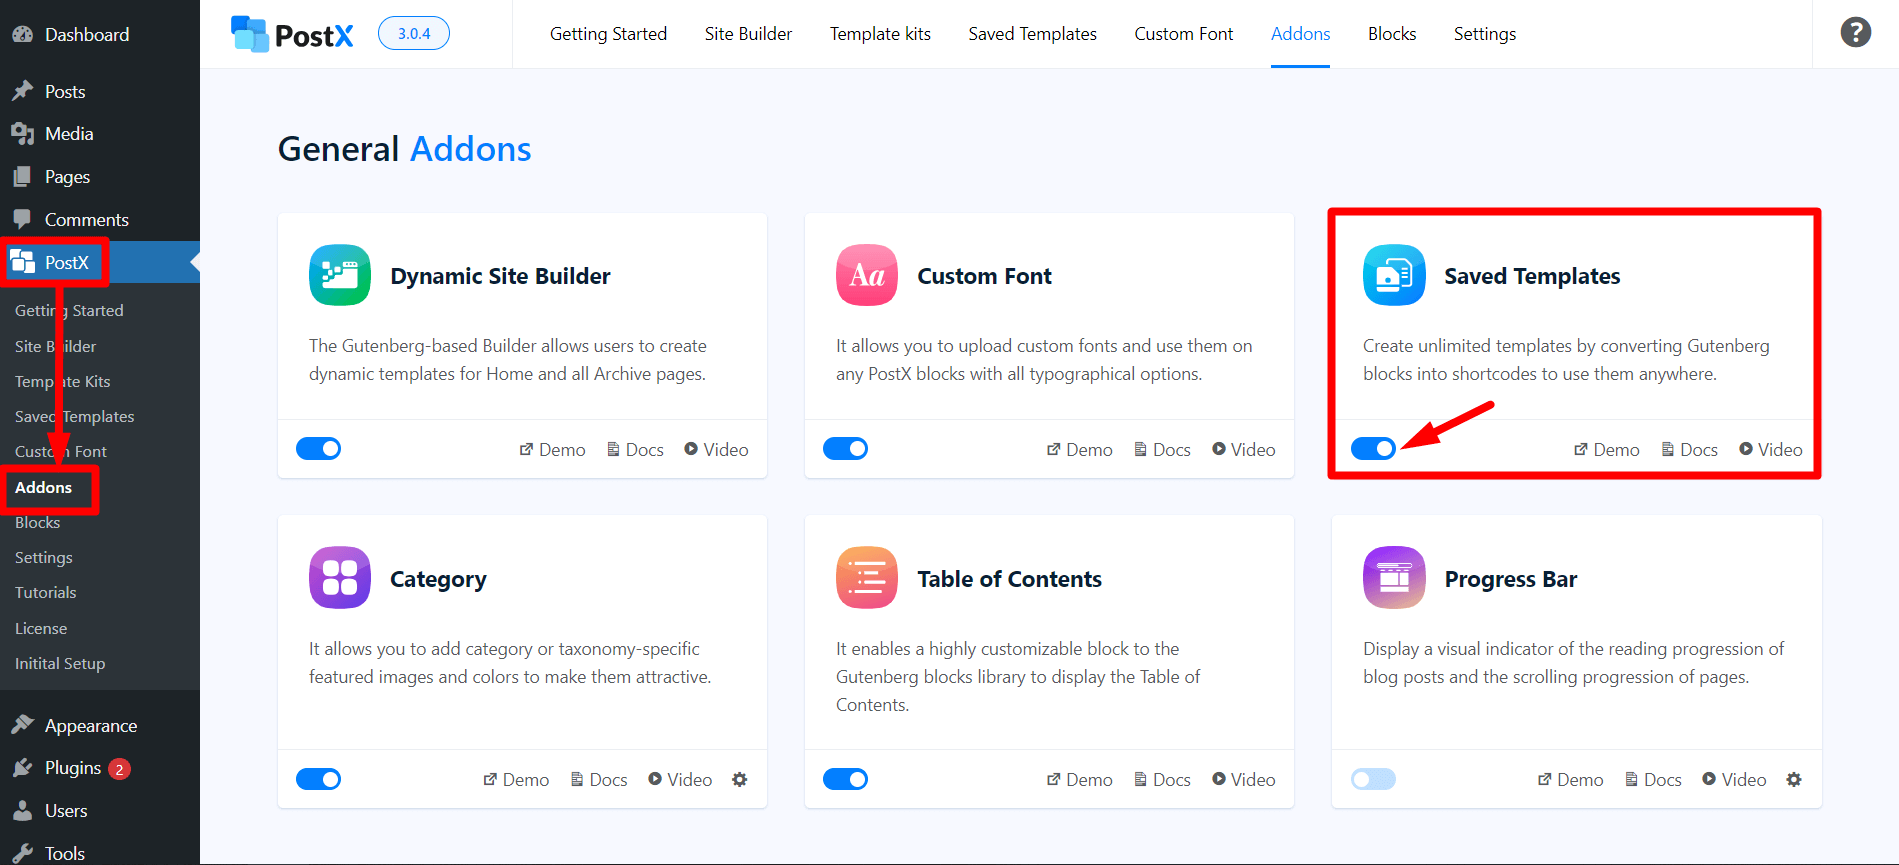
Go to PostX > Addons. Then Enable the Saved Template addon using the toggle bar.
PostX Saved Template creates a shortcode for you, which you can use to add a search bar in your website’s header.
Step 3: Add Search Block to a Saved Template
To search the bar in the menu, you must create a saved template with PostX.
Go to PostX > Saved Templates and click “Add New Template” to create a new template. Don’t forget to name it if you want to customize it later.
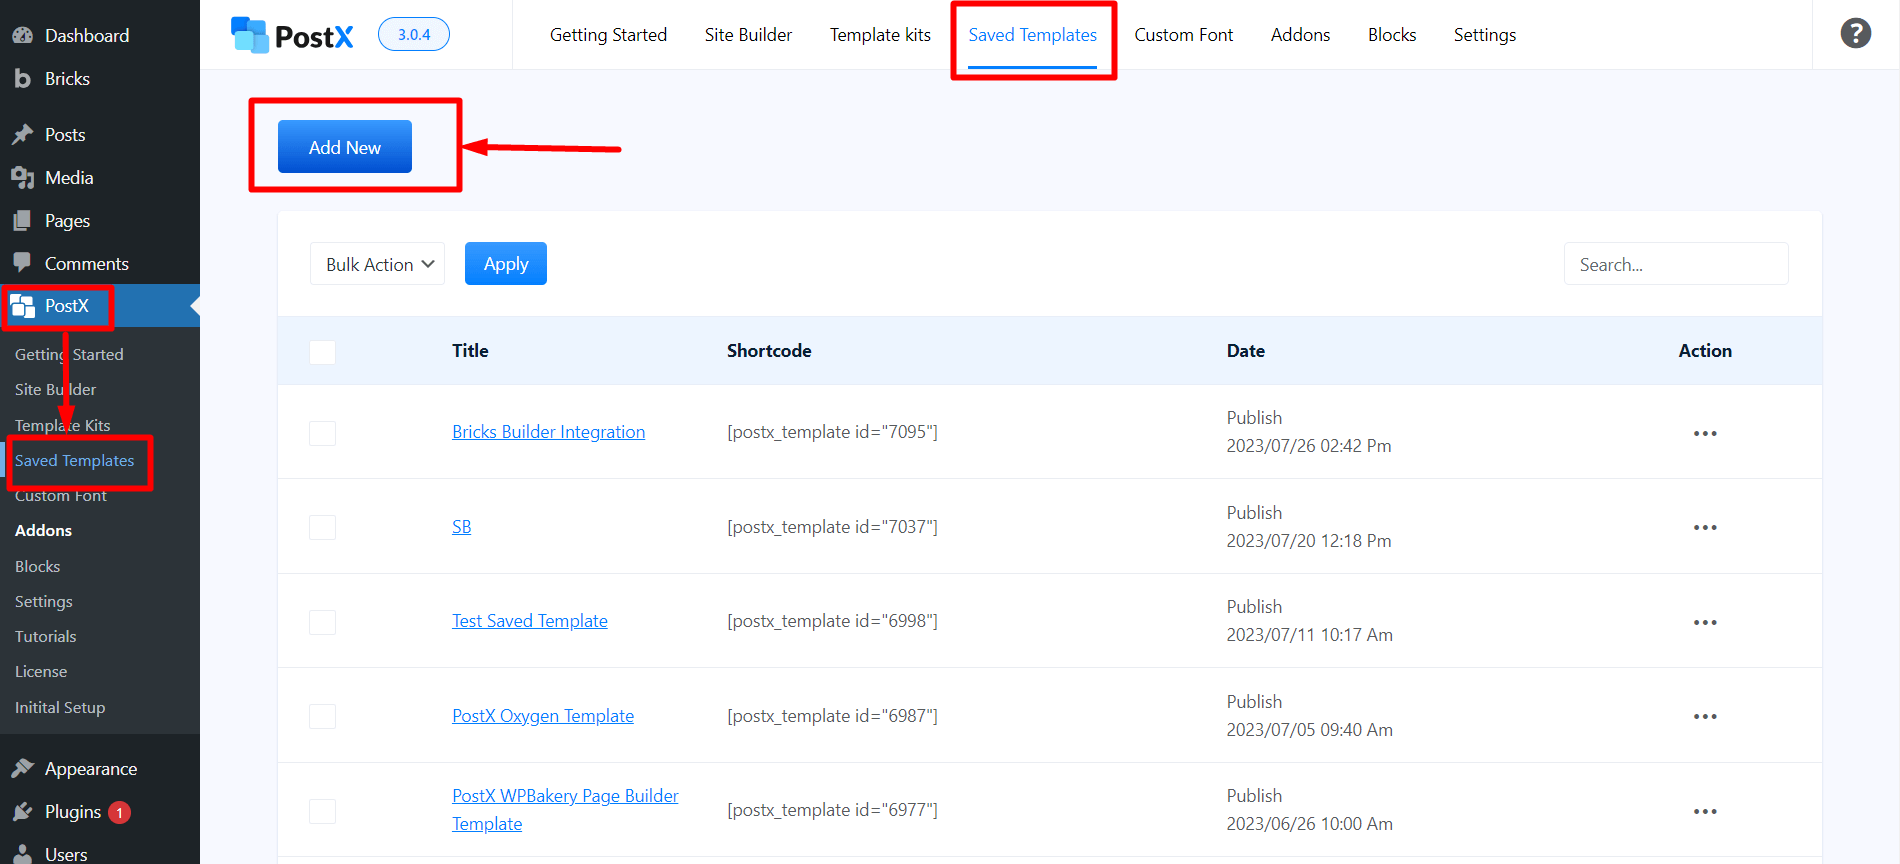
Then, add the PostX Search Block in the page.
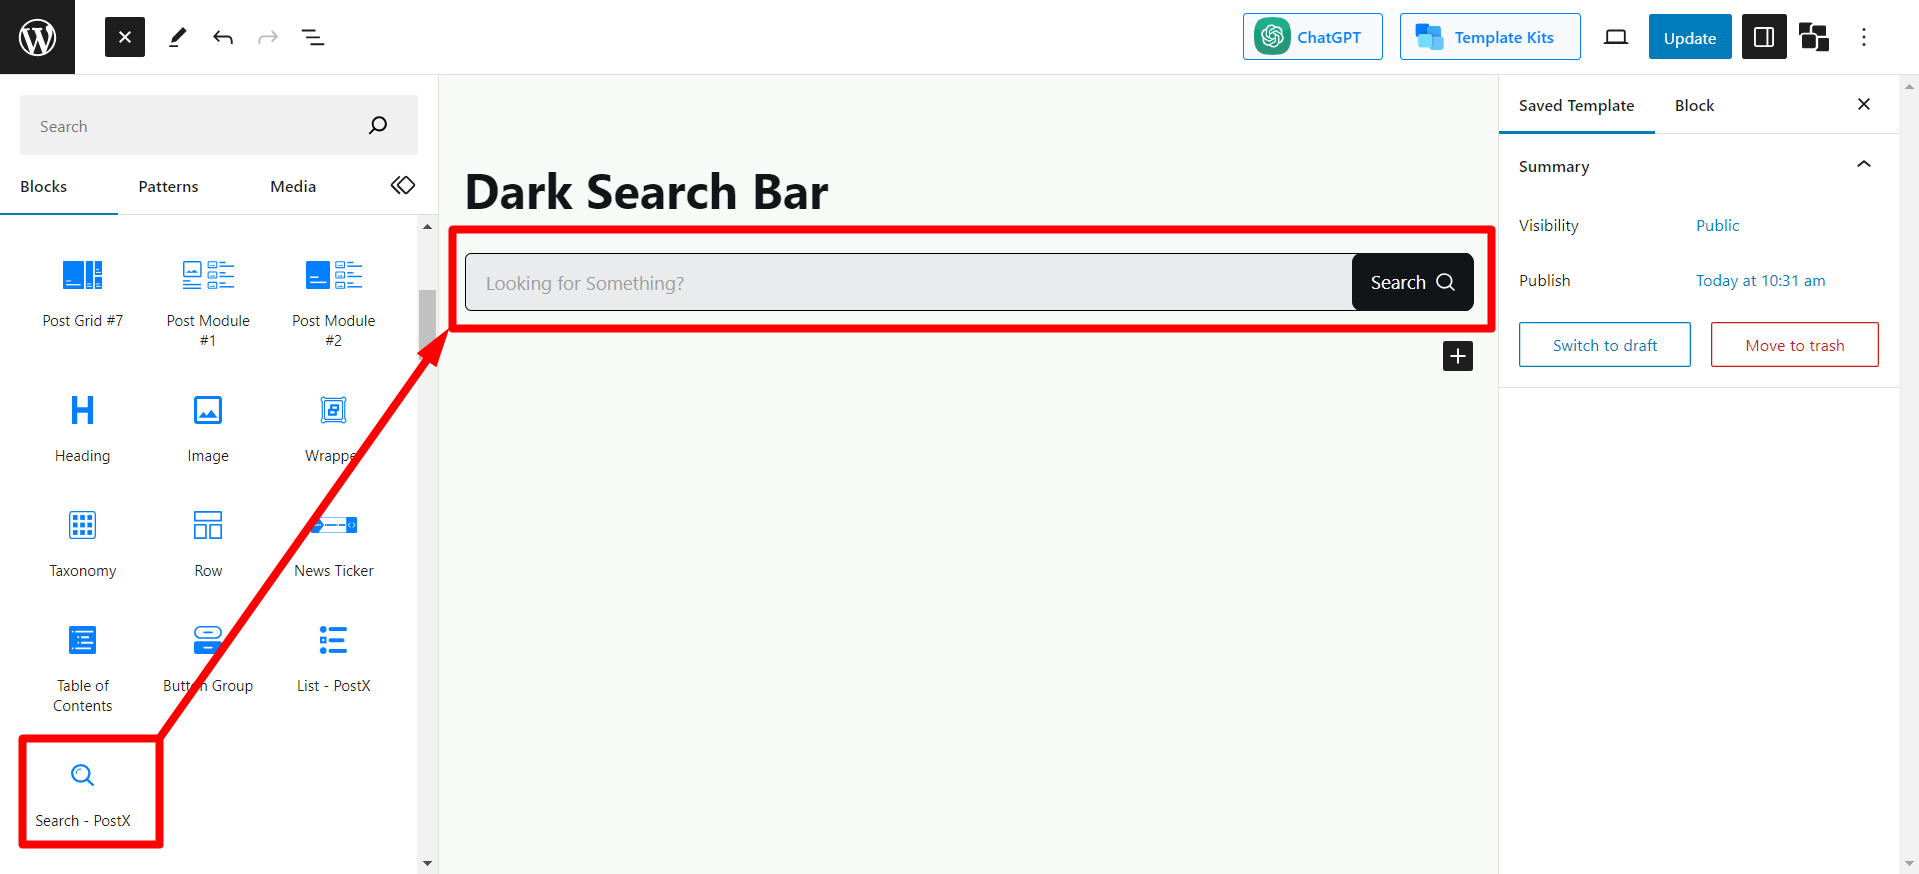
You can customize it just the way you want. To avoid customization hassles, you can 1-click import premade templates by clicking the “Predefined Patterns” button.
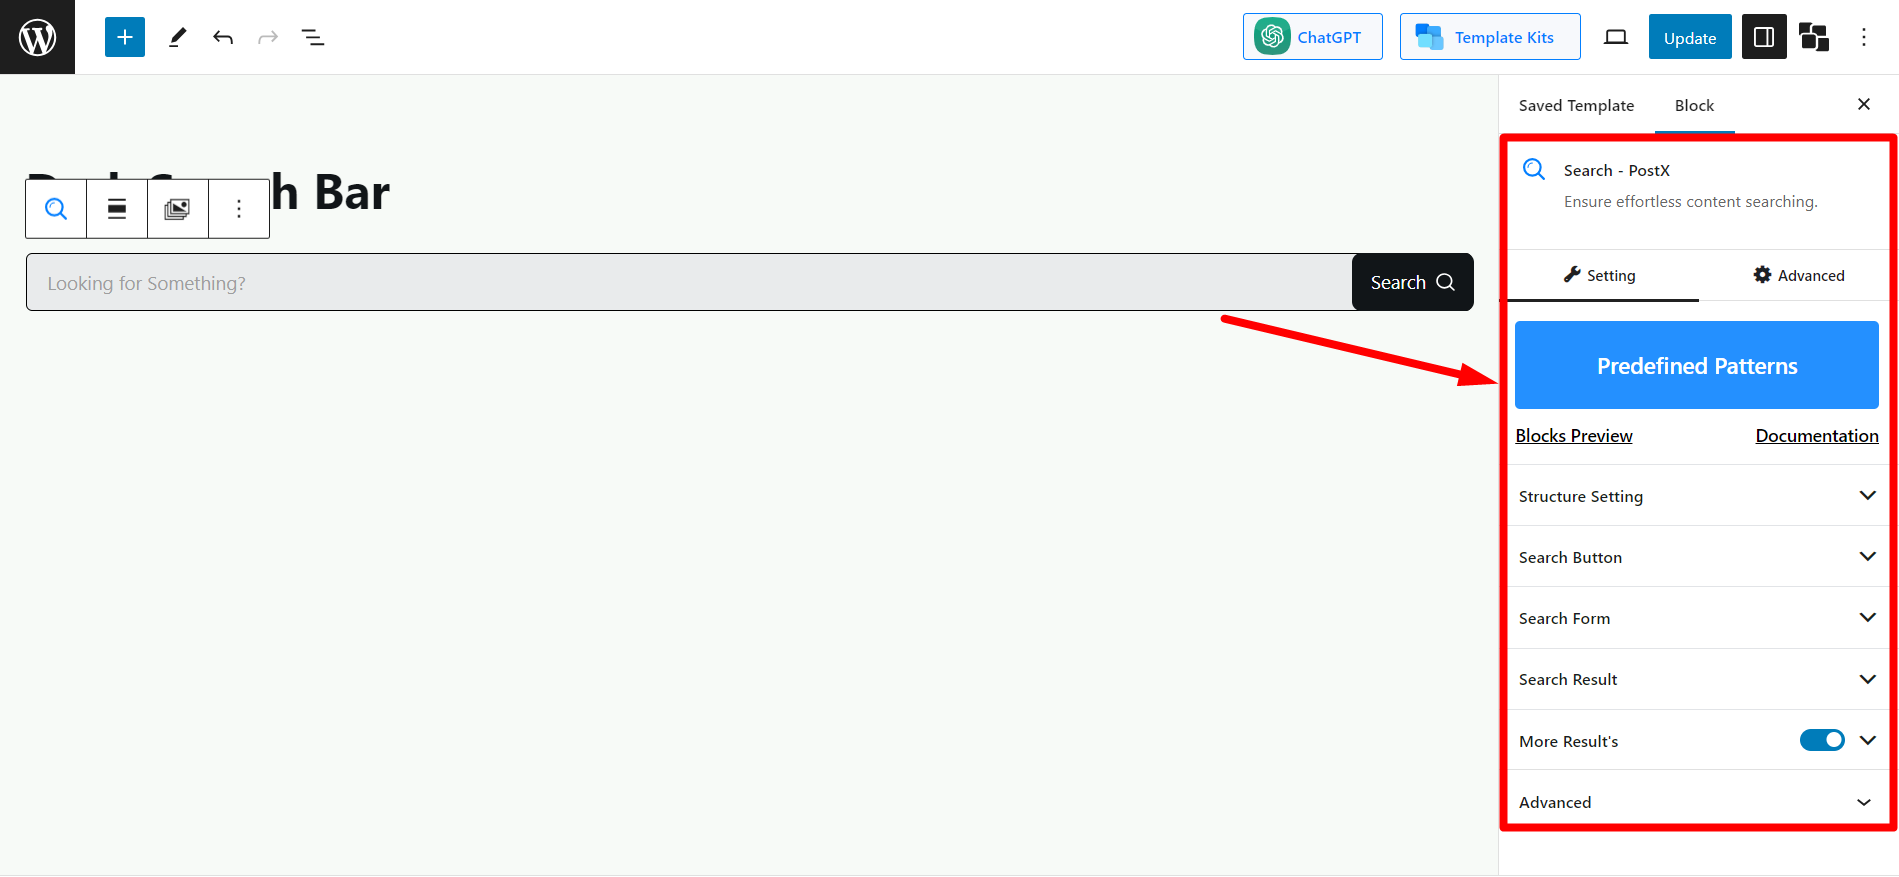
Once you have done your customization click “Publish,” and your saved template is ready.
Step 4: Copy the Shortcode
Return to the saved template page (PostX > Saved Templates) to copy the shortcode.
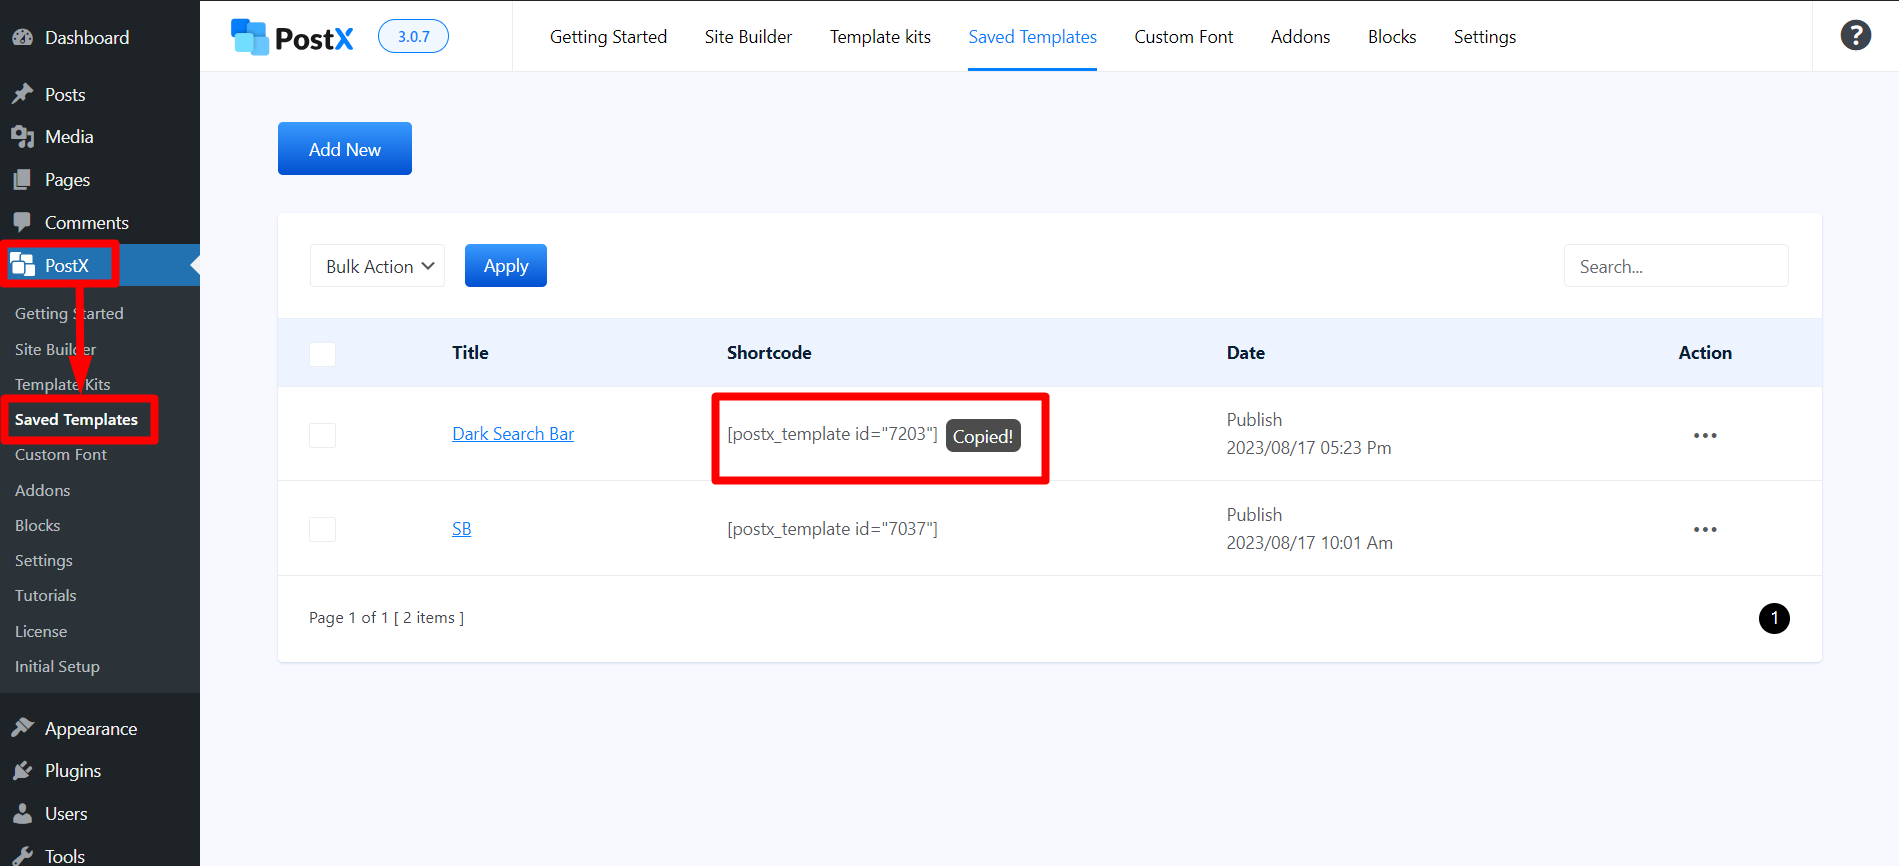
You’ll find a shortcode for the template you’ve just created. Click on it to copy it, and follow the next steps.
Step 5: Add Search Bar to WordPress Menu
Now, go to WordPress Dashboard > Appearance > Customize. Just like we’ve shown you while adding the default search bar.

Now, drag and drop the HTML element to the main row. And click on it after adding.
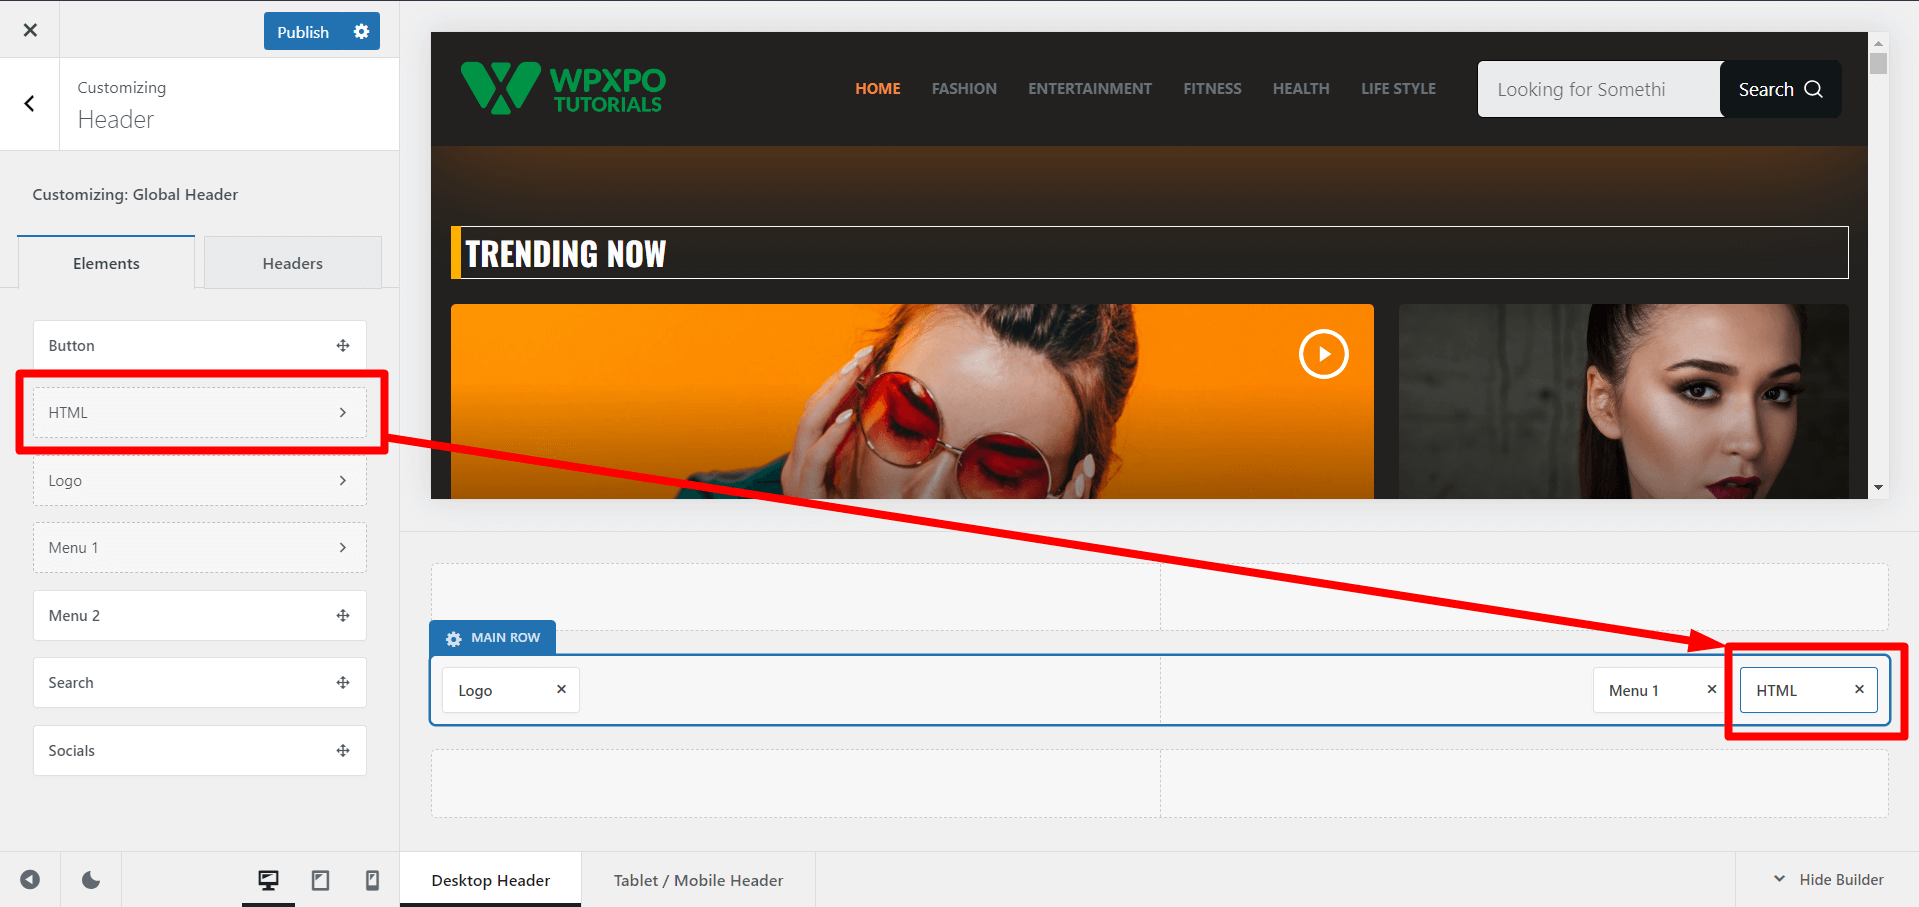
You’ll see a text field in the HTML editing section. You just have to paste the copied shortcode in the text box. And you’ll see a search bar in WordPress menu section, just the one you created in the saved template.
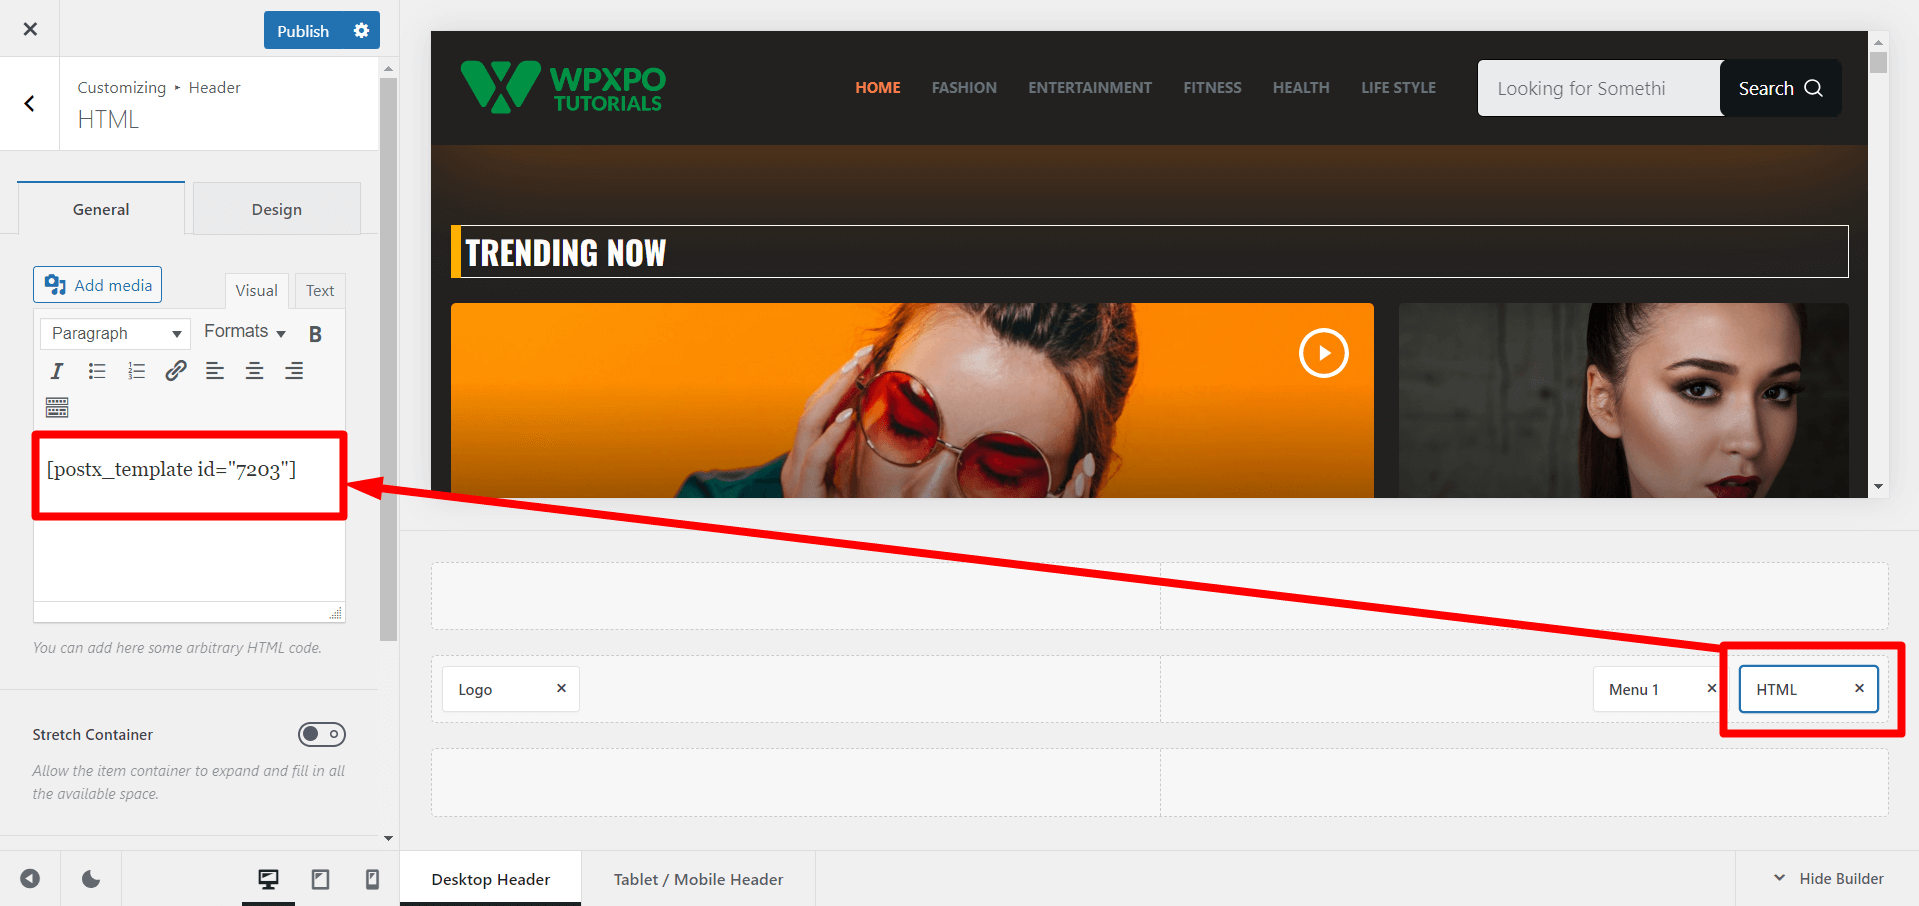
Now, hit publish to make it live.
Let’s see the fronted view after adding search bar to the WordPress menu using PostX.

Step 6: Customizations after Publishing
There’s an amazing secret to PostX’s Saved Template. It auto-syncs on the live page. Suppose you customize and update the saved template (consisting of the search block). In that case, the changes will be automatically synced, and you won’t have to go through every step again and again.
With the PostX Advanced Search block, you’ll get the following customization options:
- AJAX Search Enabler
- Search Form Style Settings
- Enable Search Popup
- Search Button Settings
- Search Result Settings
- More Results Settings
- Text, Typography, and Color settings
- Margins/Padding and Alignment settings
And More…
Do you think that’s too little? Don’t miss out on our extensive documentation of the search button block, and you’ll be amazed at how nitty-gritty details you can customize in the search block.
Oh, is that a button? Do you know, that PostX also has a customized Button Block? No? Be sure to check out the PostX Button Group Block.
Resources You’ll Love
Here are a few articles to check out PostX features I’m sure will be helpful for you:
- How to Add WordPress Custom Fonts: Take Full Control of Typography
- How to Create WordPress Bullet Points with PostX Advanced List Block
- Introducing PostX ChatGPT Addon: The WordPress AI Content Generator
- PostX Dynamic Site Builder: Build your Site Within A Few Clicks
- How To Display WordPress Video as Featured Image With PostX
Wrapping Up
This comprehensive guide has provided a step-by-step roadmap to add search bar in WordPress menu with or without plugins. Your options are extensive and accessible, from using themes with header builders to exploring the world of PostX’s advanced search block. Create, customize, and curate at any time without hassle!
