WowShipping Shipping Zone lets you create a shipping zone easily. You can combine shipping conditions and adjust costs to keep shipping clear and efficient.
Why WowShipping Has Shipping Zones
WooCommerce already has shipping zones, but they are basic. They only cover simple setups. WowShipping Shipping Zones are built for more. With them, you can:
- Add advanced conditions
- Combine multiple rules
- Control shipping costs more accurately
WooCommerce zones set where you ship, while WowShipping zones control how you ship. This makes shipping more flexible and easier to manage.
Note: Shipping zones you create in WowShipping will also appear in WooCommerce’s default zone list. The default option stays because other plugins may need it. WowShipping rules only work with zones created in WowShipping.
How to Access the Shipping Zone Option in WowShipping
There are three ways to create a new Shipping Zone using WowShipping:
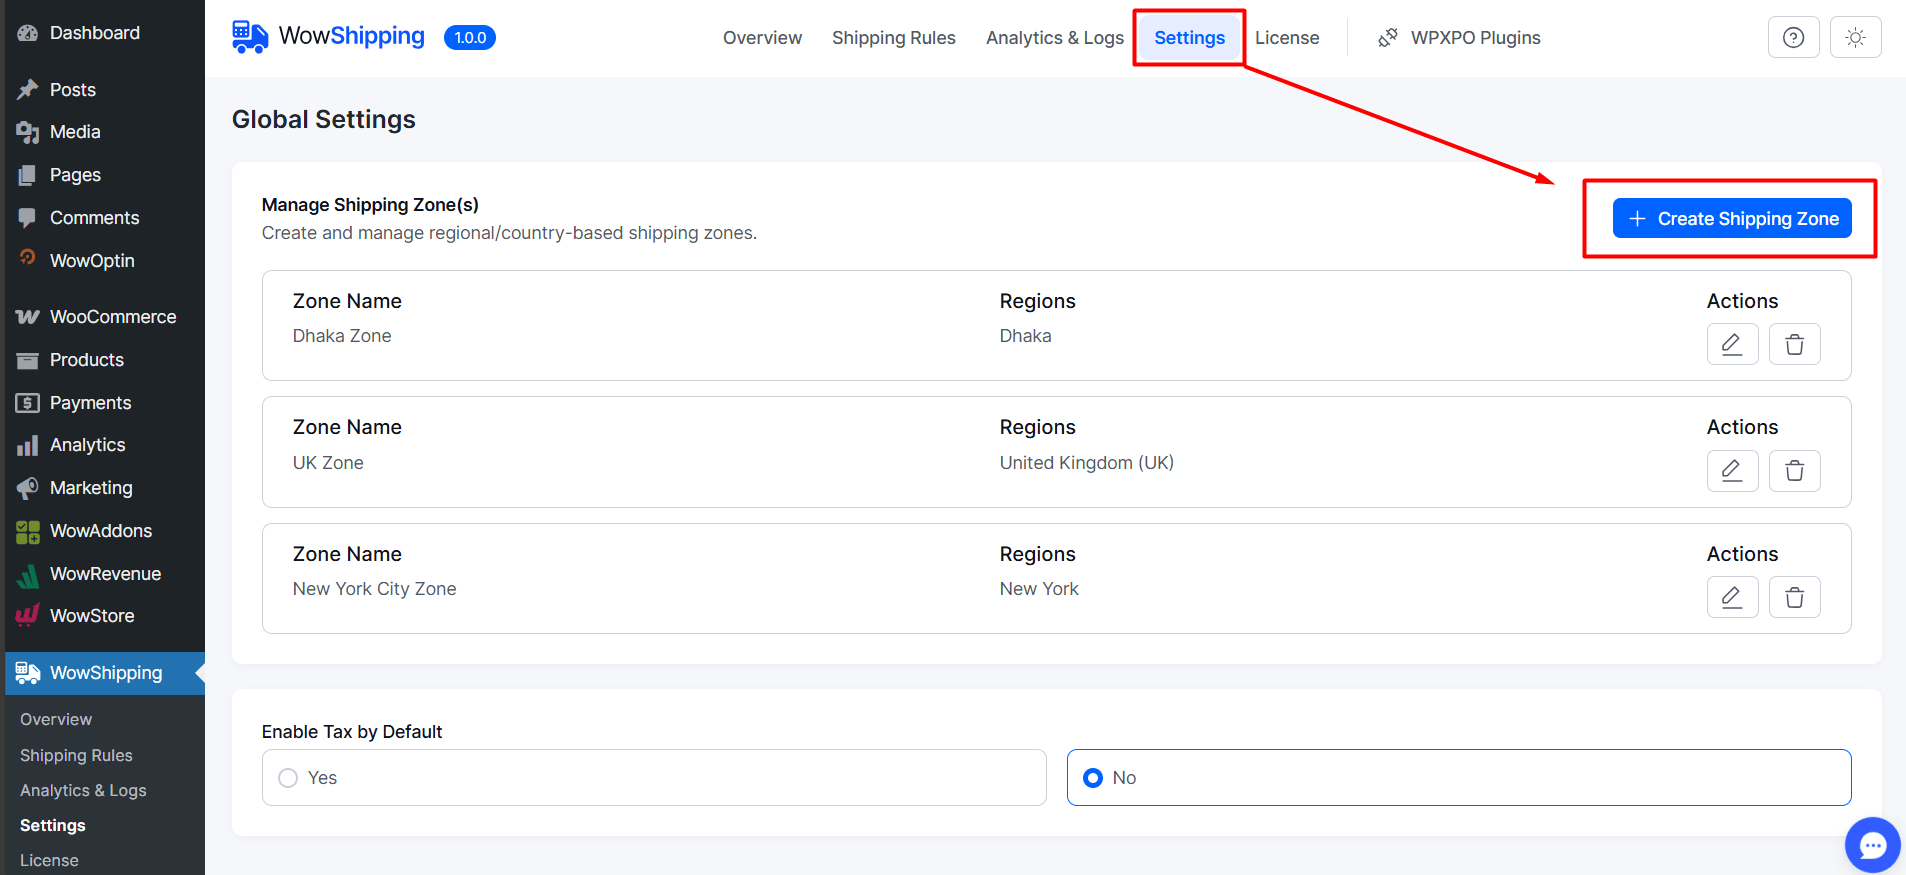
⭐ From the WowShipping Dashboard, go to Settings and click Create Shipping Zone.
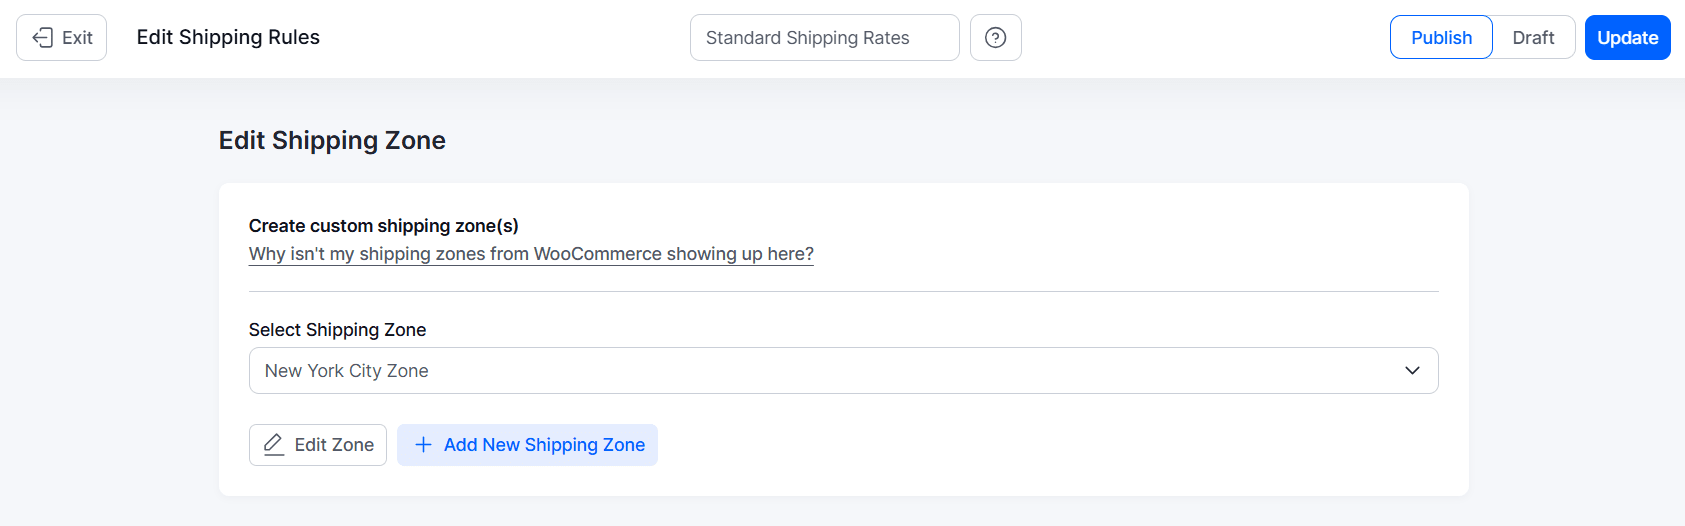
⭐ While creating a rule, you can also add a new Shipping Zone directly inside the Create Shipping Rule section.
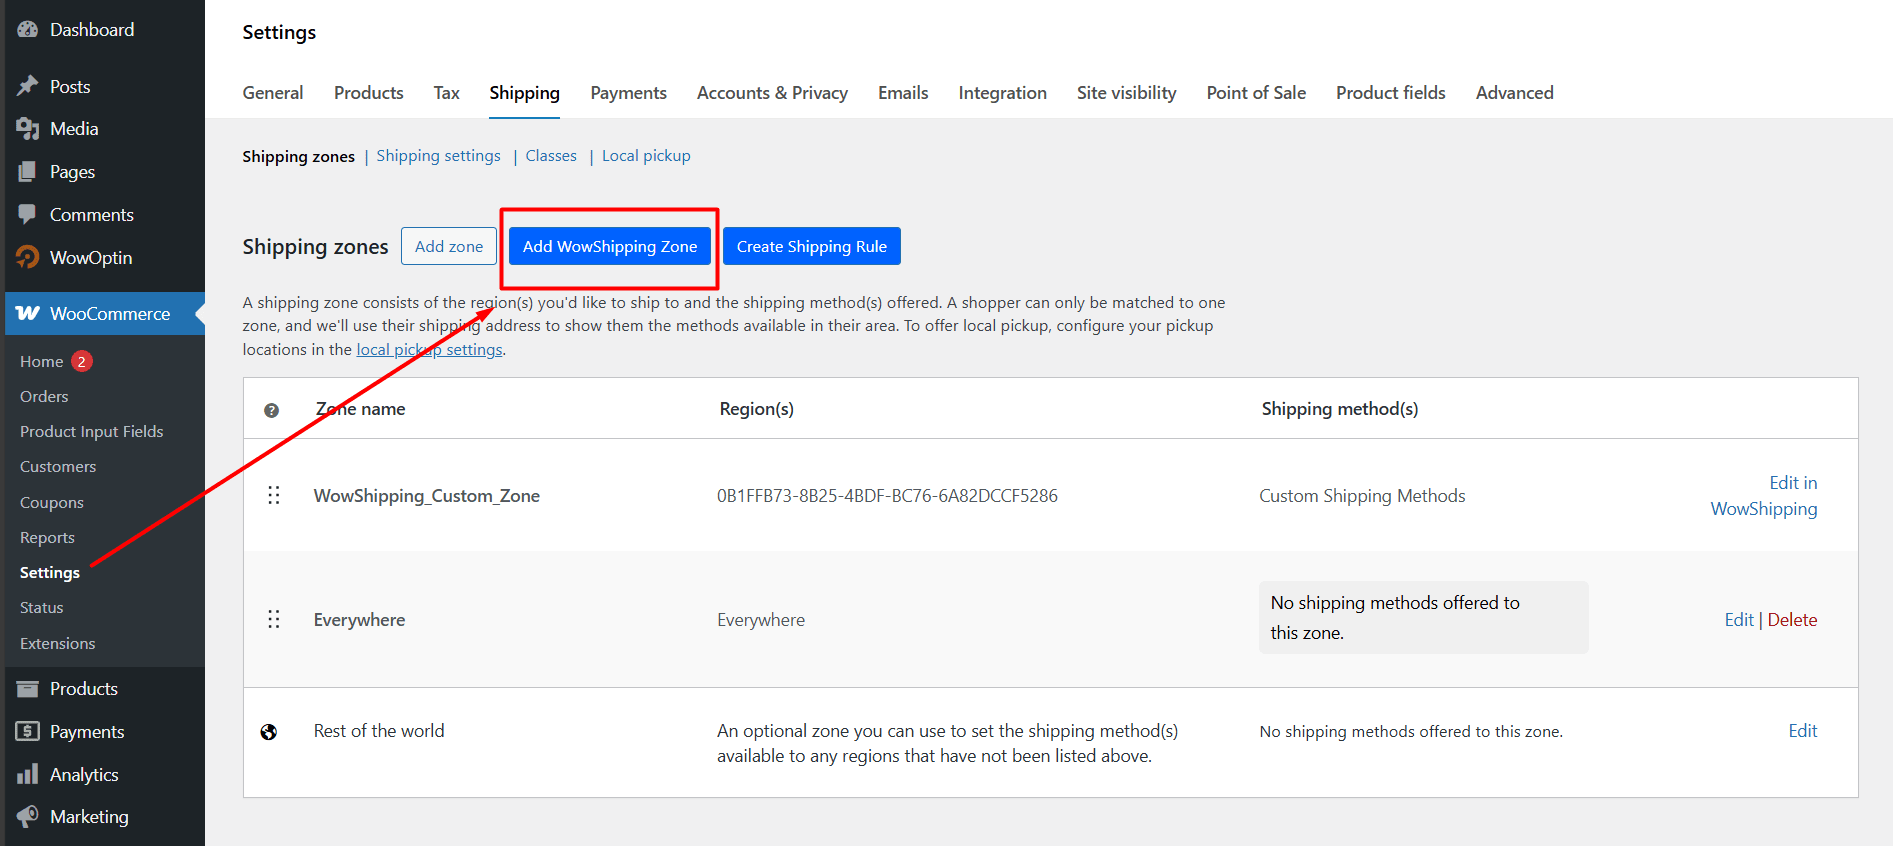
⭐ From WooCommerce Settings, go to WooCommerce > Settings > Shipping and click Add WowShipping Zone.
How to Create a Shipping Zone in WowShipping
It’s quick and simple to set up a new shipping zone in WpwShipping.
Steps to Follow:
- Name the Zone – Add a clear name (example: New York City Zone).
- Add Regions – Search or select regions from the list.
- Click Save Zone to finish.
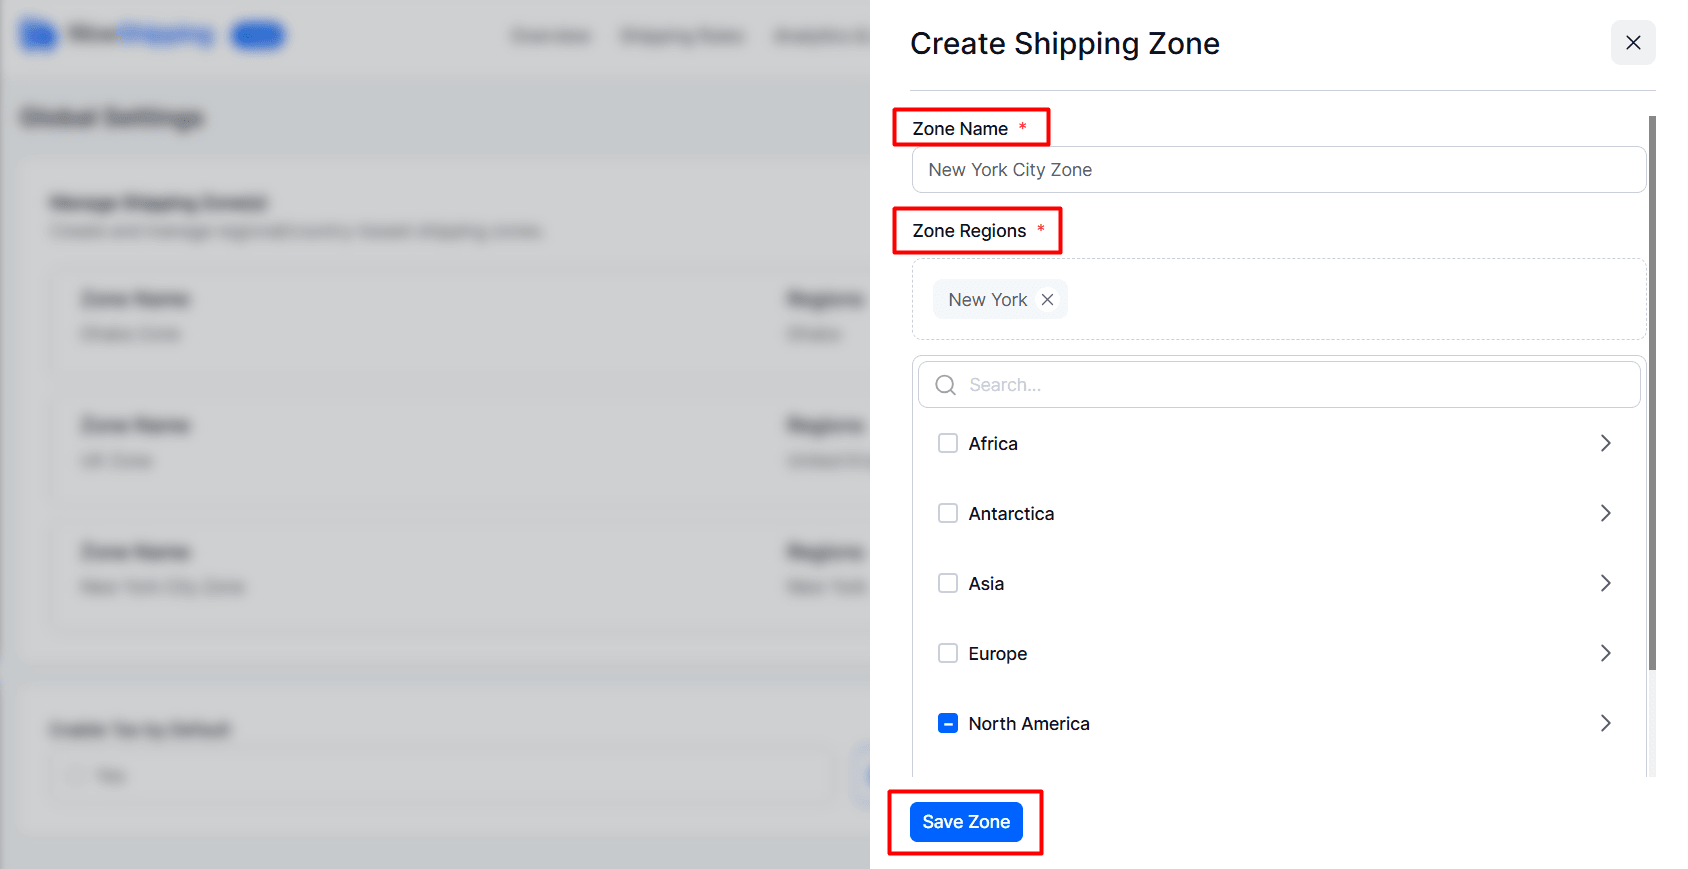
That’s it! Your new Shipping Zone is now ready to be used with WowShipping rules.
How to Edit a Shipping Zone in WowShipping
You can easily edit any shipping zone to match changes in your strategy. You can access the edit option from two areas:
⭐ From Settings – Go to Settings, find the zone, and click the Edit icon.
⭐ From Rule Creation – While creating or editing a rule, select the zone and click Edit Zone.
What You Can Edit
- Rename Zone – Change the name if needed.
- Modify Regions – Add or remove regions.
After making your changes, update the zone. The updates will apply instantly to your rules.
Best Practices for Editing Shipping Zones in WowShipping
Follow these tips to keep your zones organized and error-free:
✔️ Use clear names – Example: Dhaka City Zone or North Bangladesh Region.
✔️Avoid overlaps – Don’t assign the same region to multiple zones unless needed.
✔️ Test after changes – Run a checkout test to confirm rules work correctly.
✔️ Keep a record – Note zones and regions for future clarity.
✔️ Update rules – Adjust related rules after adding or removing regions.
These steps help keep your shipping smooth, accurate, and ready to grow.