Creating shipping rules using WowShipping may seem complex, but it’s as simple as it sounds. Follow these quick steps to set up your first rule in WowShipping.
Quick checklist
- Requirements met (one time setup)
- Plugin activated (one time setup)
- Shipping Zone created
- Shipping Rule created and published
- Checkout tested
- Analytics and Logs reviewed
1. Check compatibility and install
💡 This step is needed only once
- Confirm your site meets the System Requirements.
- Make sure WooCommerce is active.
- Follow the guide for Installation & Licensing.
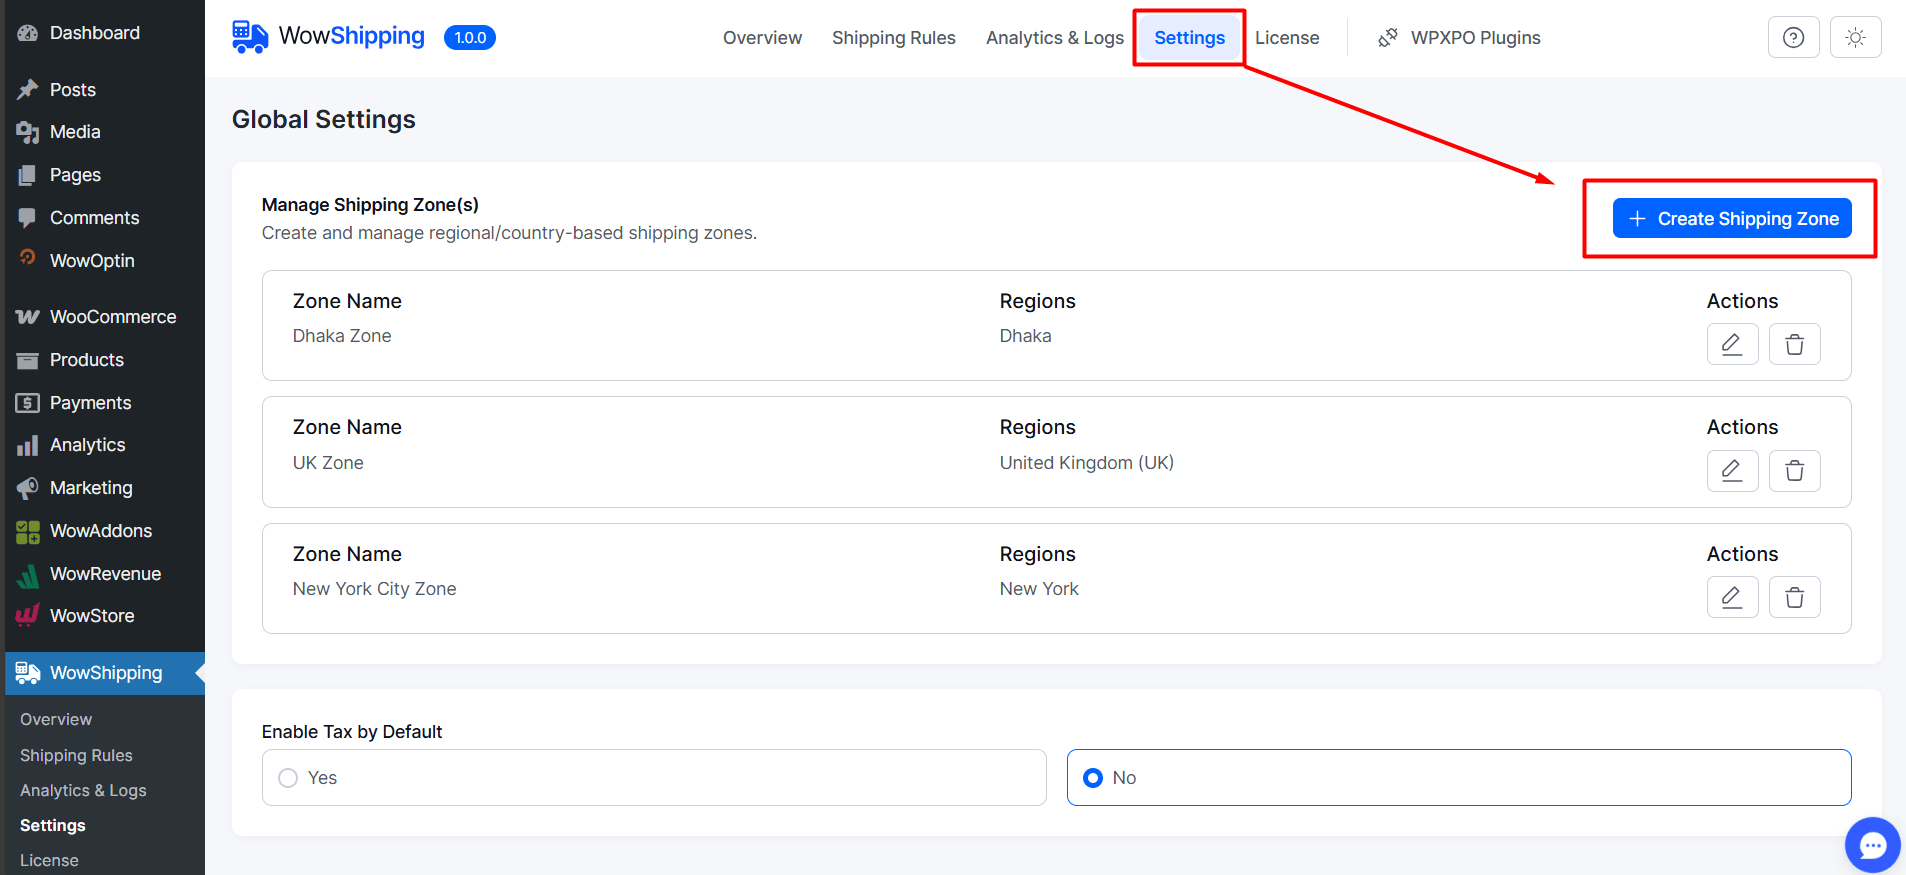
2. Create a Shipping Zone
- Go to WowShipping → Settings
- Click Create Shipping Zone
- Enter a Zone Name
- Select Countries/States
- Click Save
3. Set Up a Shipping Rule
- Navigate to Shipping Rules → Create New Rule
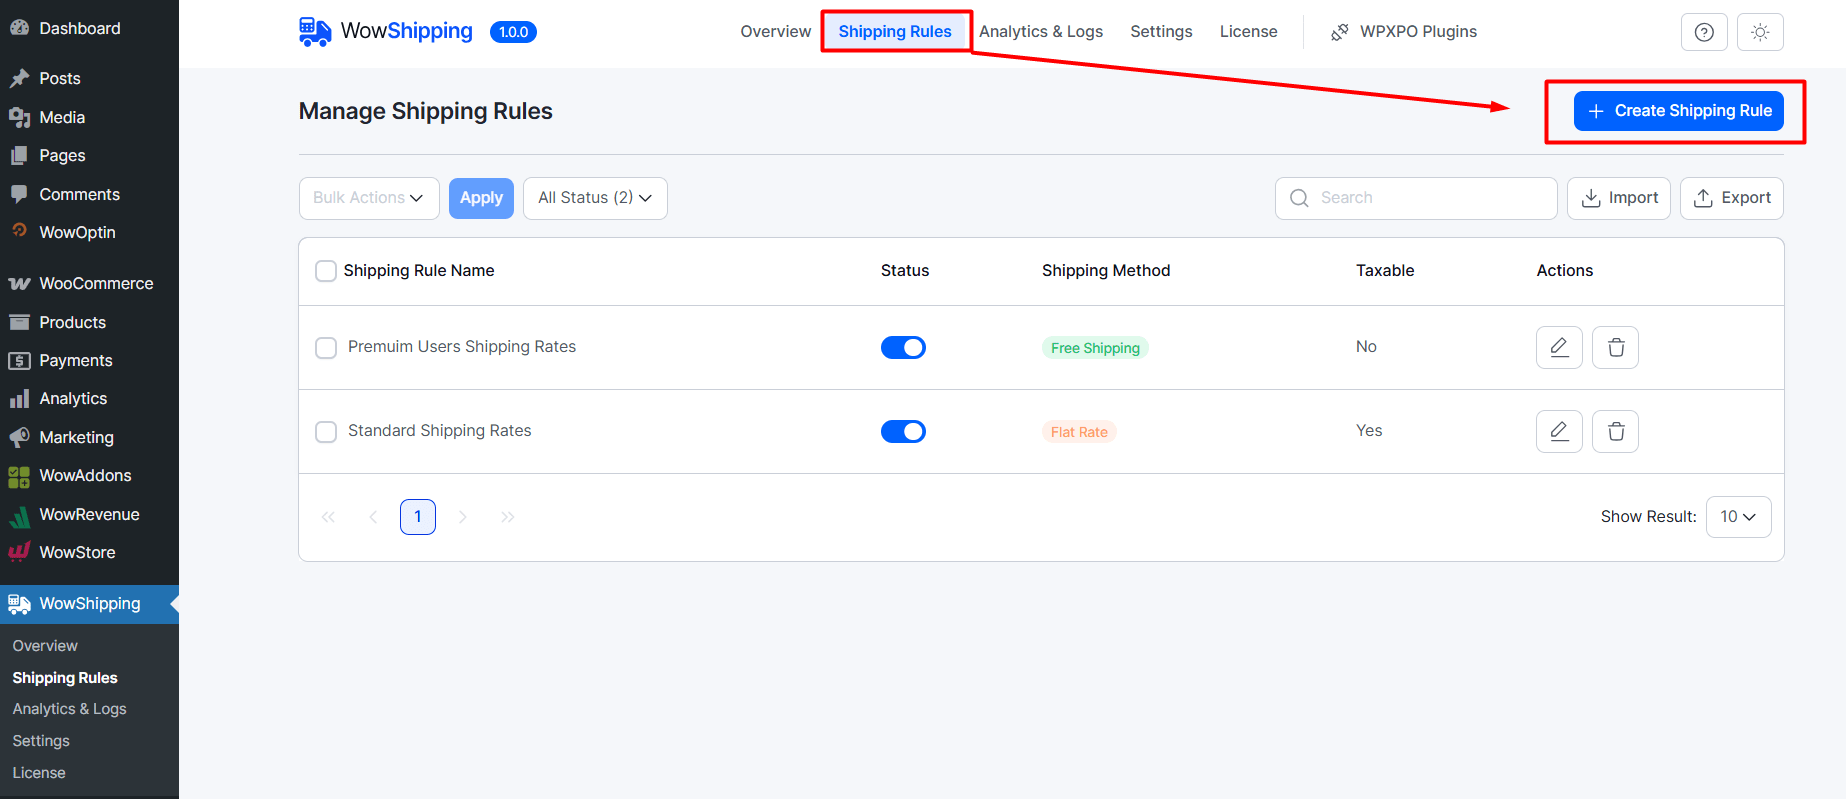
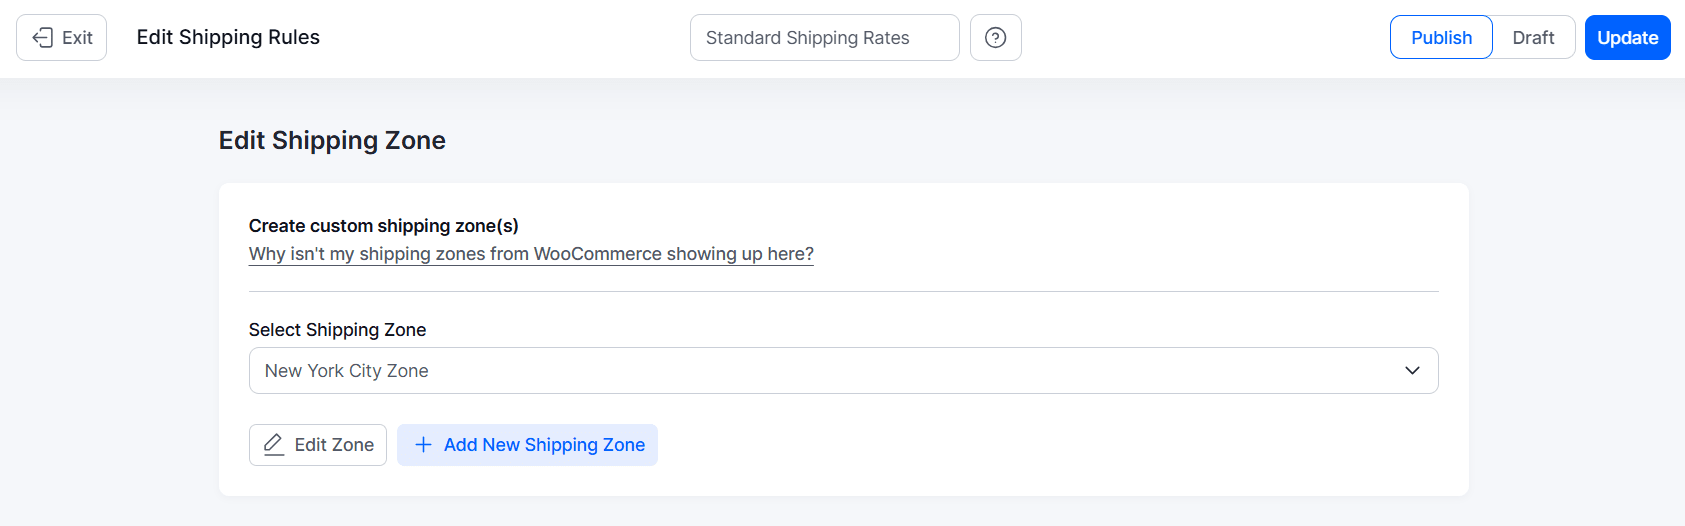
- Choose a Shipping Zone (existing or new)
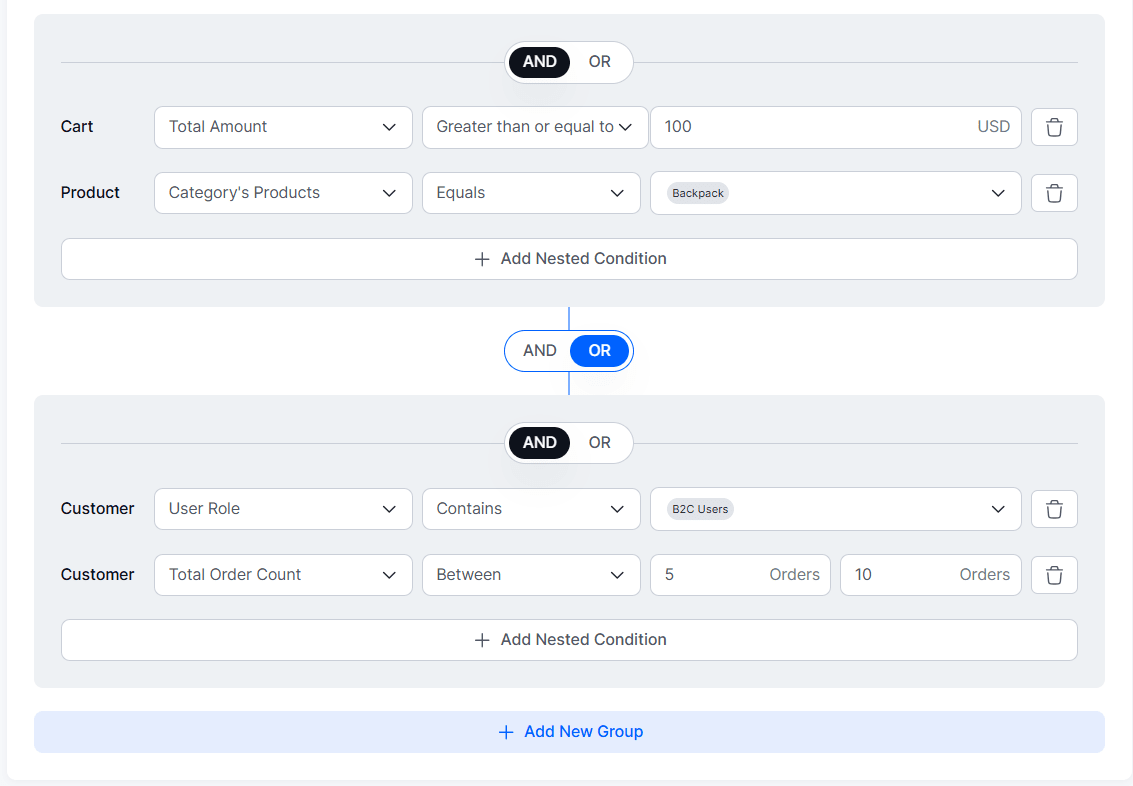
- Define Shipping Conditions by adding rules
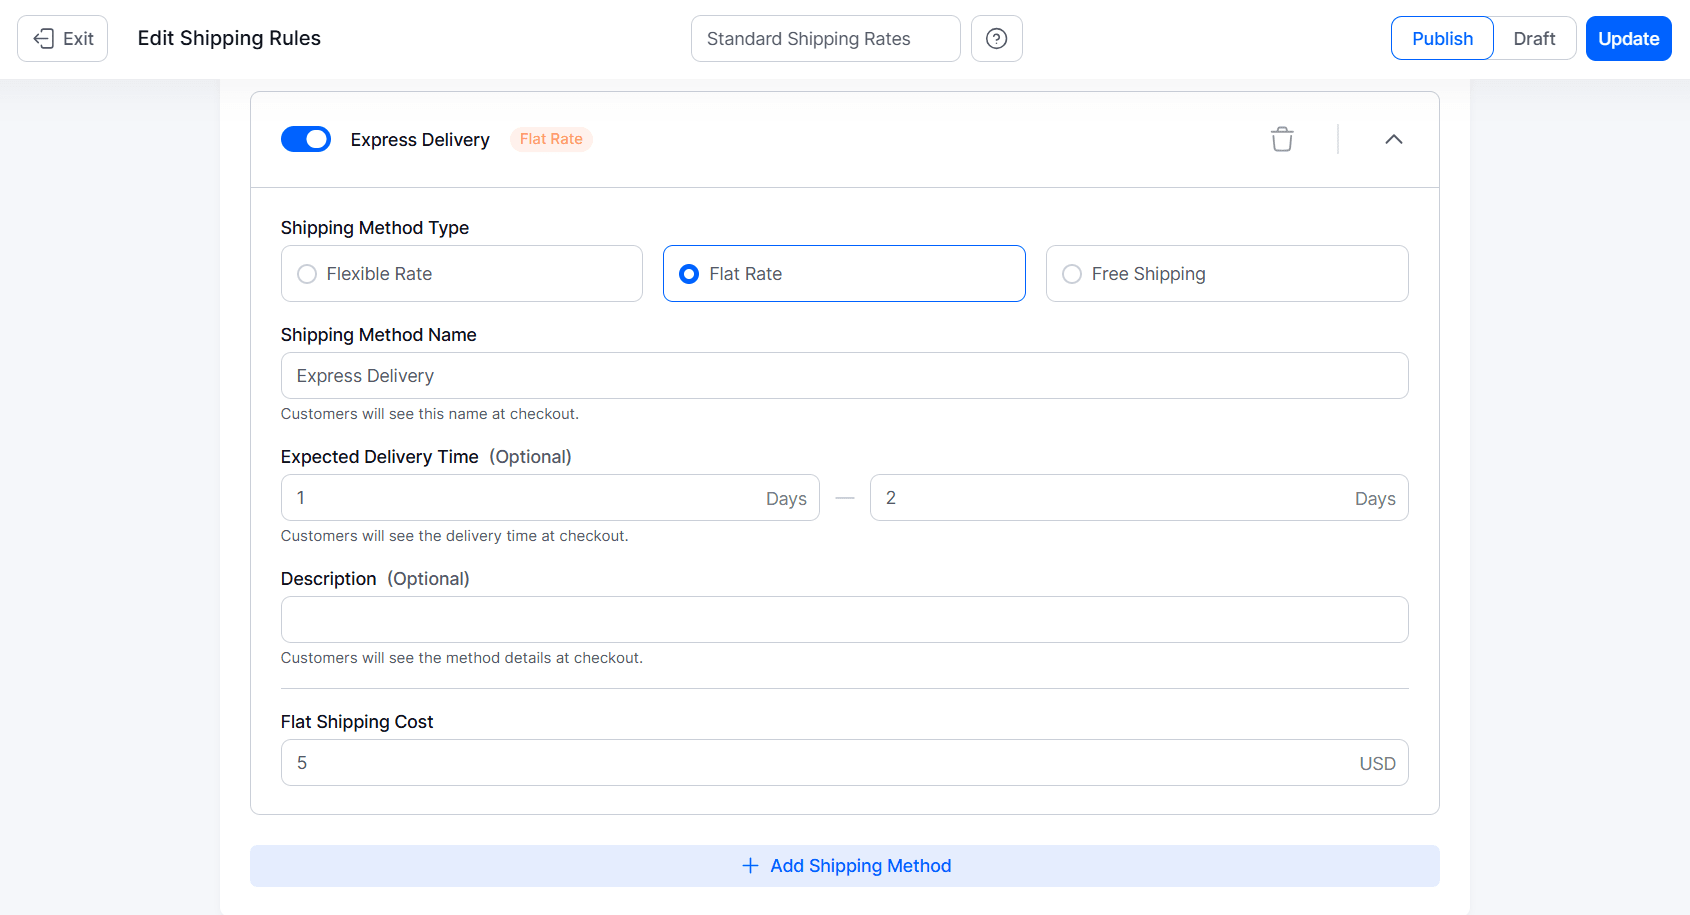
- Add Shipping Methods
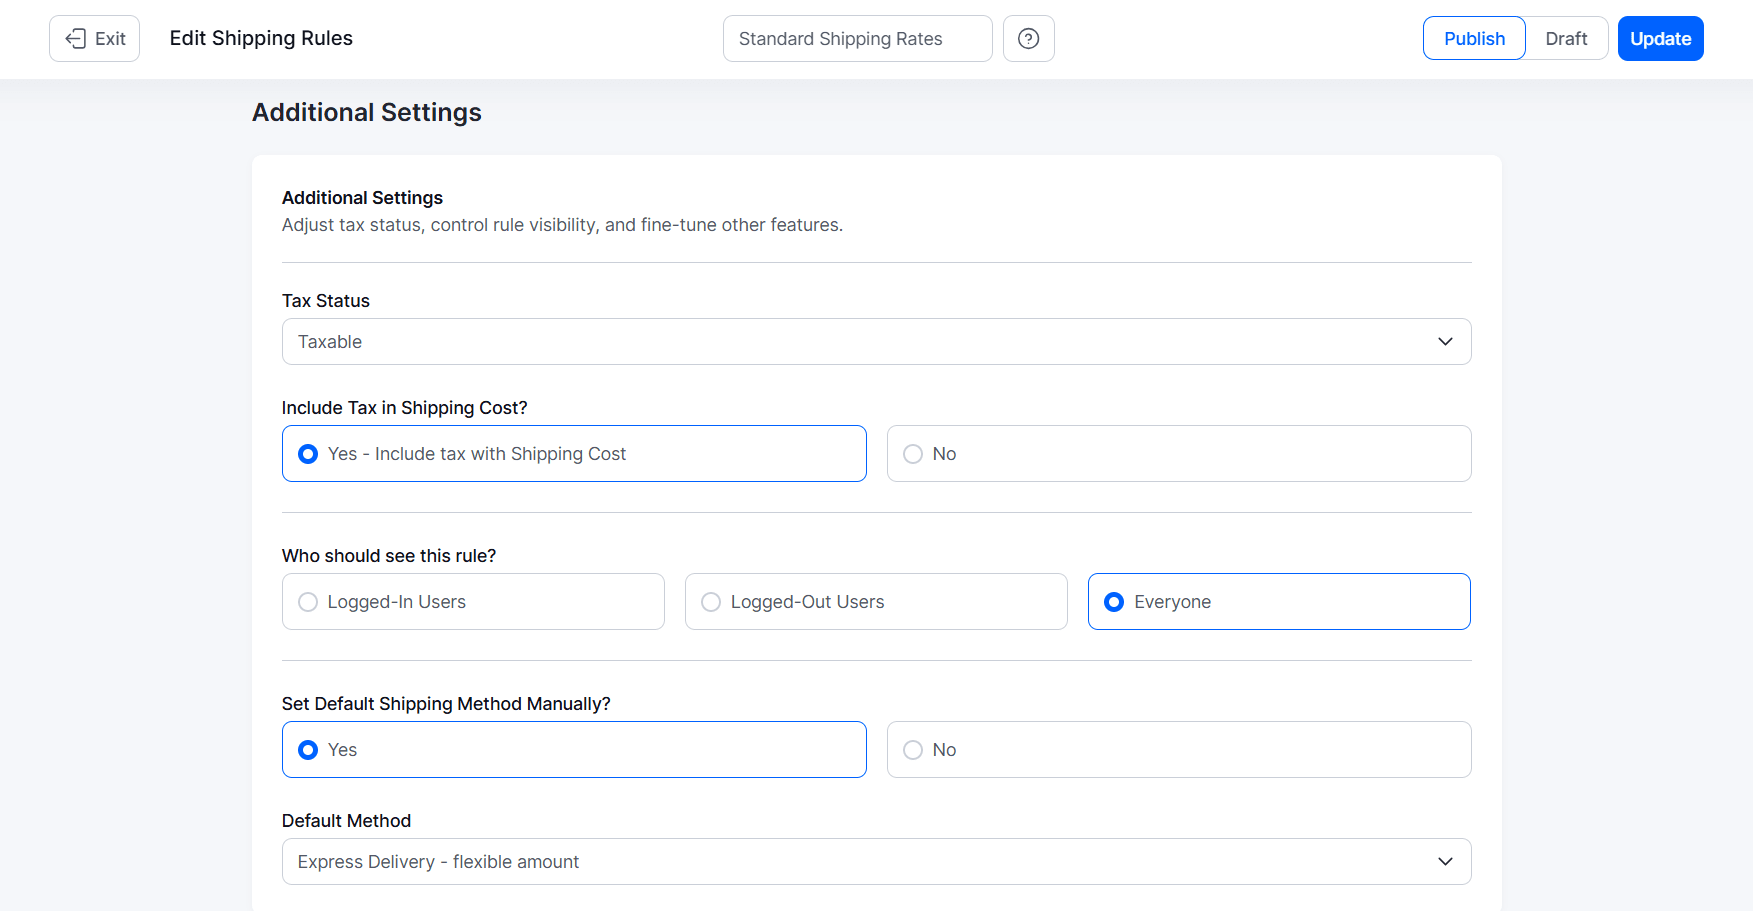
- Set Additional Settings
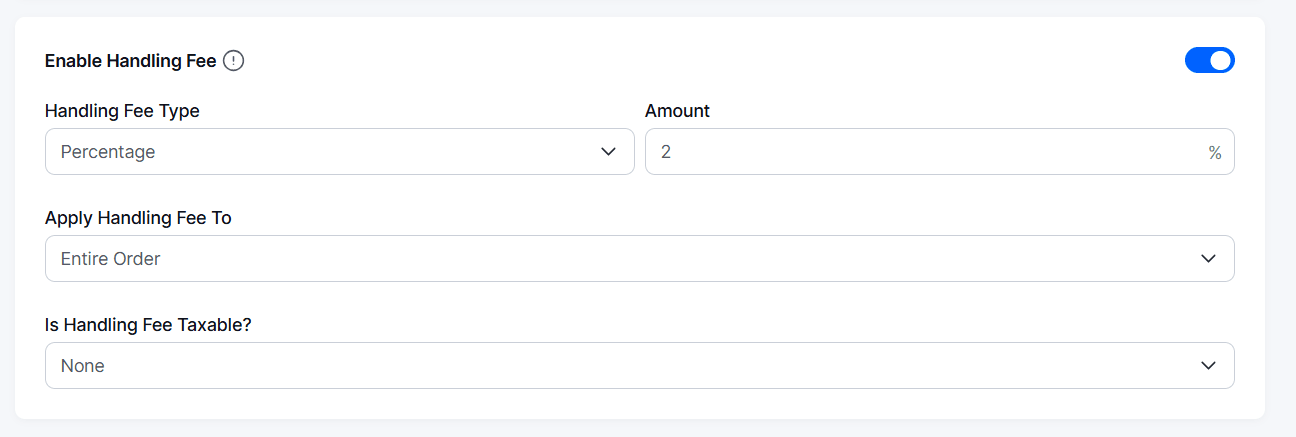
- Enable Handling Fee if required
- Toggle Status to Publish
- Click Save
4. Test & Publish
- Add a test product to the cart
- Use a shipping address inside your new zone
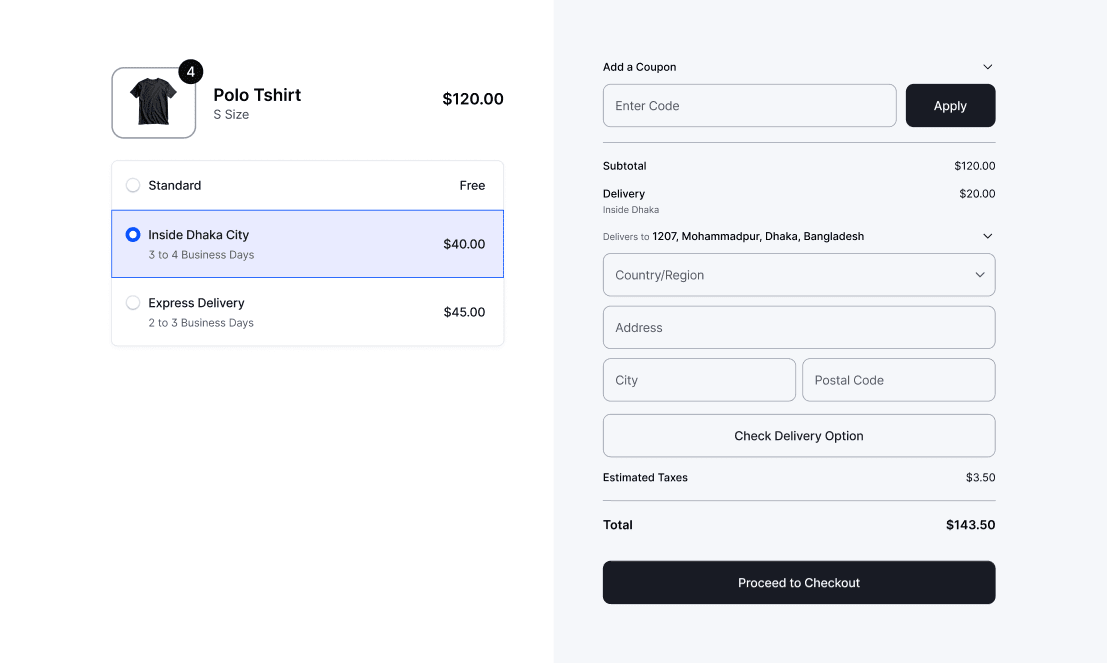
- Check the calculated rate at checkout
- If the results look correct, keep the rule Active
5. Track & Optimize
- Monitor performance with Analytics & Logs
- Adjust shipping rules and costs based on the results.