You can now use the default WooCommerce product attributes for creating conditional logic for product addons. Here’s how to do it:
If you want a quick overview, you can check out this video:
Step 0: Create the Product Attributes
You need to create product attributes in WooCommerce before you can use them for creating conditional logic for your product options. So you need to have the WooCommerce plugin installed on your WordPress website. After that, you need to:
- Go to Products > Attributes from your WordPress dashboard
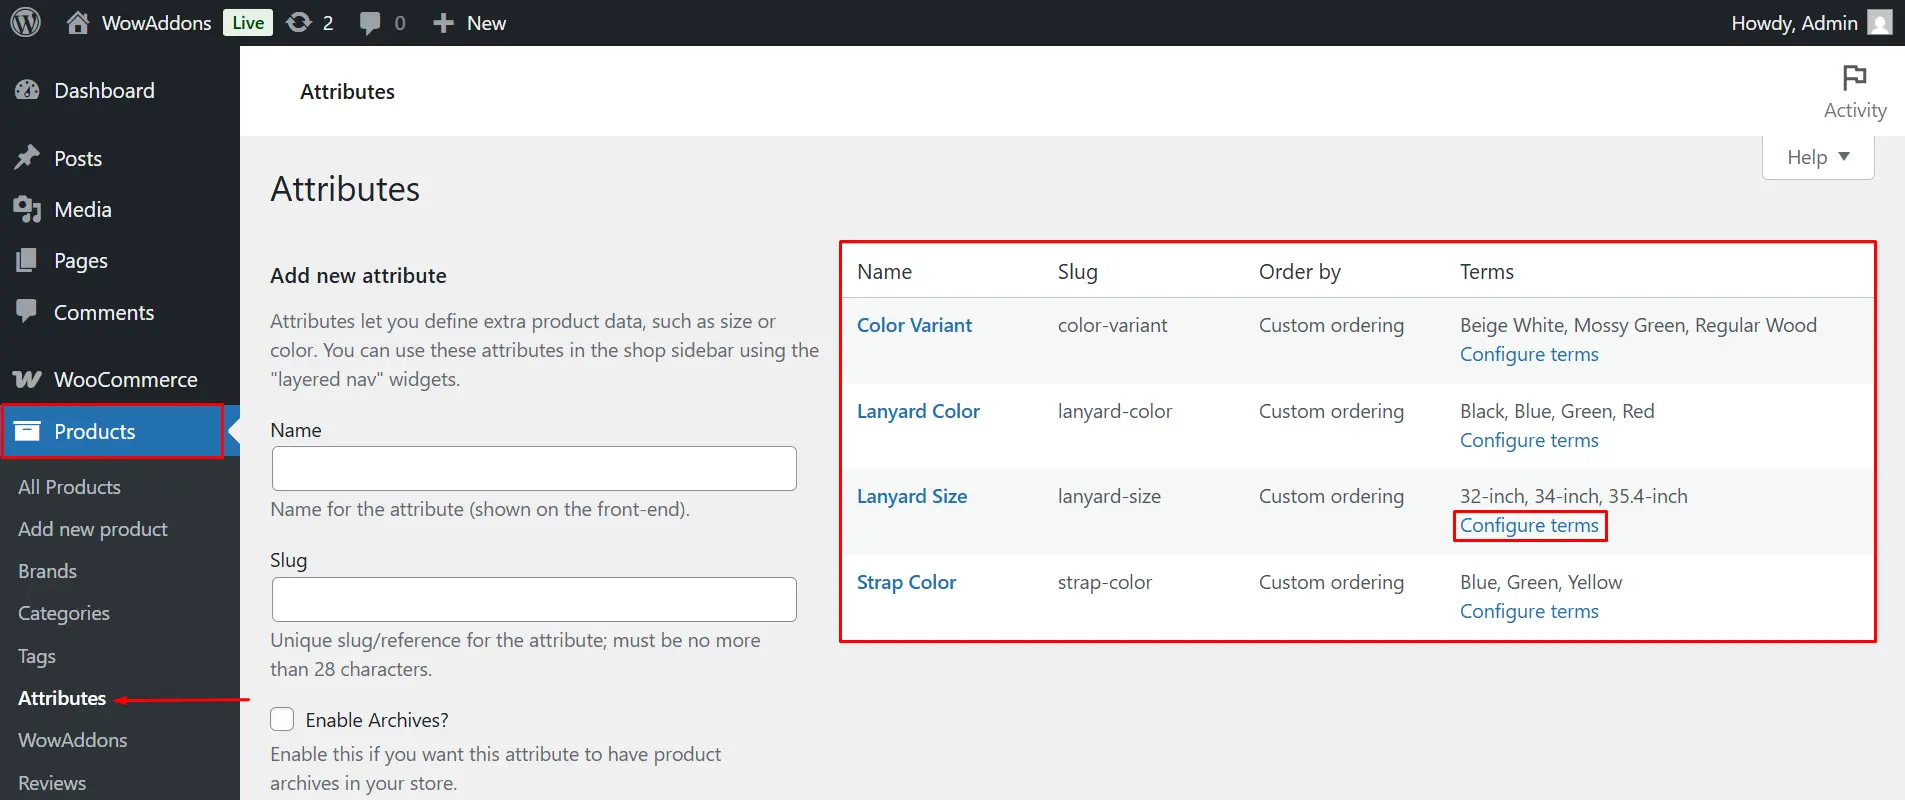
- Create the product attributes
- Configure the items of the attributes
- Save the attributes
Now, when you go to create a conditional logic, you’ll find the attributes in the conditional logic section. Here’s how to do it:
Step 1: Create Options for Your Product
Please follow this link to create options for your product. The quick version of it is:
- Go to WowAddons > Click on “Create Options.”
- Give it a title and choose your product
- Now go ahead and add your options
Step 2: Create Custom Logic with Attributes
Once you add your product options, you can create the conditional logic. Here’s an example:
Let’s say you want to buy lanyards for your office staff. In this case, when your lanyard size, which is the product attribute in this case, is selected, the rest of the options will appear. To do this, you need to:
- Select the extra product addon (image swatches addon in this case)
- Go to the “Conditional Logic” section
- Enable conditional logic for the image swatches addon
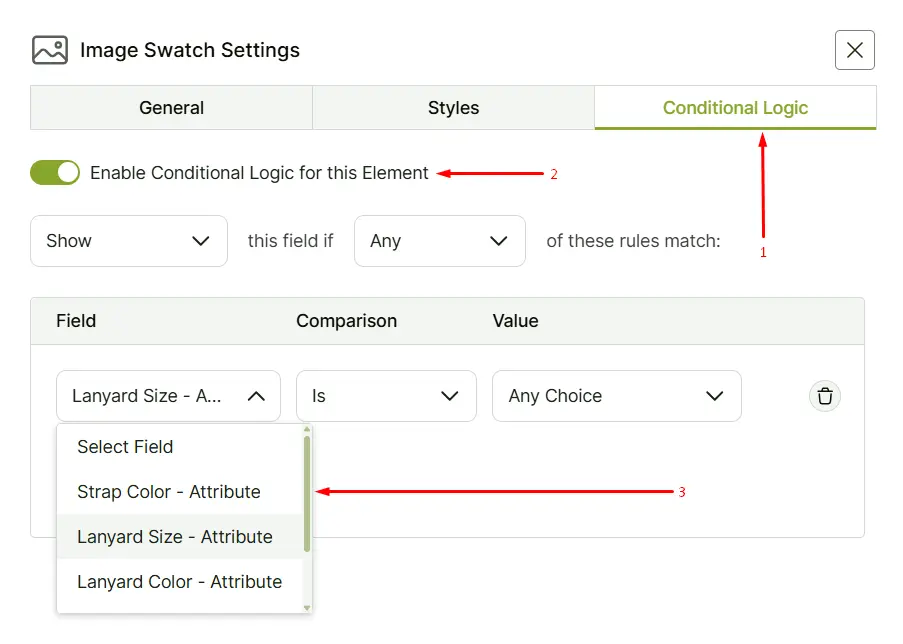
- Select the product attribute from the list
- Set the conditions for the logic
Once you’ve done that, simply save the settings and publish.
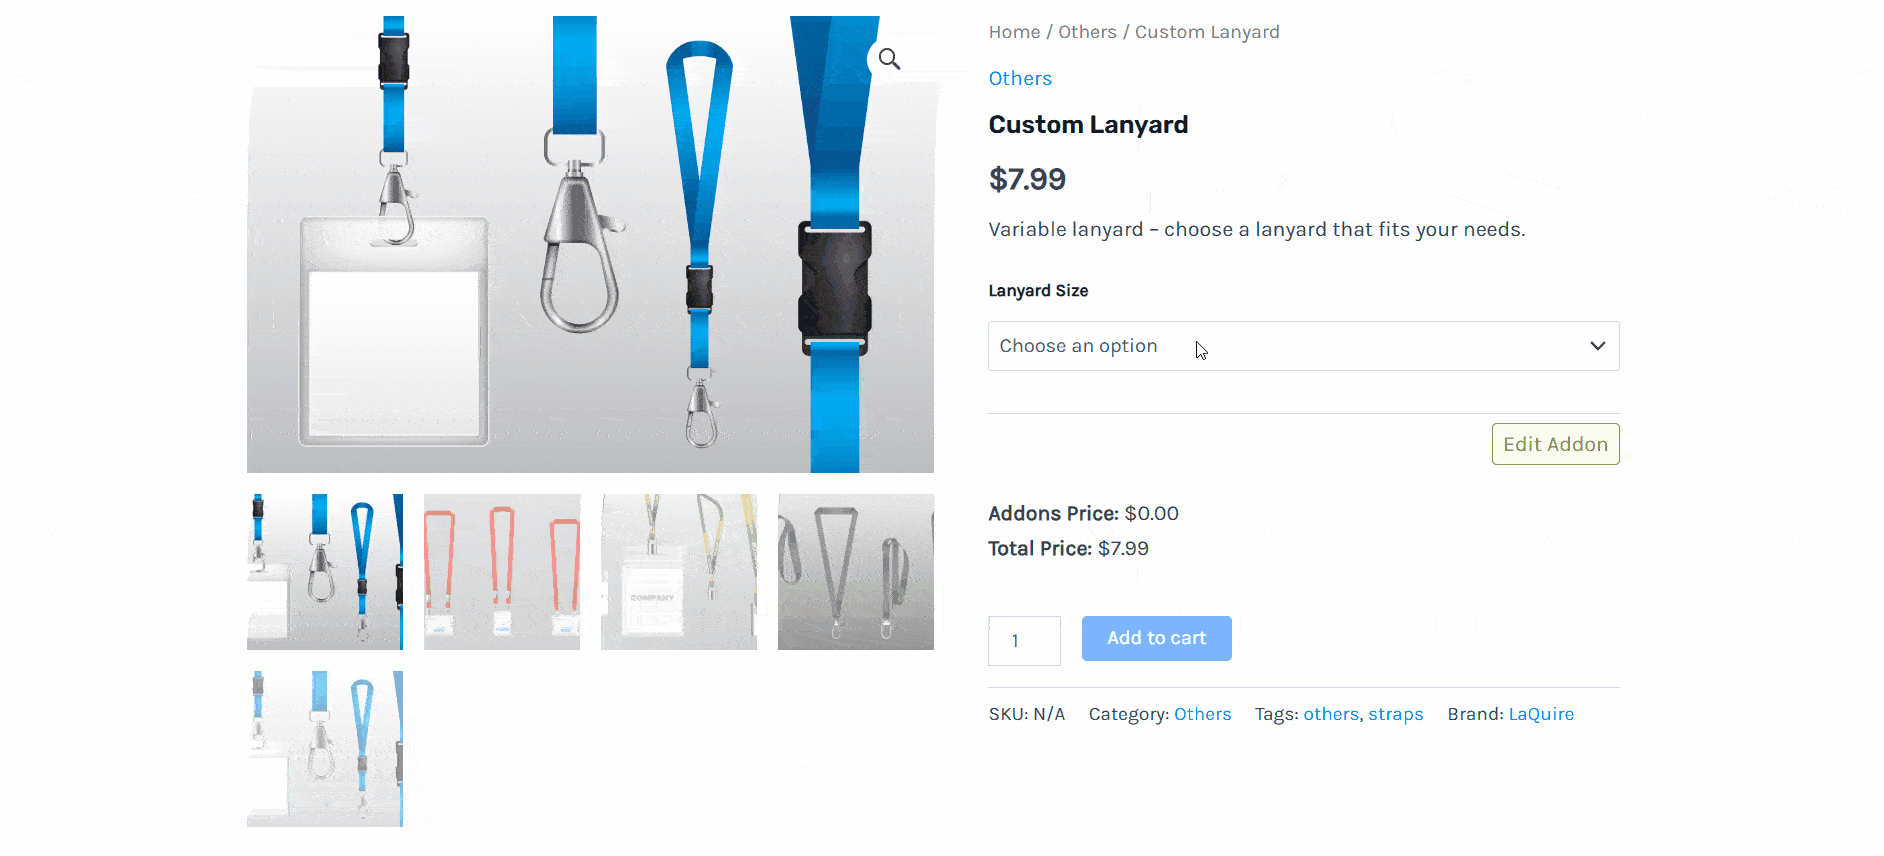
Step 3: Final Output
Once it’s done, if you select a lanyard size, you will see the rest of the options appear.
FAQ
Here are answers to some frequently asked questions:
Will it work with all types of products?
No, this will only work with variable products. Also, it will not work with products that have a fixed attribute.