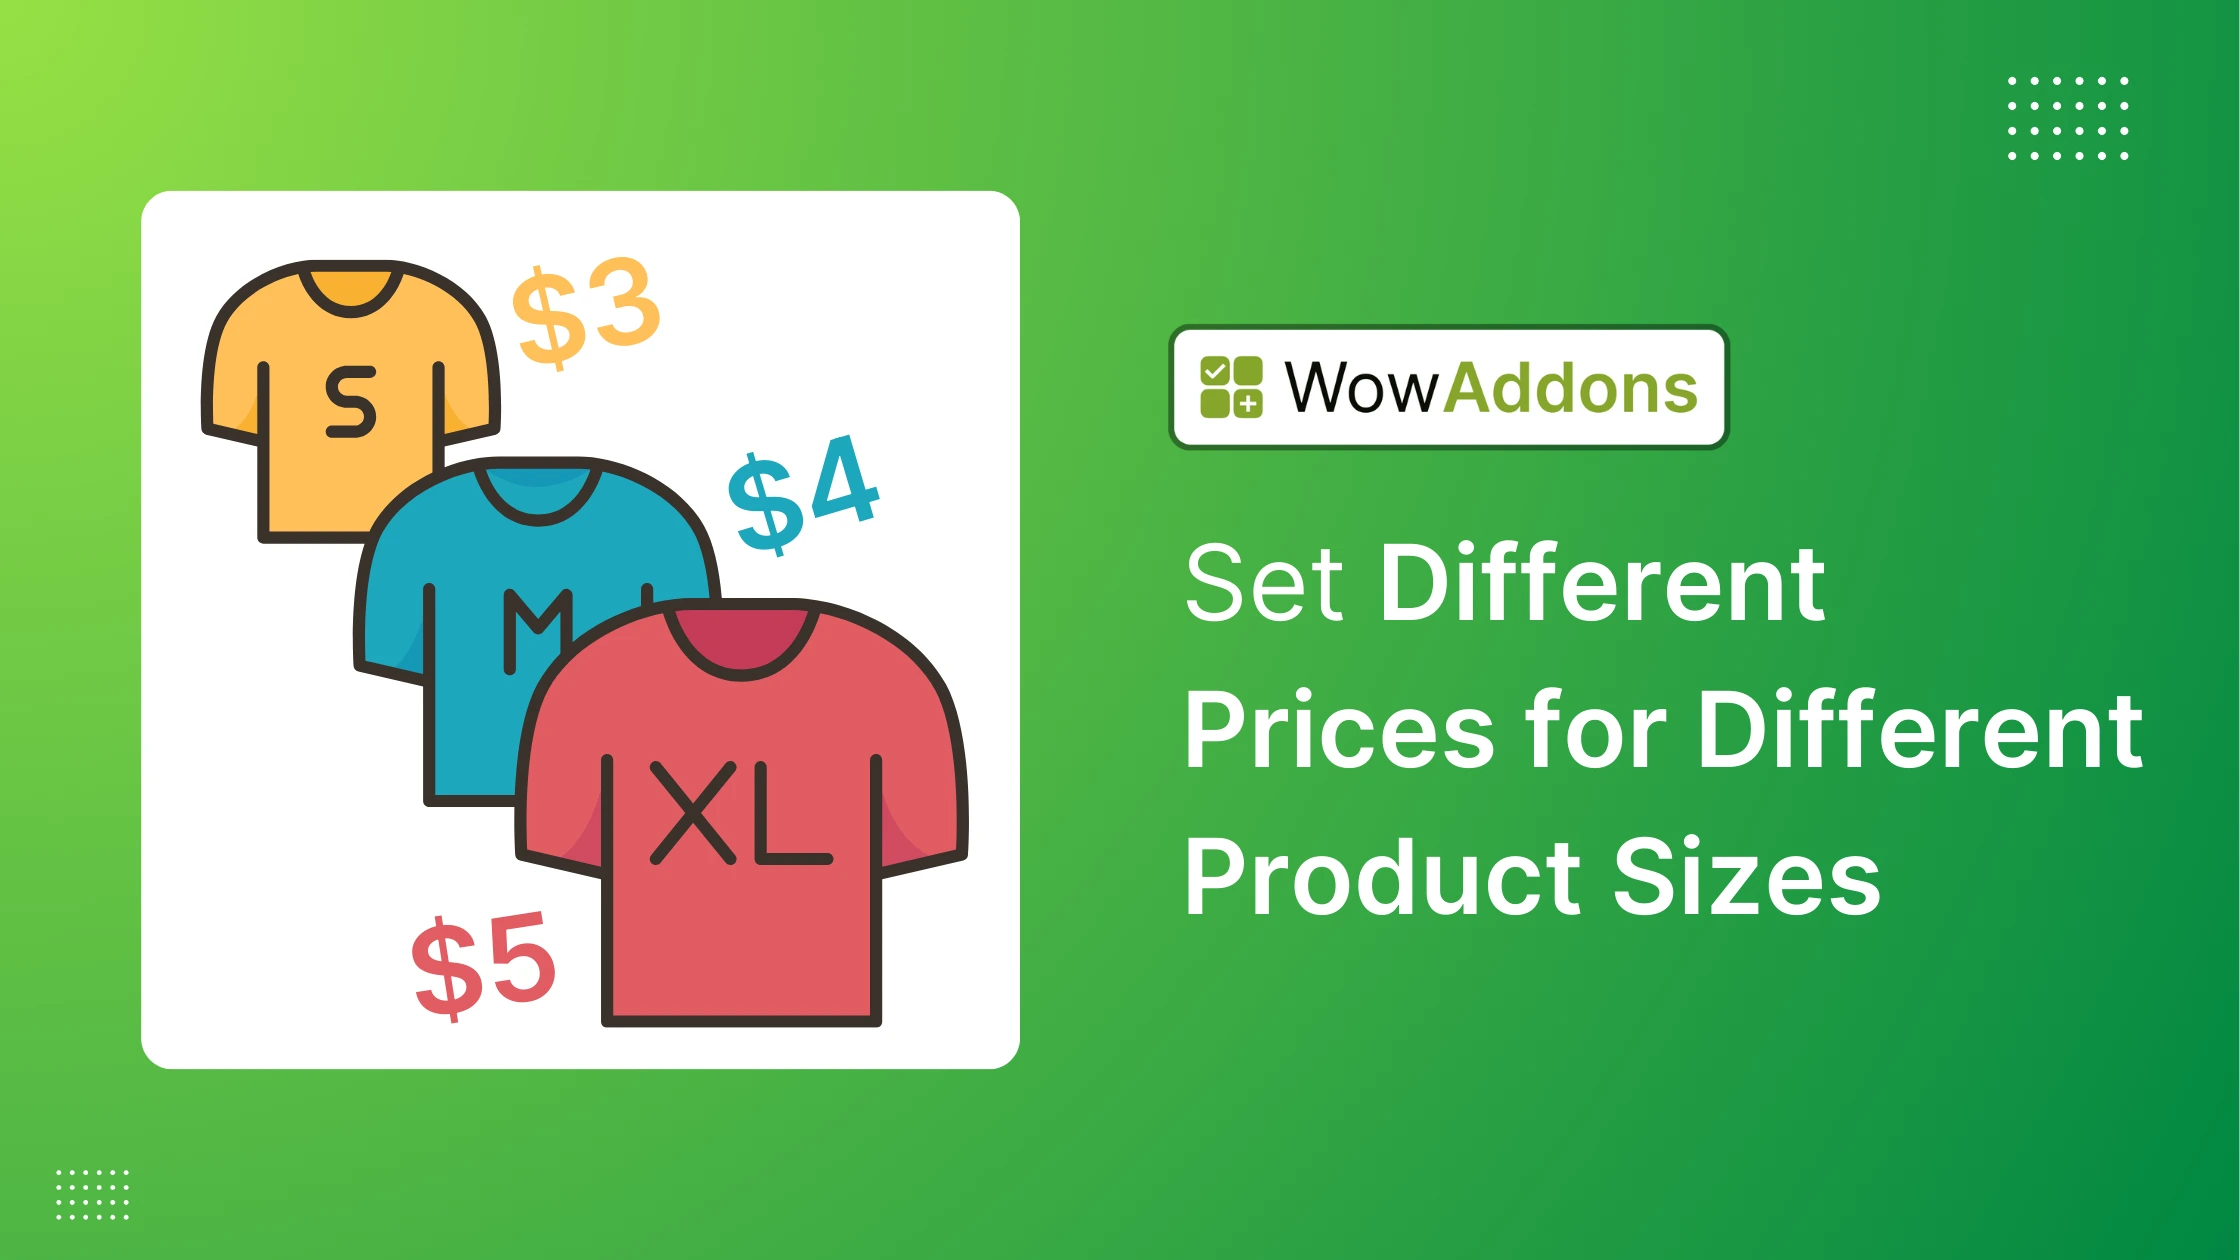
If you’re reading this, you probably want to sell your products in multiple sizes with varying prices on your WooCommerce store.
Back when I was new to WooCommerce, I remember thinking, ‘How hard could it be to charge just $2 more for a 4ft x 5ft pallet compared to a 2.5ft x 3ft one?’
I quickly realized that while WordPress has a basic option for this, it wasn’t enough. However, I figured out a better way, and that’s what we’ll talk about today.
And, of course, I’ll recommend using a plugin because it’s definitely worth it! Let’s find out why and how.
What Is a Size-Based Pricing?
Ever notice how a large pizza costs more than a small one? Or how a king-size blanket is pricier than a throw? That’s size-based pricing in action—it’s when the price changes based on how big (or small) something is.
Think of it like buying coffee:
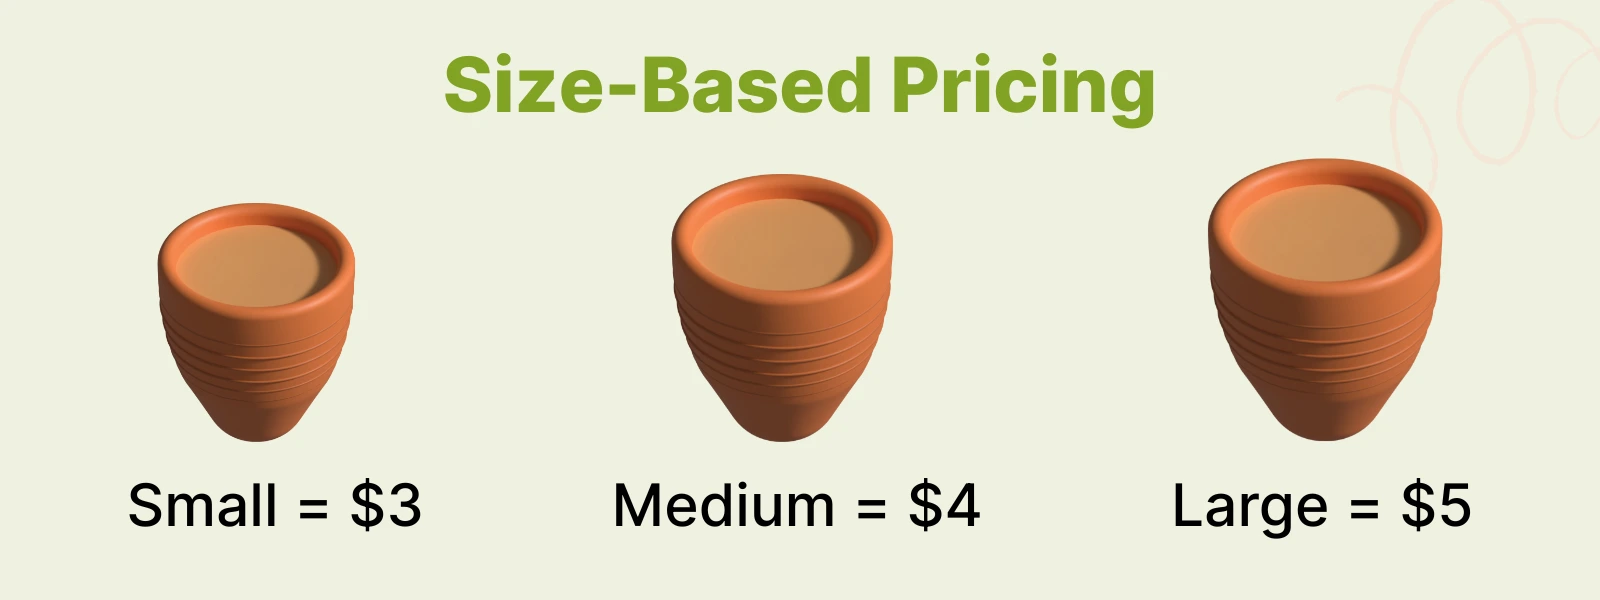
Bigger sizes cost more because they use more materials, take extra time to make, or cost more to ship. Simple, right? But there are other reasons like:
✅ Fair for Customers – People pay for exactly what they get.
✅ Better Profit Control – Covers the real cost of bigger items.
✅ Flexible Options – Customers can choose what fits their needs and budget.
Bottom line? Customers choose a size, and the price updates instantly – no confusion, no surprises.
🛍️ How to Set Different Prices for Different Product Sizes in WooCommerce
If you’ve worked with WordPress before, you know there are multiple ways to add new functionality. You can go with default settings, plugins (the right ones, of course), or custom coding. The same applies here. But since you’re reading this blog, I’m guessing custom code isn’t what you’re looking for, right?
That leaves us with two solid options:
- Method 1: Using Variable Products (Basic Approach)
- Method 2: Using the WowAddons Plugin (Recommended)
Method 1: Using Variable Products (Basic Approach)
The most straightforward approach is to use WordPress’s built-in variable product functionality. Let’s learn to do it step by step.
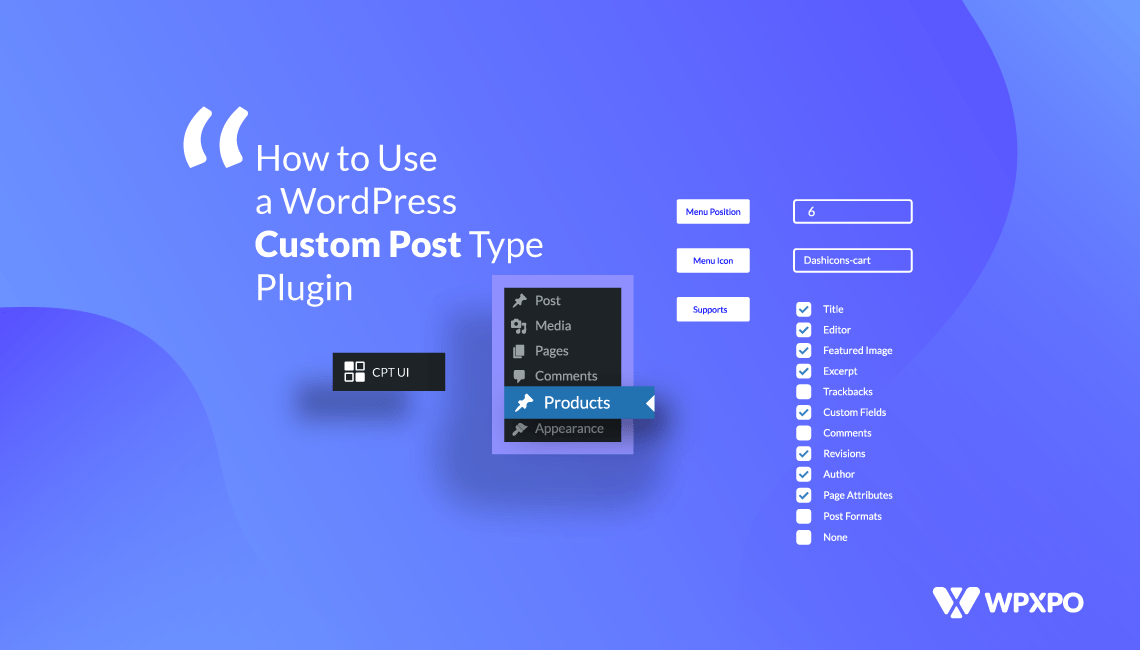
First, from your WordPress dashboard, head over to the “Products” tab -> Add new product. Or, you can edit an existing one.
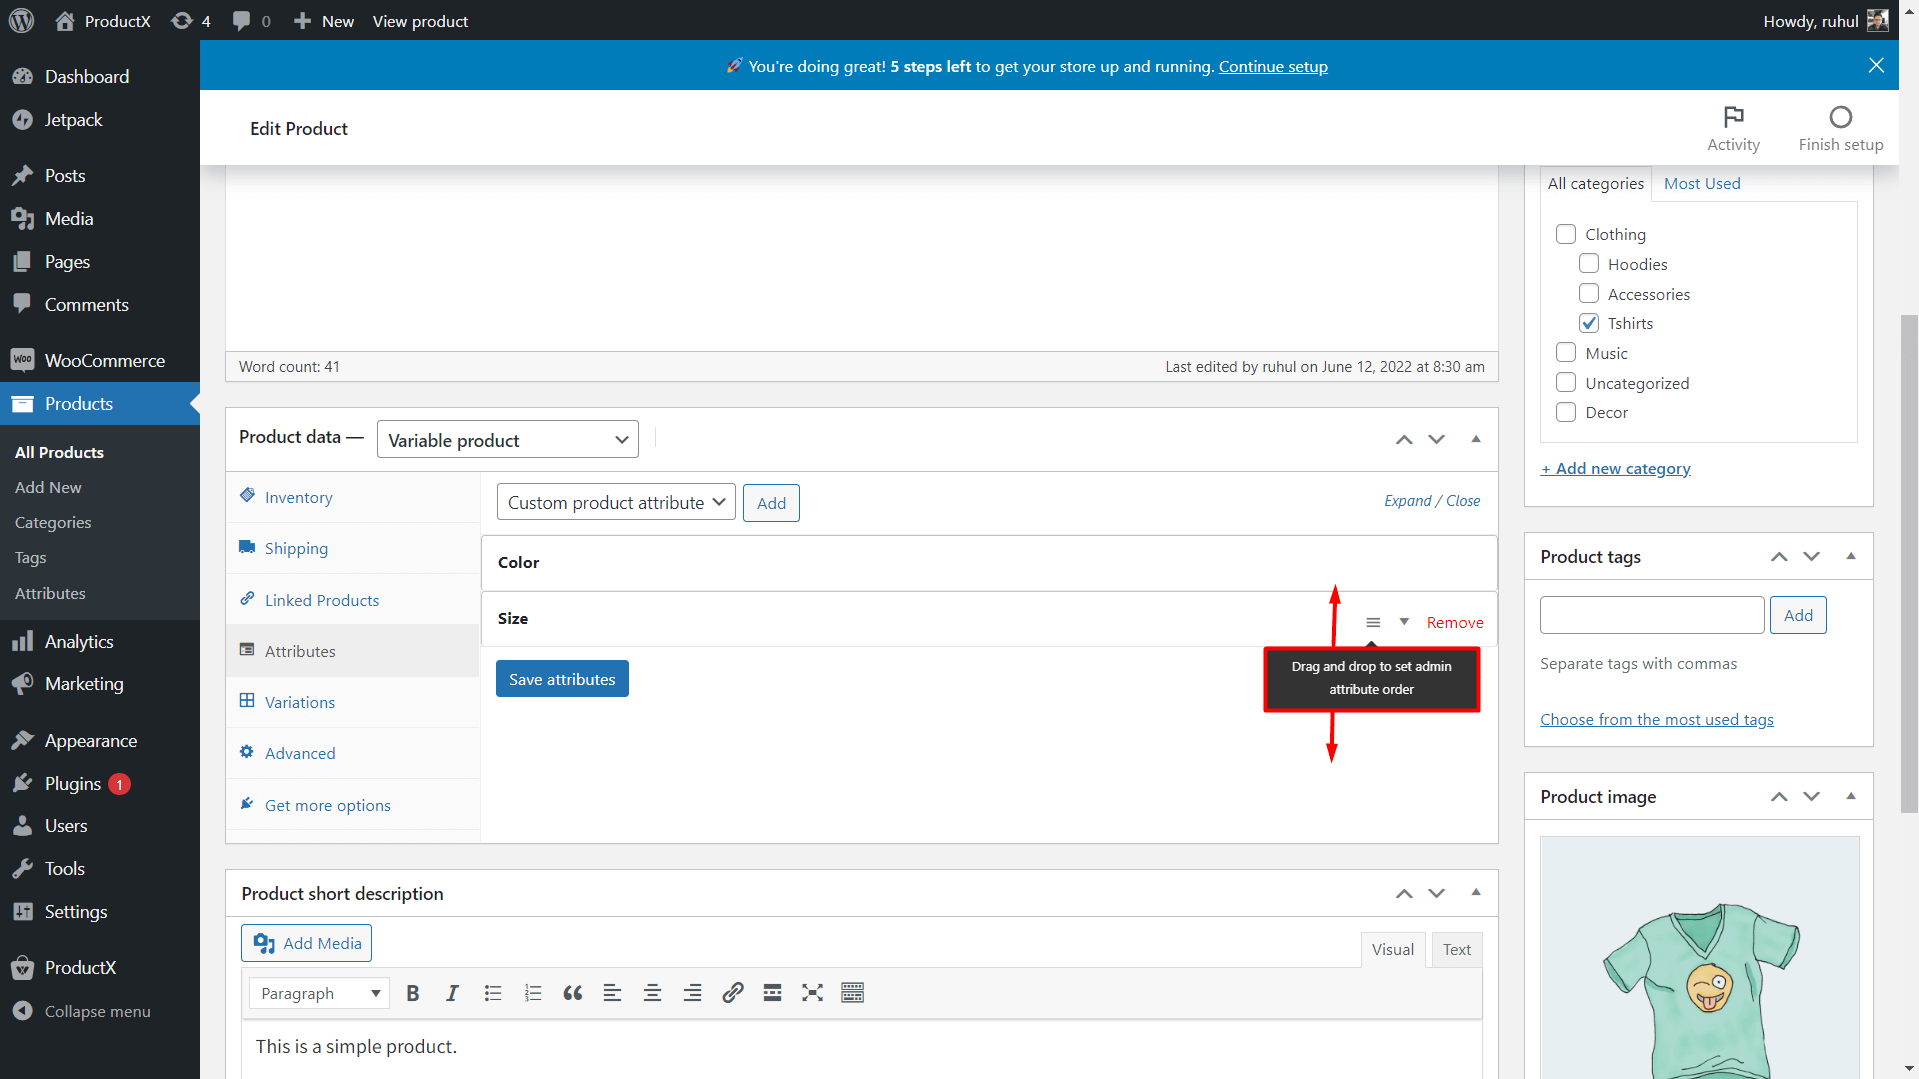
- Set the product type to “Variable Product“
- Navigate to the “Attributes” tab and click “Add New” to create a new attribute.
- Enter “Sizes” as the attribute name.
- Then, input your desired size options in the value field, separated by the “|” symbol. In this case: 2.5ft3ft | 3ft3ft | 4ft*5ft
- Must check “Used for variations” and save the attributes
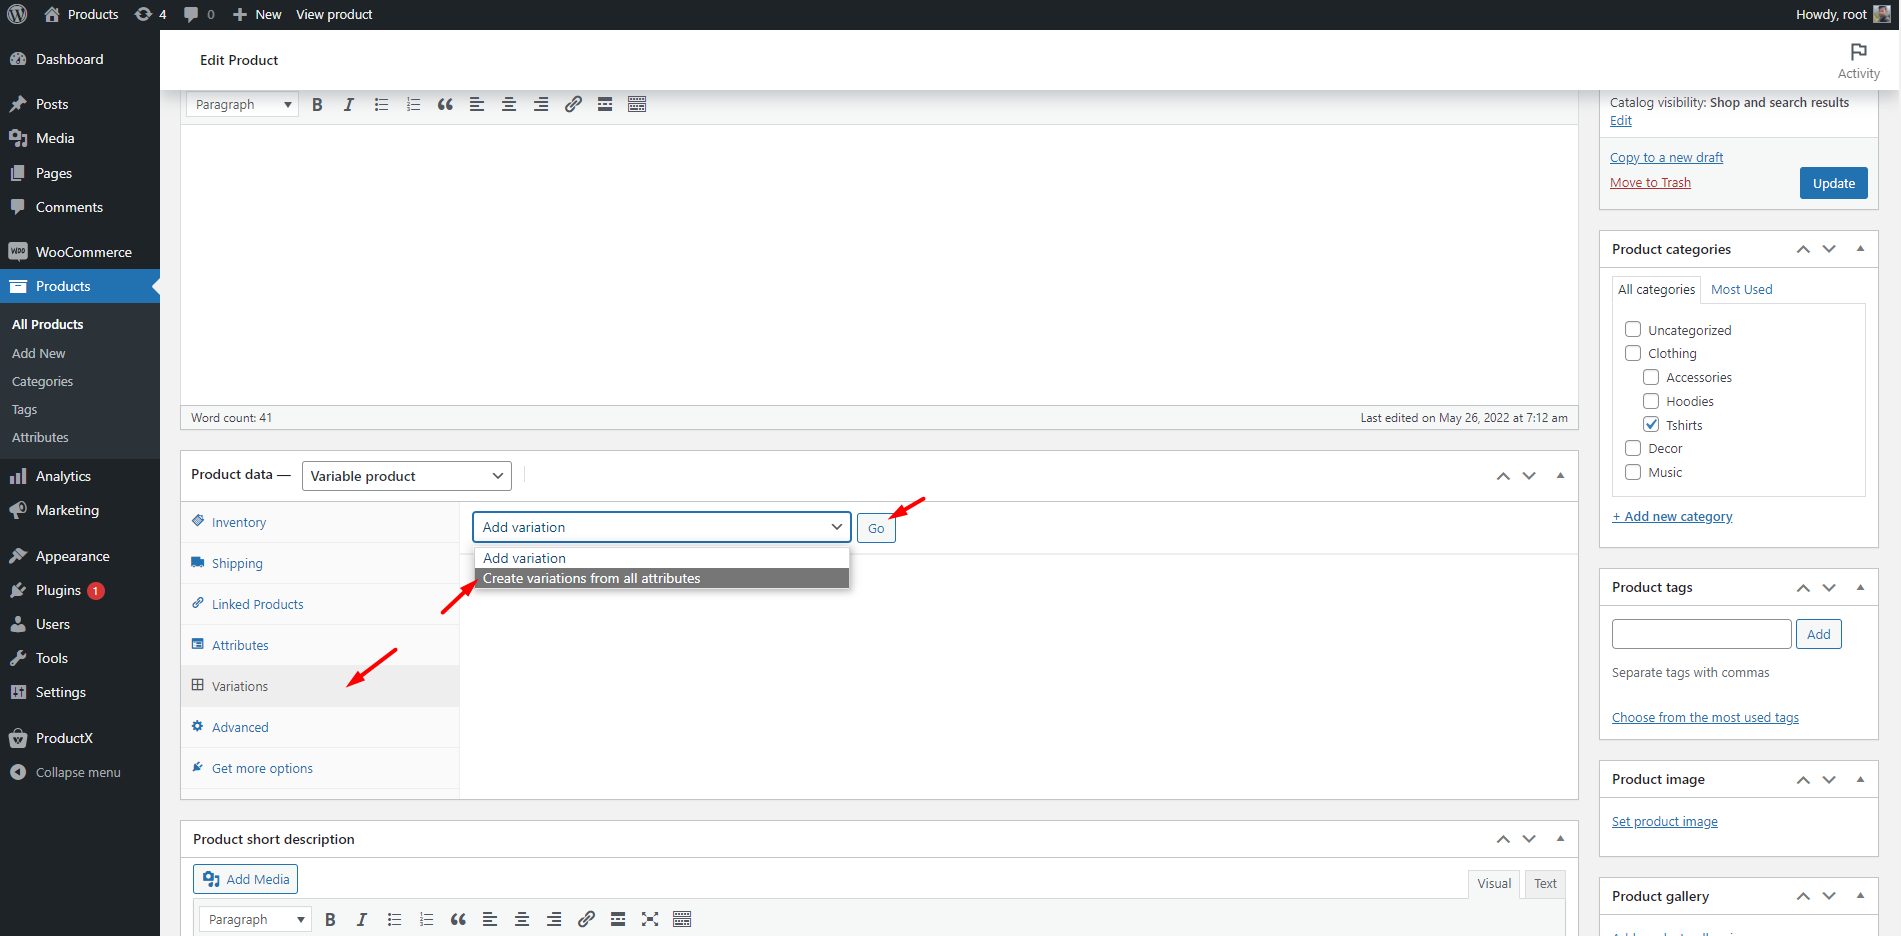
- Go to the “Variations” tab and click “Generate Variations” (or set them up manually).
- Configure each variation by expanding the tab and adding details like prices, images, dimensions, and more.
Save your changes and you’ve successfully set different prices for different product sizes!
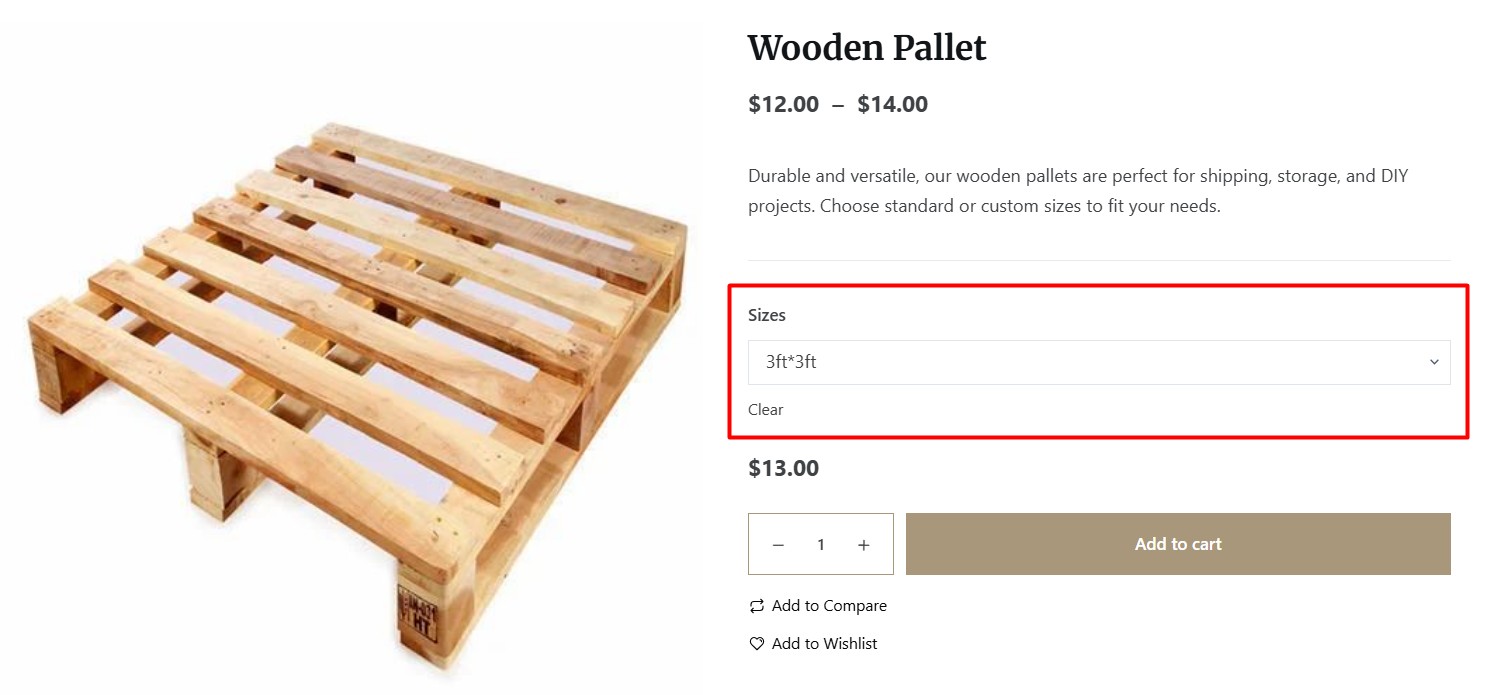
⚠️ Issues with Default Variable Product
Right now, this is functional but not very visually appealing or attention-grabbing as you can see. This lacks with:
- Limited display options: The default dropdowns for variations aren’t always the most user-friendly, especially if you have many sizes.
- Can be time-consuming: Manually creating and managing a large number of variations can be tedious.
- Lacks advanced pricing: The default doesn’t offer the advanced pricing rules that some businesses need.
Let’s explore a more modern and intuitive approach – one that enhances both aesthetics and usability while delivering advanced functionality. 👇
Method 2: Using the WowAddons Plugin (Recommended)
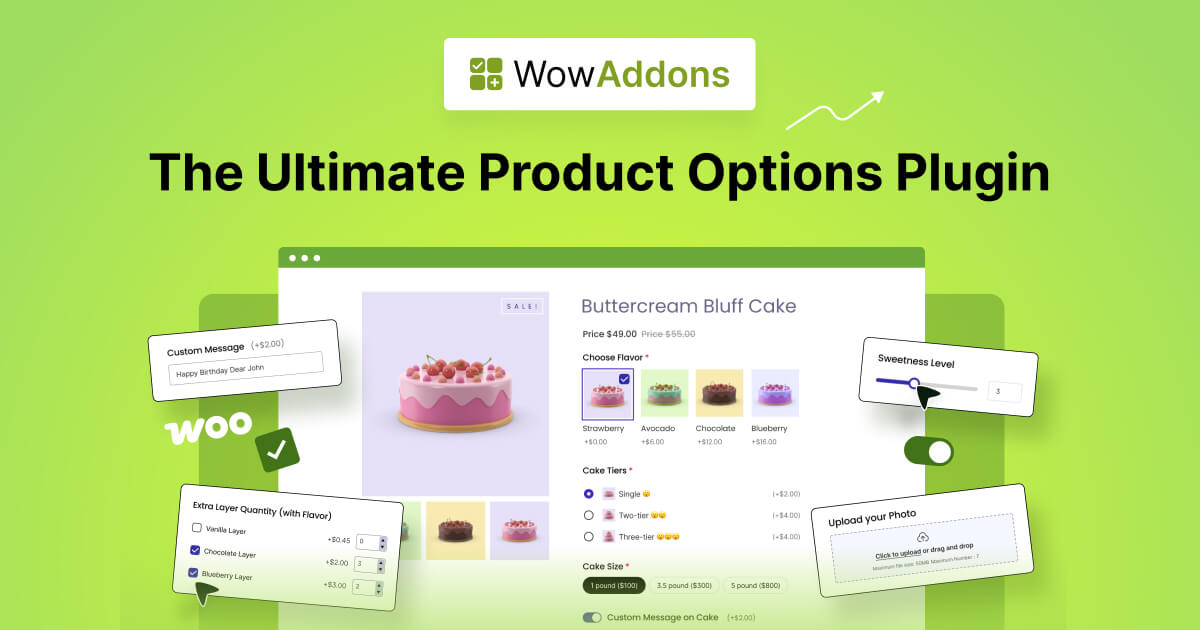
Are you confused about what WowAddons does? This is the ultimate WooCommerce plugin for adding custom product options. It lets you create extra fields, checkboxes, dropdowns, and more so customers can personalize their orders.
For example:
- A cake shop can add a text field for custom messages.
- A clothing store can offer fabric choices, embroidery, or custom sizing.
- Any store can create custom options for any product!
Ready to explore how it works? Let’s walk through the plugin step by step!
Step #1: Create the Addons
Before anything, do the obvious: install and activate the WowAddons plugin
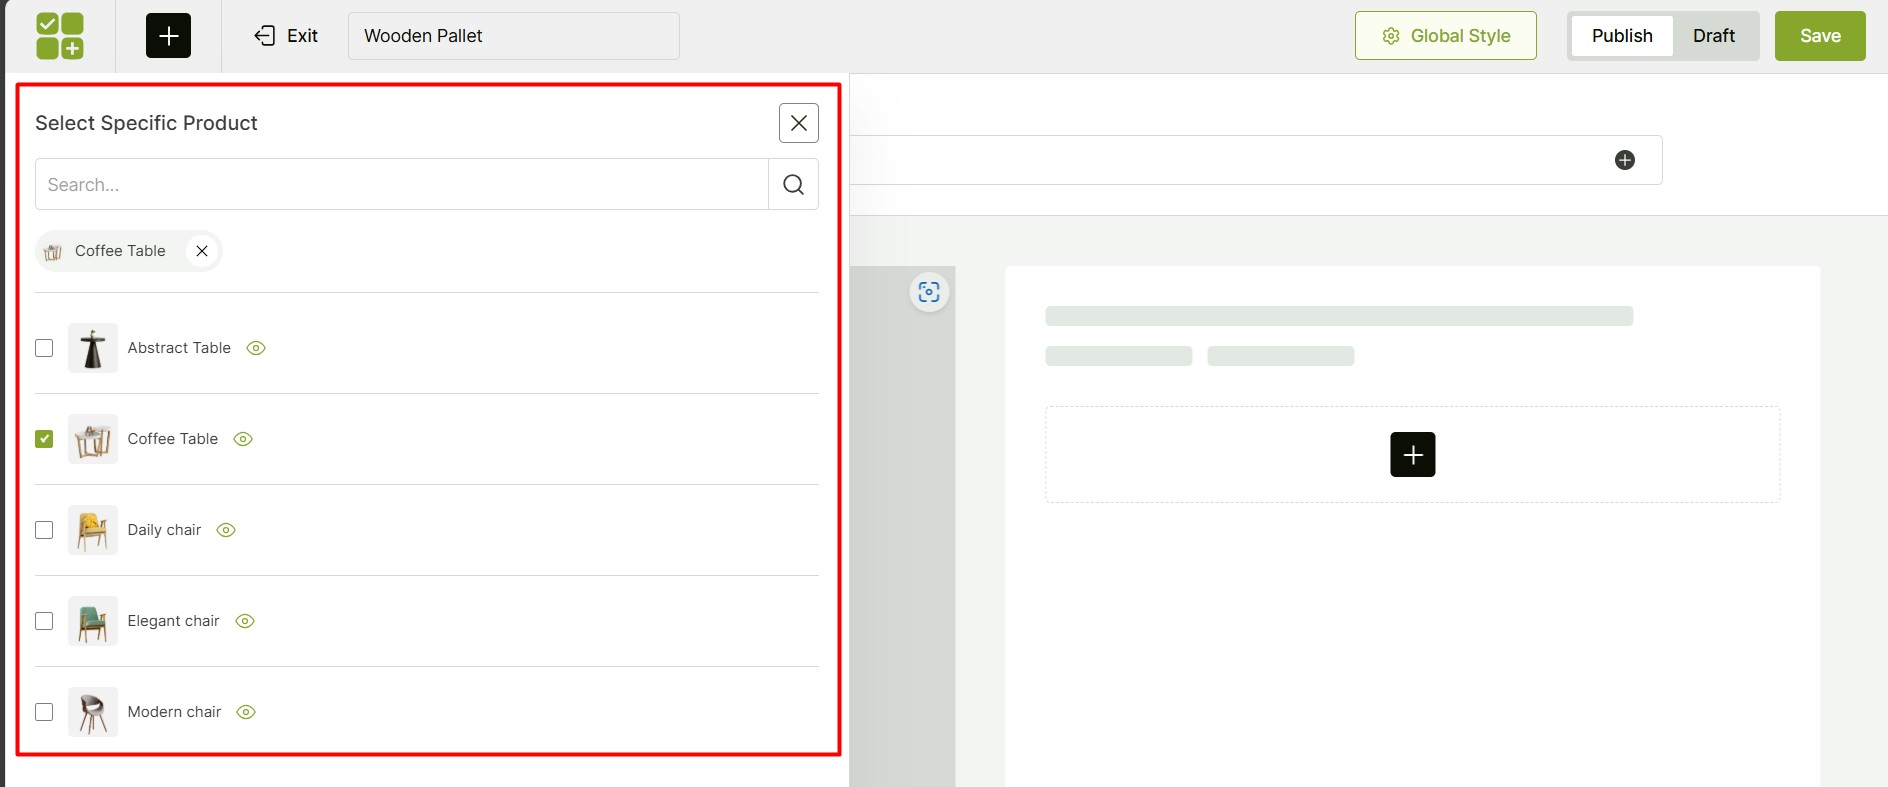
- Go to the WowAddons tab and click “Create Addons”.
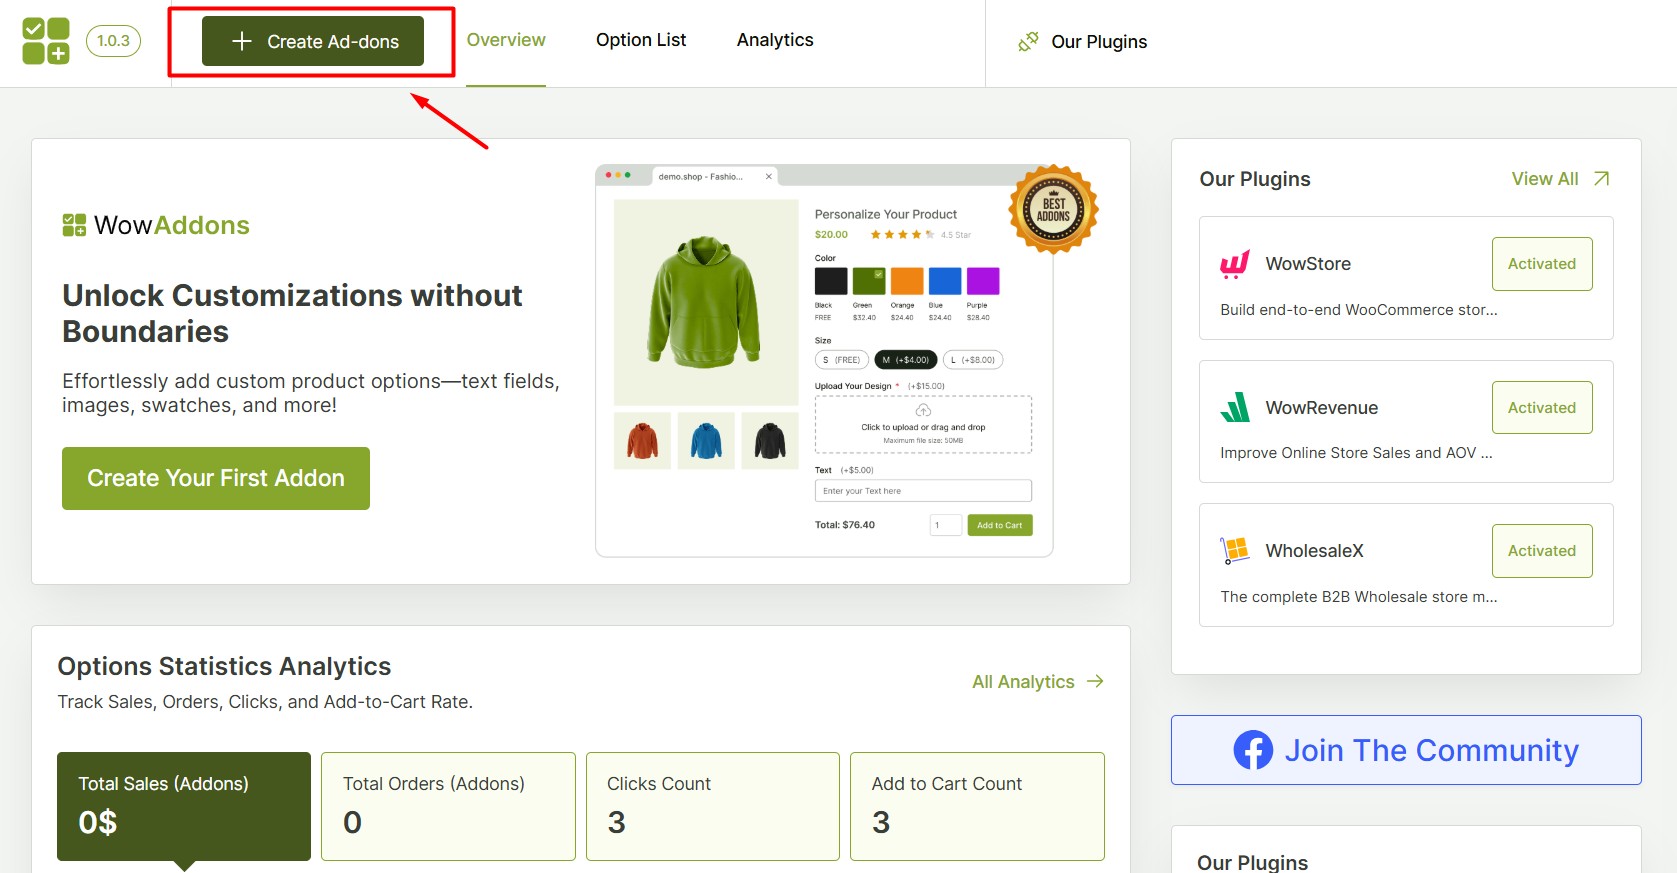
- Give your addon a name (e.g., “Product Sizes”).
- Select the product you want to add size options to.
Step #2: Add the Custom Field
Click the “+” icon on the canvas to add a custom field. There are 24 elements available for a variety of use cases. But for the size selection field, you can use any one of these 5 elements:
- Radio Buttons
- Checkboxes
- Dropdown
- Image Swatches
- Color Swatches
For this guide, I’ll start with the Radio element. Then I’ll show you how they look using the other elements.

Step #3: Configure Basic Settings
There are mainly three options to configure:
- Enable Required? – Turn this on if customers must select a size before ordering.
- Hide Title? – If you don’t want the title (e.g., “Choose Sizes”) to show, enable this.
- Quantity Selector? – Allow customers to order multiple quantities of each size.
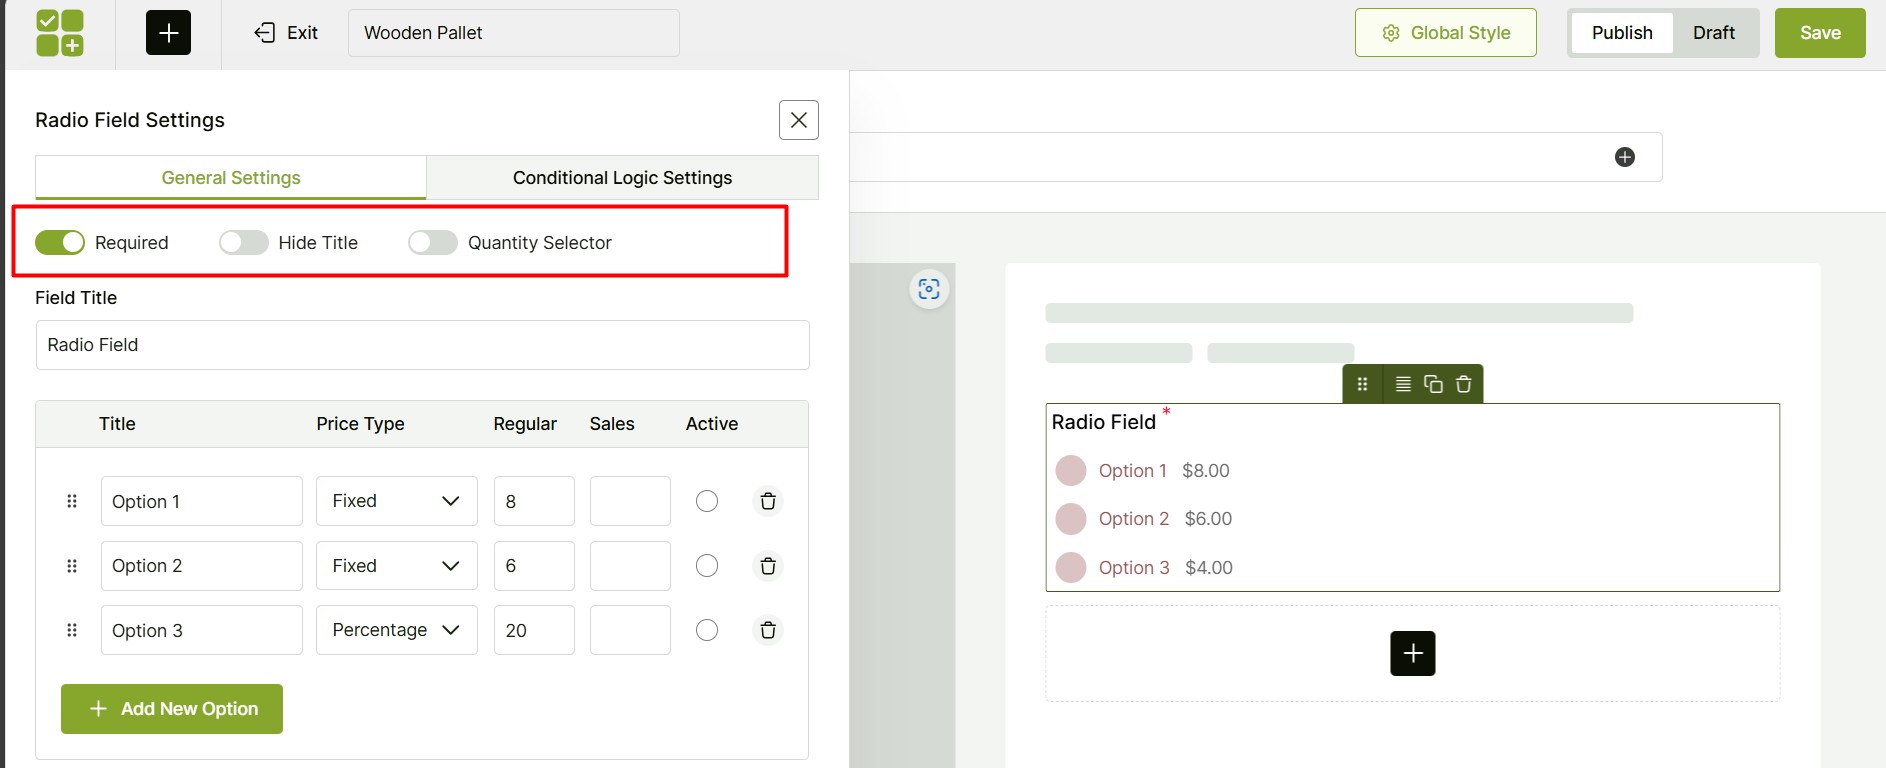
Step #4: Add Your Size Options
This is the most crucial step! We’ll now set the visible size options that customers will select from. Let’s walk through this setup together.
- In the Title field, enter each size (e.g., 2.5ft x 3ft, 3ft x 3ft, 4ft x 5ft).
- Price Type – Select from three options:
- Fixed Price (set a specific amount)
- Percentage (add a % to the base price)
- No Cost (no extra charge)
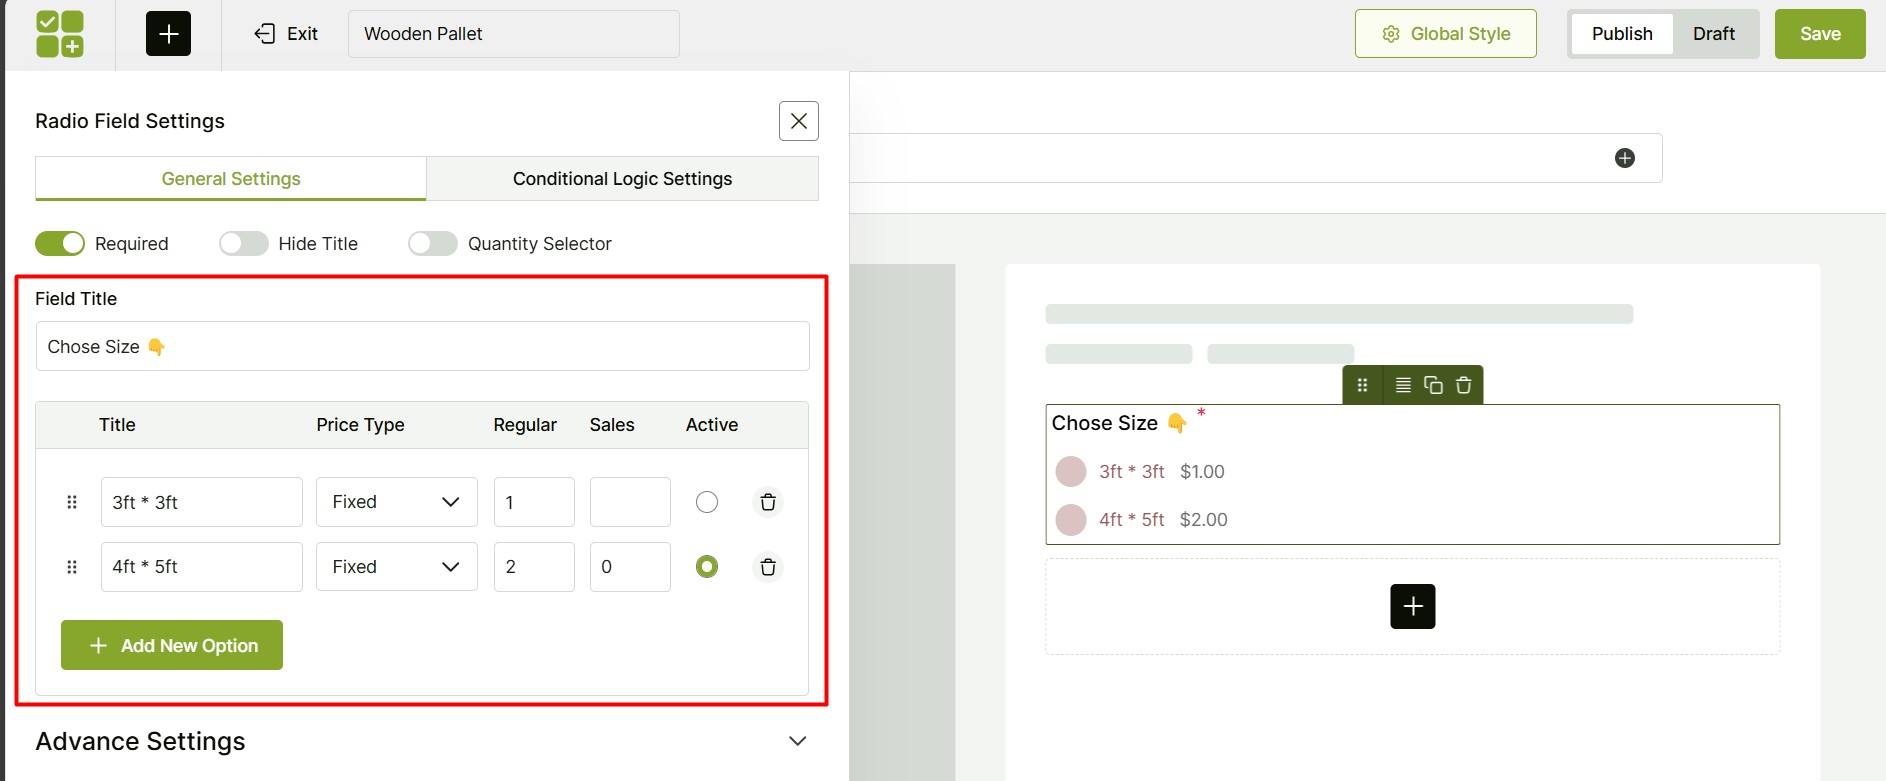
- You can even add a sale price with the regular price for each size.
- Default Selection – Now pick which size should be pre-selected.
Step #5: Conditional Logic (Optional)
In the conditional logic settings, you can set dependencies between custom fields.
For example, selecting (or not selecting) an option in one field can show or hide options in another field. However, this feature is optional, and we don’t need it for our size field.
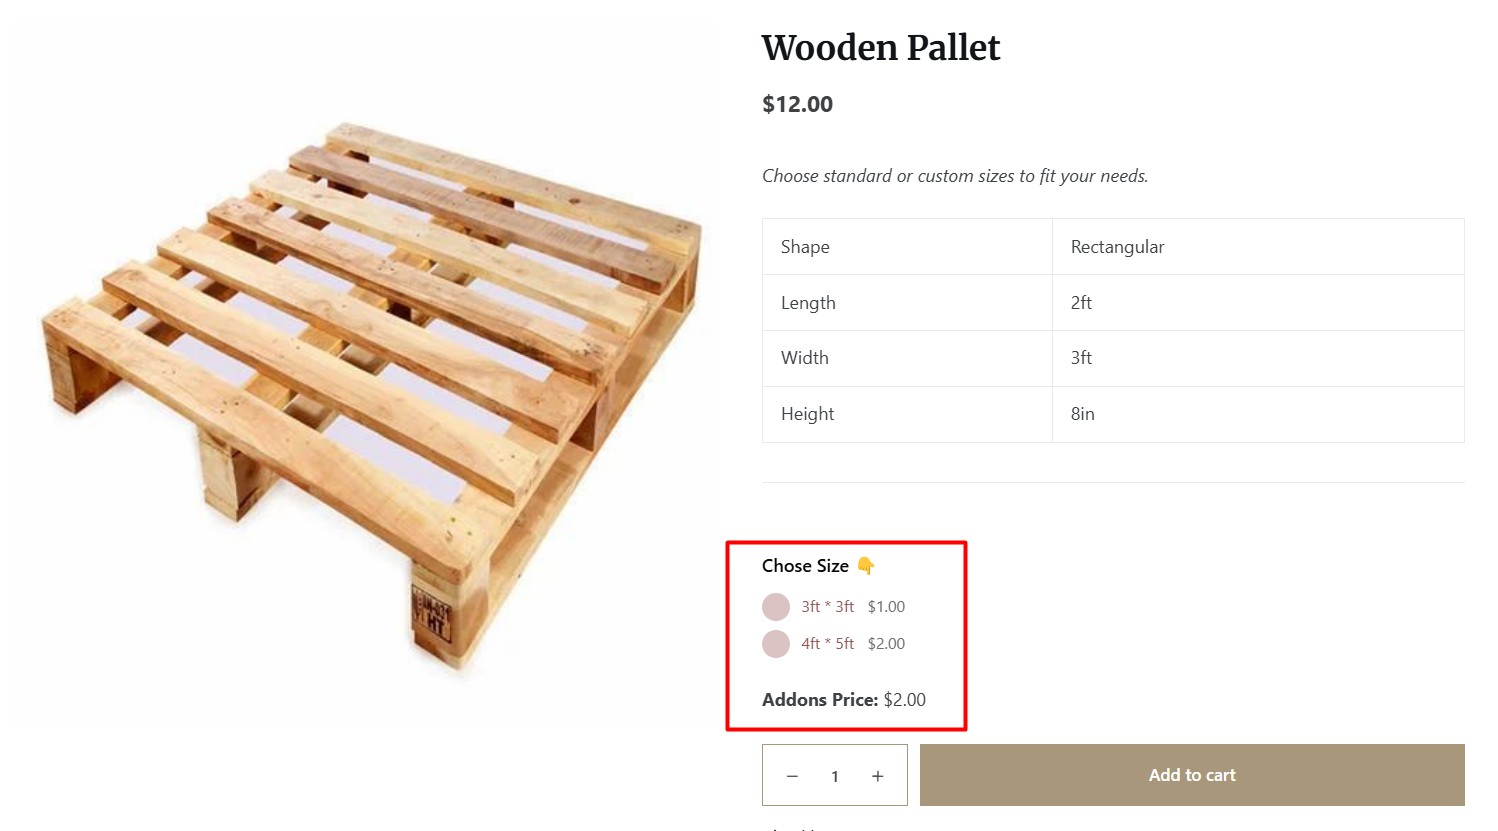
That’s it! Now your customers can easily select sizes when ordering.
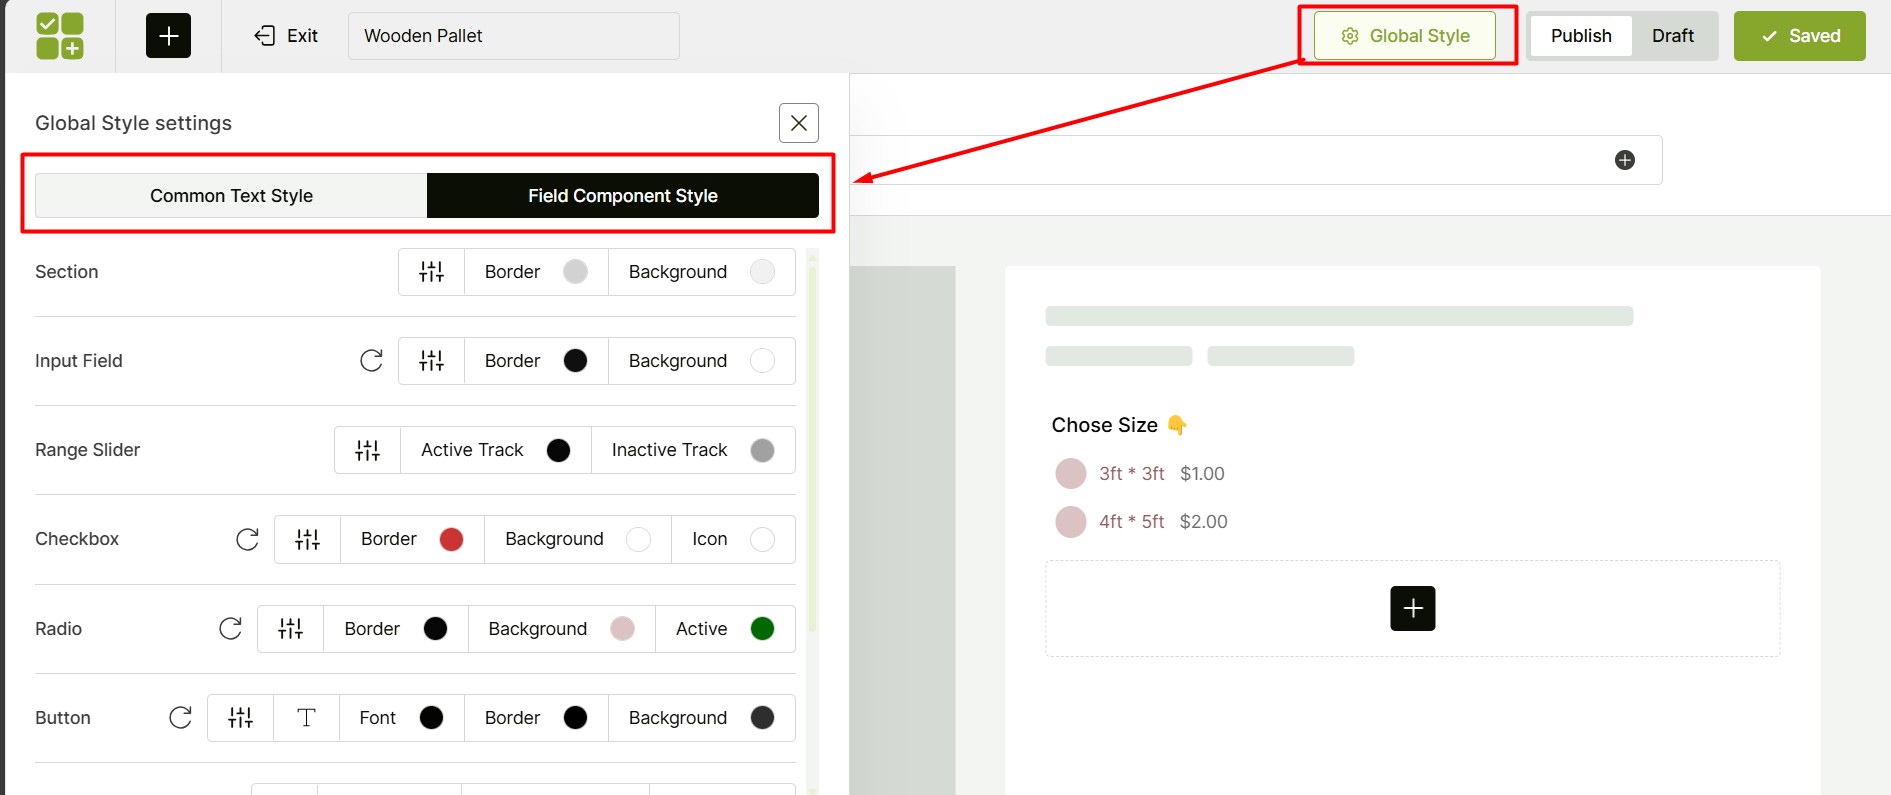
🎨 Design the Size Selection Custom Field
The function is now set up. Next, you can customize its appearance and begin offering it to your customers. For now, the custom field color and typography can be modified from the “Global Settings” option.
🤔 Why I Prefer Plugin Over Variable Products
From my experience, WordPress’s variable products – the default way to set different prices for sizes feel outdated. Today’s shoppers want a smoother, more visual experience – something the default system can’t provide. A dedicated plugin is the best solution. Let’s focus on why.
Beyond Simple Variations
While the default variable product option lets you offer sizes (S, M, L) with different prices, WowAddons lets you add extra options and customizations. Think of these scenarios:
- Optional Add-ons: You could offer “Gift Wrapping” and charge a different price depending on the size of the item (e.g., small box vs. large box).
- Customizable Sizing: You could allow customers to enter their exact measurements (like for custom-made clothes) and the price is calculated dynamically based on those measurements.
- Size-Based Upgrades: You could offer a “Premium Fabric” option, where the price changes depending on the size the customer chooses.
Better User Experience
This plugin gives you more control over how choices are displayed to the customer:
- Visual Appeal: Instead of boring dropdown menus, you can use radio buttons, image swatches, or color selectors, which makes picking a size easier and more attractive.
- Show Options Conditionally: You can choose to show or hide options depending on the size selected. For example, if a customer chooses “Large,” you could then show an option for “Extra Long Sleeves.”
Smarter Pricing
Product Options gives you more advanced ways to calculate prices for different sizes:
- Price Formulas: You can use formulas to calculate the price based on the size.
- Quantity-Based Pricing: You can change the price of a size depending on how many the customer orders.
Additionally, managing options via a plugin is far easier than dealing with numerous variable products.
✨ My Proven Strategies for Effective Size-Based Pricing
Since I’m using this option for myself and others, I’d love to share my simple rules to make the most of it.
✅ Prioritize Transparency: Always display price differences between sizes clearly to prevent checkout surprises and build customer trust.
✅ Apply Consistent Pricing Logic: Use a standardized formula (e.g., +$1 per size up) to ensure fairness and predictability.
✅ Align Pricing with Costs: Adjust prices based on actual material and production expenses to maintain profitability.
✅ Optimize the User Experience: Test how customers interact with size/price options to ensure clarity and ease of selection.
✅ Leverage Data-Driven Adjustments: Track sales performance by size and price point and adjust your strategy for maximum conversion.
📦 Wrapping Up!
So there you have it! Setting up different prices for different sizes in WooCommerce is straightforward once you know the right approach. right?
For those wanting to level up, the WowAddons plugin is a must-have. It goes beyond basics with customization and conditional options. I’ve found it saves hours, especially when you’re dealing with dozens or hundreds of products.
Remember, this isn’t just about the technical setup – it’s about creating a better shopping experience while protecting your profit margins. Everybody wins!
I’d love to hear how it works for you! Reach out with any questions. ☺️
Resources You’ll Love
- How to Allow File Uploads on WooCommerce Product Pages
- WooCommerce Product Addons: Types, Examples & Best Plugins
🧠 FAQs about Setting Different Prices for Different Product Sizes in WooCommerce
The answers to the questions on your mind could be right here:
How do I add an extra field in WooCommerce product?
You can add any types of custom/extra field in your WooCommerce porduct using the WowAddons plugin. With this plugin, you have not limitation to customize and add options in your products.
Follow these steps:
-> Install and activate WowAddons.
-> Create a new addon and assign the products.
-> Choose the custom field elements from 24 alternatives.
-> Configure the settings and publish.
How to Add Size Chart in WooCommerce?
You can add a size chart using WowStore plugin. Just enable the Size Chart addon and then configure the values on atable format. It’s that easy!
How Do I Add Size Variations on WooCommerce?
To add size variations (or any attribute variations):
-> Go to Products → Add New (or edit an existing product).
-> Select “Variable product” from the Product Data dropdown.
Go to the Attributes tab:
-> Create a new attribute (e.g., Size) or select an existing one.
-> Enter values (e.g., S, M, L, XL) and Save attributes.
Go to the Variations tab:
-> Add Variation → Select sizes and set prices.
Save changes.